When a lotion pump feels weak, leaks in a box, or clogs at the nozzle, the real problem usually sits inside the tiny plastic engine on top.
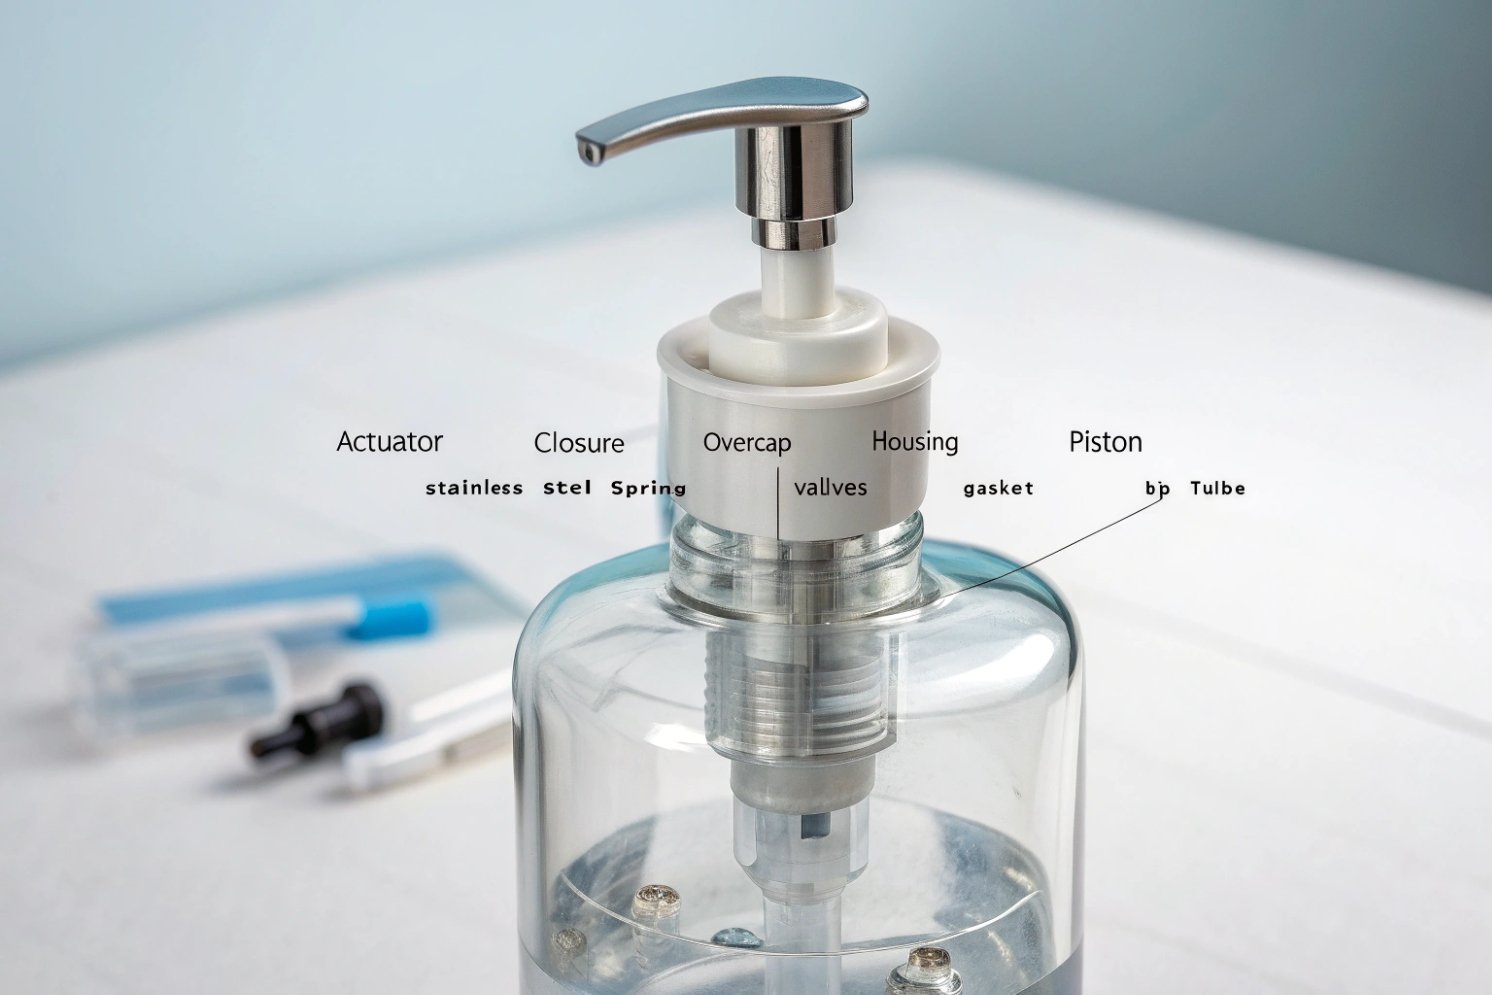
A lotion pump is a small fluid machine built from actuator, closure, overcap, housing, piston, spring, valves, gasket, and dip tube that deliver clean, repeatable, leak free doses with each press.

Most buyers only check dose volume and price. In daily projects, the brands that dig into pump structure get fewer leaks, less breakage in transit, and a smoother, more premium feel in the hand. The details inside the pump decide all of that.
In packaging terms, a lotion pump is a type of pump dispenser 1 designed to deliver a repeatable dose from a bottle or jar.
What do the actuator, closure, and overcap each do on a pump?
At the top of every lotion pump, three visible parts decide what the user feels, how the bottle looks, and how safe the product stays during shipping.
The actuator gives the user a grip and defines the dose and pattern, the closure locks the pump to the bottle, and the overcap protects, seals, and supports transport.

How the “top side” builds user experience
When someone presses a pump on a bathroom shelf, the first touch is the actuator. It is also called the pump head. This part controls how the finger rests, how heavy the stroke feels, and how clean the product stream looks. A flat head feels different from a curved saddle head. A narrow nozzle gives a sharp jet, while a wider one gives a softer ribbon. For face serum, many brands choose a softer, shorter stroke. For hand soap, they often choose a stronger stroke with a larger dose.
The closure or collar sits right under the actuator. It threads onto the bottle neck and holds the whole pump body in place. It also covers the neck finish and makes the pack look clean. Closures can be ribbed for better grip in wet bathrooms, or smooth for a more high-end look on cosmetics. Some collars are wider and hide the bottle neck step to create a “full shoulder” look on premium glass bottles.
The overcap or dust cap is a simple part, but it protects both the product and the brand image. It keeps dust away from the nozzle, stops accidental pressing in bags or cartons, and makes the pack feel more hygienic in retail. Many caps snap over the actuator; some include small inner ribs that lock on the head.
Here is a simple map of these parts:
| Part | Position on pump | Main job | Design notes |
|---|---|---|---|
| Actuator | Top, finger contact | Start pumping and control discharge | Shape, stroke, and orifice size drive feel and dose |
| Closure | On bottle neck | Fix pump, cover threads, support seal | Ribbed vs smooth, height, and decoration change the look |
| Overcap | Outside, over actuator | Protect and prevent mis-press | Can be clear, tinted, or frosted for different brand lines |
On transport jobs, many buyers add one more top-side element: a lock mechanism. This can be a lock-down head that turns and clicks, a lock-up system that lifts to open, or a small clip that slides between actuator and collar. This tiny piece can cut leakage claims in long sea shipments by a big margin, especially when verified through cosmetics packaging testing 2 such as leakage and transport simulation.
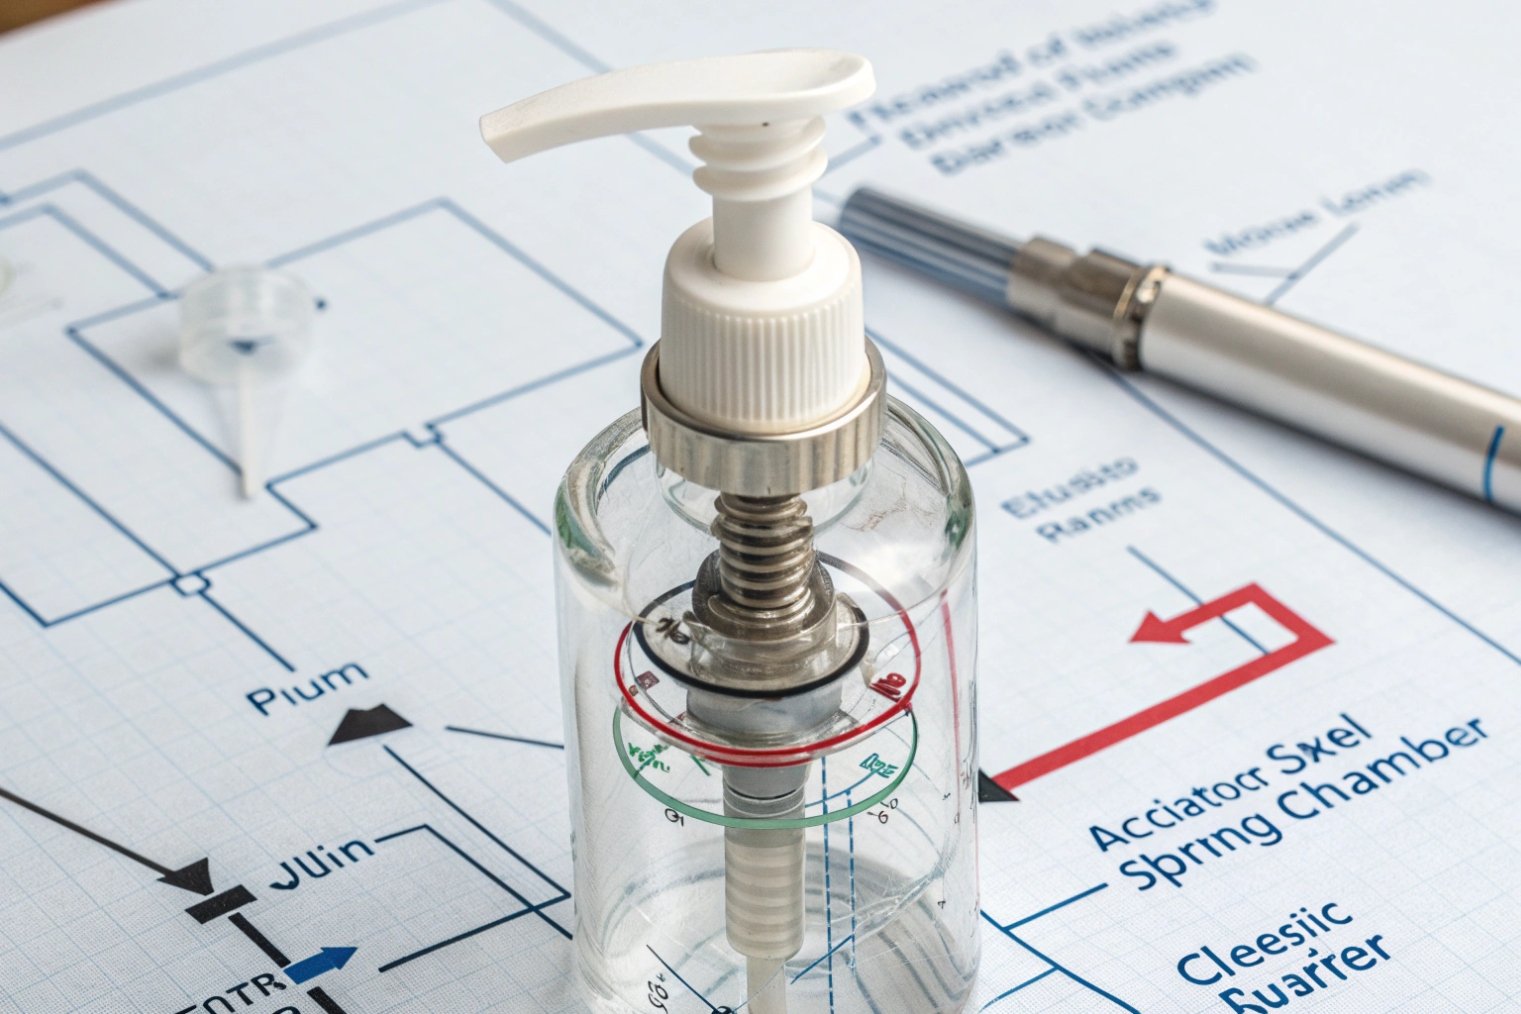
How do the piston, spring, and pump chamber create suction and discharge?
Inside the pump, three hidden parts work as the heart of the system and move the product up from the bottom of the bottle.
The piston seals and moves inside the pump chamber, the spring pulls it back after each press, and the chamber volume change creates suction on the upstroke and pressure on the downstroke.
The full pumping cycle, step by step
In every project, these three parts decide whether the pump feels “strong” or “weak.” The pump chamber (also called housing or body) is the hollow space inside the pump. The piston slides inside this space. The stainless-steel spring sits under or around the piston and keeps it in the rest position when nobody presses the head.
The work cycle is simple but very exact:
-
Rest position
The piston sits high. The pump chamber is full of air or product from the last stroke. The spring holds the piston in place. -
Downstroke (discharge)
When a user presses the actuator, the piston rod pushes the piston down into the chamber. The chamber volume becomes smaller. Pressure increases and pushes the product up through the internal channels and out of the nozzle. At the same time, the lower check valve closes so the product cannot move back into the bottle. -
Return (spring action)
When the finger leaves the actuator, the stainless spring opens back to its original length. It lifts the piston up. This movement pulls the actuator back and gives that “elastic” feel consumers like. -
Upstroke (suction / priming)
As the piston rises, the chamber volume increases again. This drop in pressure creates suction. The lower check valve opens, and fresh product from the dip tube flows into the chamber. After a few strokes on a new bottle, the chamber fills fully. This is the priming stage.
The balance between piston diameter, chamber volume, and spring strength sets the dose volume and the feeling in the hand. A bigger chamber gives a bigger dose. A stronger spring gives a more firm, “premium” stroke but may be hard for older users. A weak spring feels soft but can cause poor return, slow priming, and incomplete discharge.
You can see the key relationships in this table:
| Element | If you increase it… | Result for the pump | Typical use case |
|---|---|---|---|
| Chamber volume | More internal space | Larger dose per stroke | Body lotion, hand soap |
| Piston diameter | Wider sealing area | Stronger pressure, but more force needed | Thick cream, hair conditioner |
| Spring rate | Stiffer spring | Faster return, firmer feel, better closure | High-viscosity or high-end skin care |
| Stroke length | Longer travel of actuator | More product each press, longer priming time | Family-size wash or shampoo |
In daily work with brands, small adjustments in these numbers often fix repeat problems, such as “pump feels empty,” “dose is too small,” or “too hard to press for kids.” The heart of the pump is this little piston–spring–chamber group.
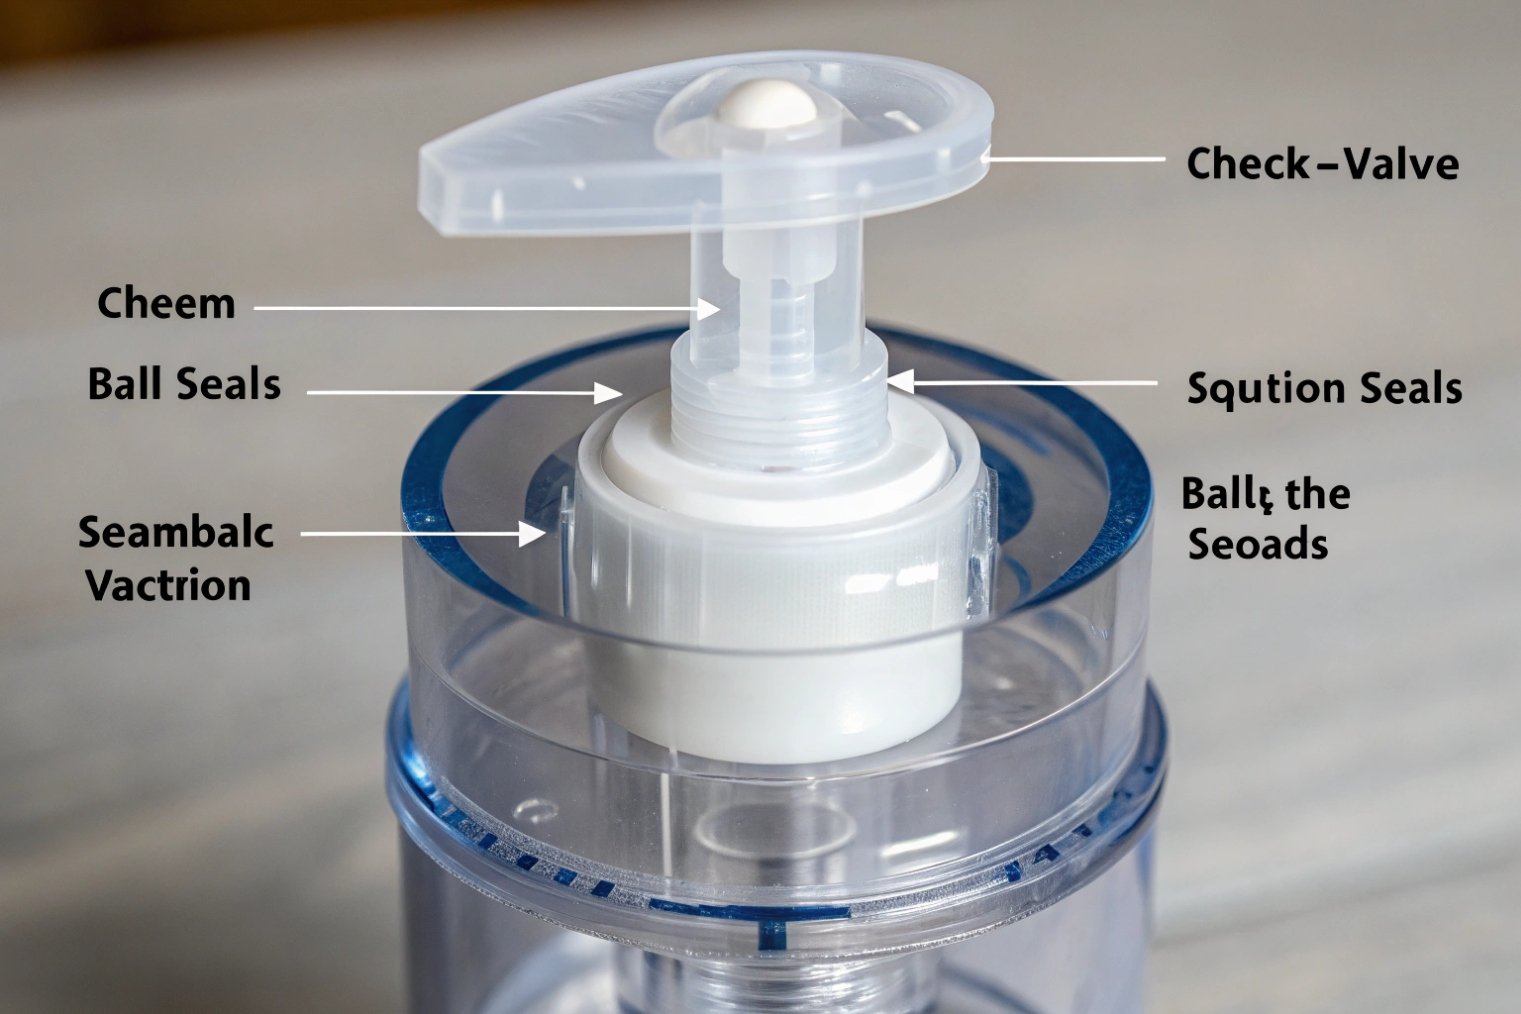
What roles do the valve/ball, gasket, and dip tube play in leak prevention?
Even a strong pump is useless if the bottle leaks in the box or if air sneaks into the system and breaks the prime.
The check valve or ball keeps flow one-way, the gasket seals the bottle neck, and the dip tube feeds product up while helping maintain a solid fluid column.
How these “invisible” parts keep the system tight
Leak complaints often come from parts nobody sees. The lower one-way check valve 3, often a small plastic or glass ball, sits at the base of the pump chamber. When the pump pulls product up, this ball lifts slightly and lets product move from the dip tube into the chamber. When the pump pushes down, the pressure forces the ball onto its seat, and it blocks flow back into the bottle. This simple one-way action keeps suction stable and stops backflow.
The gasket or liner lives under the closure, on top of the bottle neck finish. It can be a PE, TPE, or rubber disc. It fills the tiny gap between the plastic closure and the glass or plastic bottle. A good gasket spreads the torque evenly, keeps air from entering along the threads, and stops product from seeping out during shipping or if the bottle tips over.
The dip tube is the long PP or PE tube that reaches near the bottom of the bottle. Many people see it only as a straw to move product up, but it also supports leak control. If the tube is cut too short, the pump may suck air early, so the column of product in the system breaks, and the first stroke after storage feels “empty.” If the tube is cut too long or left sharp, it can press against the base and deform, which may block flow.
Here is how each part links to typical problems:
| Part | Main role in leak control | If it fails or is wrong… | Common symptom at customer side |
|---|---|---|---|
| Check valve / ball | Keep flow one-way and hold prime | Ball does not sit well, seat not smooth, or debris is present | Pump loses prime, many “air only” strokes |
| Gasket / liner | Seal between closure and bottle neck | Wrong size or material, or torque is too low / high | Ring leaks at neck, stains around collar |
| Dip tube | Maintain product column from base to chamber | Tube too short, too long, or wrong cut shape | Inconsistent dose, last 10–15% hard to pump |
On higher-value products, many buyers also add a secondary seal under the cap, such as a shrink band or induction seal on plastic bottles. For glass bottles with pumps, a strong gasket and a tested lock mechanism usually give enough protection when the inner pieces above are well tuned.
Which materials (PP/PE, stainless spring) and neck finishes (20/410, 24/410) should you specify?
For a buyer or brand owner, the key decisions happen in the spec sheet: plastic type, spring grade, and neck finish size.
Most lotion pumps use PP or PE for main plastics, 304 or 316 stainless steel for the spring, and standard neck finishes such as 20/410, 24/410, or 28/410 matched to the bottle.

Matching materials and neck sizes to your formula and bottle
The two basic plastics in lotion pumps are PP (polypropylene) and PE (polyethylene), both common polyolefin plastics 4. PP is rigid, holds shape well, and takes color and metallization nicely, so many actuators and closures use PP. PE is softer and a bit more flexible, so many dip tubes and some seals use PE. For decorations such as spray coating, frosting, or electroplating, PP is often the first choice because it gives a sharp surface and stable geometry.
Inside the pump, the metal spring is in contact with the product or with vapor from the product. 304 stainless steel is the most common option. It works well for many standard lotions, soaps, and shampoos. For more active formulas, such as products with high salt, strong acids, or high levels of essential oils, 304 vs 316 stainless steel 5 is a useful comparison because 316 typically offers better corrosion resistance. For very sensitive formulas, brands often ask for full compatibility testing on the exact recipe.
Neck finishes like 20/410 or 24/410 are bottle neck finish codes 6 that define both the neck diameter in millimeters and the thread style. For example, “24/410” means a 24 mm outer diameter with a specific 410 thread profile. The pump closure must match this code exactly or leaks and cross-threading will appear. For small facial serums in slim bottles, 18/410 or 20/410 are common. For standard personal care bottles, 24/410 is one of the most popular options. For larger family-size packs, 28/410 is often used.
Even with the right neck and gasket, sealing still depends on consistent application and removal torque. Building a target range and verifying it with application and removal torque testing 7 helps prevent “too loose leaks” and “too tight cracked collars” in real shipments.
Here is a practical cheat sheet you can use when writing specs:
| Scenario / product type | Suggested plastics | Spring grade | Typical neck finish | Notes |
|---|---|---|---|---|
| Standard body lotion, hand soap | PP actuator and closure, PE tube | 304 | 24/410 | Good balance of cost, strength, and feel |
| Face serum, light emulsion in small bottle | PP actuator, slim collar, PE tube | 304 or 316 | 18/410 or 20/410 | Smaller dose, more delicate look |
| Hair conditioner or thick cream | PP body, PE tube, TPE gasket | 304 (stronger spring) | 24/410 or 28/410 | Larger chamber and stronger spring for viscosity |
| Products with high essential oil or acid | High grade PP or special resin, PE or TPE tube | 316 | Case by case, often 24/410 | Need extra compatibility checks |
| Hotel, travel or e-commerce shipping focus | PP parts, strong gasket, overcap + lock | 304 | 24/410 | Add lock-down or clip-lock to reduce leakage |
In real orders, the best way is to start from your formula and region. Then match the material set, spring grade, and neck finish to the glass or plastic bottle design you already have. A small change such as moving from 304 to 316 springs, or from a flat gasket to a shaped one, can save a lot of hidden cost in returns and complaints.
Conclusion
A lotion pump only looks simple. Once each part and material is tuned to the formula and bottle, it becomes a reliable, precise, and brand-safe dosing tool.
Footnotes
-
Quick overview of how pump dispensers meter and deliver liquids in consumer packaging. ↩︎ ↩
-
Overview of packaging performance tests (compatibility, leakage, transport) used for cosmetic components. ↩︎ ↩
-
Explains how one-way check valves prevent backflow and help a pump hold prime. ↩︎ ↩
-
Background on polyolefin plastics commonly used for PP/PE pump parts and dip tubes. ↩︎ ↩
-
Compares 304 and 316 stainless steels so you can specify springs with better corrosion resistance. ↩︎ ↩
-
Helps you decode neck finish numbers like 20/410 so closures match threads and seal properly. ↩︎ ↩
-
Shows how application/removal torque is measured to avoid leaks from caps that are too tight or loose. ↩︎ ↩


