A good bottle can still fail a customer’s “clean test” if it feels greasy. That one bad impression can erase a lot of work in production and sales.
Oily residues stay on glass bottles when mold-release and line lubricants aren’t fully burned off or washed away, and when washing, water quality, coatings, and SOPs let thin oil films survive and trap dust.

From the furnace to the filler, every touch point can add a micro-layer of oil. If process and cleaning are not tuned, those micro-layers become visible smears, label failures, and even cap back-off. Let’s break down where the residues come from and how to stop them.
Are mold release agents or line lubricants the main cause?
You can pull brand new bottles straight from a pallet, touch the surface, and still feel a light greasy film. No filling yet. No product yet. Just glass and oil.
Yes, mold-release oils and line lubricants are usually the primary sources of oily residue. Over-application, incomplete burn-off, and migration from conveyors and closures all leave persistent films on the glass surface.
How mold-release oils create invisible films
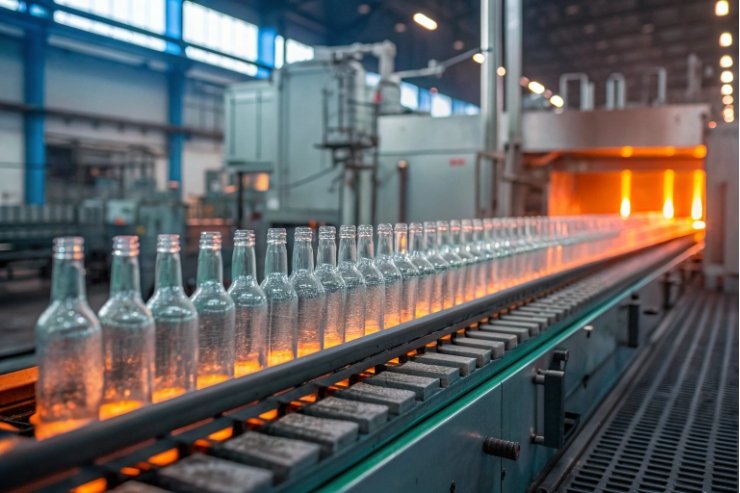
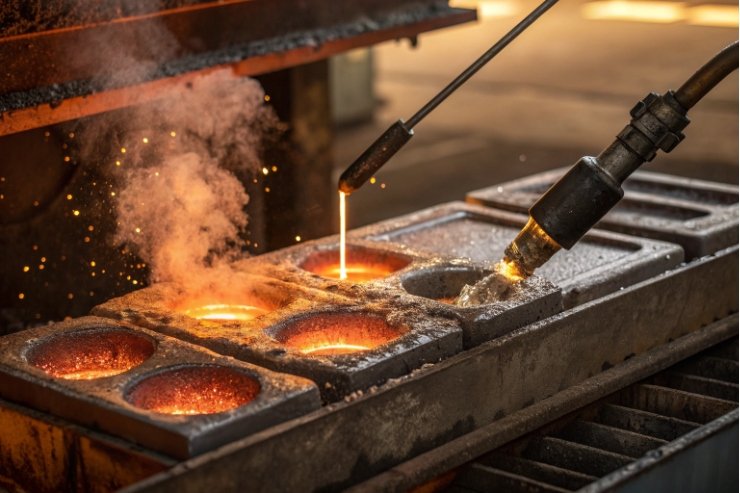
During forming, molten glass drops into hot molds. To keep bottles from sticking and to extend mold life, operators use swabbing oils or mold-release agents 1. In theory, most of this oil should burn off under high temperature.
In practice, several things go wrong:
- Over-spraying or heavy swabbing coats the cavity with more oil than the process can burn off.
- Cooler zones in the mold or shorter contact times mean some oil survives the heat.
- Low-quality or poorly matched mold oils leave more non-volatile residue on the surface.
That unburned fraction transfers onto the fresh glass as a very thin, uniform film. The bottle may look clear, but it feels slightly greasy and shows poor “water break” behavior. Water beads and slides instead of forming a clean sheet. Labels and inks then struggle to adhere, especially on shoulders and label panels.
We see this clearly when two lines use different mold oil disciplines. The “clean” line labels smoothly and consistently. The “oily” line needs higher adhesive coat weights, and operators start blaming labels or glue, when the real issue is upstream on the forming side.
Line lubricants and silicone migration
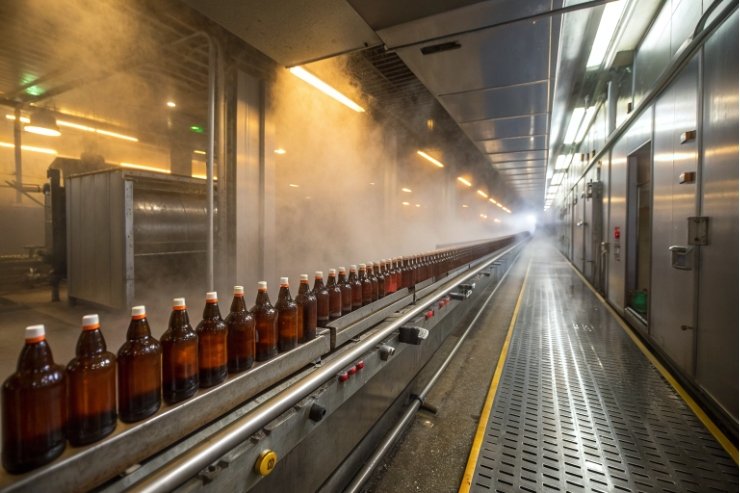
After forming and annealing, bottles meet another oil source: line lubrication. Typical examples:
- Conveyor lubricants (wet or dry) on glass-to-glass and glass-to-metal contact points
- Silicone or other lubricants on stoppers, gaskets, and closure components
- Occasional use of sprays for quick fixes in tight spots
These materials are designed to be slippery, spread out, and resist water. That is exactly what makes them hard to remove. Fine mists can drift from conveyors to bottle bodies. Siliconized closures can transfer a ring of lubricant to the neck and shoulder area. Once there, the oil film slowly creeps along the glass surface.
Over time, you see patterns such as:
- Oily rings around the shoulder or below the closure
- Slippery neck threads, leading to cap “back-off” and leaks
- Hazy zones where oil has trapped airborne dust and carton fibers
So yes, mold-release and line lubricants are the main culprits. Other factors matter, but if these two are out of control, no downstream cleaning will fully solve the residue problem.
Do inadequate washing and water hardness leave films?
Many teams say, “But we washed the bottles,” and still see residue. The missing piece is how chemistry, water quality, and temperature work together on oil.
Inadequate washing, wrong detergent conditions, and hard or cold water can leave emulsified oils and mineral films on glass, which hold a greasy feel even though the bottle “went through the washer.”
Why some washing makes residue worse, not better
A good bottle washer uses alkaline detergent with surfactants at the right temperature. The detergent emulsifies oils and holds them in suspension until they drain away. Several things break this system:
- Low wash temperature: oil stays viscous and harder to emulsify.
- Overloaded wash tank: too much oil and soil, not enough fresh chemistry.
- Short contact time: bottles move through faster than the detergent can act.
- Wrong detergent: poor compatibility with silicone or synthetic oils, weak surfactant package.
Cold rinses are another trap. If very cold water hits hot bottles or a hot detergent film, the emulsion can “break.” Oils that were temporarily suspended in the wash collapse out of solution and redeposit as a stubborn film. It looks like the washer “painted” oil back onto the glass.
The role of water hardness and mineral films
Hard water adds its own layer of trouble. Water hardness 2 adds calcium and magnesium ions that interact with detergents and surfactants, reducing their cleaning power. They also form mineral spots and hazes, especially during hot rinse and drying.
Those mineral patches:
- Increase surface roughness, so oils and lubricants pin more easily.
- Act like anchors where thin oil films can cling and spread.
- Make bottles look cloudy even when they are technically “oil free” in other spots.
So a bottle can come out of the washer with both a thin oil film and a mineral haze. The surface feels greasy, and labels show patchy adhesion. Staff may assume the issue is only oil, but water treatment is part of the fix.
You can often diagnose washer and water problems by looking at where residue appears:
| Symptom | Likely contributor |
|---|---|
| Greasy feel mainly at heel/shoulder | Incomplete detergent action or emulsion break |
| White haze plus slick feel in patches | Hard water + oil redeposition |
| Clean mid-body, oily near neck and threads | Closure lubricant migration + weak washer |
When detergent, water softness, and rinse temperatures are tuned correctly, oily films become far easier to remove, and residue complaints drop sharply.
Can coatings or inks trap grease around label panels?
Sometimes the bottle body looks fine, but areas near label panels or decoration lines collect haze and greasy dust. It feels like the decoration is “pulling in” dirt.
Yes. Hot-end/cold-end coatings, labels, shrink sleeves, and printing inks can create micro-textures and surface energy differences that trap migrating oils and dust around label panels.
How coatings interact with oil and dust
Modern bottles almost always carry surface treatments:
- Hot-end coating (often tin(IV) oxide) 3 to improve scratch resistance.
- Cold-end coating (often a polyethylene wax) 4 to lower friction.
- Optional ceramic inks, organic inks, or coatings for decoration.
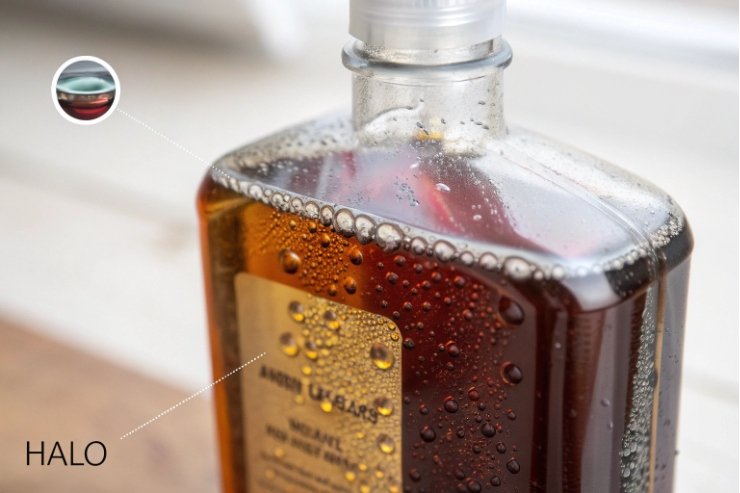
These layers change how liquids spread on the surface. They can be more hydrophobic than raw glass. When line oils or silicone lubricants land on these coated surfaces, they spread and stay put rather than washing away easily. Over time, airborne particles stick to the oil-rich patch, forming a visible halo or stain.
If the coating is not uniform—common near label panels, shoulder transitions, or sharp embossing—some zones hold more oil than others. That creates uneven visual defects:
- Dark “wet-looking” bands around label edges
- Oily fingerprints that do not rinse off because oil has merged with the coating
- Dust “shadows” where fine powder has stuck in oil-rich spots
With safety or polymer coatings, there is an extra layer. These thick coatings are great at containing shards and improving grip, but they also hold oils tightly. If upstream lubrication is heavy, the coating will accumulate residue unless cleaning is adapted.
Labels, inks, and adhesive zones as collectors
Label areas are also oil magnets. The combination of adhesive, paper or film, and glass creates small gaps and edges where oil and dust can settle. Common scenarios:
- Oil migrating from neck threads flows down until it meets the top label edge, then stops and builds up there.
- Slight adhesive squeeze-out around edges traps dust and merges with oil films.
- Screen-printed inks or raised varnish lines create micro-steps that pin oils along their edges.
If the glass below the label was not properly cleaned, label adhesion suffers. You may see:
- Bubbles or “fish-eyes” where adhesive cannot wet out an oily patch.
- Labels lifting at corners, especially on high-curve shoulders.
- Uneven color because dust-in-oil changes how light reflects around the panel.
The result is that customers perceive bottles as dirty, even when the beer or product inside is perfect. From a quality point of view, this is just as damaging as a real contamination issue.
To prevent that, coatings and decoration specs must be written together with lubrication and washing SOPs. You want a system where:
- Coatings improve scuff performance but still allow proper cleaning.
- Label zones have predictable surface energy and minimal oil load.
- Decoration does not introduce extra “traps” for lubricant and dust.
Which cleaning and SOP changes prevent residue build-up?
Oily residue is not solved by “wiping harder.” It is solved when forming, washing, lubrication, and inspection all pull in the same direction.
The most effective prevention comes from tightening mold-oil use, optimizing washer chemistry and water treatment, controlling silicone and conveyor lubes, and verifying cleanliness with simple surface tests before labeling.
Upstream controls: forming and line lubrication
The first wins are often upstream:
- Standardize mold-release oils: choose low-residue products designed for container glass, with data on burn-off and toxicity.
- Control swabbing and spray rates: train operators and set clear limits so molds are lubricated just enough, not flooded.
- Monitor forming temperature and contact time: ensure conditions that fully burn off excess oil while still protecting molds.
- Switch or tune conveyor lubrication: consider dry lubricants 5, reduce overspray, and shield open areas where mist could reach clean bottle bodies.
- Limit silicone-heavy sprays: keep siliconized products focused on true contact points (e.g., specific stoppers), not general “line fixes.”
When upstream lubrication is under control, residue load entering the washer drops immediately, and the rest of the system has a fair chance to work.
Washer setup, water management, and validation
Next, the washer:
- Use an appropriate alkaline detergent with strong surfactants that can handle both mineral and silicone oils.
- Keep wash temperatures high enough (commonly 60–80°C, depending on product guidelines) to reduce oil viscosity and improve emulsification.
- Maintain tank chemistry: monitor pH, conductivity, and soil load; dump and recharge according to a real schedule, not just “when someone remembers.”
- Avoid shocking with very cold rinses after a hot alkaline stage; step down temperature if possible so emulsions stay intact.
- Treat water for hardness (softener, RO, or DI) to avoid mineral scale that traps oils and causes haze.
Then, prove it is working. Simple shop-floor tests are powerful:
- Water-break test: clean glass should form a continuous water sheet, not beads or islands.
- Surface-energy checks such as dyne testing 6 to confirm wetting is high enough for labels and inks.
- Label adhesion test on sample bottles before full production, especially after changes to oils, coatings, or detergents.
When these checks become routine, residue problems appear in data first, not as customer complaints.
Decoration, packaging, and handling practices
Finally, connect cleaning with decoration and handling:
- Agree on coating specs with your glass supplier: hot-end and cold-end treatments that balance scuff resistance and washability.
- Confirm decoration compatibility: spray coats, screen inks, and safety coatings should withstand your washer and not hold extra residues.
- Design label panels with enough flat area and gentle curves to allow good adhesive contact, even on high-speed lines.
- Review closure lubrication SOPs: reduce excess lube on caps and stoppers, and check for cap back-off or neck-ring oil patterns.
- Train line staff to spot early signs of residue, like uneven haze at shoulders or sudden label lifting in one washer lane.
A simple checklist helps keep the system on track:
| Area | Key check |
|---|---|
| Forming | Mold oil usage within spec, no heavy swab marks |
| Lubrication | Minimal overspray, targeted silicone only |
| Washer | Correct temp, chemistry, and dump frequency |
| Water | Hardness under control, no scale build-up |
| Surface quality | Passes water-break and quick label tests |
| Decoration/labels | No “halo” residue around panels after filling |
With these pieces in place, oily residue stops being a mystery and becomes a controlled parameter in your process, just like fill height or torque.
Also keep in mind that silicone contamination 7 can cause severe de-wetting and adhesion issues even at very low levels.
Conclusion
Oily residues on glass bottles are a process problem, not a glass problem—and good control from mold oil to washer to label makes them disappear.
Footnotes
-
Background on mold-release agents and why excess can transfer to formed glass. ↩ ↩
-
Explains hardness, “slimy” feel after washing, and why minerals reduce cleaning performance. ↩ ↩
-
Tin oxide basics and why it’s used for durable hot-end surface treatment on container glass. ↩ ↩
-
Polyethylene wax basics relevant to cold-end slip coatings that can hold or spread oils. ↩ ↩
-
Overview of dry lubricants and why they reduce lubricant carryover on conveyor lines. ↩ ↩
-
Explains dyne testing and how surface energy affects wetting, adhesion, and cleanliness checks. ↩ ↩
-
NASA paper on detecting silicone contamination from mold releases that causes de-wetting and adhesion failures. ↩ ↩


