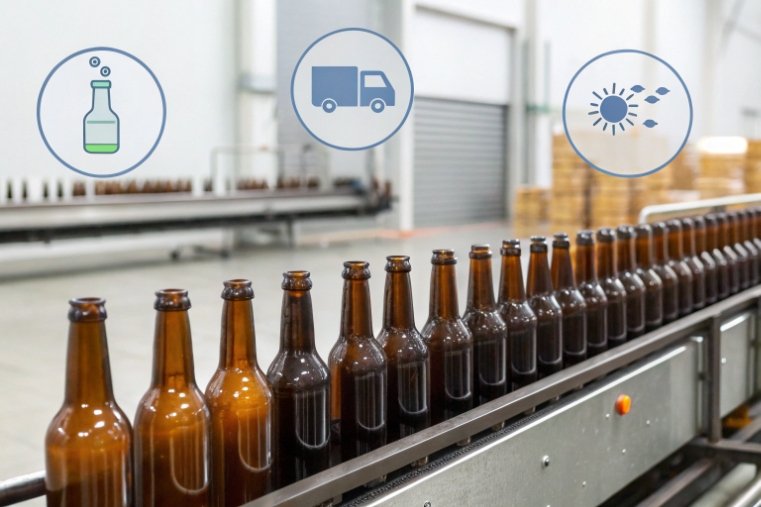
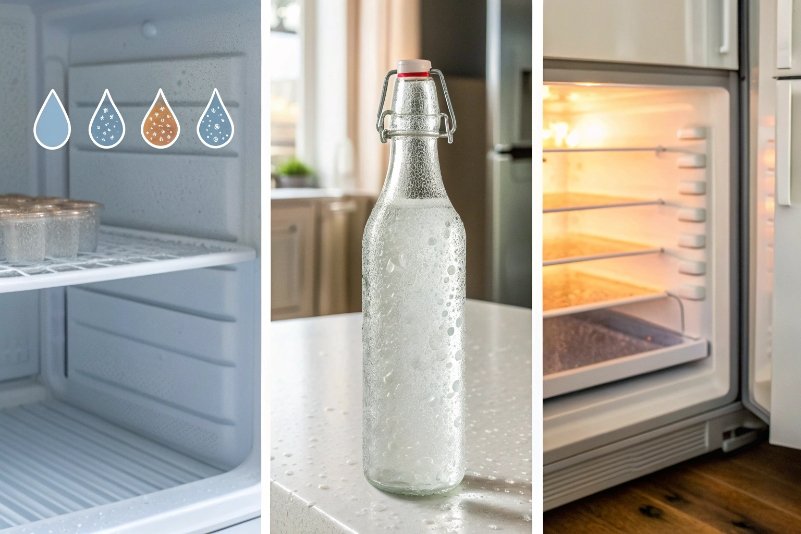
Cold storage looks safe, but many glass bottles still crack or even explode in fridges and freezers. This leads to product loss, safety issues, and angry customers.
Glass bottles crack in cold storage because freezing liquids expand, pressure builds inside, and thermal shock creates stress. Soda-lime glass is most fragile. Flexible plastics and careful headspace design make freezing safer.

When brands understand how cold, pressure, and material work together, they can design bottles that survive real use. Good choices at the packaging stage prevent returns, leaks, and broken glass later.
A bottle that looks fine at room temperature can fail after one night in the fridge. The problem often starts long before any visible crack appears.
Cold-related stress and microcracks come from liquid expansion during freezing, fast temperature changes, and hidden surface flaws. These combine to overload the weak spots in soda-lime bottles.
Volume expansion and internal pressure
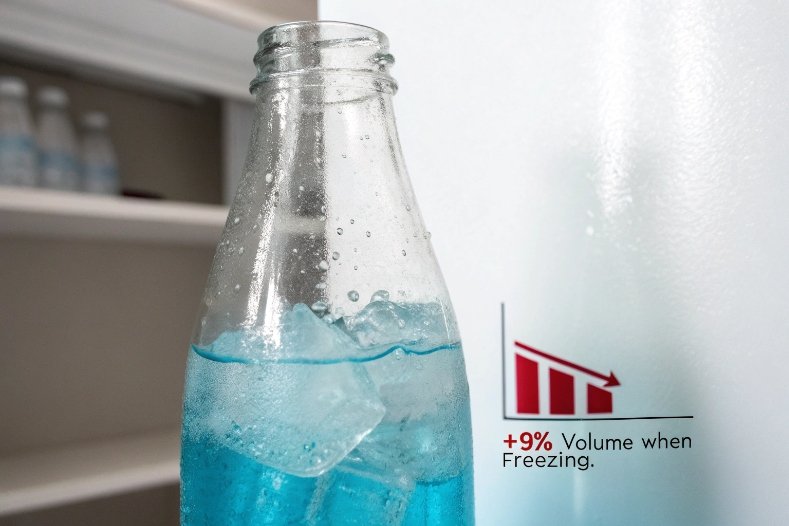
Water expands about 9% when it freezes 1. Most beverages are mostly water, so their volume jumps as ice forms. In a rigid container, this extra volume has nowhere to go. The pressure turns inward against the glass wall.
Glass is strong in compression but weak in tension. When internal pressure rises, the inner surface goes into tension. Once this tensile stress is higher than the glass strength at the weakest point, a crack starts. If the bottle is filled too high, ice forms early and pushes hard on the shoulder and sidewall.
Carbonated drinks are worse. Dissolved CO₂ already creates internal pressure. When the liquid cools and starts to freeze, gas solubility changes. Pressure spikes again. In that state, any small defect in the glass can trigger failure. This is why freezing carbonated drinks in glass containers can cause dangerous explosions 2. Sometimes the closure pops first. Sometimes the glass loses.
| Factor | Effect on Pressure | Typical Result |
|---|---|---|
| Water expansion (~9%) | Strong pressure increase | Sidewall or shoulder cracks |
| Carbonation (CO₂) | Extra internal gas pressure | Cap lift or explosive failure |
| Overfilling (low headspace) | No expansion room | Early cracking during freezing |
| Narrow neck | Expansion blocked | Neck or shoulder fracture |
Thermal shock and temperature gradients
Glass does not conduct heat well. The surface cools first. The inner liquid stays warmer for a while. This creates a temperature gradient between the outside and inside. The outer glass contracts faster than the inner region.
This mismatch creates internal stress. If a warm bottle goes straight onto a very cold freezer shelf, the outer layer shrinks quickly. The inner layer tries to stay larger. Tension forms in the cooled region. This is classic thermal shock.
Soda-lime glass has a higher thermal expansion than borosilicate 3, so it reacts stronger to temperature changes. When the cold side and warm side of the glass differ by too many degrees, microcracks appear. These microcracks may not show at once but grow over cycles.
Flaws, microcracks, and stress concentrators
Real bottles are not perfect. They have mold seams, embossed logos, shoulder transitions, and tiny scratches from filling lines and transport. Each irregularity acts as a stress concentrator. When stress flows across the bottle wall, it “focuses” at these features.
Even without full freezing, a combination of light internal pressure, cold contraction, and a small scratch can start a crack. That is why cracks often run from the shoulder, around a logo, or along a seam. Over time, microcracks reduce the effective strength of the bottle.
In quality control, these details matter. Good handling, better packaging, and proper cold testing help catch weak spots before they reach the shelf.
| Weak Feature | Why It Is Vulnerable | Common Crack Pattern |
|---|---|---|
| Shoulder/neck transition | Sharp geometry change | Radial crack from shoulder |
| Mold seam | Thickness and surface variation | Vertical crack along seam |
| Embossed logo | Local stress concentration | Crack around or through logo |
| Scratches/impacts | Pre-existing microcracks | Sudden shatter under light load |
Can soda-lime, tempered, or borosilicate bottles be safely frozen?
Many people think thicker glass or “stronger” glass means safe freezing. The reality is more complex and depends on both material and use conditions.
Soda-lime, tempered, and borosilicate glass behave very differently in cold. Borosilicate and some tempered products tolerate thermal shock better, but no glass is completely safe if overfilled or frozen too fast.
Soda-lime bottles
Most beverage and food bottles use annealed soda-lime glass for packaging 4. It is affordable and suitable for normal cold storage. However, it has limited thermal-shock resistance. It does not like fast temperature changes or high internal pressure at low temperatures.
This type of bottle may survive a normal refrigerator, especially for still liquids with some headspace. Problems start when users freeze water or juice directly in the bottle, or put warm bottles straight into a deep freezer. In these cases, both expansion and thermal shock can cause sudden cracking.
Tempered bottles and jars
Tempered glass has a compressive stress layer at the surface. This layer improves impact resistance and some thermal shock performance. If a crack starts, the glass usually shatters into small pieces.
Tempered containers can tolerate higher temperature swings than standard soda-lime. Still, they are not magic. Freezing a completely filled tempered bottle can still lead to failure when internal ice expansion breaks through the compressive layer.
Tempered glass is more common in tableware and ovenware. It is less common for standard beverage bottles due to forming and cost factors. When brands use it, they often do so for special products or high-risk applications.
Borosilicate bottles
Borosilicate has a much lower thermal expansion coefficient. This gives it very good thermal shock resistance. That is why laboratories and premium kitchenware rely on borosilicate.
In practice, this means borosilicate can move from room temperature to freezer more safely than soda-lime, especially if there is enough headspace. However, the glass itself is still rigid. It does not stretch to absorb 9% volume increase from water turning into ice. Overfilling or sealing tightly during freezing can still break the container.
Alternative materials for freezing
This is why freezer-safe plastics are so common. HDPE and PP stay tough at low temperatures and can flex if the contents expand 5. Stainless steel bottles also handle low temperatures well, as long as they are only partially filled and not tightly sealed during freezing.
| Material | Thermal Shock Resistance | Flexibility | Freezer Suitability* | Notes |
|---|---|---|---|---|
| Soda-lime (annealed) | Low–medium | None | Risky, only with care | For refrigeration, not true freezing |
| Soda-lime (tempered) | Medium–high | None | Better, still needs headspace | Shatters into small pieces when failing |
| Borosilicate | Very high | None | Good, but not fail-safe | Best glass choice for cold shock |
| HDPE plastic | Medium | High | Very good | Ideal for freezing liquids |
| PP plastic | Medium | High | Very good | Used in many food containers |
| Stainless steel | High | Low | Good with partial fill and loose cap | May deform or damage seal if overfilled |
*Assumes proper headspace and no extreme misuse.
How much headspace and which closures reduce pressure buildup when freezing?
Even the best glass will fail if the liquid has no space to expand. The way we fill and close containers has a direct effect on crack risk.
Headspace of at least 10% is a good baseline for freezing high-water liquids 6. Wide-mouth containers, flexible seals, and non-rigid closures further reduce pressure and improve safety.
How much headspace is enough?
Water expands around 9%. In theory, matching this with 9–10% headspace sounds enough. In practice, expansion is not uniform. Ice tends to grow upward and outward in local zones.
So, a safe rule is to leave at least 10% headspace for still liquids like broth, juice, or water. For very viscous liquids, more space is better because they do not flow easily while freezing. For carbonated drinks, the safest advice is simple: do not freeze them in glass.
If customers might misuse the product, it is better to give them visual fill marks or clear instructions on the label. This is often cheaper than handling complaints and returns.
| Liquid Type | Suggested Headspace | Glass Freezer Use |
|---|---|---|
| Water, juice, tea | ≥ 10% | Possible, still risky |
| Thick sauces, purees | 15–20% | Only in wide-mouth glass |
| Dairy drinks | ≥ 15% | Risky, proteins may foam |
| Carbonated beverages | Avoid freezing | Use plastic or do not freeze |
| Alcohol (high proof) | Less expansion | Still watch for thermal shock |
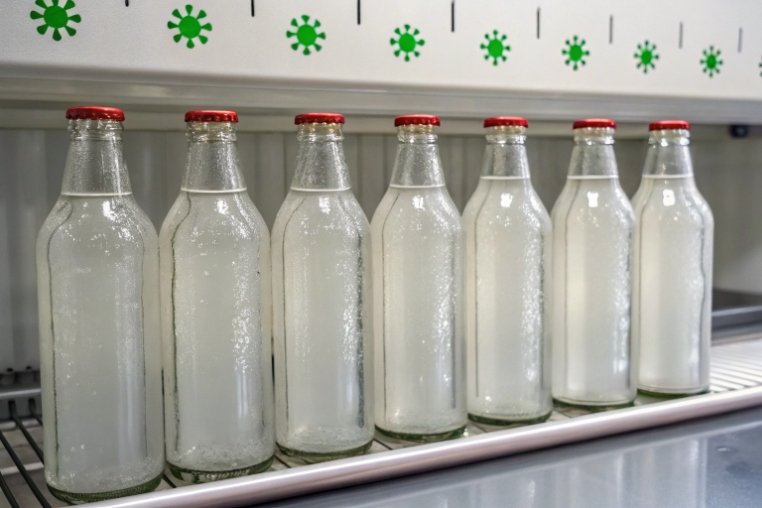
Which closures work better?
Closures play two roles in freezing. They must seal during normal use, but they should not turn into rigid barriers when ice pushes up. A completely rigid metal crown on an overfilled carbonated drink can force the stress into the glass.
Lug caps with liners, plastic screw caps, and swing-top closures with rubber gaskets can flex a little. If the user leaves the cap slightly loose during freezing and tightens it after thawing, the risk goes down again. For sensitive applications, vented or special freezer caps can allow some gas release while still controlling hygiene.
Narrow necks raise risk because they block ice movement. Wide-mouth jars and bottles give ice room to rise. This helps redirect expansion into the headspace, not into the sidewall.
| Closure Type | Flexibility | Freezing Safety (with headspace) | Comment |
|---|---|---|---|
| Crown cap (beer) | Very low | Poor | Can pop or crack glass |
| Metal lug cap | Low–medium | Medium | Better with soft liner |
| Plastic screw cap | Medium | Good | Leave slightly loose while freezing |
| Swing top with gasket | Medium | Good | Gasket can flex under pressure |
| Vented freezer cap | High | Very good | Best for lab and food prep |
In real use, clear instructions help. For example: “If freezing, leave 20% empty and do not tighten cap fully.” Small guidance like this protects both product and brand image.
What are best practices for gradual cooling and thawing to avoid breakage?
Many failures come not from extreme cold but from how fast temperature changes. A good cooling and thawing routine protects both glass and product.
Best practice is simple: cool in steps, avoid sudden temperature jumps, and thaw slowly 7. Never move glass directly between very hot and very cold environments.
Cooling rules that protect glass
First, avoid putting a warm or hot bottle straight into a freezer. Let it reach room temperature, then cool it in the refrigerator. After that, if freezing is needed, move it into a freezer. This stepwise drop reduces thermal shock.
Second, keep bottles away from the coldest spots in the freezer, like vents or bare metal shelves. A simple cardboard layer under the bottle can soften extreme cold contact. Air space around the bottle also helps. Crowded conditions reduce airflow and create uneven cooling.
Never pour boiling or very hot liquid into a cold bottle. The inner surface will expand suddenly while the outer surface is still cold. This can crack even borosilicate.
Safe thawing and handling
Thawing should be slow. The safest method is to move the frozen container into the refrigerator and let it warm overnight. If faster thawing is needed, a container of cool water is better than hot water or direct heat.
Do not run very hot tap water over a frozen bottle. Do not place a frozen bottle into a hot oven or microwave. Sudden expansion of the inner surface can peel away the compressive surface layer and start a large crack.
When thawing, keep the cap slightly loose if hygiene allows. As ice melts and trapped gases expand, pressure can rise again. A loose cap lets that pressure out instead of pushing into the glass.
Simple protocol for users
For many brand owners, the key is to convert technical rules into simple steps on packaging. That helps end users use the product safely without reading a manual.
| Step | Good Practice | Avoid This |
|---|---|---|
| Filling | Leave 10–20% headspace, use wide mouth | Filling to the brim |
| Cooling | Room temp → fridge → freezer (if needed) | Hot bottle straight into freezer |
| Storage | Keep upright, spaced, away from vents | Direct contact with very cold metal surfaces |
| Thawing | Fridge or cool-water bath | Hot water, microwave, or oven |
| Closures | Loosen cap slightly for freezing and thawing | Fully tighten caps during freezing |
These small habits often decide whether a bottle survives the cold chain. They also reduce claims and protect brand trust.
Conclusion
Glass can handle cold if you respect expansion, headspace, and thermal shock, and choose the right material and freezing routine.
Footnotes
-
Demonstration that water expansion on freezing can crack or burst rigid glass containers. ↩︎ ↩
-
Consumer guidance on freezing alcohol and why carbonated drinks in glass can explode. ↩︎ ↩
-
Comparison of soda-lime and borosilicate glass thermal expansion and resulting thermal-shock resistance. ↩︎ ↩
-
Overview of glass types used for beverage bottles and why soda-lime is most vulnerable in freezers. ↩︎ ↩
-
Guide to HDPE and PP containers that stay impact resistant at typical freezer temperatures. ↩︎ ↩
-
Practical tips for safely freezing liquids in glass bottles, including generous headspace and vented caps. ↩︎ ↩
-
Overview of freezer-safe containers and best practices for cooling, storage, and thawing without breakage. ↩︎ ↩


