Hot-fill can look stable in the first minute, then failures appear on pallets or at customers. Cooling is often the hidden trigger that turns “good bottles” into cracks and leaks.
Cooling creates thermal gradients, shrinkage, and pressure changes. Those forces can cause cracking, base checks, paneling, and closure leakage if the bottle design, annealing, and cooling curve do not match the line.

What really happens during cool-down, and why failures often appear late?
The cooling phase creates the highest stress swings
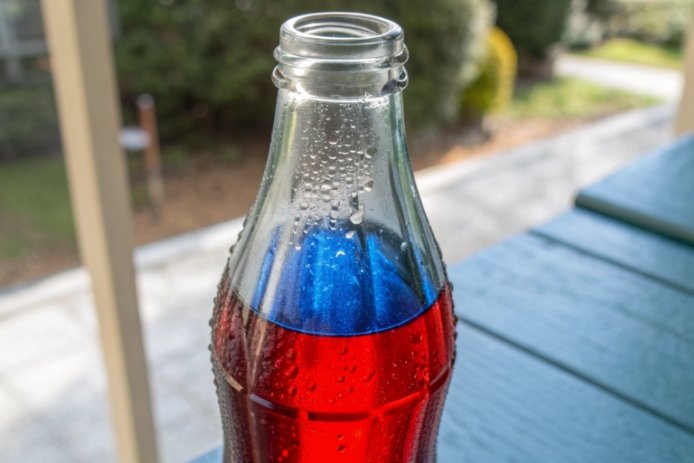
A hot-filled bottle does not cool as one uniform object. The product cools from the outside in. The glass cools from the outside and from contact points. The base often cools fastest because conveyors and starwheels pull heat away. The inside surface can stay hot while the outside surface becomes cooler and stiffer. That mismatch creates tensile stress 1 in the glass wall. Tensile stress is the main driver of cracks.
Cool-down adds shrinkage and pressure changes
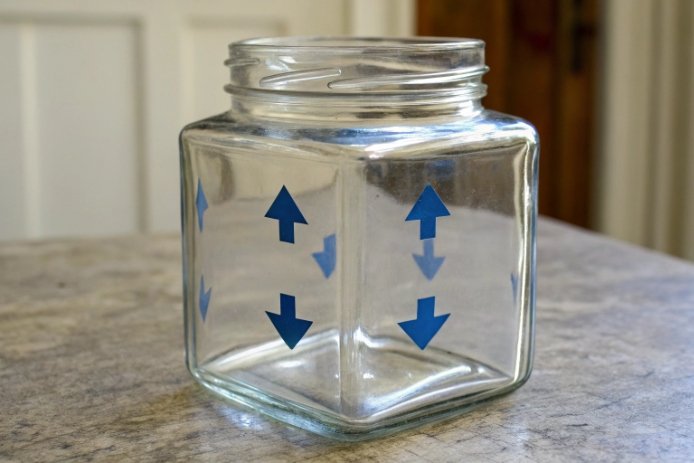
As the liquid cools, it shrinks. Headspace 2 gas also cools, so pressure drops. Many hot-fill 3 systems end with a partial vacuum. That vacuum is useful because it improves shelf stability and tamper evidence. Still, vacuum also pulls on the bottle panels and the closure seal. If the bottle is lightweight or has weak panels, the vacuum can cause paneling 4 or deformation. If the closure system loses compression during heating, vacuum can pull air in during cooling and break the seal.
Failures show late because microdamage grows
A bottle can survive the fill, then fail later because microcracks grow under stress cycles. A base check can start as a tiny surface crack at the heel. The crack can grow during cooling, transport vibration, or vacuum pull. That is why operators often see “late cracks” in depalletizing or at customer warehouses.
| Risk category | What drives it during cool-down | Where it shows up first | What it looks like |
|---|---|---|---|
| Thermal stress | inside hot, outside cool | heel, base corner, shoulder | cracks, checks, microcracks |
| Shrinkage/vacuum | product and gas contract | panels, shoulder, closure | paneling, loss of vacuum, leaks |
| Closure relaxation | liner softens then sets | finish land and threads | torque loss, cap back-off, weeping |
| Handling damage | hot glass is weaker | heel and contact lines | scuffs, microcracks, later breaks |
Most plants reduce post-hot-fill failures when they treat cooling as a controlled “process recipe.” That recipe includes bottle start temperature, fill temperature, cooling ramp, closure timing, and vacuum target.
Now the details.
Why can rapid cooling after hot filling cause cracking, base checks, or microcracks in glass bottles?
Rapid cooling after fill can feel like a productivity win, but it can create an invisible crack factory. The bottle can leave the line intact and fail later in storage.
Rapid cooling creates steep temperature gradients across the glass thickness. Those gradients create tensile stress at the heel and base, which can cause immediate cracks, base checks, or microcracks that grow later.
How rapid cooling turns into stress
The inner glass surface is heated by hot product. The outer surface is cooled by air, water spray, and metal contact. When the outside cools fast, it stiffens first. The inside stays hot and tries to shrink later. The outside resists that movement. This mismatch creates tensile stress on one side of the wall. Glass does not tolerate tensile stress well, especially at scratches or sharp radii.
Why the heel and base corner fail first
The base has more mass and more contact cooling. The heel also has a geometry change. That change concentrates stress. A small crack often starts at the base corner radius, then grows as the bottle continues to cool. A “base check” can look like a short crack at the base edge. Many base checks start as microcracks from contact cooling and then grow under vacuum and handling.
Why microcracks are dangerous even if they do not leak
Microcracks can stay closed at room temperature. Later, vibration and impacts can open them. A microcrack can also act as a path for stress corrosion 5 when water and alkali are present. That can turn a small flaw into a late failure.
Practical triggers that make rapid cooling worse
-
Cold rinses applied too early
-
Cold starwheel plates under a thick base
-
High-speed air jets aimed at the heel
-
Line stops that overheat the product, then restart with hard cooling
| Cooling trigger | What it does | Typical defect | Fast correction |
|---|---|---|---|
| Early cold rinse | shocks outer wall | heel cracks, base checks | delay rinse or raise rinse temp |
| Strong base contact cooling | chills base faster than wall | base corner cracks | use warmer plates or reduce contact time |
| Uneven airflow | cools one side more | one-side cracks | balance airflow and bottle spacing |
| Stop-start events | creates extreme gradients | random cracks | add restart rules and buffer time |
A stable hot-fill line reduces cooling shock first, then fine-tunes fill temperature. That order usually delivers faster results.
How does cooling shrinkage affect vacuum/pressure inside the bottle and lead to paneling, deformation, or closure leakage?
Shrinkage is predictable, but it becomes risky when vacuum is high and the bottle wall is weak. The same vacuum that helps shelf life can also pull the bottle into failure modes.
Cooling shrinkage lowers internal pressure and can create vacuum. Vacuum can pull thin panels inward (paneling), distort shapes, and load the seal. If the seal loses compression, vacuum can pull air in and cause leaks or loss of vacuum.
Why vacuum forms during cool-down
The liquid volume decreases as temperature drops. The headspace gas also cools, so gas pressure drops. If the system has minimal headspace or if the cap is applied hot, the final vacuum can be large. Vacuum creates inward force on the bottle panels and upward force at the closure seal.
Paneling and deformation come from weak zones
Paneling is more likely when:
-
the bottle is lightweight and has large flat panels
-
the bottle has thin shoulder or label panels
-
the bottle has uneven thickness around the circumference
-
the bottle has poor annealing and carries stress
A thick-bottom bottle can still panel if the label area is thin. The base can stay stable while the body collapses slightly. That deformation can also change closure alignment and thread load.
Vacuum can turn small seal issues into leaks
During cooling, vacuum can pull air in through micro-channels at the sealing land. The bottle might not show product leakage, but it can lose vacuum. In food, loss of vacuum can become a safety and shelf-life issue. In beverages, loss of vacuum can cause visible cap movement or looseness.
Vacuum also loads the wall and can keep tensile stress active at the heel while the glass is still cooling. That load can help a microcrack grow into a visible check.
| Vacuum-related effect | What causes it | What it looks like | What to control |
|---|---|---|---|
| Paneling | high vacuum + weak panels | inward dents | panel geometry + thickness uniformity |
| Shape distortion | uneven cooling + vacuum | oval body | controlled cooling + cavity control |
| Loss of vacuum | seal micro-leaks | soft cap or no pop | liner choice + land flatness |
| Closure leakage | weak seal under vacuum/pressure swings | sticky neck, seep | torque window + closure timing |
A robust system sets a vacuum target that the bottle design can handle, then verifies seal integrity after full cool-down.
What closure and liner issues can appear after cooling (torque loss, seal relaxation, cap back-off)?
A cap can feel tight during application and still become loose after cooling. That shift often comes from liner creep at heat and differential expansion between materials.
After cooling, closures can show torque loss, liner compression set, seal relaxation, and cap back-off. Heat softens the liner and can reduce load, then cooling creates vacuum that tests the seal. Small finish ovality or land waviness can turn these changes into leaks.

Torque loss is normal, but the amount matters
Most closure systems lose some torque after application, especially after a heat cycle. The liner creeps under compression. The cap shell also expands when hot and then shrinks on cooling. If the system relies on torque to maintain seal load, too much torque loss can break sealing pressure.
Seal relaxation and compression set
A liner is a spring at room temperature. At hot-fill temperatures, the liner becomes softer. The liner can take a compression set 6, so it does not fully rebound. That reduces long-term seal force. This is why a closure can pass immediate leak tests and fail after 24 hours.
Cap back-off and thread movement
Some systems can show cap back-off when:
-
the cap material has high thermal expansion and creep
-
the thread engagement is shallow
-
vibration occurs during cooling and conveyance
-
the closure torque is near the low limit
Back-off often appears as a small rotation that reduces liner compression. The bottle can lose vacuum without obvious leakage.
Which closures tend to be more sensitive
-
Plastic continuous thread systems can be sensitive because plastic expands and creeps more.
-
Lug/twist-off systems can be sensitive because they depend on controlled compression and vacuum.
-
ROPP systems 7 can be stable, but they still depend on finish roundness and liner recovery.
| Issue | Root cause | What to measure | Best prevention lever |
|---|---|---|---|
| Torque loss | liner creep and cap expansion | back-off torque vs time | liner grade + torque window |
| Seal relaxation | compression set | leak after 24–72 hours | hot-fill liner material |
| Cap back-off | vibration + low retention | rotation marks, vacuum loss | thread design + capper control |
| Micro-leaks | ovality + land waviness | dye ingress, vacuum decay | finish tolerances + land flatness |
A strong closure program treats heat cycling as normal. The program chooses a liner that survives it and sets torque targets that keep compression after cooling.
What cooling curve and QC tests help prevent post-hot-fill failures (thermal shock test, leak test, torque audit, and stress inspection)?
Many projects focus on the fill temperature. The cooling curve usually decides the failure rate. The best QC plan proves the cooling curve works on the worst bottles, not only on average bottles.
A safe cooling curve uses staged cooling that avoids cold shock at the heel and finish. QC should include thermal shock or line-simulation trials, leak testing at heat and after cool-down, torque audits over time, and stress inspection by cavity and shift.
A practical cooling curve approach
A useful cooling curve has three goals:
1) Reduce the peak wall gradient in the first minutes.
2) Keep cooling symmetric and consistent.
3) Reach room temperature without sharp steps.
A common staged idea is:
-
hold or tunnel stage to let heat spread in the glass
-
warm rinse first, then cooler rinse later
-
avoid early cold contact at the base
-
keep airflow balanced so one side does not chill faster
The exact temperatures depend on the product, bottle design, and line speed. Still, the staged concept works across many lines.
QC tests that directly catch post-cool failures
Stress inspection (polariscope):
This test shows residual stress 8 from annealing. High stress reduces thermal margin.
Thermal shock or line simulation:
This test should include the real fill temperature, hold time, and cooling steps. The test should include stop-start cases.
Leak tests:
Run tests both hot and after cool-down. Vacuum decay, pressure decay, and dye ingress 9 are useful.
Torque audits:
Measure application torque and back-off torque immediately, after heat soak, after cool-down, and after 24–72 hours.
Sampling rules that stop weak cavities from shipping
-
Sample across cavities, not only across time.
-
Include worst-case thickness bottles if variation exists.
-
Add extra sampling after any lehr, mold, cap, or cooling setting change.
| QC tool | When to run it | What it catches | Pass signal |
|---|---|---|---|
| Polariscope stress check | each shift | under-annealing and uneven cooling | stress pattern within limit |
| Hot-fill simulation | qualification + changes | real cracking risk | zero cracks in sample set |
| Thermal shock step test | baseline comparison | margin to shock | stable ΔT threshold |
| Leak test (vacuum/pressure) | per lot sampling | seal micro-leaks | decay within limit |
| Dye ingress | audits and qualification | tiny channels | no dye penetration |
| Torque audit over time | each batch or weekly | relaxation and back-off | torque retention within band |
A plant can prevent most post-hot-fill failures when the cooling curve is treated like a controlled spec and the QC plan watches both glass stress and closure seal behavior.
Conclusion
Cool-down can create thermal stress, vacuum, and closure relaxation. Staged cooling, strong annealing control, and hot-cycle leak and torque testing prevent cracks and leaks after shipment.
Footnotes
-
Internal stress created when glass expands and is constrained. ↩
-
Volume of gas above the product inside a sealed container. ↩
-
Process of filling containers with hot liquid to ensure sterility. ↩
-
Deformation of container walls due to internal vacuum. ↩
-
Degradation of materials leading to cracks under stress. ↩
-
Permanent deformation of a material remaining after compression. ↩
-
Standard neck finish type often used with aluminum caps. ↩
-
Internal tension remaining in glass after improper cooling. ↩
-
Test method using dye to detect leaks in package seals. ↩


