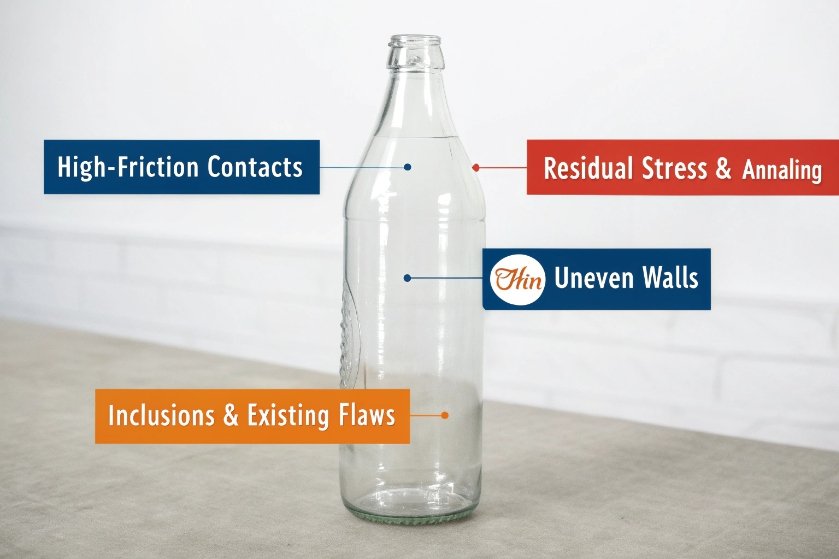
Scratches and burst failures rarely come from “bad luck.” They come from very specific points where hot glass, hard equipment, and unstable stress meet each other.
Scratches in glass bottles are mainly caused by high-friction contacts and dirty ware-handling, while burst failures are driven by residual stress, thin or uneven walls, and existing flaws that give up under pressure or impact.
When the surface gets damaged, the effective strength of the bottle drops fast. So the real job is to control every touch point: from gob cutting and mold contact to dead-plate transfer, cold-end conveyors, coatings, and pressure tests. If these are stable, scratches stay low and burst failures become rare.
Are shear marks and mold scuffing linked to gob temperature and timing?
Shear marks and mold scuffing are not just cosmetic; they can become crack starters. They are closely linked to how the gob is cut, how hot it is, and when it meets the mold.
Yes. Shear marks and mold scuffing are strongly affected by gob temperature, shape, and timing. Wrong gob conditions and machine timing leave scars and scuffs that later weaken the bottle.
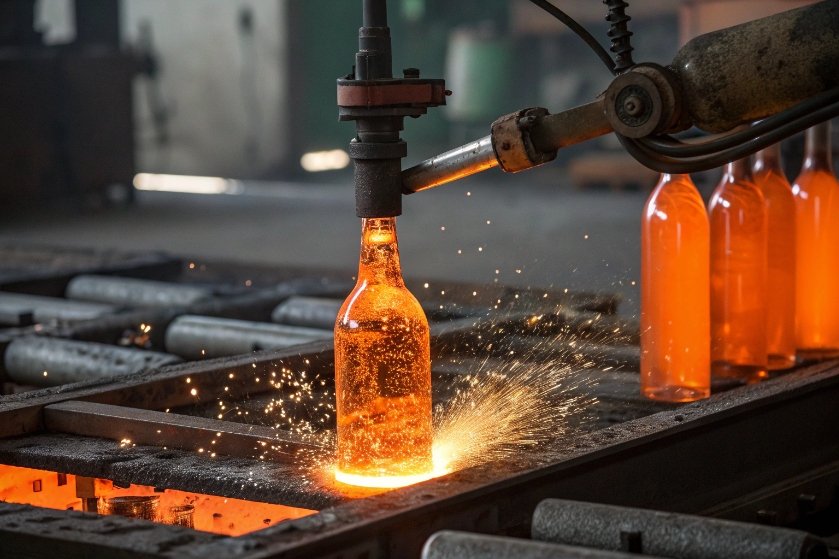
How hot-end settings create shear marks and scuffed glass
When the shear cuts the gob, it leaves a “scar” at the cut face. If the gob is too cold, too long, or cut badly, that scar can stay visible after forming as a shear mark on the bottle body or heel. References like the Emhart Glass defect guide (Container defects—causes and remedies) 1 and the specific “Body Defects – Shear Marks” inspection notes 2 list common drivers such as low glass temperature, wrong gob shape, and shear/mechanism issues.
At the same time, mold scuffing appears when:
- Gob temperature or viscosity is off, so glass drags along the mold wall.
- Molds are rough, dirty, or poorly lubricated.
- Mold timing, plunger timing, or counter-blow are not in sync with gob entry.
The result is a rough track on the surface. It may look like a dull patch or a brushed area in the body or shoulder. These scuffs break the smooth compression layer of the surface and create places where cracks can start under load.
In practice, we see the same root causes repeat:
- Uneven gob temperature between sections or cavities.
- Incorrect gob weight or length, leading to bad contact in the blank mold.
- Poor shear adjustment, leaving heavy scars.
- Worn or dirty mold surfaces and guides.
A simple way to map this is:
| Symptom | Likely Root Cause | Key Actions |
|---|---|---|
| Heavy shear mark on body | Gob too cold or long; poor shear settings | Adjust gob temp/length; refine shear timing and spray |
| Brush-like scuffs | Rough/dirty molds; wrong lubrication | Polish/clean molds; fix lube schedule |
| Loading marks at heel | Gob entry off; wrong plunger/counter-blow | Tune gob delivery and blank side timing |
When gob temperature and timing are stable, and molds stay smooth and clean, most of the “mystery” scratches from forming simply disappear.
How do take-out tongs, dead-plate velocity, and conveyor friction abrade surfaces?
Even a perfect bottle leaving the mold can lose strength in seconds if the ware-handling system treats it like a piece of steel instead of hot fragile glass.
Take-out tongs, dead-plates, and conveyors create abrasion when surfaces are misaligned, running too fast, or contaminated. Every rough or high-friction contact point adds scratches, scuffs, and microcracks.
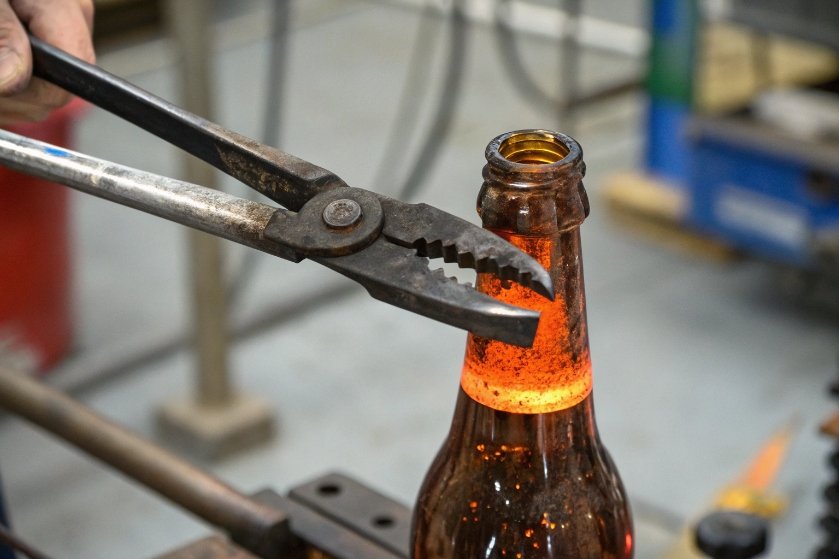
Hot ware-handling: where scratches really start
Right after forming, bottles move through a chain of contact points:
- Take-out tongs hold the bottle at the neck and transfer it out of the mold.
- The bottle lands on a dead-plate or cooling plate.
- Pushers move it onto a moving conveyor toward the lehr.
If any of these steps is harsh, misaligned, or dirty, the soft glass surface takes damage. Typical issues include:
- Take-out tongs out of shape that pinch, twist, or scrape the neck and shoulder.
- Dead-plate impact when the take-out drop height or timing is wrong, causing heel bruises and percussion cones (bruises) 3.
- High dead-plate friction when plates are worn, dirty, or wrong material, leading to flat scuffs on the base.
After this, cold-end conveyors add more risk:
- Speed mismatches between conveyors and pushers make bottles slew and rub.
- Tight or abrasive guide rails force long, hard sidewall contact.
- Loose cullet, dust, and sand on belts act like sandpaper on the heel and body.
These steps do not always break bottles immediately. Instead they create micro-scores that act as future crack origins. Work like AGR’s filling line impact measurement 4 is a good reminder that “small” impacts and contacts can be measurable—and repeatable—strength reducers.
A practical checklist for reducing abrasion looks like this:
| Area | Typical Abrasion Cause | Control Method |
|---|---|---|
| Take-out tongs | Out-of-shape jaws, sharp edges | Regular re-facing, alignment, jaw insert change |
| Dead-plate | Hard impacts, rough or dirty surface | Adjust drop height/velocity; clean or reline |
| Hot conveyor | Speed mismatch, debris, sharp guides | Match speeds; clean belts; use smooth, wide rails |
| Cold conveyor | Back-pressure, jams, tight rails | Control line pressure; set rails; use low-friction materials |
When ware-handling is smooth, gentle, and clean, the number of new scratches drops fast, and burst failures later on also fall, because the surface is still strong when bottles reach filling.
Do pressure tests indicate thin-wall or uneven thickness causing bursts?
Burst failures during pressure testing are one of the clearest signals that thickness, stress, or surface quality is out of control. The pattern of failure usually tells us which factor dominates.
Yes. Internal pressure tests are very sensitive to thin-wall, uneven wall thickness, and local flaws. Where a bottle bursts under test often matches the thinnest or most damaged region.
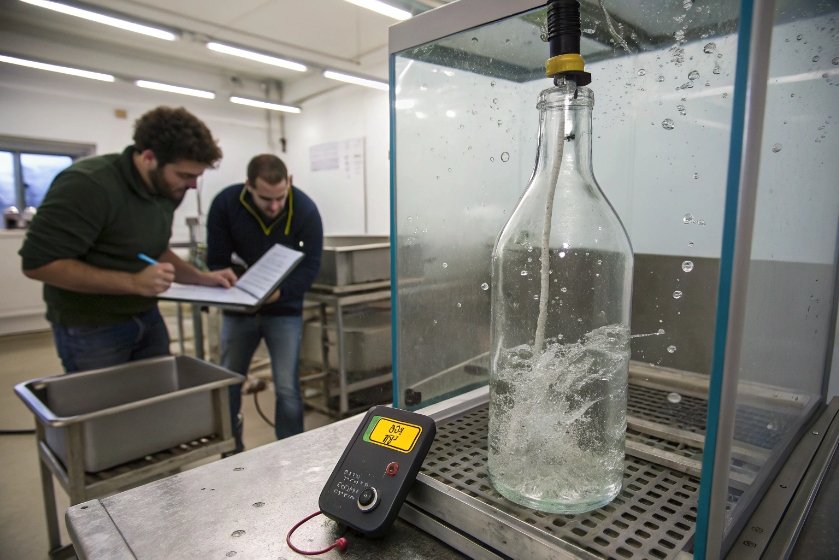
What burst tests really tell us about wall and stress
Pressure testers fill the container with water and raise internal pressure until a target level or until the bottle bursts. Standards such as ASTM C147 (internal pressure strength of glass containers) 5 formalize this approach.
When a bottle bursts, breakage often starts at:
- The thinnest wall section in heel, shoulder, or body.
- A scratched or scuffed region from conveyors or handling.
- A zone with high residual tensile stress from under-annealing.
- An inclusion (stone, cord, bubble) or devitrified patch.
To use burst tests as a diagnostic tool—not just a pass/fail gate—it helps to combine them with wall thickness mapping and fracture-origin work. Classic references like “Bottle Breakage – Causes and Types of Fractures” 6 are useful for connecting where a fracture started to what the glass likely experienced earlier.
We can then classify burst failures roughly like this:
| Burst Origin Area | Likely Root Problem | Next Actions |
|---|---|---|
| Heel / base | Thin heel, impact damage, or inclusions | Check wall map; review ware-handling and defects |
| Shoulder | Uneven distribution, annealing or design | Adjust forming; review annealing curve |
| Sidewall | Thin band, conveyor scuffs | Check gob distribution; tune conveyor rails |
| Finish / neck | Residual stress, torque, inclusions | Check annealing; finish geometry and torque spec |
If test settings are reasonable, frequent bursts are a symptom, not an over-test. They point directly to where forming, annealing, or handling needs work.
Which hot-end and cold-end coatings minimize abrasion-induced breakage?
No matter how careful we are, bottles still touch each other and the line. Coatings are the thin “invisible armor” that lets glass survive fast conveyors and tight packaging.
Tin-oxide hot-end coatings plus polymer cold-end coatings create a low-friction, protective system that reduces scuffing, preserves surface strength, and lowers abrasion-related breakage.
How coatings work together to protect the glass
Hot-end coating is applied right after forming, while the container is still hot, often above 500 °C. Then cold-end coatings are applied near the lehr exit to reduce friction during handling and packing. A practical overview of these mechanisms is summarized well in Lehigh’s “Glass Surface Treatments” lecture notes 7.
The combined effect is:
- Lower sliding friction in accumulation and at guides.
- Less glass-to-glass scratching inside cartons and on pallets.
- Higher retained strength, so bottles can be lighter without more breakage.
The system has to be in balance. Too little coating, or degraded application, means friction rises and scratches return. Too much or uneven coating can create label adhesion and appearance issues, so monitoring is important.
We can summarize coating strategy like this:
| Coating Stage | Main Function | Key Control Points |
|---|---|---|
| Hot-end (SnO₂) | Build base strength, promote cold-end adhesion | Correct precursor dosage, temperature, CTU monitoring |
| Cold-end (PE) | Reduce friction, prevent scuffs and scratches | Spray rate, coverage uniformity, dryer / exhaust setup |
| System check | Keep both balanced | Regular coefficient-of-friction tests and audits |
When coatings are stable and verified, small abrasive events on the line no longer cut deep into the glass. Combined with good ware-handling, this is one of the most effective ways to cut abrasion-induced burst failures.
Conclusion
Scratches and burst failures are not random events. They are the visible result of very specific forming, ware-handling, thickness, stress, and coating issues. When each contact point and each stress source is under control, glass bottles stay smooth, strong, and reliable from furnace to filler.
Footnotes
-
Emhart’s defect guide explains common container defects, causes, and remedies used by production teams. ↩ ↩
-
Practical troubleshooting checklist specifically for shear-mark defects and feeder/shear contributors. ↩ ↩
-
Explains percussion cones (bruises) and why these impact flaws reduce glass strength. ↩ ↩
-
Shows how filling-line impacts are measured and why they correlate with breakage risk. ↩ ↩
-
Defines standardized methods to determine glass container breaking strength under internal pressure. ↩ ↩
-
Classic fracture guide describing bottle breakage types and how fracture origins indicate root causes. ↩ ↩
-
Technical overview of hot-end tin oxide and cold-end polymer coatings used for strength retention. ↩ ↩


