For B2B buyers in the beverage and food sectors, thermal breakage during filling or pasteurization is a costly nightmare that halts production lines. Is the solution finding a material that doesn’t expand, or mastering the physics of stress to withstand that expansion?
Thermal tempering does not change the glass’s Coefficient of Thermal Expansion (CTE). Instead, it utilizes the glass’s natural expansion and contraction properties during a rapid heating and cooling process to lock in surface compression, significantly increasing resistance to thermal stress failure.

The Engineering Dance: Using Expansion to Fight Expansion
At FuSenglass, we often clarify to our clients that "tempering" is not a chemical additive or a material change; it is a thermal history we write into the glass. The relationship between tempering and thermal expansion is paradoxical: we actually need the glass to expand and contract significantly for the tempering process to work.
If glass had zero thermal expansion, thermal tempering would be impossible. The process relies entirely on the physical movement of the glass volume as it changes temperature. By manipulating the timing of this expansion and contraction, we can trap the surface of the bottle in a state of high compression.
When a standard annealed bottle breaks during a hot-fill 1 process, it fails because the hot liquid expands the inner wall while the outer wall remains cool and contracted. This differential creates tension on the outer skin. Since glass is weak in tension, it cracks. A tempered bottle survives this same scenario not because it refuses to expand, but because it has a "reserve" of compressive strength that counteracts the tension.
Key Thermal Concepts Overview
| Concept | Definition | Role in Tempering |
|---|---|---|
| CTE (Coefficient of Thermal Expansion) | How much the glass volume changes per degree of temperature change. | The Engine: This physical property drives the stress creation during the quench. |
| Delta T ($\Delta T$) | The temperature difference between two surfaces or environments. | The Trigger: High $\Delta T$ is used to create the stress profile, and the bottle resists higher $\Delta T$ in use. |
| Quench | Rapid cooling of the glass surface. | The Lock: Freezes the surface dimensions while the core is still hot and expanded. |
| Stress Profile | The distribution of tension (core) and compression (surface). | The Result: The final mechanical state that defines a tempered bottle’s durability. |
Now, let’s analyze exactly how we manipulate these forces to transform a fragile vessel into a durable component of your supply chain.
Does physical tempering change a glass bottle’s CTE, or mainly increase resistance to thermal-stress cracking?
Many procurement managers ask if tempered glass is "low expansion" glass. It is important to correct this terminology to ensure you are buying the right product for your specific thermal environment.
Tempering leaves the Coefficient of Thermal Expansion unchanged. The process creates a mechanical shield of compressive stress on the surface, allowing the bottle to withstand the internal tension generated by thermal expansion without fracturing.
The Unchanged Material Property
The Coefficient of Thermal Expansion (CTE) 2 is determined solely by the chemical composition of the raw batch materials—silica, soda ash, limestone, and cullet. Standard soda-lime glass has a CTE of approximately $9.0 \times 10^{-6}/K$. Whether the bottle is annealed (slow cooled) or tempered (rapid cooled), this number remains identical. If you heat a 200mm tall tempered bottle by 100°C, it will grow in height by the exact same amount as an annealed bottle.
The Mechanism of Resistance
The difference lies in how the bottle handles the stress resulting from that expansion. In an untreated bottle, the surface has almost no internal stress. When thermal shock 3 occurs (e.g., hot liquid filling), the rapid expansion generates tensile force. Glass has a tensile strength 4 of roughly 40 MPa (megapascals). If the thermal shock generates 50 MPa of tension, the bottle breaks.
In a tempered bottle, we have induced a permanent compressive stress on the surface, often exceeding 100 MPa. This acts like a pre-loaded spring. When that same thermal shock hits:
-
The heat generates 50 MPa of tension.
-
The glass surface starts at -100 MPa (compression).
-
Net Stress: -100 MPa + 50 MPa = -50 MPa.
The surface is still in compression. The glass does not break because the net stress never crossed into the danger zone of net tension. The CTE didn’t change; the starting line of the race did.
Material vs. Mechanical Comparison
| Property | Annealed Bottle | Tempered Bottle | Borosilicate (Low CTE) |
|---|---|---|---|
| Expansion Rate (CTE) | High | High (Unchanged) | Low |
| Surface State | Neutral | High Compression | Neutral |
| Thermal Endurance | Low | High | High |
| Failure Mode | Large sharp shards | Small safe chunks (Dicing) | Large sharp shards |
How do heating temperature and quench rate in tempering interact with thermal expansion to build a compression layer?
Understanding the interaction between heat and expansion helps in diagnosing quality issues. If the heating is too low or the quench too slow, the glass’s natural expansion won’t be sufficient to build the protective layer.
The process relies on thermal expansion. Heating expands the glass structure, and rapid quenching "freezes" the expanded surface. As the hot core subsequently cools and contracts, it pulls the surface inward, creating the necessary compressive layer.

Step-by-Step Physics of the Stress Build
To build a compression layer, we must leverage the "lag" between the cooling of the surface and the cooling of the core. This is a precise interplay of temperature and timing.
-
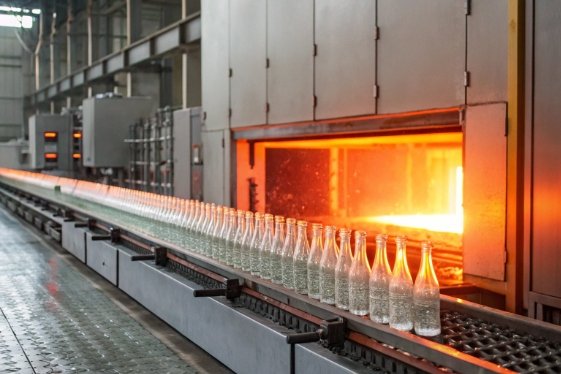
The Expansion Phase (Heating): We heat the bottle to approximately 600°C–650°C, just past the transition range 5. At this point, the glass is soft and visibly red. Crucially, due to its CTE, the glass has physically expanded in volume. The molecules are further apart.
-
The Surface Freeze (Quench Onset): We blast the bottle with high-pressure cold air (quenching). The outer surfaces cool instantly and become rigid solid glass. Because they solidified while the bottle was essentially "oversized" (hot), the outer dimensions are locked in this expanded state.
-
The Core Contraction (Cooling Down): The inner core of the glass wall is still hot and soft. As it slowly cools down to room temperature, it tries to contract (shrink) according to its CTE.
-
The Tension-Compression Lock: Here is the magic. The core wants to shrink, but it is attached to the rigid outer skin that is already frozen in place. The core pulls inward on the skin as it shrinks. This pulling force puts the core into tension and pulls the outer skin into tight compression.
Critical Variables
If the glass had a low CTE (like Pyrex), this process would be difficult because the core wouldn’t shrink enough to pull the surface tight. This is why soda-lime glass 6 (high CTE) is actually easier to temper than low-expansion glass.
-
Heating Temperature: Must be high enough to allow the glass to expand fully and relax stress before quenching.
-
Quench Rate: Must be faster than the thermal conductivity 7 of the glass. If you cool too slowly, the core cools with the surface, and no stress is built.
The Physics of Stress Creation
| Phase | State of Surface | State of Core | Resulting Interaction |
|---|---|---|---|
| Furnace (620°C) | Hot / Expanded | Hot / Expanded | Zero Stress (Equilibrium) |
| Quench Start | Cools / Rigid / Locked | Hot / Soft / Plastic | Surface dimensions set. |
| Cooling Down | Cold / Rigid | Cools / Contracts | Core pulls on rigid surface. |
| Final State (20°C) | Compression (-) | Tension (+) | Balanced Stress Profile. |
What thermal shock limits can tempered bottles typically handle in hot-fill, pasteurization, or rapid cooling scenarios?
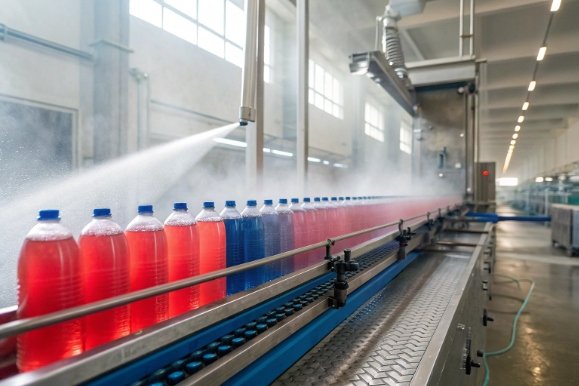
For brands using retort processes, hot-filling juices, or candle jars, the operational "safe zone" is the primary concern. Annealed glass is risky; tempered glass is robust.
Tempered glass bottles can typically withstand thermal shock differentials ($\Delta T$) of 120°C to 150°C, compared to just 40°C for annealed glass. This allows for safe hot-filling, aggressive pasteurization, and rapid cooling without breakage.
Operational Thresholds
The "Delta T" ($\Delta T$) is the critical metric. It represents the sudden change in temperature. For example, pouring 95°C wax into a 20°C jar creates a $\Delta T$ of 75°C.
-
Annealed Glass (Standard): Safe $\Delta T$ is typically ~42°C.
- Risk: A 90°C fill into a room temp bottle (20°C) is a $\Delta T$ of 70°C. This will shatter untreated glass unless pre-heating is used.
-
Tempered/Toughened Glass: Safe $\Delta T$ is typically 120°C to 150°C (depending on wall thickness and geometry).
- Benefit: You can fill boiling liquid (100°C) into a freezing bottle (0°C) without failure.
This increased limit removes the need for slow, energy-intensive "warming tunnels" before filling and "cooling tunnels" after filling. You can move product faster through more aggressive temperature changes.
Scenario Analysis
However, it is vital to note that "fully tempered" bottles (like car side windows) are rare due to the complex geometry of the neck. Most bottles are "toughened" (partial temper).
-
Hot-Fill: The inner wall expands, putting the outer wall in tension. Tempered glass handles this easily.
-
Pasteurization/Retort: This involves heating the filled bottle. The danger is usually in the cooling phase (cold water spray). Tempered glass resists the shock of cold water hitting the hot bottle.
-
Freezer-to-Oven: Only high-quality tempered borosilicate is recommended here, but tempered soda-lime handles freezer-to-microwave reasonably well, provided the $\Delta T$ stays under 130°C.
Safe Delta T Limits by Glass Type
| Glass Condition | Safe Thermal Shock ($\Delta T$) | Typical Application |
|---|---|---|
| Annealed Soda-Lime | 40°C – 50°C | Standard Beverage, Wine, Spirits |
| Heat Strengthened | 60°C – 80°C | Some Food Jars, thick bottoms |
| Fully Tempered | 120°C – 150°C | Durable Tumblers, Candle Jars, Food Storage |
| Borosilicate (Annealed) | 120°C – 140°C | Labware, Premium Kitchenware |
What QC tests confirm tempering effectiveness and heat-cycle durability?
You cannot assess tempering by looking at the bottle. A tempered bottle looks identical to an annealed one. Validation requires destructive and optical testing.
Quality control relies on three pillars: ASTM C147 for thermal shock endurance, polariscopes to visualize stress patterns, and fragmentation tests to ensure safe breakage behavior. These confirm the tempering process was successful.
The Trinity of Validation
When FuSenglass validates a production run of tempered ware, we are looking for consistency. If the air nozzles in the quench section are slightly misaligned, you might get "leopard spots" of stress rather than a uniform layer, leading to weak points.
1. Thermal Shock Test (ASTM C147)
This is the practical performance test.
-
Protocol: Bottles are soaked in a hot water bath (e.g., 95°C) and then transferred mechanically within seconds to a cold water bath (e.g., 21°C).
-
Pass Criteria: The glass must survive a specified $\Delta T$ (e.g., 120°C) without cracking.
-
Significance: This directly tests the relationship between the expansion forces and the compression layer.
2. Fragmentation Test (Fracture Pattern)
This distinguishes "tempered" from "annealed."
-
Protocol: A center punch is used to break the glass at its thickest point.
-
Pass Criteria: The glass must shatter into small, relatively harmless cubes ("dice"), not long, sharp jagged shards. Standards often require a minimum particle count (e.g., 40 pieces in a 50x50mm square).
-
Significance: This proves the core was in high tension. Only high stored energy creates this dicing effect.
3. Polariscope Examination (Optical)
-
Protocol: Viewing the glass under polarized light 8.
-
Pass Criteria: A specific, uniform color pattern (isochromatics) indicating stress distribution. We look for a "Maltese Cross" pattern in the base of tumblers/jars.
-
Significance: Non-destructive check to ensure every unit on the line has been treated.
Buyer’s QC Checklist
| Test Name | What it Validates | Metric / Standard |
|---|---|---|
| Thermal Shock | Usability in Hot-Fill | Pass @ $\Delta T$ 120°C |
| Fragmentation | Safety / Temper Quality | > 40 particles / 25cm² |
| Polarimetry | Uniformity of Stress | ASTM C148 9 / Visual Pattern |
| Impact Test | Mechanical Strength | Pendulum 10 or Drop Test |
Conclusion
Thermal tempering is the art of turning the enemy—thermal expansion—into an ally. By orchestrating the expansion and contraction of the glass, we build a hidden shield of compressive stress. This allows your bottles to endure the rigorous thermal cycles of modern production lines, reducing breakage and protecting the consumer.
Footnotes
-
A filling method where hot liquid sterilizes the container, requiring high thermal resilience. ↩
-
A material property that quantifies how much a substance expands when heated. ↩
-
Structural failure caused by rapid temperature changes, creating expansion/contraction stress. ↩
-
The maximum stress a material can withstand while being stretched or pulled before breaking. ↩
-
The temperature range where a polymer or glass transitions from a hard solid to a soft state. ↩
-
The most common type of glass used for containers, known for its high thermal expansion rate. ↩
-
A measure of a material’s ability to conduct heat, influencing how fast it cools. ↩
-
A tool used to visualize stress distribution in transparent materials like glass. ↩
-
Standard test method for examining glass containers for residual stress using a polariscope. ↩
-
A device used to measure impact resistance by swinging a weighted hammer against a sample. ↩


