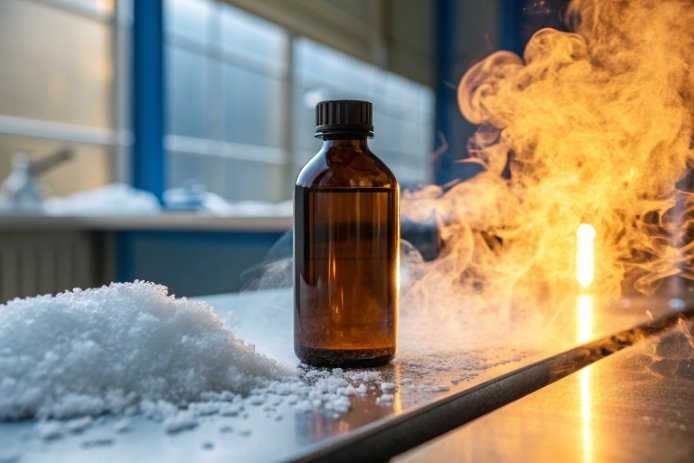
Thermal cracks feel unfair. The bottle looks fine, then one hot rinse, one cold conveyor, or one fast cool-down creates a failure that ruins the whole batch.
Thermal stress concentration is the main reason glass bottles crack during hot-fill, pasteurization, labeling heat, and cool-down. Local stress peaks form at geometry transitions and thickness hot spots, so cracks start even when average CTE and dimensions are “correct.”

Why do small thermal hot spots cause big glass failures?
A glass bottle rarely fails because the whole bottle expanded “too much.” It fails because one area of the glass is forced into tension while nearby glass resists. That situation happens when temperature changes are uneven, or when the bottle shape concentrates stress. Thermal stress concentration is the bridge between heat exposure and a real crack.
The stress story is always local
When hot liquid touches the inside wall, the inner surface heats first. When cold air, a cold rinse, or metal contact cools the outside, the outer surface changes temperature first. Those two surfaces want to move by different amounts. Glass can handle compression well, but it handles tension 1 poorly, especially if there is a scratch or a tiny inclusion. So the “maximum ΔT” is not a single number. It is a local stress limit that depends on where the gradient forms.
Stress concentration is geometry plus temperature plus history
Three factors stack in the same places:
1) Geometry: sharp radii, corners, and thickness steps increase local stress.
2) Thermal gradient: fast heating or cooling makes the inside and outside disagree.
3) Residual stress: under-annealing or uneven cooling leaves stored stress that reduces margin.
When those three stack at the heel or finish, even a small process change can trigger rejects.
Why it matters for cost and reputation
Thermal stress concentration does not only cause cracks. It can cause microcracks that survive the line and fail later in shipping. It can also cause closure leakage by changing finish load. That creates sticky necks, label failure, and shelf-life issues.
| What the line changes | What the bottle feels | What stress concentration does | What customers see |
|---|---|---|---|
| Fill temperature drift | fast inner-wall heating | raises heel/shoulder stress | cracks or checks |
| Early cold rinse | fast outer-wall cooling | reverses stress quickly | base checks |
| Heavy base design | slow heat equalization | holds gradients longer | random late breaks |
| Weak annealing | stored tensile zones | reduces safety margin | “mystery” cracking |
| Hot labeling band | local hot stripe | creates narrow stress ring | cracks after labeler |
The rest of this article breaks the problem into four practical parts: where stress concentrates, how design and ramps amplify crack start, what failure modes look like, and how to reduce risk through design, annealing, and process control.
Where does thermal stress concentration usually occur in a glass bottle, and why?
Thermal cracks usually repeat in the same zones. That is not bad luck. Those zones are built to concentrate stress.
Thermal stress concentration most often occurs at the heel, base corner, shoulder transition, and neck finish. These areas combine thickness changes, curvature, contact cooling, and sealing geometry that create local tensile stress during heating and cooling.
Heel and base corner: thick mass + sharp transition
The heel is the base-to-wall transition. It often has a thickness jump and a tight radius. During hot-fill, the inner heel heats fast. The outer heel stays cooler due to metal contact and airflow. That creates a strong gradient and tensile stress at the surface. If the heel has scuffs from conveyance, cracks start there first.
Base and push-up: cold anchor effect
The base often stays cooler because it touches conveyors and starwheels. Even if heat is applied above the base, the base acts like a cold anchor. That anchor restrains expansion in nearby glass and increases stress in the heel band. A deep push-up can add complex thickness patterns that create stress hinges.
Shoulder: curvature and thickness distribution
The shoulder is a geometry transition from body to neck. It often has curvature plus thickness gradients. If a shrink sleeve tunnel or warm rinse heats the shoulder unevenly, the curved region becomes a stress amplifier. Shoulder checks can form as small cracks that later grow.
Neck finish: small surfaces, high demands
The finish carries closure load. It has threads, a sealing land, and a bore edge. Thermal cycling can change contact pressure as caps and liners expand and soften. Any local stress in the finish from annealing drift can stack with capping torque and temperature changes. This is why finish cracks can appear even when the body is fine.
| Bottle zone | Why stress concentrates there | Process trigger that exposes it | Typical crack origin |
|---|---|---|---|
| Heel | thickness step + tight radius | cold rinse, conveyor contact | base corner/heel line |
| Base/push-up | mass + complex geometry | fast cool-down | base checks near edge |
| Shoulder | curvature + transition | hot-fill + uneven air | shoulder check or split |
| Neck finish | threads + sealing land | hot capping + cooling | finish crack or chip |
In many projects, the fastest improvement comes from mapping crack origin points on actual failures. When 80% of cracks start in one zone, the fix becomes targeted and cheaper.
How do thickness variations, sharp design transitions, and rapid heating/cooling amplify crack initiation?
Most bottles do not crack because they are “thin.” They crack because thickness is uneven and transitions are sharp, so thermal gradients become concentrated.
Thickness variation and sharp transitions amplify crack initiation by increasing local temperature gradients and creating stress hinges. Rapid heating or cooling increases the gradient rate, so tensile stress rises faster than the glass can tolerate at weak surfaces.
Thickness variation creates uneven temperature fields
A thick section heats slower, but its inner skin can heat quickly while the core lags. A thin section heats more evenly. When thick and thin are side by side, they expand differently at the same time. That mismatch creates bending stress and local tension. The worst case is a sudden step, like a thick heel band next to a thin label panel.
Thickness variation also creates circumferential imbalance. One side of the bottle can be thicker due to parison 2 distribution drift. Then one side expands more during hot-fill. That causes one-side cracks and makes defects look random.
Sharp transitions create stress multipliers
A sharp corner or small radius increases stress concentration. Even a good thermal process can fail on a sharp heel corner. In design terms, sharp transitions reduce the “effective strength” of the glass under tension. This effect becomes stronger under thermal gradients because the glass is being pulled in a localized way.
Rapid ramps increase stress peak speed
Fast heating and fast cooling do not allow temperatures to equalize. The inner wall can be hot while the outer wall is still cold. The stress peak rises quickly. If the bottle has residual stress from under-annealing, the total stress crosses the limit. That is why a small process change, like earlier cooling or higher rinse pressure, can cause a big crack spike.
Why scratches and microdamage matter more during fast ramps
Thermal stress finds flaws. A tiny scratch at the heel can become the start of a crack when the outer surface is in tension. Handling and conveyance quality is part of thermal-crack control, even if the recipe is perfect.
| Amplifier | What it does to stress | What it looks like on the line | Best control lever |
|---|---|---|---|
| Thickness step | creates a stress hinge | cracks repeat at a “ring” line | smooth gradient, reduce step |
| Small radius | multiplies tensile stress | heel corner failures | increase radii |
| One-side thick wall | uneven expansion around circumference | cracks from one direction | cavity tuning, parison control |
| Rapid cooling | increases wall ΔT | cracks after rinse/tunnel | staged cooling |
| Surface scuff | lowers crack start threshold | late breaks in packs | protect heel, reduce abrasion |
A practical design review always includes a “thermal stress map.” It highlights thickness steps, sharp radii, and contact cooling points. Those are the places where thermal shock will show first, even if average wall thickness looks strong.
What common failure modes result from localized thermal stress?
Thermal stress concentration creates patterns. When those patterns are understood, troubleshooting becomes much faster.
Localized thermal stress commonly causes base checks, vertical cracks, shoulder checks, finish cracking or chipping, and sudden breakage during handling. Many failures start as microcracks that grow during cooling, vacuum formation, or transport vibration.
Base checks: small cracks at the base edge
Base checks often appear as short cracks near the base corner. They are common after rapid cooling or after cold contact under a hot-filled base. They can be shallow at first and then grow. Base checks are dangerous because they can survive inspection and later cause breakage during pallet movement.
Vertical cracks: splits driven by high tensile stress
Vertical cracks often start at the heel or shoulder and run upward. They can happen when the inner wall expands quickly and the outer wall resists. They also happen when one side is cooled harder than the other, which creates bending stress and a split line.
Shoulder checks and panel cracks
Shoulder cracks can form when the shoulder transition is heated or cooled unevenly, such as in shrink tunnels or during pasteurization 3 ramps. Panel cracks can happen when vacuum and thermal stress combine in lightweight designs with large flat panels.
Finish cracking and chipping
Finish cracks can be triggered when hot capping is combined with thermal cycling. Differential expansion between glass, cap, and liner changes load and can create stress at the sealing land or thread root. Chipping can also increase when cold bottles enter hot labeling or when torque is too high during a temperature mismatch.
| Failure mode | Typical origin zone | Typical trigger | What it often gets blamed on |
|---|---|---|---|
| Base checks | base corner/heel | cold rinse, cold conveyor | “weak glass” |
| Vertical splits | heel or shoulder | fast heat-in or one-side cooling | “bad mold” |
| Shoulder checks | shoulder transition | shrink sleeve tunnel, pasteurization | “label issue” |
| Finish cracks | sealing land/threads | hot capping + cooling | “cap quality” |
| Sudden breakage | pre-existing microcrack zones | vibration + vacuum + impacts | “shipping damage” |
A strong failure review practice is to classify the defect type, record the origin point, and correlate it with the process time line. Thermal failures usually align with a specific station: fill, rinse, tunnel, cooler, or capper.
How can you reduce thermal stress concentration through bottle design, annealing control, and hot-fill/cooling process optimization?
Cracking is not solved by one adjustment. It is solved by removing stress amplifiers and keeping the thermal cycle smooth and repeatable.
Reduce thermal stress concentration by designing smoother radii and more uniform thickness, keeping annealing stress low and consistent by cavity, and optimizing hot-fill and cooling ramps to avoid sharp outside shocks and unstable stop-start events.

Design: remove stress hinges before production starts
Design controls provide permanent improvement. The highest ROI changes are:
-
increase heel and base corner radii
-
smooth thickness transitions, especially at heel and shoulder
-
limit heavy base mass when thermal cycling is harsh
-
avoid embossing in zones exposed to strong heat bands
-
control finish perpendicularity and land flatness for stable sealing
A lighter bottle with smooth transitions often survives thermal cycling better than a heavier bottle with sharp steps.
Annealing: remove residual stress and make it uniform
Annealing does not change the composition-based CTE 4 in a meaningful way, but it changes the safety margin. A stable lehr 5 profile should:
-
reheat enough for stress relaxation
-
hold long enough for thick zones
-
cool evenly without drafts and lane imbalance
Cavity-level stress control is important. One cavity with high stress can create most of the cracks and ruin the whole lot.
Process: shrink the gradient and slow the shock
Hot-fill and cool-down controls should reduce the wall gradient:
-
pre-warm bottles if they arrive cold
-
keep fill temperature inside a tight window
-
delay cold rinses or start with warmer rinse stages
-
reduce cold metal contact at the base early in the cycle
-
define stop-start recovery rules to avoid extreme gradients
-
control closure timing and neck temperature so finish stress does not stack with torque
Verification: treat thermal risk like a gated requirement
Design and process changes should be proven with:
-
hot-fill simulation including worst-case cooling steps
-
thermal shock step tests for baseline comparison
-
polariscope 6 stress inspection by cavity and shift
-
thickness mapping on critical zones
-
leak and torque retention tests after thermal cycling
| Control layer | Key action | What it reduces | What to measure |
|---|---|---|---|
| Design | smooth radii and transitions | stress concentration | crack origin shift, fewer heel cracks |
| Forming | reduce thickness variation | uneven gradients | weight spread, wall mapping |
| Annealing | lower residual stress | pre-load tension | polariscope patterns |
| Hot-fill | stable fill window | stress variability | crack rate vs fill temp |
| Cooling | staged cooling | outside shock | base checks after rinse |
| Closure | cap at controlled neck temp | finish stacking stress | torque retention + leak tests |
In my work, the biggest gains usually come from combining two moves: smoother heel transitions in design and staged cooling in process. When those are paired with strong annealing control, thermal cracks stop looking random and start looking preventable.
Conclusion
Thermal stress concentration drives most bottle thermal failures. It forms at heels, shoulders, and finishes, then grows under fast ramps and residual stress. Smooth design, good annealing, and staged cooling prevent cracks.
-
Why glass is weak in tension: an explanation of brittle fracture mechanics. ↩
-
Definition of parison in glass forming and its impact on wall thickness. ↩
-
Overview of pasteurization processes and thermal requirements for packaging. ↩
-
Explanation of Coefficient of Thermal Expansion (CTE) in materials. ↩
-
Function and importance of annealing lehrs in glass manufacturing. ↩
-
Using a polariscope to detect residual stress in glass containers. ↩


