A perfume bottle only gets a few seconds to convince someone to reach for it, and then years to protect the juice inside. Both jobs start at the design table.
Good custom perfume bottle design balances capacity, neck finish, pump, ergonomics, colour, coatings, and testing so the pack looks iconic, sprays beautifully, and survives real supply chains.

When I design a bottle with a client, I always treat it as an engineering project wrapped in a branding project. The magic happens when those two sides do not fight each other. Let’s break the key choices down step by step.
How do capacity, neck finish, and pump type work together in a custom bottle?
It is easy to choose a “pretty” shape first and then struggle with pumps, caps, and line filling. That path usually costs time and money later.
Start with capacity, neck finish, and pump type together. They decide spray feeling, component compatibility, and whether the bottle runs smoothly on filling and assembly lines.
Get the basic architecture right
Before sketching fancy silhouettes, lock three technical anchors:
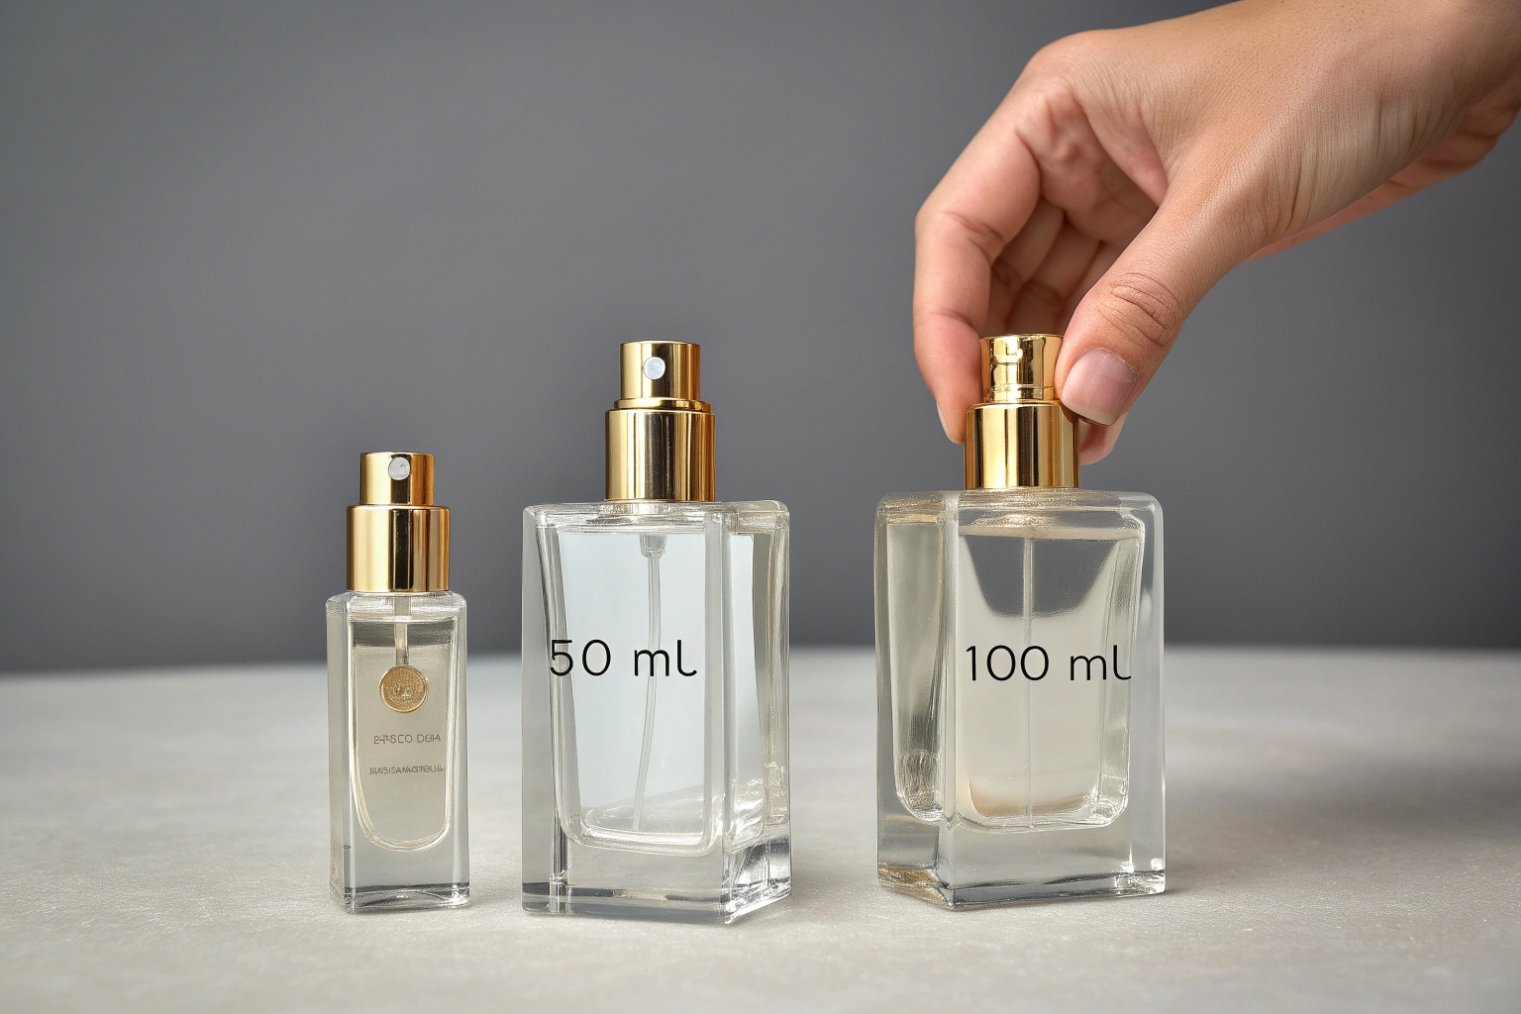
- Capacity: 30 ml, 50 ml, 75 ml, 100 ml, or a travel mini.
- Neck finish: crimp (FEA15 / FEA20) or screw (13/415, 15/415, etc.).
- Pump type: fine-mist fragrance pump, splash, or possibly roll-on for flankers.
Capacity influences how often the user sprays and how the bottle feels in hand. A 30 ml should feel light and portable. A 100 ml should still fit one hand without feeling like a brick. Pump output (for example 0.08–0.12 ml per spray) and bottle volume together define how long the bottle will last.
Neck finish and pump type must match from day one. Many brands choose crimp pumps for a more “sealed”, luxury look and better long-term tightness. If you want the broadest component compatibility, start from common FEA15 and FEA20 crimp finishes 1. Others pick screw pumps for easy refilling and simpler assembly—just make sure you understand how 15/415 and 20/415 thread finishes map to closures, pumps, and tolerances 2. Each route drives mold design, cap design, and even your refill policy.
Think in systems, not single parts
It helps to see bottle, pump, and cap as one system, not as three separate purchases:
| Element | Key decisions | Impact on design and operation |
|---|---|---|
| Capacity | 30 / 50 / 100 ml etc. | Bottle height, base thickness, shipping weight |
| Neck finish | Crimp vs screw, thread spec | Pump choice, cap design, sealing reliability |
| Pump | Output, stem length, spray angle | Sensory experience, coverage, number of uses |
| Cap | Height, weight, inner fit | Overall proportions, leak protection, shelf look |
Once these are set, you can still play with shoulders, bases, and small details. But you are no longer fighting physics or component catalogs. You are designing on top of a stable platform.
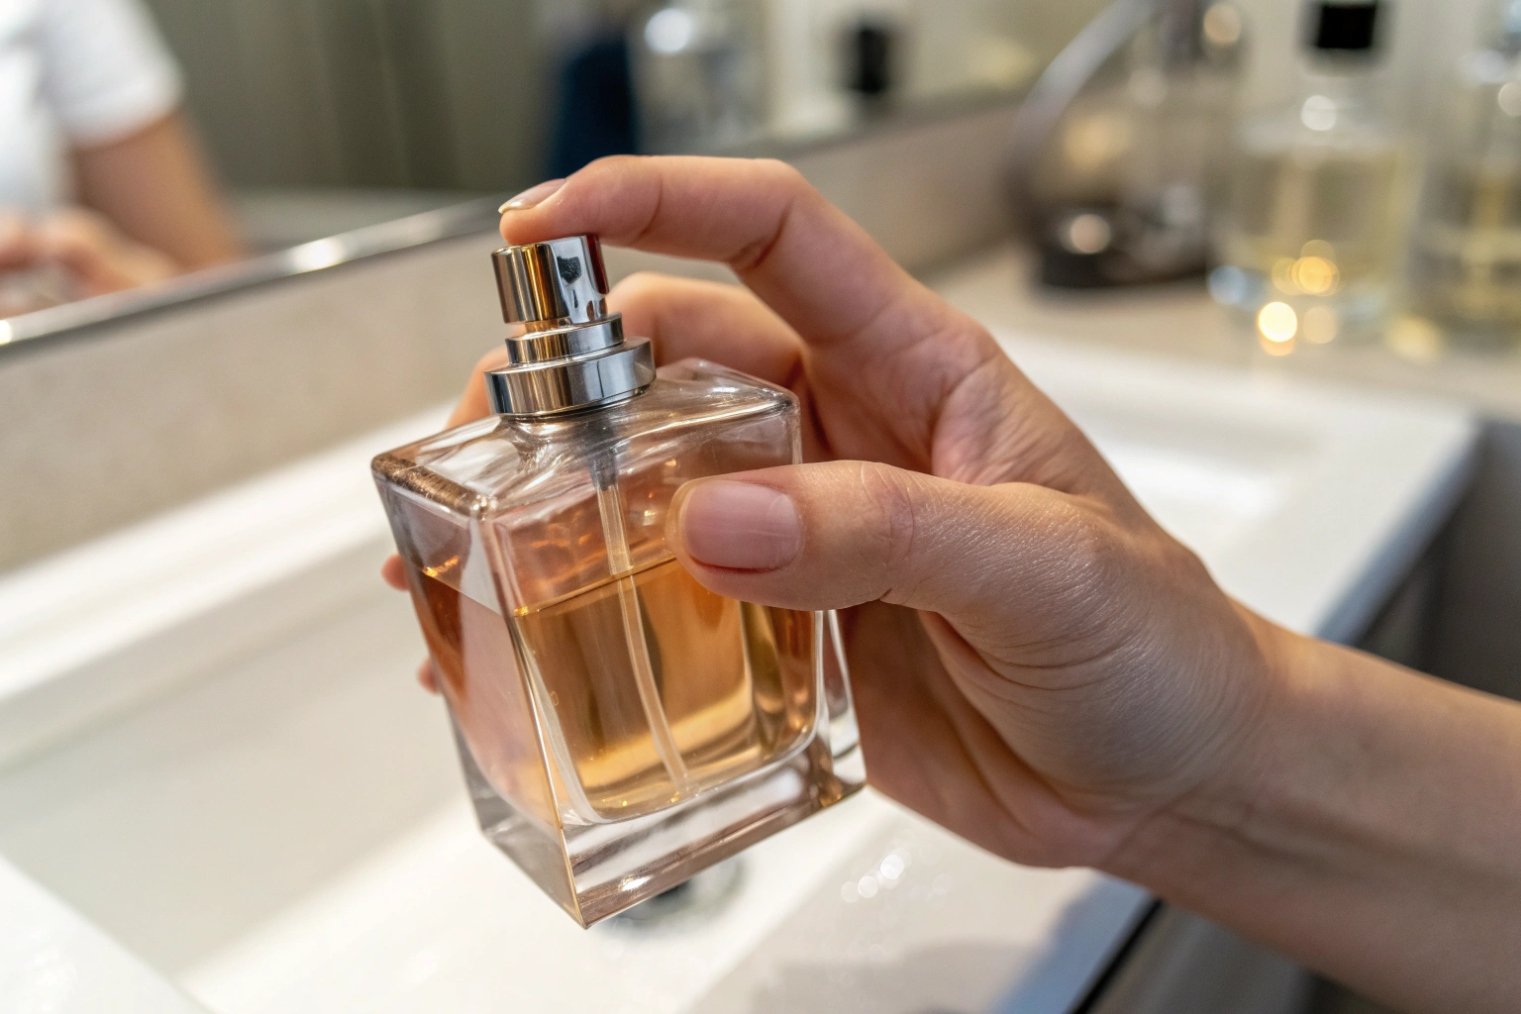
What ergonomics ensure a secure grip and comfortable spray?
A bottle can look beautiful in a photo and feel awkward in a real hand. If grip and spray feel wrong, people use it less and remember it less.
Good ergonomics mean the bottle sits securely in the hand, the index finger finds the actuator naturally, and the spray can be controlled without strain or slipping.
Design for how the hand actually holds the bottle
In real life, most people:
- Hold the bottle with three fingers and the thumb around the body
- Use the index finger or middle finger to press the actuator
- Spray at chest or neck height, often with one hand
So the design should support that. This is classic ergonomics and human factors work: reduce slips, reduce strain, and make the “right” grip obvious 3.
- Width vs height: too tall and narrow feels tipping-prone; too wide feels clumsy.
- Corner treatment: very sharp corners can dig into fingers and make grip uneasy.
- Front–back depth: a very thin “slab” bottle can twist when pressed.
A small test I often use: print the bottle outline at 1:1 scale, cut it out in stiff board, and let people “pretend spray”. If the shape fights their hand on cardboard, glass will not fix it.
Cap and actuator comfort
The cap and actuator matter as much as the main body:
- The cap top should be broad enough for a finger and not too slippery.
- The actuator head should have a slight curve or texture so the finger does not slide off.
- The force needed for each spray should feel light but not flimsy.
You can check the ergonomic basics with a simple table:
| Area | What to check | Good practice |
|---|---|---|
| Grip | Can a small and a large hand hold it safely? | Test with several people and hand sizes |
| Stability | Does it tip easily when placed on a surface? | Wider base or thicker heel for tall bottles |
| Actuator reach | Is the pump easy to reach without stretching? | Keep actuator centered and not too recessed |
| Cap removal | Can the cap be removed with one hand? | Avoid caps that require excessive force or twisting |
If you treat grip and spray comfort as early design constraints, you end up with a bottle that people enjoy using every day, not just photographing on launch day.
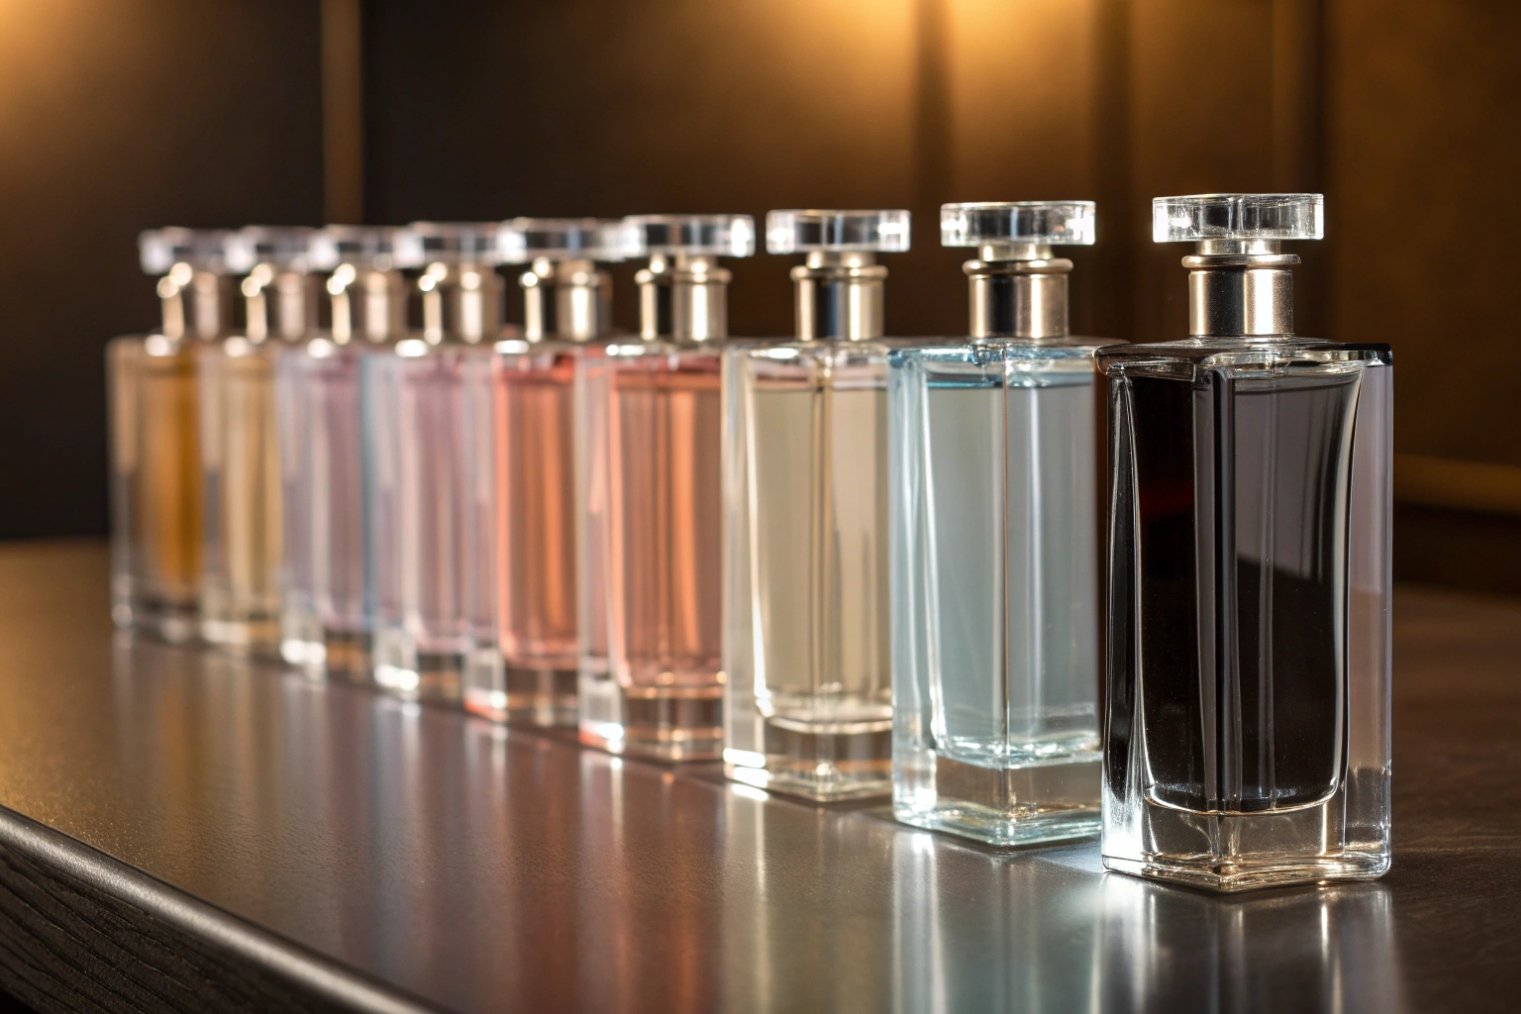
Which glass colors or coatings best match the fragrance profile?
Colour and coating choices are often emotional decisions, but they also affect light exposure, shelf readability, and cost. The trick is to link them clearly to the scent and position.
Pick glass colours and coatings that match the fragrance story, protect light-sensitive formulas, and stay practical for production and recycling.
Connect colour with the scent and target
Glass colour can underline the fragrance profile:
- Clear / high-flint: purity, transparency, unisex, “skin scent” stories.
- Soft tints (smoky grey, blush, pale blue): modern, gentle, lifestyle-driven.
- Deeper tones (amber, black, opaque): intense, evening, or strong identity.
For fresh citrus or aquatic scents, many brands stay with clear or light blue. For dense oriental or oud-based scents, darker glass feels more natural and also adds light protection. If your brief includes “light protection,” it’s worth remembering that amber glass blocks more light than clear and many other common colors 4. Gender-neutral lines often use smoke, greige, or very clean flint to avoid strong “pink/blue” cues.
Coatings give extra freedom:
- External spray coatings add solid colours, gradients, or soft-touch finishes.
- Internal spray gives colour to the inside while leaving the outer surface clear.
- Frosting / acid etch creates a matte, quiet-luxury effect; technically it’s often acid-etched (frosted) glass 5.
Balance aesthetics with practicality
Every effect has a practical side:
| Option | Advantages | Watch-outs |
|---|---|---|
| Clear flint glass | Shows juice, looks honest and premium | Lowest light protection |
| Tinted in-mass glass | Colour is durable, no chipping | Fewer standard colours, higher glass MOQ |
| External coating | Flexible colours, gradients, fast line changes | Needs cure time, chipping risk if mishandled |
| Frosting / etch | Soft, premium, hides smudges | Surface is more fragile and slightly less strong |
| Opaque / black | Maximum light protection, bold shelf impact | Harder to see fill level, shows dust and scratches |
If your formula has very light-sensitive materials, you may want deeper glass, a coating, secondary packaging, or all three. If sustainability is key, you might prefer in-mass coloured glass or thin, easily removable coatings, and avoid heavy multi-layer decorations that complicate recycling.
Colour and coating should never be an afterthought. Decide them with the perfumer, brand team, and manufacturer in the room so everyone knows what the formula, story, and factory can support.
When should tooling, QA, and transit/drop tests be scheduled?
Great design on paper is not enough. Bottles must pass filling, travel, and retail life without leaks, cracks, or ugly scuff marks.
Plan tooling, QA plans, and drop/transit tests early. They should start before you sign off the final design and finish well before the first big commercial order.
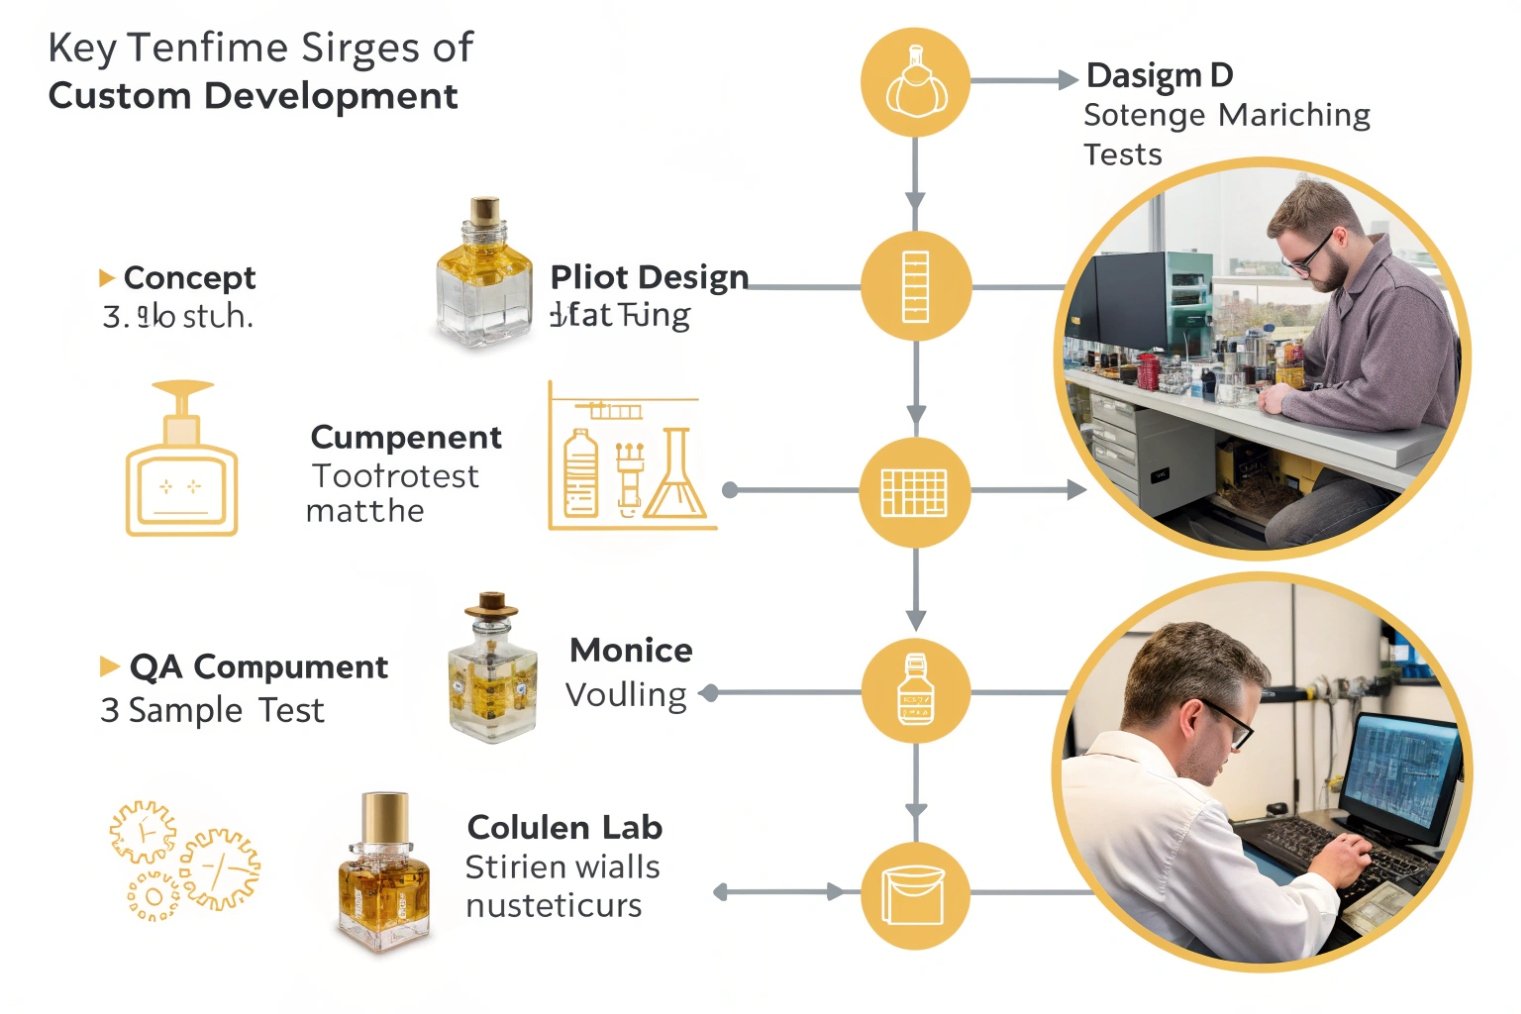
Build a clear development timeline
A simple, realistic sequence looks like this:
-
Concept and 3D design
- Capacity, neck, pump, and rough shape set.
- 3D renders or printed mockups for ergonomics and brand review.
-
Pilot tooling (trial mold)
- First real glass samples from a pilot cavity.
- Early checks on weight, wall distribution, stress, and neck dimensions.
-
Component matching
- Fit tests with real pumps, caps, and labels.
- First spray tests, leak checks, and torque/crimp checks.
-
Lab tests and QA standards
- Define Acceptable Quality Limit (AQL) sampling levels for cosmetic and dimensional defects 6.
- Run leak tests, thermal cycling (for normal storage), and compatibility tests with the formula.
-
Transit and drop tests
- Carton and pallet tests to mimic courier and freight handling.
- Use an established approach like ISTA packaged-product testing as your “when to re-test” and “what changed” sanity check 7.
- Drop tests from typical heights (for example, 80–100 cm) in likely orientations.
-
Golden sample sign-off
- One approved bottle, pump, and cap set becomes the reference for the whole production.
Put QA under the same design umbrella
You can think of QA, testing, and tooling as part of design, not as a separate phase after design “ends”.
A simple planning table helps keep teams aligned:
| Stage | Who is involved | Key decisions and tests |
|---|---|---|
| Design freeze | Brand, design, glass supplier | Final shape, capacity, neck, colours, coatings |
| Pilot mold samples | Glass supplier, QA, operations | Dimensions, stress, visual defects, pump fit |
| Pre-production run | Glass plant, filler, QA | Line speed, breakage, decoration, packing |
| Lab + transit tests | QA, logistics, brand | Leak, scent stability, drop, vibration, stacking |
| Mass production | Supplier + QC inspections | AQL checks, on-line sampling, corrective actions |
If you schedule these steps late, you often end up accepting compromises or delaying launch. If you schedule them from the start, your custom bottle can look special and still behave like a stable, repeatable industrial product. That combination is what real perfume brands need.
Conclusion
A custom perfume bottle works when beauty, ergonomics, colour, and testing all line up, so the pack tells your story clearly and performs like a reliable piece of equipment.
Footnotes
-
Reference for FEA crimp finishes and typical fine-fragrance pump dosing. ↩ ↩
-
Quick guide to common closure thread finishes used in cosmetics packaging. ↩ ↩
-
Clear definition of ergonomics and how it applies to product handling and comfort. ↩ ↩
-
Explains why amber glass offers stronger light shielding than many alternatives. ↩ ↩
-
Overview of acid etching and why it creates a frosted, matte glass surface. ↩ ↩
-
Simple overview of AQL and how inspection sampling thresholds are commonly set. ↩ ↩
-
Official guidance on when packaged-product performance testing should be repeated after changes. ↩ ↩


