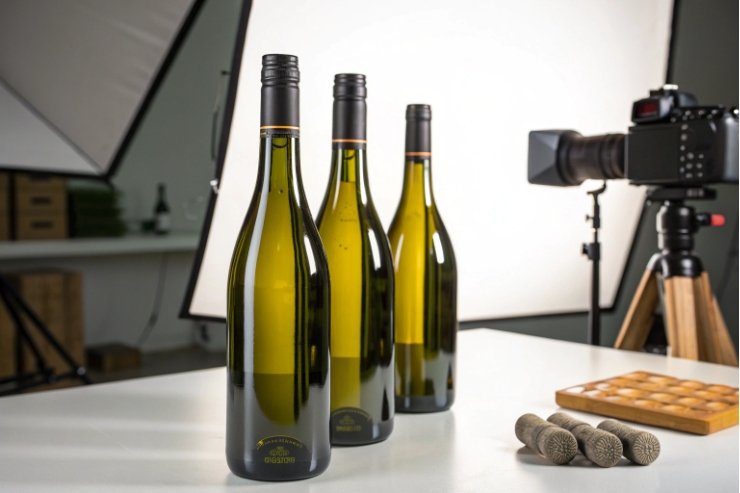
A rough, dull wine bottle makes a good wine feel cheap and can even cause label problems or extra scuff in the supply chain.
Bottle smoothness comes from the full process chain: mold finish and venting, gob temperature and IS timing, hot-/cold-end coatings, and clear test methods (Ra, gloss, and AQL) that lock in what “good” means.

If you understand where texture actually comes from, you can ask better questions at the glass plant, write smarter specs, and solve “orange peel” or scuff issues without endless blame games.
How do mold finish, venting, and wear shape bottle surface texture?
You can order “premium flint” glass and still end up with grainy, tired-looking bottles if the molds and vents are not under control.
Mold material, machining, lubrication, venting, and wear all print directly onto the bottle surface. Smooth, well-maintained blank and blow molds give glossy glass; worn, dirty molds create dull, orange-peel textures.
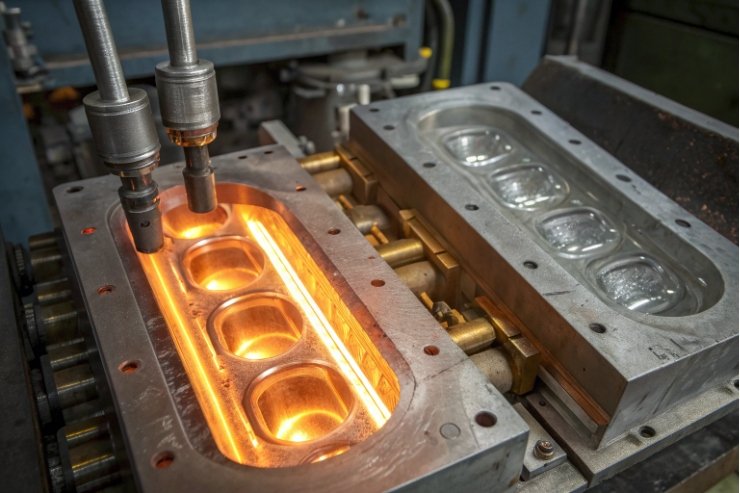
Mold steel, finish, and surface wear
Whatever texture sits on the mold face, the glass will copy it. So:
- High-density mold irons or alloys with fine machining give tight, even grain.
- Poor machining leaves tool marks that show as faint lines or “brushed” areas.
- Oxidation, pitting, and corrosion make the glass look matte and patchy.
Over time, repeated heating and cooling plus mold cleaning wear the surface. If refurb cycles are too long, the glass starts to show:
- “Sandpaper” zones on label panels.
- Dull shoulders while the rest of the bottle still looks bright.
Good plants track mold life and refurbish or replace sections before that happens. If you see a pattern where one cavity always makes rough bottles, that is a classic sign of local mold damage.
Mold lubrication and venting quality
Mold oil is not just “grease.” It controls how the hot glass flows along the mold wall.
- Too little or low-quality oil → glass drags, sticks, and loses gloss.
- Too much oil → burning, smoke, and deposits that again dull the surface.
Correct venting is also key. If the vent paths clog, trapped air can imprint tiny bumps or texture artifacts—often visible as mold air venting marks 1 in repeating patterns.
Routine vent cleaning and oil checks are cheap compared with the cost of scrapping dull or rough-looking pallets.
Gob cutting, scissor marks, and entry
Before the gob even touches the mold, the feeder and shears can already damage future smoothness.
- Thick or misaligned scissor blades leave big shear marks.
- Poor gob loading makes glass slide or bounce against the blank mold wall.
These show up later as:
- Linear drag marks or flat streaks up the body.
- Slight “wrinkles” or folds that light picks up on close inspection.
You can think of it like this:
| Factor | What happens on mold / gob | How it shows on bottle surface |
|---|---|---|
| Mold wear / pitting | Pits and rough patches | Grainy, matte, uneven gloss |
| Dirty / blocked vents | Air trapped, glass “fights” surface | Orange peel, washboard textures |
| Poor lubrication | Glass drags instead of glides | Drag lines, dull scuffed feel |
| Bad shears / loading | Deep shear marks, sliding entry | Lines, folds, visible flow marks |
So if your wine bottles suddenly feel rougher, do not only talk about “glass recipe.” Ask first about mold overhaul, vent cleaning, and shear maintenance schedules.
How do gob temperature and IS timing imprint flow lines and texture?
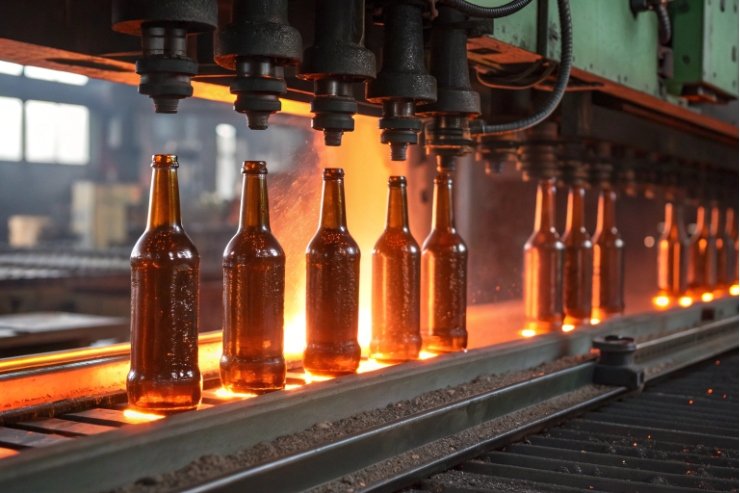
Even with perfect molds, the glass itself can “freeze” into rough textures if temperature and timing are off.
Gob temperature, viscosity, and IS-machine timing decide how the melt wets the mold before a solid skin forms. If the skin forms too soon, you see orange peel, washboard, or visible flow lines on the wine bottle surface.
Skin formation: too hot, too cold, too fast
When the gob hits the blank mold, it must do two things at once:
- Wets the mold surface smoothly.
- Builds a skin that is strong enough for forming.
If the glass is too cold or the contact is too long without flow:
- The skin forms while glass is still uneven.
- Local viscosity differences “freeze” into shallow waves.
- You see “orange peel” or “toad skin” on shoulders and body.
If the glass is too hot and the cycle time is too slow:
- The surface can sag or show flow patterns as it tries to move under its own weight.
- Sometimes this looks like faint streaks or “curtains” in the body.
Practically, plants manage this with stable measurement and control of the glass gob temperature and viscosity relationship 2.
IS timing, distribution, and flow lines
In blow-and-blow or press-and-blow, the full IS motion sequence matters:
- Plunger timing (for press-and-blow / NNPB).
- Settle-blow or pre-blow timing.
- Transfer time between blank and blow mold.
If the sequence is not synchronized with glass temperature:
- Glass moves unevenly, causing flow lines visible as streaks.
- Local over-thinning at high-stress zones leads to surface distortion.
- The label panel can pick up a faint “washboard” pattern.
Because wine bottles are often inspected under bright light, even small flow marks are visible to a trained eye and can trigger cosmetic rejects.
Furnace and forehearth stability
Smoothness also depends on how stable the glass is before it becomes a gob:
- Large temperature swings in the forehearth introduce viscosity bands.
- Poor mixing and cords create local refractive and texture differences.
Even if the mold is perfect, these bands can show:
- Slightly different gloss or “shimmer” along the bottle height.
- Local roughness where a colder band hits the mold earlier.
So a stable furnace and forehearth, not just the IS settings, are part of the smoothness story.
In simple terms:
| Parameter | If it is wrong | Texture result |
|---|---|---|
| Gob temperature | Too cold / too hot | Orange peel, waves, or sagging |
| IS timing | Out of sync with viscosity | Flow lines, washboard |
| Forehearth stability | Hot/cold bands, cords | Patchy gloss and micro-rough |
When we debug “rough” bottles, we often walk backwards: first IS timing and gob temp, then forehearth, then furnace and batch.
Can hot-/cold-end coatings raise gloss and reduce scuff on wine bottles?
Even perfect newborn bottles can lose their smoothness if they are not protected on conveyors, in cases, and on pallets.
Hot-end oxide and cold-end lubricity coatings do not create gloss from nothing, but they help preserve the original smooth surface, protect against scuffing, and keep wine bottles looking glossy through handling and transport.
Hot-end oxide: invisible armor under the shine
Right after forming, while the bottle is still very hot, we apply a nanometer-scale oxide layer. In production terms, this is the hot-end container glass coating 3 step.
Effects:
- Increases surface strength and scratch resistance.
- Gives a more uniform base for later coatings and labels.
- Slightly smooths the micro-roughness from the mold face.
The oxide alone will not fix deep orange peel or big flow lines, but it does make the surface less sensitive to small contact damage.
Cold-end coatings: control friction and prevent scuff
After annealing, bottles pass through cold-end coating stations. Many plants use a polyethylene cold-end coating 4 to balance slip, scuff resistance, and label behavior.
This film:
- Lowers bottle-to-bottle friction on lines and in cartons.
- Reduces shoulder and body scuff during mass handling.
- Helps bottles slide instead of grabbing and chipping.
If cold-end coating is too light:
- You will see gray scuff bands around the shoulder and label panel.
- Gloss drops quickly as bottles move through plant and distribution.
If it is too heavy:
- Bottles can be slippery in depalletizers.
- Labels or screen prints may struggle to adhere unless surfaces are prepared or de-coated.
Decoration and line impacts
Decorations can either help or hurt smoothness:
- A clear protective overcoat on ACL print can protect around the art.
- Heavy mechanical brushing or aggressive screen-printing frames can mark glass if cold-end is weak.
- Additional coatings (matte sprays, soft-touch lacquers) change surface friction and need their own handling rules.
The trick is to treat all coatings as a system. When hot-end, cold-end, and decorative layers are tuned together, bottles keep a “wet” glossy look from forming line to tasting room.
A simple coating view:
| Layer | Main target | Impact on perceived smoothness |
|---|---|---|
| Hot-end | Strength and base protection | Supports gloss, resists micro-scratches |
| Cold-end | Slip and scuff reduction | Keeps surface shiny through handling |
| Decoration | Branding and feel | Can add or reduce gloss, adds texture |
If you see bottles arrive at your winery with flat shoulders and scuff bands, it is time to talk about cold-end application and line handling, not just “bad glass.”
Which Ra, gloss tests, and AQLs define acceptable smoothness?
“Smooth” and “shiny” sound nice, but they are too vague for contracts or quality claims.
You can control smoothness with measurable Ra and gloss targets, plus AQL-based visual standards for scuff and texture, so the glass plant and the filler talk the same language.
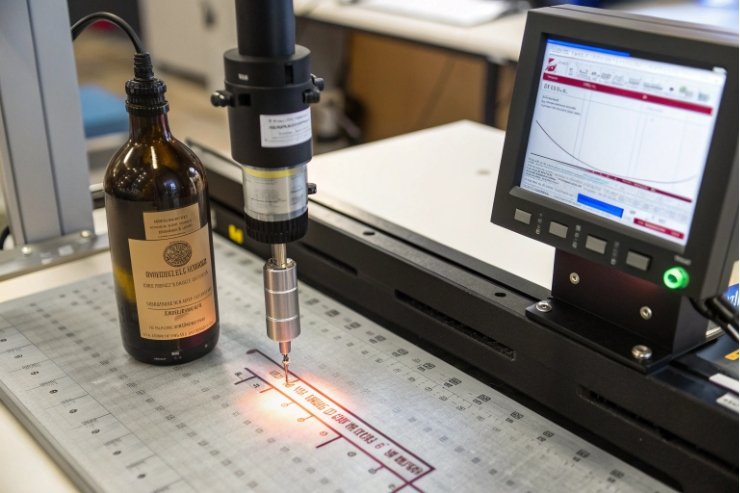
Measuring roughness (Ra) on glass
Ra (arithmetical mean roughness) comes from contact or optical profilometers. If you need a standard definition, many teams reference the Ra roughness parameter (EN ISO 4287) 5 to keep measurement language consistent.
On label panels or body samples you can define:
- Max Ra values for key regions (for example, label panel, shoulder).
- Different Ra limits where embossing or heavy texture is intentional.
On wine bottles, Ra values are usually very low, but you still see differences between:
- Smooth, fire-polished-like surfaces.
- Orange peel or micro-pitted areas from mold wear.
You might agree a spec such as:
- Label panel: Ra ≤ X µm.
- Lower body: Ra ≤ Y µm.
These numbers depend on your product and brand level. The key is that everyone knows where and how to measure them.
Gloss measurement
Gloss is often measured with a gloss meter at a standard angle (commonly 60° for general surfaces). A helpful reference is how ASTM D523 gloss geometries (20°/60°/85°) 6 are selected based on surface reflectivity.
You can:
- Define a minimum gloss unit (GU) on a flat area.
- Track gloss loss after simulated handling or wash cycles.
Gloss gives a quick check of both forming and coating consistency:
- Low gloss + high Ra → surface formed poorly or mold worn.
- High Ra + normal gloss → more complex; you might see localized texture but still decent shine.
Combined Ra and gloss tables help you decide when a batch is visually acceptable and when it should be held.
AQLs and visual acceptance
In real life, you also need visual AQL standards. These separate surface issues into:
- Critical: deep scratches, cracks, sharp edges (AQL often 0).
- Major: strong scuff bands, heavy orange peel in label area, obvious drag marks.
- Minor: small localized matte spots, fine flow lines outside main view area.
To align sample plans and switching rules, many buyers standardize on the ANSI/ASQ Z1.4 acceptance sampling system 7.
Typical AQL levels (as an example only):
| Defect class | Example defects | Typical AQL idea |
|---|---|---|
| Critical | Sharp check, deep scratch, open crack | 0.0 (none allowed) |
| Major | Heavy scuff on label panel, strong orange peel on body | 0.4–0.65 |
| Minor | Light haze/scuff away from primary view | 1.0–2.5 |
You then link these classes to sample plans. Inspectors know:
- How many bottles to check per pallet or batch.
- How many defects of each class are allowed.
- When to accept, hold, or reject.
A good practice is to build a defect photo board or sample library that shows “acceptable” vs “reject” for your brand. That makes long email debates shorter and keeps both sides honest.
Conclusion
Smooth glass wine bottles come from controlled molds, stable forming, smart coatings, and clear test limits—when all four align, you get the gloss your wine deserves and the efficiency your line needs.
Footnotes
-
Explains how mold air venting leaves tiny marks and improves mold filling fidelity. ↩︎ ↩
-
Shows why gob temperature links to viscosity and final container wall/skin behavior. ↩︎ ↩
-
Describes hot-end oxide coating purpose: abrasion protection, strength retention, and handling smoothness. ↩︎ ↩
-
Details polyethylene cold-end coatings and how they affect friction and label adhesion. ↩︎ ↩
-
Defines Ra and related roughness parameters for consistent measurement and specification writing. ↩︎ ↩
-
Explains gloss units and why 60° is commonly used, with ASTM D523 geometry context. ↩︎ ↩
-
Official overview of Z1.4 attribute sampling plans and how AQLs map to inspection decisions. ↩︎ ↩


