Plain bottles look the same on shelf. Then a competitor shows an engraved bottle that feels like a keepsake, and suddenly the label alone looks weak.
Engraving makes glass feel premium because it is permanent, tactile, and hard to copy. The right method depends on volume, required detail, strength limits, and how the decoration must survive shipping.

Engraving is not only an “effect.” It is a production choice. It touches tooling cost, lead time, decoration durability, and even breakage risk if depth and location are wrong. When it is designed with the process in mind, it becomes one of the cleanest ways to lift perceived value.
How do laser engraving and mold embossing compare for detail and cost?
A lot of bottle programs fail at the quote stage. One team budgets for “engraving,” then discovers they priced the wrong method for the volume.
Laser engraving wins for small batches and variable data. Mold embossing wins for mass production because the per-bottle cost is low after tooling, but the mold cost and lead time are higher.
What “engraving” looks like in reality
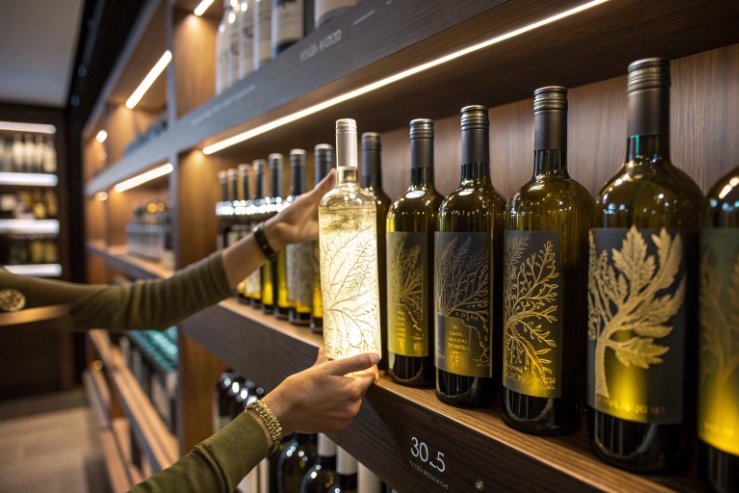
Laser engraving on glass 1 is usually a surface etch. It creates a frosted, matte mark. It can look sharp, modern, and gift-ready. Mold embossing 2 is not etched after the fact. It is formed into the bottle during production. That is why embossing is often the best match for branded bottle families and long-running SKUs.
Detail capability: where each method shines
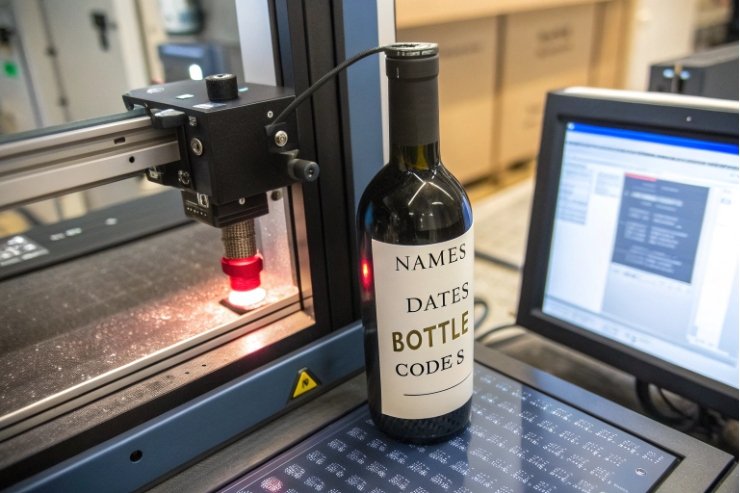
Laser engraving can hold fine lines and small text, especially on flat-ish areas or controlled curves. It also supports serial numbers, batch codes, and personalization. Mold embossing can also look crisp, but ultra-fine details soften for three reasons: glass flow limits, mold venting limits, and mold wear over time. In practice, embossing loves bold shapes and clean geometry.
Cost structure: setup vs unit economics
Laser engraving is mostly a per-piece cost plus setup. That makes it perfect for 50–2,000 bottles, gifts, and limited drops. Mold embossing is mostly a fixed tooling cost plus low unit cost. That makes it perfect for 50,000+ bottles where the tooling can be amortized.
| Item | Laser engraving | Mold embossing |
|---|---|---|
| Best volume range | Small to mid, fast turns | Mid to high, long runs |
| Detail strength | High for fine marks | High for bold shapes |
| Variable data | Easy | Hard or impossible |
| Upfront cost | Low to medium | High (tooling/mold work) |
| Unit cost trend | Stays meaningful per bottle | Drops fast at scale |
| Lead time | Short if local | Longer due to tooling and line planning |
Practical selection rules that reduce regret
- If the bottle must carry names, dates, or unique codes, laser is the clean answer.
- If the brand wants a signature bottle for years, embossing is usually the smarter spend.
- If the design is very fine and shallow, laser will look better.
- If the design must survive wet, cold, and abrasion with no risk of flaking, embossing has fewer “extra layers” to fail.
[Story placeholder: a limited-edition winery once chose embossing for only 5,000 bottles. The tooling cost made the unit price painful. The next year the same design moved to laser and the drop sold faster.]
Does engraving affect strength or create stress points?
A bottle can look premium and still crack later. The risky part is not the decoration itself. The risk is where the decoration sits and how deep it cuts into the surface.
Yes, deep engraving can reduce strength because it creates surface flaws that act like crack starters. The risk is highest near the heel, shoulder, and neck, and lowest on stable, thicker panels with shallow marks.
Why glass hates sharp defects
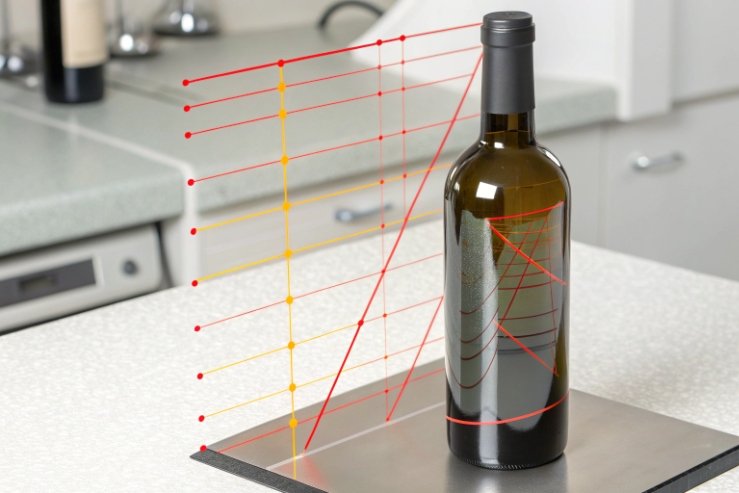
Glass fails from tensile stress at tiny surface flaws. When an engraving becomes too deep, or when it creates sharp micro-notches, it can create stress concentrators 3. That makes later events—small impacts, vibration, or temperature swings—more likely to open a crack, which is classic fracture mechanics 4.
Laser engraving can be safe when tuned correctly. But if power is too high, it can create micro-fractures from thermal shock 5 at the surface. Mechanical engraving can create deeper grooves and sharp edges if not controlled. Mold embossing usually does not cut the surface, so it tends to keep strength more stable, but very aggressive emboss geometry can still create thin zones if the forming process is pushed too hard.
Where engraving is most risky on a wine bottle
Risk zones are places that already carry stress:
- Heel and base ring: frequent contact in cartons and conveyors.
- Shoulder: common impact area and thickness transition.
- Neck/finish area: closure forces and handling knocks.
Safer zones are:
- broad body panels
- recessed label panels
- thick, flat-ish faces on custom shapes
How to design engraving to keep strength
The best approach is to treat depth as a controlled spec, not a visual guess.
- Keep engraving shallow on thin glass.
- Avoid sharp corners in the artwork. Use radiused corners and thicker strokes.
- Keep distance from edges, seams, and thickness transitions.
- Do not engrave across a mold seam line if the design needs deep relief.
| Decision | Strength impact | Better option |
|---|---|---|
| Deep engraving near heel | High risk | Move to body panel or use shallow etch |
| Tiny sharp text | Medium risk | Use bold fonts and larger size |
| Engraving across a seam | Medium risk | Place artwork away from seam |
| Heavy emboss with thin shoulder | Medium risk | Reduce emboss depth or adjust glass distribution |
Proofing strength without slowing the project
A simple strength check plan can prevent field failures:
- Engrave a small sample set across multiple bottles.
- Run a basic drop simulation on packed cartons.
- Add a temperature cycle that matches your route (warm warehouse to cool store).
- Inspect for micro-cracks around the engraved zone.
If cracks show up, the fix is usually one of these: reduce depth, change location, change artwork geometry, or improve handling so the engraved face does not rub in cartons.
Which finishes pair best with engraved surfaces?
Engraving is only half the story. The finish around it decides if people can read it under glare, and if the surface survives shipping without scuffs.
The best pairings use contrast and low glare: frosted laser marks on flint, paint-fill or wax-fill on dark glass, and matte coatings that reduce reflections. Pairing also depends on how rough logistics will be.
Match contrast to glass color
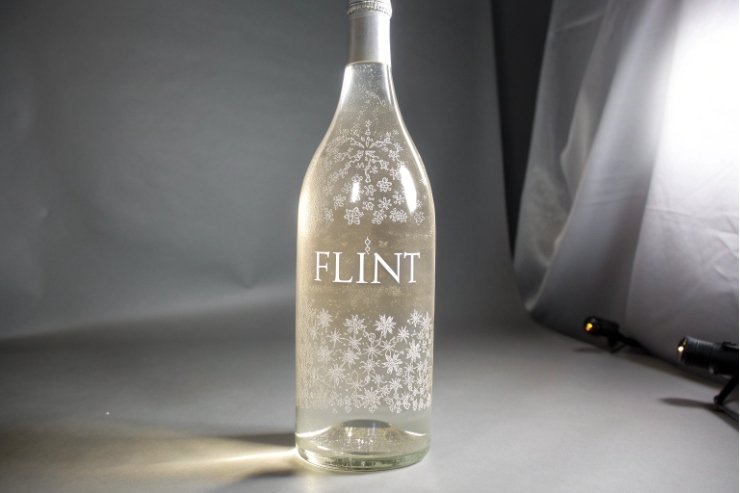
On clear flint bottles, laser etching shows well because the frosted mark scatters light. On dark green or amber, the same frosted mark can disappear under store lighting. That is when paint-fill, metallic wax-fill, or a controlled back coating can help.
Common pairings that sell well:
- Flint + laser etch: clean and minimal, good for modern brands.
- Antique green + gold paint-fill: strong contrast, luxury look.
- Amber + silver fill: premium and readable, good for gift packs.
Pair engraving with coatings carefully
Matte sprays and soft-touch coatings feel premium, but they scuff easier. If engraving sits on top of a coating, adhesion and rub resistance become the risk. If engraving cuts through a coating, it can expose edges that chip or show color mismatch.
Safer rules:
- If you want laser etch, engrave directly on glass whenever possible.
- If you want a full-body color spray, keep engraving zones protected or use embossing instead.
- If you use paint-fill, add a clear protective topcoat only if it passes abrasion tests.
Keep the finish away from functional zones
No matter how pretty it is, decoration should not interfere with closures or bottling equipment.
- Avoid coating and engraving at the sealing land and support ring.
- Avoid thick coatings near label application zones if labels are needed.
- Avoid rough textures where conveyors contact hard.
| Finish choice | Best for | Main risk | Basic control |
|---|---|---|---|
| Laser frost (no fill) | Flint, small batch | Low contrast on dark glass | Increase stroke width and size |
| Paint-fill / wax-fill | Dark glass, gifting | Rub-off in cartons | Rub test + protective dividers |
| Matte spray + emboss | Premium shelf presence | Scuffing | Upgrade packing and handling |
| Frosted bottle + etch | Luxury minimal look | Fingerprints, haze | Handling rules and QC lighting |
Secondary packaging is part of the finish plan
If the route includes ocean freight or e-commerce, even the best finish needs protection. For engraved bottles, sleeves or tight dividers prevent face-to-face abrasion. A premium finish with weak packaging often arrives looking used. That kills perceived value fast.
How do you ensure consistent depth and readability in production?
Many engraving programs start strong in prototypes, then drift in production. Depth changes, text becomes hard to read, and the brand loses the premium feel.
Consistency comes from locking artwork rules, fixing bottle positioning, using a depth spec with control samples, and running simple QC checks for contrast, location, and legibility under defined lighting.
Start with artwork rules that match curved glass
Curved glass creates glare and distortion. The safest design choices are boring, and boring is good here.
- Use bold fonts and avoid hairline strokes.
- Avoid very small text on round bodies.
- Increase letter spacing slightly to reduce visual merging.
- Use high-contrast shapes, not thin outlines.
- Place key text on the flattest area available.
Control the process with fixtures and “golden samples”
Laser engraving needs stable positioning. A rotary fixture helps align round bottles, but it still needs repeatable datum points. Mold embossing needs mold maintenance and cavity tracking so depth does not fade with wear.
A strong program uses:
- a “golden sample” bottle approved by the brand
- a standard photo setup and lighting for inspection
- a tolerance for location shift (mm) and size shift
- a depth or “appearance standard” for the mark
QC checks that catch drift early
QC should be simple and fast, so it actually gets done:
- Legibility check: can a reader see it at normal distance under store-like light?
- Contrast check: does the mark pop, or does it disappear?
- Location check: is it centered and level?
- Surface damage check: any chipping, micro-cracks, or sharp edges?
For embossing, pairing visual checks with simple go/no-go gauges 6 (when available) can catch drift early.
For paint-filled engraving, add:
- rub resistance after cure
- moisture and condensation exposure check
- carton vibration check if shipping is rough
| Control point | Laser engraving control | Emboss control |
|---|---|---|
| Depth consistency | Power/speed/pass count locked | Mold cavity depth and wear control |
| Position accuracy | Jigs + rotary fixture + datum | Mold alignment and bottle handling |
| Readability | Font rules + lighting standard | Bold geometry + stable mold surfaces |
| Drift detection | Hourly sample check | Cavity-based inspection and maintenance |
Budget planning: where costs usually hide
Consistency costs money, but it saves more money later. The hidden budget items are:
- extra sample rounds to tune settings
- color approval rounds for paint-fill
- rework time for files if the artwork is too fine
- upgraded packaging to stop scuffing
The best way to protect budget is to define rounds upfront:
- one round for artwork feasibility
- one round for production-intent samples
- one round for shipping simulation samples aligned to ASTM D4169 distribution-cycle testing 7
If the project needs more rounds, it should be a clear change, not a surprise.
Conclusion
Engraving can be a powerful premium cue when the method fits the volume, depth stays controlled, stress zones are avoided, and packaging protects the surface through real shipping.
Footnotes
-
Learn laser-engraving basics and typical mark appearance so you choose realistic detail levels. ↩︎ ↩
-
Understand embossing fundamentals to compare “formed-in” branding versus post-process marking. ↩︎ ↩
-
Shows how small notches amplify stress, making cracks start sooner in glass. ↩︎ ↩
-
A primer on how microscopic flaws grow into failures under load and vibration. ↩︎ ↩
-
Explains thermal shock and why excessive laser energy can create micro-fractures. ↩︎ ↩
-
Learn how go/no-go gauges simplify fast pass/fail checks for production consistency. ↩︎ ↩
-
Official overview of a common distribution test cycle for validating packed shipping performance. ↩︎ ↩


