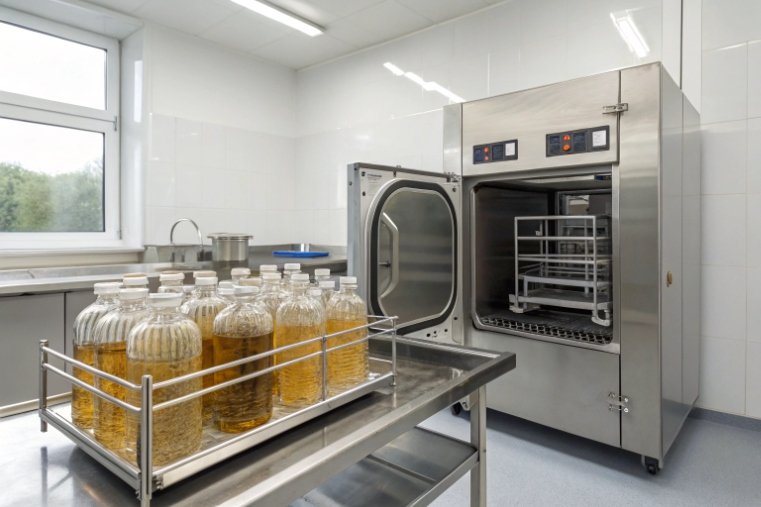
Autoclaving glass bottles 1 looks simple, but wrong settings or caps can give you cracked glass, boiled-over media, or loads that are not actually sterile.
To safely autoclave glass lab bottles, use borosilicate media bottles, a validated liquids cycle (e.g. 121 °C at 15 psi), loosen or vent caps, avoid thermal shock, and confirm sterility with indicators.

Once the routine is set, autoclaving becomes a quiet backbone of the lab. The goal is repeatable, boring cycles: no surprises, no broken bottles, and media you fully trust. Let’s walk through settings, caps, bottle choice, and sterility checks step by step.
What time–temperature–pressure settings are recommended for borosilicate lab bottles?
If the cycle is too short, your media is not sterile. If the cycle is too harsh, your bottles and caps wear out fast.
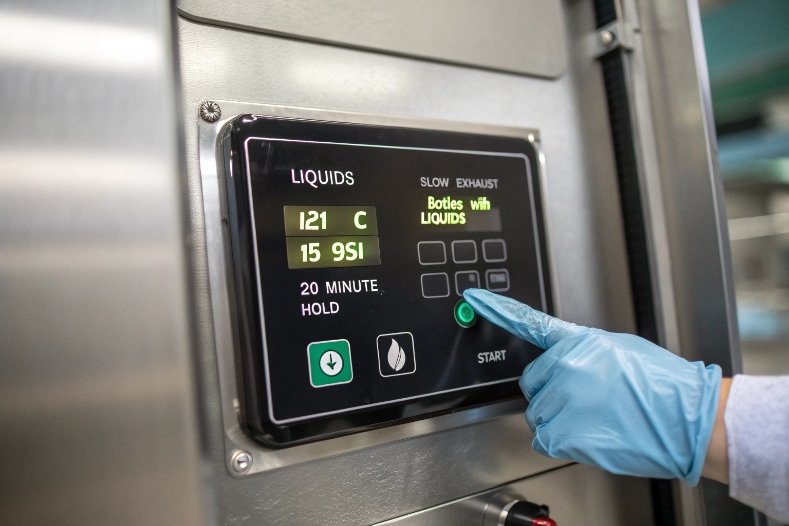
For borosilicate media bottles, a typical liquids cycle for steam sterilization 2 uses saturated steam at 121 °C (about 15 psi overpressure) with a 15–30 minute hold, depending on volume and load density. Higher-temperature cycles (126–134 °C) are possible when validated for your specific load.
Choosing the right cycle for bottles and media
Borosilicate lab bottles are designed for high heat and repeated autoclave runs, but they still need the correct cycle type. The key is matching temperature, hold time, and exhaust profile to what is inside the bottle.
The common baseline for liquid-filled media bottles:
| Parameter | Typical setting for liquids | Notes |
|---|---|---|
| Temperature | 121 °C | Classic sterilization point |
| Pressure | ~15 psi (≈103 kPa) above atmospheric | Saturated steam at 121 °C |
| Hold time | 15–30 min after reaching 121 °C | Longer for large or dense loads |
| Cycle type | “Liquids” / slow exhaust | Prevents boiling over and bottle stress |
Many lab autoclaves also support higher-temperature programs, like:
- 126 °C for about 10 minutes
- 132–134 °C for about 3–4 minutes
These shorter, hotter cycles can work well, but only if validated for your specific bottle type, fill volume, and load. Higher temperatures also stress caps, liners, and any tubing more quickly, so I prefer to reserve them for loads where speed really matters and validation data already exists.
A few practical tips:
- Use liquids or slow-exhaust cycles for anything containing liquid. Fast exhaust is for dry instruments and can cause boil-over in bottles.
- Start your hold time only once the entire load has reached the target temperature (your autoclave should control this automatically).
- For very large volumes (1–2 L bottles near ¾ full), lean toward the 30 minute end of the range unless you have clear evidence that 15 minutes is enough.
Over time, standardize a small set of load types in your lab (media, buffers, water, glassware only) and assign each a validated cycle. This makes training easier and reduces mistakes.
Should I loosen caps or remove liners before autoclaving to protect seals?
A perfectly sealed bottle in an autoclave is not “safe”; it is a small pressure vessel waiting to fail. Caps and liners need a path to vent steam.
You should never autoclave fully sealed glass bottles. Loosen screw caps by about a quarter to one full turn, or use vented/membrane caps, and remove or back off liners that could block steam and pressure equalization.
How to set up caps, liners, and closures
The goal is simple: steam must enter and exit the bottle, and pressure inside must match the chamber. At the same time, you want caps and seals to survive repeated cycles.
Here is a practical breakdown:
| Component | What to do before autoclaving | Why it helps |
|---|---|---|
| Screw caps | Loosen ~¼–1 turn | Allows venting, reduces stress on threads |
| Vented caps | Leave fully tightened (per manufacturer) | Built-in membrane or vent handles pressure |
| Liners (e.g. PTFE) | Loosen or remove if they fully seal | Prevents trapped pressure under liner |
| Aluminum foil | Loose cover over open necks if uncapped | Keeps dust out while letting steam in/out |
If you use GL-45 media bottles 3, many manufacturers offer vented caps with PTFE membranes. These are designed for autoclaves and let you keep caps fully tightened while still allowing steam flow. They are a good upgrade if you run the same media bottles frequently.
A few extra habits that protect seals:
- Do not overtighten caps right after the cycle. Let bottles cool below ~100 °C with caps still loose; this avoids strong vacuum that can distort seals.
- Avoid cycling soft liners at temperatures above their rating. Many plastic or rubber seals are rated around 140 °C; check the data sheet.
- If caps show warping, cracks, or a permanent “flat” gasket that no longer springs back, retire them. It is cheaper than losing a whole media batch.
For open bottles that you will cap later, loosely covering mouths with sterilization-grade foil or autoclave paper gives a good balance between sterility and venting.
Which bottle sizes and glass types tolerate repeated autoclave cycles best?
Not every “glass bottle” is autoclave-ready. Some compositions and geometries survive hundreds of cycles; others fail after a few harsh runs.
For repeated autoclave use, choose borosilicate Type I media bottles 4 from reputable lab brands, stick to volumes and fill levels they specify, and avoid soda-lime or consumer glass. Smaller and medium volumes handle repeated cycles more comfortably than very large, tightly filled bottles.

Matching bottle design to real lab use
Borosilicate glass is the standard for autoclave-ready laboratory bottles. It offers low thermal expansion and good chemical resistance. But even within borosilicate, shape and size matter.
Key points to consider:
| Factor | Better choice for repeated cycles | Why it matters |
|---|---|---|
| Glass type | Type I borosilicate media bottles | Handles thermal stress best |
| Wall thickness | Designed-for-lab thickness, not ultra-thin | Extra safety margin |
| Bottle size | 100–1000 mL for most routine media | Heats and cools more evenly |
| Fill level | ⅔–¾ full (less for foamy or viscous media) | Leaves room for expansion and boiling |
| Neck and shoulder | Smooth transitions, few sharp corners | Lower stress concentration |
Some additional guidelines that help in practice:
- Avoid autoclaving soda-lime or “unknown” glass, even if it has a metric scale printed on it. These pieces may not withstand repeated 121 °C cycles.
- Inspect borosilicate bottles regularly for star fractures, scratches, and chips—especially at the base and shoulder. Any damage is a reason to retire a bottle from high-heat service.
- Large 2–5 L bottles are tempting for bulk media, but they are harder to heat evenly and more vulnerable to thermal gradients. If you must use them, validate the cycle and give them extra respect during cooling.
Opal or tempered glass is common in tableware, not in lab media bottles. In the lab, you mostly want classic transparent borosilicate so you can see fill level, clarity, and contamination.
When you choose bottles and caps from the same system (for example, a manufacturer’s GL-45 bottle family with matching vented caps), you also gain consistent performance: similar cooling curves, reliable sealing, and known autoclave ratings.
How can I prevent thermal shock and verify sterility with indicators?
Even the best borosilicate can crack if you push it too hard between hot and cold. At the same time, a perfect-looking bottle does not guarantee sterility unless the cycle is verified.
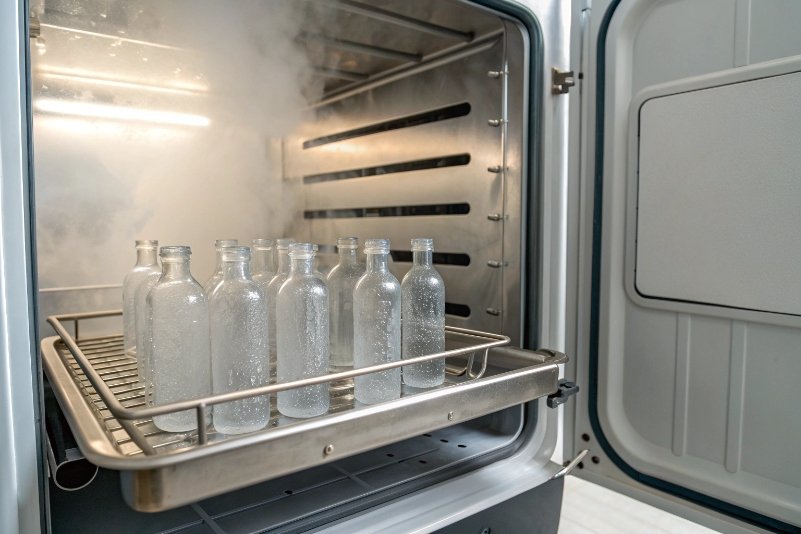
You can reduce thermal shock by loading bottles correctly, using a liquids cycle with slow exhaust 5, and letting bottles cool gradually. To verify sterility, use chemical indicator tape or integrators 6 on each load and periodic biological indicators for validation 7.
Handling bottles before, during, and after the run
Think in three phases: loading, running, and unloading.
1. Loading to avoid stress and spills
- Place bottles upright in a heat-resistant secondary tray.
- Add a small amount of water to the tray to buffer temperature and catch spills.
- Keep at least 5 cm of space between bottles for steam circulation.
- Never place glass directly on the autoclave chamber floor; use racks or trays.
2. Choosing the right exhaust and cool-down
A liquids/slow-exhaust program helps because:
- Pressure is released gradually, so bottles are less likely to boil over.
- The temperature drop is smoother, reducing thermal gradients within the glass.
After the cycle:
- Wait until pressure is back to zero before opening the door.
- Crack the door slightly to allow gentle cooling and steam escape.
- Do not stand directly in front of the door; wear heat-resistant gloves, lab coat, and eye protection.
- Let bottles cool until you can see the liquid is no longer vigorously boiling and the glass has lost its intense glow of heat before moving the tray.
3. Verifying that you actually achieved sterility
Visual inspection is not enough. Build a small indicator routine:
| Indicator type | How often to use | What it tells you |
|---|---|---|
| Autoclave tape | Every load | Load was exposed to steam (basic check) |
| Chemical integrators | Every media/buffer load | Time + temperature + steam conditions met |
| Biological indicators | On a schedule (e.g. monthly or per SOP) | Cycle can kill resistant spores |
Place indicators in representative “cold spots” of the load, usually near the center of the tray or in the largest bottle. For recurring runs (like standard media), keep a simple log with:
- Date, cycle type, load description
- Indicator results
- Any unusual events (boil-over, cracked bottle, alarms)
If indicators fail or look borderline, treat the whole load as non-sterile and investigate. It is better to lose one cycle than seed an experiment with unknown contamination.
Finally, thermal shock and sterility are linked: a bottle that cracks or leaks undermines both safety and cleanliness. By controlling the rate of heating and cooling and confirming each cycle with indicators, you keep your glass laboratory bottles both intact and truly sterile.
Conclusion
Safe autoclaving of glass lab bottles comes from three habits: use the right borosilicate bottles and cycles, give caps and liners room to vent, and combine gentle handling with clear sterility checks every time.
Footnotes
-
UC San Diego overview of safe autoclave operation, cycles, and responsibilities. ↩︎ ↩
-
Tuttnauer guide to common steam sterilization temperatures, pressures, and exposure times. ↩︎ ↩
-
DWK DURAN GL-45 laboratory bottle specifications, materials, and autoclave suitability. ↩︎ ↩
-
Supplier overview of Type I borosilicate glass media bottles and temperature resistance. ↩︎ ↩
-
Princeton EHS explanation of liquid/slow-exhaust autoclave cycles and preventing boil-over. ↩︎ ↩
-
STERIS Verify chemical integrators monitoring steam sterilization time, temperature, and steam contact. ↩︎ ↩
-
STERIS overview of biological indicators with resistant spores for confirming sterilization effectiveness. ↩︎ ↩


