Cracks during hot-fill can happen even when the recipe looks perfect. When the lehr is off, hidden stress builds and the bottle loses its heat safety margin.
Annealing does not “fix” thermal expansion like changing chemistry does. It mainly removes residual stress from uneven cooling, so the bottle can handle thermal gradients without cracking.

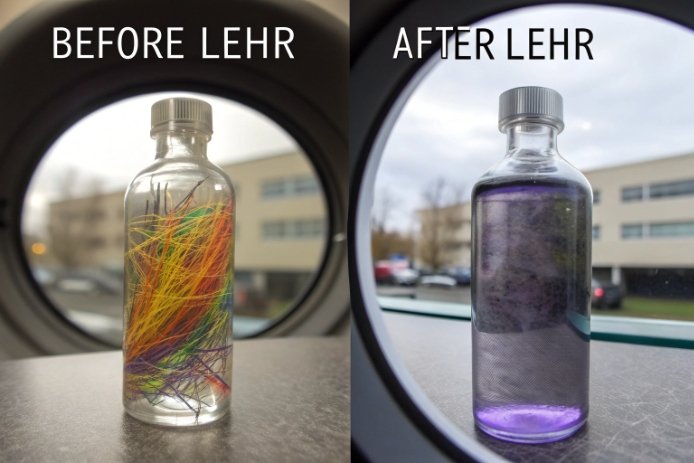
Annealing and thermal expansion: what really changes in production
Annealing 1 is the step that decides whether the bottle keeps its shape and stays calm when temperature changes fast. The glass recipe sets the base CTE and the base viscosity curve. The lehr 2 mostly sets the stress state that rides on top of those properties. That stress state changes how the bottle behaves in real life, because thermal failure in bottles is almost never caused by “bulk expansion” alone. It is caused by thermal gradients and tensile stress peaks.
A hot-fill or pasteurization event heats the inner wall first. The outer wall lags behind. The hot layer wants to expand. The cold layer resists. That mismatch creates stress. If a bottle leaves the lehr with residual stress already stored in the heel, shoulder, or finish, the thermal stress adds on top. The final stress can cross the fracture limit even when the composition-based CTE is correct.
Annealing also affects how stable the bottle is under repeat cycles. Good annealing makes stress patterns more uniform between cavities. It also makes failures more predictable and easier to diagnose. Under-annealing makes cracks look random. Two bottles from the same pallet can fail in different places because the stress distribution is uneven.
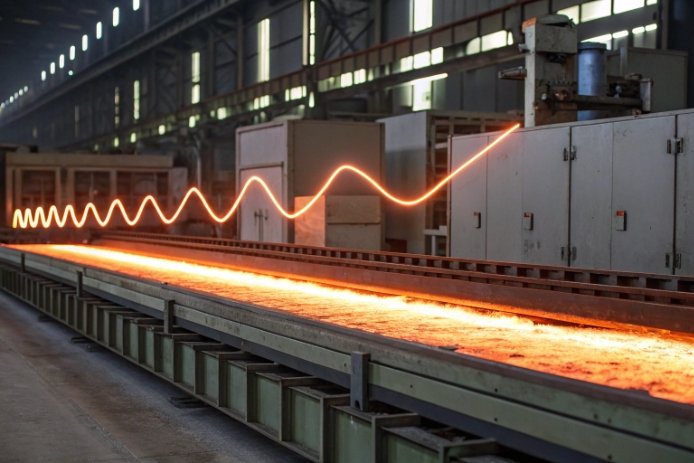
The simple lehr goal
A lehr profile should do three things:
1) Heat the bottle enough for stress to relax.
2) Hold long enough for the thick zones to catch up.
3) Cool in a controlled way so new stress does not form again.
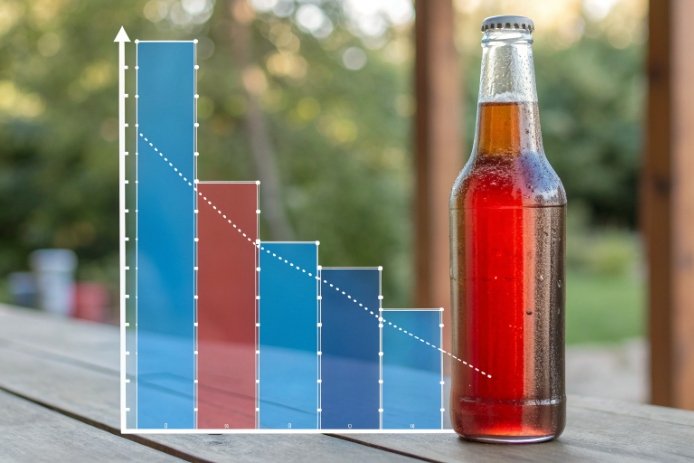
Why “thermal expansion performance” is a system result
When customers say “expansion performance,” they often mean “it survived heat.” Survival is shaped by:
-
composition-based CTE and elastic stiffness
-
bottle thickness and thickness variation
-
annealing quality (residual stress)
-
the real process ramp rate and ΔT
-
closure torque and cooling conditions at the finish
| What affects heat resistance | Mainly set by recipe | Mainly set by annealing | What the filling line feels |
|---|---|---|---|
| Mean CTE value | yes | no (very small effect) | baseline stress per ΔT |
| Residual stress level | no | yes | crack risk margin |
| Stress uniformity by cavity | no | yes | “random” vs stable results |
| Thermal gradient sensitivity | partly | strongly | base/heel cracks and checks |
| Long-cycle stability | partly | strongly | delayed cracking after storage |
The next sections answer the practical questions that show up in customer audits and internal troubleshooting: what annealing really changes, how lehr profiles connect to thermal shock, why “correct CTE” still cracks, and how to prove annealing quality every batch.
A bottle line becomes calmer when annealing is treated like a product spec, not a utility step.
Does annealing change the glass bottle’s CTE, or does it mainly reduce residual stress from cooling?
When the thermal test fails, it is tempting to blame CTE. In many cases, the CTE did not move at all. The stress did.
Annealing mainly reduces residual stress from cooling. It does not meaningfully change the composition-based CTE for container glass, although tiny structural-relaxation shifts can exist and are usually too small to explain cracking.

Annealing is a stress-relief process. The glass is cooled from forming temperatures and passes through a range where it is no longer fluid, but it can still relax stress slowly. If cooling is uneven, different zones “freeze” at different times. That creates locked-in tensile and compressive stress. The lehr uses controlled heating and cooling to let those stresses relax before the structure becomes too rigid to move.
CTE is mostly controlled by chemical composition. A soda-lime bottle expands based on its oxide network. Annealing does not change the oxide ratios. So the mean linear CTE stays effectively the same for practical engineering decisions. There is one nuance that matters in lab talk: glass structure depends on thermal history 3, sometimes described by fictive temperature. A different fictive temperature can slightly change density and some thermal properties. In container work, that effect is normally much smaller than the stress effect. If a plant sees major thermal cracking, it is almost always stress, thickness gradients, or process ramp rate, not a meaningful CTE shift caused by annealing.
The real reason annealing changes “apparent expansion performance”
A stressed bottle can crack at a lower ΔT because the stress field is already near the limit. A well-annealed bottle can survive the same ΔT because it starts closer to zero. That looks like “better expansion performance,” but the CTE is not the hero. Stress control is.
Practical signals that point to stress, not CTE
-
Cracks start at heel or finish, not in the middle of a uniform wall.
-
Failures vary strongly by cavity number.
-
Crack rate changes when lehr speed, zone heat, or ambient draft changes.
-
CTE lab data looks stable, but polariscope stress patterns change.
| Observation | If CTE changed | If annealing changed | What usually happens in plants |
|---|---|---|---|
| Color stays same, cracks spike | possible but unlikely | very likely | lehr drift or uneven cooling |
| Cracks only from some cavities | not a CTE sign | strong annealing sign | airflow or bottle spacing issue |
| More delayed cracks after storage | not typical | common | residual stress slowly releases |
| Thermal shock fails at same ΔT | could be CTE | could be stress | check stress patterns first |
The safe production mindset is simple: CTE is a recipe spec. Annealing is a stress spec. Both matter, but they solve different problems.
How does the annealing lehr temperature profile impact thermal shock resistance in hot-fill, pasteurization, and sterilization?
A lehr profile that looks fine on paper can still be wrong for the thickest zone of the bottle. That mismatch shows up only when the bottle sees a fast thermal cycle.
The lehr profile impacts thermal shock resistance by controlling how much residual stress remains and where it sits in the bottle. A strong profile heats enough for stress to relax, holds long enough for thick zones, and cools evenly so new gradients do not lock stress back in.
Thermal shock resistance in hot-fill 4 and sterilization is about stress peaks. The lehr sets the starting point. If the bottle enters the filling line with high residual stress at the heel or finish, the process has less margin. If the bottle leaves the lehr with low and uniform stress, the same process becomes forgiving.
Key parts of a lehr profile that matter most
1) Reheat and equalization
The bottle must be reheated into a range where stress can relax. Thick-bottom designs need more time, because the base lags behind the wall. If the wall relaxes but the base does not, the bottle leaves with a “split personality” stress state.
2) Soak / hold time
Hold time is where thick zones catch up. If line speed rises or loading changes, soak time can collapse. The bottle may still look perfect, but stress is locked in.
3) Controlled cooling through the stress-freeze range
Cooling must be smooth and symmetric. Cold air jets on one side, lehr openings, or uneven conveyor contact can re-create stress after the soak.
Why process type changes the annealing risk
-
Hot-fill: short, sharp heating from the inside. Heel and base corners are common failure points.
-
Pasteurization: longer cycle and more uniform heating, but repeated cycles can grow small flaws.
-
Sterilization/retort: harsh ramps and repeated cycles. Any residual stress becomes expensive fast.
A practical “lehr-to-process” matching method
The best match is to map bottle zones to process gradients:
-
heel/base: slow to heat, high stress risk
-
shoulder: geometry transition, stress concentration
-
finish: closure torque plus thermal change
| Lehr profile weakness | Bottle stress result | Process failure pattern | What to adjust first |
|---|---|---|---|
| Reheat too low | stress never relaxes | early cracks in hot-fill | raise reheat zones |
| Soak too short | base stays stressed | heel cracks, cavity bias | increase soak or slow line |
| Cooling uneven | new stress locked in | random cracks, one-side cracks | balance airflow and spacing |
| Overheating / distortion risk | shape instability | ovality and handling issues | tune setpoints, not only heat |
A lehr profile should be treated like a recipe. It needs control limits, not only a target. The best plants lock the profile so tightly that hot-fill becomes predictable, not a daily surprise.
Can under-annealing or uneven cooling cause cracking even when the bottle’s composition-based CTE is “correct”?
Many teams feel stuck when the lab CTE matches the datasheet, yet cracking still happens. This is a normal situation. CTE can be correct and the bottle can still fail.
Yes. Under-annealing or uneven cooling can leave tensile stress in critical zones, so the bottle cracks under thermal gradients even when the chemistry-based CTE is correct. The bottle fails because total stress exceeds strength, not because CTE is “wrong.”
Residual stress is like a pre-load. It reduces the extra stress the bottle can take later. Thermal stress from hot-fill adds quickly, especially at thickness transitions. When these stresses add, cracks start at the weakest spot. The weakest spot is usually where thickness is high and cooling is uneven: heel, base corner, shoulder transition, and finish ring.
How under-annealing shows up in real life
-
Cracks increase after a lehr speed change.
-
Cracks increase in winter when ambient drafts change.
-
Cracks shift to one side of the bottle when airflow is uneven.
-
Cracks spike after mold changes that change wall thickness distribution.
Uneven cooling also creates cavity-level patterns. One cavity may run hotter at takeout, or bottles may sit closer together in one lane of the lehr. That changes cooling symmetry. Even if average stress is “okay,” the worst bottles will fail.
Why “correct CTE” is not a shield
CTE controls how much the glass wants to expand for a given temperature change. It does not control:
-
how fast the temperature changes inside the wall
-
where stress concentrates due to geometry
-
how much stress is already present from forming
A thick-bottom bottle with sharp transitions can crack in hot-fill even with a low-CTE glass if stress and gradients are high enough. At the same time, a well-annealed soda-lime bottle can survive hot-fill if gradients are controlled and thickness is uniform. This is why annealing and design often beat small recipe tweaks for cracking problems.
| Root cause | CTE needs change? | Annealing needs change? | Design/process usually involved? |
|---|---|---|---|
| Cracks after lehr speed increase | no | yes | yes |
| Cracks only in thick-base design | maybe | yes | yes |
| Cracks only in some cavities | no | yes | sometimes |
| Cracks after hot-fill ramp change | no | maybe | yes |
The practical lesson is simple: keep CTE inside the recipe band, then use annealing and thermal ramp control to protect the bottle from stress spikes.
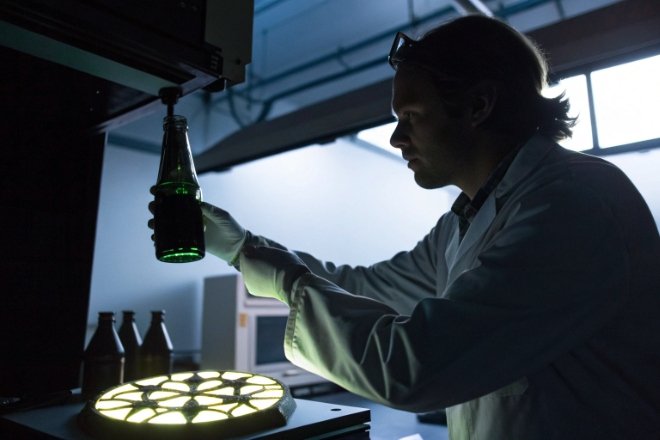
What QC tests (stress inspection, thermal shock testing, sampling standards) verify annealing quality for each bottle batch?
Annealing quality must be proven, not assumed. The best QC system is fast enough to run every shift and deep enough to catch drift before shipments.
Verify annealing quality with three layers: fast stress inspection (polariscope), batch-level thermal shock or thermal cycling tests that match the customer process, and a sampling plan that covers cavities, time, and thickness extremes.
A strong QC program uses both stress measurement and performance testing. Stress tests tell what is stored inside the bottle. Performance tests show if the bottle survives the real thermal cycle. Both are needed, because a bottle can show low average stress and still fail if stress is concentrated in a thin ring at the heel or finish.
1) Stress inspection as an every-shift control
A polariscope 5 (or strain viewer) is the common tool. The key is to standardize:
-
viewing position and bottle orientation
-
lighting and background
-
pass/fail reference images for each SKU
-
zones to check: heel, shoulder, finish, base center
A useful habit is to record stress patterns by cavity number. That turns “random cracks” into a map. It also helps maintenance teams fix airflow or conveyor issues.
2) Thermal shock and thermal cycling tests that match the line
Thermal shock tests 6 must reflect the real hazard:
-
hot-fill simulation: fill at target temperature, hold, then cool under defined conditions
-
pasteurization simulation: controlled heat-up and cool-down cycle
-
sterilization simulation: full cycle replication, including worst-case ramp rates
The test should include worst-case conditions like line stops. Many field cracks happen during abnormal events, not during steady running.
3) Sampling standards that protect against blind spots
A good sampling plan covers:
-
start, middle, end of production run
-
each cavity (or a rotating subset with full coverage daily)
-
worst-case thickness group (heavy base, high variation)
-
after any lehr setpoint change, mold change, or cullet change
The goal is to catch drift early. A single “one bottle per hour” sample can miss a cavity issue for days.
| QC layer | Tool | Sampling idea | What it catches |
|---|---|---|---|
| Stress inspection | polariscope | per shift, per cavity subset | lehr drift and uneven cooling |
| Thickness link | thickness/weight checks | daily or per change event | stress hot spots by design |
| Thermal performance | hot-fill/retort simulation | per batch or per lot gate | real cracking risk |
| Trend control | control chart 7 rules | continuous review | slow drift before failure |
The simplest acceptance rule that works
Use a two-band system:
-
warning band: stress patterns drifting, but still passing
-
stop band: stress above limit or thermal test failure
When warning bands trigger, the fix should start with lehr airflow balance, soak time, and bottle spacing. If fixes only happen after failures, the plant will always feel reactive.
Conclusion
Annealing rarely changes CTE in a meaningful way. It removes residual stress and makes thermal shock performance predictable, so bottles survive hot-fill and sterilization without surprise cracking.
-
The critical cooling process to prevent glass breakage. ↩
-
A specialized oven used for annealing glass containers. ↩
-
How previous heating and cooling affect glass properties. ↩
-
Filling process that requires bottles to withstand high heat. ↩
-
Instrument for visualizing internal stress patterns in glass. ↩
-
Standard method for testing glass resistance to temperature changes. ↩
-
Tool for monitoring process stability and detecting trends. ↩


