Everyone says they “sterilize” glass bottles, but many methods are risky, incomplete, or confusing. That confusion can ruin products and damage brands.
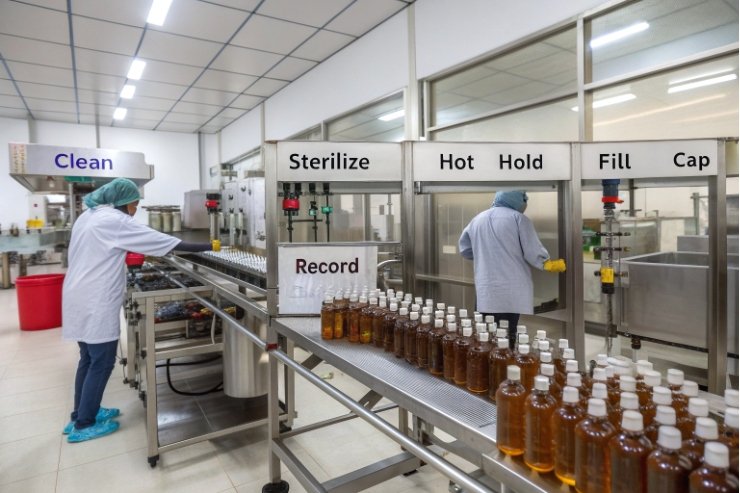
To sterilize glass bottles properly, always start with thorough cleaning, then choose a validated heat method such as boiling, steam, or autoclave, keep everything hot until filling, and protect it with aseptic handling and batch records.

Sterilization should not feel like guesswork. When the right method matches the right product, you protect shelf life, flavor, and safety at the same time. Let us walk step by step from cleaning, to heat, to closures, to records, so every batch has a clear, repeatable workflow.
Which sterilization method—boil, steam, autoclave—fits your use case?
You probably already boil or “hot wash” your bottles, but different products and regulations may demand very different sterilization methods.
Boiling suits many high-acid foods and hot-filled products, steam fits moderate risk use cases, and autoclaves or pressure canners are reserved for low-acid, medical, or pharmaceutical products where full spore destruction is required.
Start with the non-negotiable: cleaning is not sterilizing
Every method begins the same way. Bottles must be visibly clean before you even think about heat. Use FDA Food Code 2022 provisions on cleaning and sanitizing 1 as a baseline mindset: remove soil first, then apply a validated kill step.
- Inspect each bottle under good light.
- Reject any that are chipped, cracked, or badly scratched. Defects increase breakage risk and can stop proper sealing.
- Wash in hot, soapy water, inside and outside.
- Use a bottle brush for narrow necks.
- Rinse with clean, preferably hot water until there is no foam left.
This step removes soil, sugar, oils, and manufacturing dust. If residue stays on the glass, heat will not “burn it off.” It only bakes it in place and gives microbes places to hide.
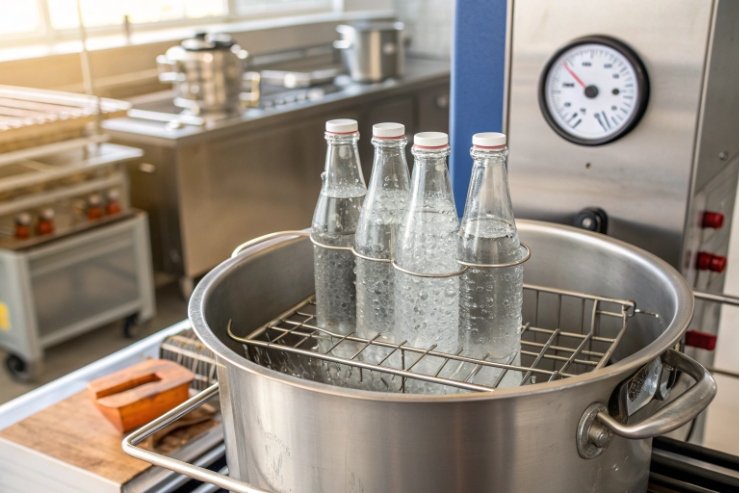
Boiling water: the classic and still gold standard for many foods
For home canning, small batches, and many high-acid products, boiling water is still the main method.
A simple workflow (aligned with NCHFP Sterilization of Empty Jars 2):
- Place a clean rack or folded towel at the bottom of a deep pot.
- Stand the washed bottles upright on the rack.
- Cover completely with water. The water should be at least 2–3 cm above the bottle tops.
- Bring to a rolling boil.
- Hold at a continuous boil for at least 10 minutes at sea level.
- For higher altitudes, add roughly 1 extra minute per 1,000 ft (300 m).
When the time is done, you do not fish bottles out and leave them on a cold bench. Keep them in the hot water until you are ready to fill, or place them on a clean tray and fill while they are still very hot. This keeps sterility and also reduces risk of thermal shock when you add hot product.
For many high-acid recipes that will be processed again for 10 minutes or more in a boiling-water canner, you actually do not need to pre-sterilize bottles—pre-sterilization is not needed when processing is 10 minutes or more 3. The full canning step provides the kill step. Pre-sterilization then becomes added safety, not a requirement, which saves time on high volume runs.
Steam and pressure: when you need more than 100 °C
For some workflows, especially baby feeding items, lab work, or very sensitive products, steam systems give extra security.
- Countertop steam sterilizers or baby-bottle steamers: These use saturated steam around 100 °C for a set time, often 10–15 minutes. They are simple and useful when you need frequent small batches.
- Pressure canners and autoclaves: These take it further. At about 15 psi (around 1 bar) over pressure, steam reaches about 121 °C, consistent with CDC steam sterilization guidance 4. This higher temperature can inactivate spores that survive boiling.
Low-acid foods (like plain vegetables, meats, broths, and some sauces) are the classic example. Boiling water is not enough for them. They require pressure canning to reach a safe internal temperature and holding time, as described in NCHFP guidance on ensuring safe canned foods 5. The same logic applies in pharmaceutical and lab settings, where autoclaves are standard.
When you use pressure systems with glass, bottle design matters. Thick, even walls and a strong heel (bottom) handle thermal stress better. This is one reason professional buyers often choose bottles that are certified for retort or autoclave use instead of generic decorative glass.
Methods that are not true sterilization (and when they still help)
Many people ask about ovens, microwaves, and dishwashers.
- Ovens: Dry heat is slow and uneven unless you have lab-grade equipment. Domestic ovens often overshoot or cool in spots. This can stress the glass and still leave cold zones.
- Microwaves: They heat water, not glass. Empty bottles may not heat safely or evenly.
- Dishwashers: Even with a “sanitize” cycle, you cannot guarantee time–temperature contact inside each bottle the way you can in a dedicated sterilization step.
So for serious canning or any regulated product, these are not recommended as your main sterilization step. They are fine as a cleaning aid, but not as the validated kill step.
There are also no-rinse sanitizers such as phosphoric acid–based products or iodophor that many homebrewers use. These are excellent for reducing surface microbes quickly before cold-fill of beer or kombucha. They are fast and gentle on labels and equipment. However, they are sanitizers, not always full sterilizers, so you must follow the manufacturer’s instructions for concentration and contact time and match them to your risk level and local rules.
Should caps and liners be sanitized differently from bottles?
Most people treat caps like a small version of the bottle, but closures are made of different materials that react very differently to heat.
Caps, liners, pumps, and droppers usually cannot handle the same heat cycle as glass bottles, so they need tailored methods such as gentle hot water, compatible sanitizers, or pre-sterilized components from the supplier.
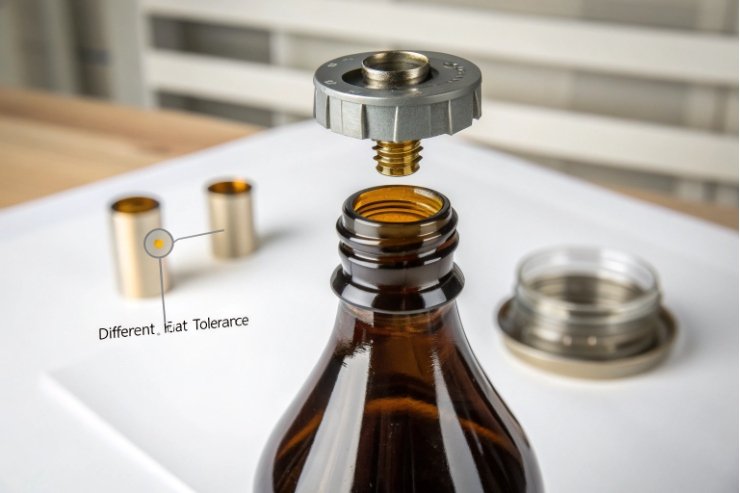
Recognize that caps are a small system, not a single piece
A “cap” often includes:
- A metal or plastic shell
- An inner liner (rubber, EVA, TPE, foam)
- Sometimes a wad, induction liner, or tamper-evident band
- For pumps and droppers, there are springs, balls, and multiple plastics
Each part has its own tolerance for heat, steam, and chemicals. When one component fails, the whole closure fails. Liners can warp, stiffen, or leach if you push them beyond their limit. That is why glass and closures almost never share exactly the same sterilization recipe.
Heat for caps: how hot is too hot?
For classic metal canning lids and twist-off caps, a gentle heat treatment is usually enough:
- Place caps in hot (not boiling hard) water, around 80–85 °C.
- Hold for about 10 minutes.
- Keep them in the hot water until use, so the sealing compound stays flexible.
Some modern canning lid manufacturers even say you should not boil their lids at all. They recommend only warming them in hot tap water before use. So always read the closure supplier’s instructions and match your process to their advice.
For heavy industrial metal caps with high-temperature liners, retort or autoclave cycles may be possible. In that case, both bottle and closure go through the same pressure process after filling. This must be validated with your closure supplier, because not all liners survive high temperature and pressure without changing seal strength or flavor.
Plastic closures, pumps, and droppers are even more sensitive. Many of them will deform or crack under autoclave conditions. In my experience, these are better handled in three ways:
- Buy pre-sterilized closures, usually gamma or e-beam treated, sealed in bags.
- Use compatible chemical sanitizers in low concentration with a defined contact time.
- Or, for non-sterile cosmetic lines, focus on very clean handling rather than full sterilization.
Chemical sanitizers for closures
When heat is not an option, sanitizers step in. The key is to choose a chemistry that:
- Is approved for food or cosmetic contact in your market
- Does not attack plastics, rubber, or inks
- Has a clear, tested contact time
Common options include:
- Alcohol sprays for quick surface reduction (but they evaporate fast and are not full sterilization)
- Peracetic acid and hydrogen peroxide systems in automated lines for caps and preforms, using peracetic acid and hydrogen peroxide cap sterilization technologies 6
- Brewery-style acid sanitizers for metal caps in beverage lines
After chemical treatment, closures usually drain and air-dry on a clean, dedicated rack. They should not sit in pools of sanitizer, since this can weaken liners or leave residues.
The main habit to build is this: treat closures as a separate process stream with its own SOP, limits, and checks. Do not assume “whatever I do to the bottle is fine for the cap.”
How do drying and aseptic handling prevent recontamination?
Sterilization only wins you a short window of safety. Clean, hot glass can pick up airborne dust, skin flora, or water-borne microbes again in seconds if the environment is dirty.
Drying on clean surfaces, keeping bottles hot until filling, and working in a simple aseptic zone with good habits are what stop recontamination between the sterilizer and the finished, sealed product.
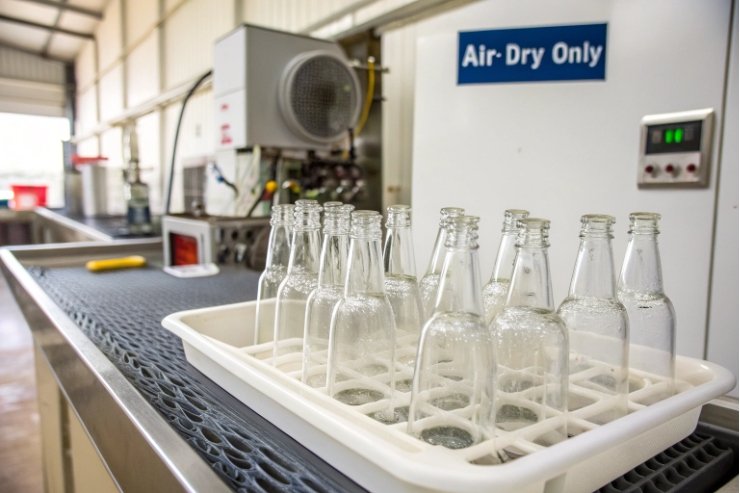
Drying: choose air over towels whenever you can
After washing and before any heat step, bottles need to drain. There are two main options.
- Air drying on a rack: Stand bottles upside down on a clean, dedicated rack or towel-lined tray. Let water run out and surfaces dry. This reduces mineral spots and avoids lint.
- Towel drying: This is faster, but every towel is a potential source of fibers and microbes. If you must use towels, they should be freshly laundered, lint-free, and used only for this purpose.
After sterilization, you usually want bottles to stay wet with clean, hot water, not to dry completely in open air. In canning, for example, sterilized jars stay submerged or are kept upside down on a tray, covered with a clean cloth, and filled while still hot. The less time they stand open in room air, the lower the risk.
In a factory, many lines use inverting conveyors, hot air knives, or filtered air blowers to remove droplets without bringing in dirty dust.
Build a simple aseptic “bubble” even in a small space
You do not need a clean room to handle bottles better. A few basic steps already change the risk picture.
- Choose a smooth, washable table for filling and capping.
- Clean it with detergent, then wipe it with a food-grade sanitizer.
- Keep pets, fans, and open windows away during filling. Airflow carries particles.
- Wear clean clothes, tie back hair, and use a cap or hairnet if possible.
- Use clean gloves or wash and sanitize hands often.
- Avoid talking, coughing, or leaning over open bottles.
In my own plant, we mark a simple “aseptic zone” around the filling and capping area. Only trained staff enter while the line is running. Parts and tools that fall on the floor do not go back on the line until they are cleaned and sanitized again.
Keep the hot chain unbroken
The last piece is temperature. Hot-filled products and hot bottles give you an advantage, but only if you keep the hot chain intact.
Typical pattern:
- Sterilize bottles in boiling water or steam.
- Hold them hot until the moment of filling.
- Fill with hot product at the validated fill temperature.
- Cap immediately.
- If needed, run a further pasteurization or retort cycle on the sealed bottles.
Every pause between these steps is a chance for cold air, condensation, and microbes to join your product. So layout, staffing, and clear roles matter as much as the equipment.
What labels and logs document batch sterility?
Even a perfect process is hard to defend if there is no paper trail. Good records prove to you, and to regulators or customers, that each batch was handled correctly.
Use bottle or carton labels with clear lot codes, plus simple sterilization logs that record method, time, temperature, operator, and packaging details for every run, so you can trace and verify each batch.
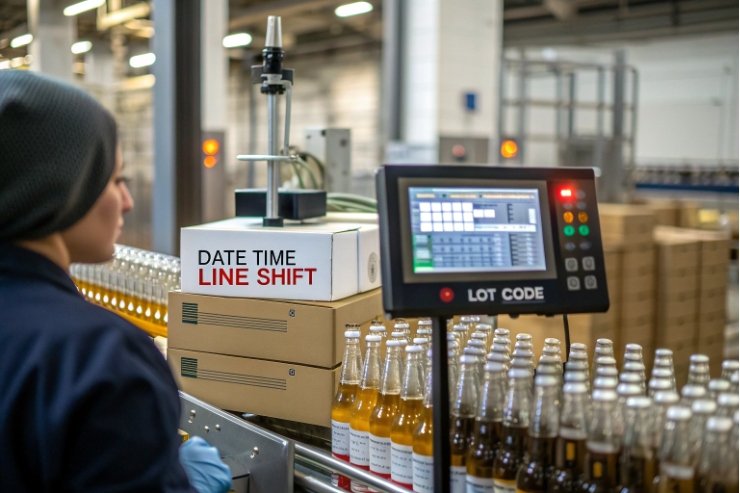
On-pack coding: what each bottle should “tell” you
Every finished bottle should be traceable back to:
- The date and time it was filled
- The line or location
- The recipe or SKU
- The sterilization or pasteurization program used
Many brands encode this into a short lot code that prints on the bottle, the label, or the carton. For example, a code might combine year, day of year, line number, and shift. It looks like a random string to consumers, but inside the company, it links to a detailed batch record.
For export and long shelf life products, this is not optional. Traceability is part of basic food safety systems such as HACCP Principles & Application Guidelines 7 and modern regulatory frameworks.
Sterilization and cleaning logs
Behind every lot code there should be a log sheet or digital record. At minimum, it should track:
- Date and time of the run
- Product name and recipe code
- Bottle type, size, and supplier lot number
- Closure type and lot number
- Cleaning method for bottles before sterilization
- Sterilization method (boil, steam, autoclave, sanitizer)
- Target and actual temperature
- Start and end time of the sterilization cycle
- Any deviations or issues (broken bottles, equipment alarms)
- Name or initials of the operator and supervisor
For autoclaves and pressure canners, many systems print a curve of time and temperature. These printouts or digital files should be stored with the batch record. For hot-fill systems, there may be regular checks of product temperature at the filler and at the capper.
Over time, these records let you spot patterns: maybe one closure lot has more seal failures, or one line has more temperature dips. That feedback loop is how you keep improving.
Bringing it all together
When bottle design, cleaning, sterilization, closure handling, aseptic habits, and documentation all line up, sterilization stops being a mystery. It becomes a routine, reliable part of your brand’s quality promise. Glass then does what it does best: protect the product and the story inside it, without adding anything of its own.
Conclusion
Clean well, choose the right heat or sanitizer method, handle closures with care, keep the hot chain intact, and document every batch. Sterility then becomes repeatable, not lucky.
Footnotes
-
Baseline FDA model code for cleaning and sanitizing food-contact equipment. (↩︎) ↩
-
Step-by-step jar sterilization times and altitude adjustments for boiling-water canners. (↩︎) ↩
-
Clarifies when pre-sterilizing jars is unnecessary if processing time is 10+ minutes. (↩︎) ↩
-
Reference steam sterilization temperatures and exposure times used as industry baselines. (↩︎) ↩
-
Explains why low-acid foods need pressure canning temperatures to control botulism risk. (↩︎) ↩
-
Overview of automated cap sterilization using PAA/H₂O₂ systems in aseptic beverage lines. (↩︎) ↩
-
Practical HACCP guidance linking process controls and records to food safety assurance. (↩︎) ↩


