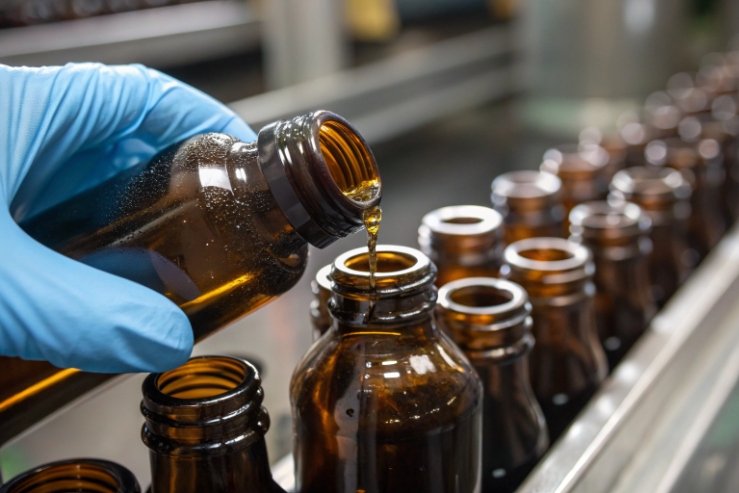
A dark bottle can hide weak glass and bad sealing. One leak or one break can ruin a whole pallet, and it can also hurt a brand on the shelf.
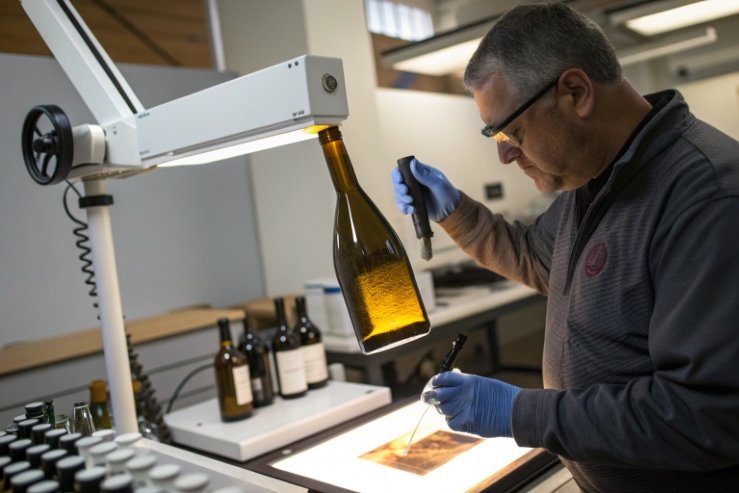
Inspect amber wine bottles with strong light or vision systems, then confirm dimensions, wall thickness, stress, and sealing surfaces. Use UV–Vis transmission data to confirm light protection in 320–440 nm, and use gauges to protect cork or screw-cap performance.

A good inspection plan does not guess. It measures what matters, and it rejects what can damage wine, filling lines, and customer trust. The steps below follow the same order that most bottling problems show up: light protection first, then glass distribution, then finish sealing, then base build.
What color density and UV-blocking range should amber glass meet?
A bottle that looks “amber enough” can still leak light where wine is most sensitive. That small gap can cause light-struck off-notes, and it can show up fast in retail lighting.
Amber glass should deliver very low transmission in the UV-A and violet band that drives light-strike (about 320–440 nm). A practical target is near-zero transmission through 440 nm, and strong attenuation up to about 450–500 nm.

Start with the risk band, not the color name
Most buyers talk about “amber” as a color. A production team should talk about “how much light gets through at each wavelength.” For wine, the risk is not only UV-B. The risk extends into UV-A and even into violet light. That is why the risk band described in studies of UV-A and violet light transmission into wine bottles 1 matters for shelf life and flavor stability—especially 320–440 nm.
Use UV–Vis transmission as the pass/fail language
A UV–Vis spectroscopy 2 test gives a transmission curve. That curve is the real “color density” that matters for protection. The goal is simple: keep transmission very close to zero across 320–440 nm. If the curve starts rising early, the bottle may still look dark, but it can let enough violet light through to trigger problems.
In practice, there are two common ways to set a spec:
- Band rule: set a maximum average transmission for 320–440 nm (for example, under 1% average).
- Point rule: set maximum transmission at key points (for example, 350 nm, 380 nm, 405 nm, 440 nm).
A third method helps when multiple suppliers are involved: set a “family curve” and allow only small shifts.
Confirm that wall thickness changes do not silently change protection
Thin walls can increase transmission, but the relationship is not linear. A lighter bottle can still protect well if the glass chemistry and colorant loading stay stable. That is why a UV–Vis test should be tied to a thickness check. If a batch comes in underweight, a quick UV–Vis check protects the wine program from silent drift.
A practical spec table for amber wine bottles
The exact number depends on bottle design, glass recipe, and market position, but this table gives a buyer-friendly target that maps to the risk band.
| Wavelength / band | Why it matters | Practical amber target | How to verify |
|---|---|---|---|
| 320–400 nm (UV-A) | Drives light-strike chemistry | ~0% to very low transmission | UV–Vis scan with a defined path |
| 400–440 nm (violet) | Still high risk for aroma damage | Very low transmission (near-zero) | UV–Vis scan and batch comparison |
| 450 nm | Common “protection line” used in packaging | Strong attenuation (very low) | Check transmission at 450 nm |
| 500–700 nm (visible) | Branding and shelf appearance | Controlled, not “fully black” | Color check + transmission curve |
A simple acceptance habit that saves time
A receiving team does not need to scan every bottle. A small sample per mold cavity is enough to catch drift. A good rule is to test first articles, then test at set intervals, and test again after any furnace or colorant change. This habit prevents the worst type of problem: the kind that gets noticed after the wine has already shipped.
How do you spot thin walls and scuff marks on dark glass?
Dark glass hides defects that clear glass would show right away. That makes thin walls and scuffs easy to miss until the first break, the first jam, or the first customer complaint.
Thin walls show up as uneven refraction, uneven weight, and weak “feel” when compared to a control bottle. Scuff marks show up under low-angle light, wetting tests, or machine vision with diffuse and backlight setups tuned for dark glass.

Use the right light setup for dark amber
A bright overhead light is not enough. Dark amber needs contrast. Three lighting angles work well:
- Backlight (transmitted light): helps reveal cords, blisters, seeds, and thin sections.
- Low-angle side light: makes scuffs, abrasion, and surface checks “flash” as the bottle rotates.
- Diffuse dome light: reduces glare and helps machine vision find haze and rub marks.
A simple manual trick also helps: rotate the bottle slowly and keep the light fixed. The defect moves, the light does not, so the eye catches the change faster.
Measure glass distribution, not only average weight
Weight alone is a blunt tool. A bottle can hit target weight and still have weak spots. That is why thickness checks should focus on:
- Heel area: the transition from sidewall to base, which often carries stress.
- Sidewall mid-body: where scuffs happen and where handling knocks occur.
- Base and punt area: where glass distribution affects stability and impact resistance.
If a supplier provides lightweight designs, a thickness map per design is even more important than the weight number.
Spotting thin walls without cutting bottles
Non-destructive checks are the fastest for incoming lots. A plant can use:
- Ultrasonic thickness checks at defined points.
- Optical thickness systems (common in automated inspection).
- Weight + dimension correlation to catch under-distribution (for example, weight drops but diameter and height stay the same).
A practical approach is to set a “control bottle.” That control is the best sample from an approved lot. Every new lot gets compared to that control by weight, feel, and thickness at the same points.
Scuff marks: why they matter more than they look
A scuff often looks cosmetic, but it can also be a strength issue. Scuffs can reduce surface strength, and they can also make labels look dull on shelf. Many scuffs come from conveyor contact or bottle-to-bottle rub. That means scuff patterns often appear in clusters, not as random singles. A receiving inspection should look for repeat patterns that suggest handling issues upstream.
A defect-spotting table that works on dark glass
This table helps train inspectors and also helps set a machine vision checklist. If you need a shared vocabulary for defects and typical root causes, the container defect causes and remedies guide 3 is a useful reference.
| Issue | What it looks like on dark amber | Fast confirmation | Why it matters |
|---|---|---|---|
| Thin sidewall | Slight “flat” optical zone when rotated | Thickness gauge at set points | Higher break risk in handling |
| Thin heel | Hard to see; shows as stress rings under polariscope | Thickness check + stress check | Common break point on impact |
| Scuff / abrasion | Grey haze lines under low-angle light | Wetting test or dome light camera | Strength loss + poor shelf look |
| Cords / strings | Wavy lines inside glass under backlight | Transmitted light scan | Weak points and poor appearance |
| Blisters / seeds | Small bubbles that sparkle under backlight | Rotate under backlight | Can grow into cracks under load |
| Inclusions | Dark specks or shiny particles | Magnifier + backlight | Can trigger crack initiation |
A small story that shaped a simple rule
A batch once looked “fine” in normal room light, but it showed heavy scuffing under low-angle light. The filler ran, but label panels looked cloudy after rinsing. The rule that stuck was simple: dark glass needs the same inspection, but with better light.
Which finish defects threaten cork or screw-cap sealing?
Most leaks start at the finish. A tiny chip or a small crack can cut a cork, break a liner seal, or stop a cap from seating flat.
Finish defects that threaten sealing include chipped or out-of-round sealing lands, checks and cracks on the top surface, damaged thread profiles for screw caps, and bore/ID drift that harms cork compression. These issues should be screened with visual inspection plus go/no-go gauges.
Understand what each closure needs
A cork and a screw cap ask for different “perfection.”
- Cork sealing needs: stable bore ID, smooth inner finish, clean top surface, and correct lead-in chamfer so the cork does not tear.
- Screw-cap sealing needs: correct thread form, correct support ring, flat sealing land, and good finish height so torque and liner compression stay in range.
If a bottle is meant for both, then the finish spec must be even tighter.
Inspect finish defects under strong light and by touch
Finish issues often hide on dark amber, so the best approach is a mix:
- Visual: look for chips, checks, cracks, and “dirt” or stones in the finish.
- Touch: a sharp edge can cut closures and also cut operators.
- Gauge: go/no-go checks for thread and bore dimensions remove guesswork.
A critical habit is to inspect the finish in rotation. A defect that is invisible at one angle may be obvious at another.
Watch for defects that create slow leaks
Not every defect leaks on day one. Some defects create slow leaks that show up later as oxidation or ullage loss. These are often the most expensive because the wine already shipped.
Typical slow-leak causes include:
- A small check across the top surface.
- A shallow “saddle” or dip on the sealing land.
- A small chip on the lip that breaks liner contact.
- Thread damage that changes seating height.
Use dimensional control to protect line performance
Even when sealing is okay, finish drift can hurt line performance. Out-of-round finishes can jam cappers. High or low finish height can change applied torque. Neck tilt can also cause crooked caps and poor label alignment. A good inspection plan measures the critical geometry behind neck and closure threads and dimensions 4:
- Finish OD and ID
- Thread profile (where used)
- Finish height
- Verticality and lean
Finish defects and their closure risks
This table helps set defect severity. It also helps align quality language between buyer and supplier.
| Finish defect | Common cause | Cork risk | Screw-cap risk | Typical action |
|---|---|---|---|---|
| Chipped lip | Handling impact, mold damage | Cuts cork, leaks | Breaks liner seal | Reject as critical |
| Check on top surface | Thermal stress, forming issue | Can cut cork top, slow leak | Liner cannot seal flat | Reject as critical |
| Crack in finish | Stress + impact | Immediate leak risk | Immediate leak risk | Reject as critical |
| Out-of-round finish | Mold wear, machine setup | Uneven cork compression | Bad thread engagement | Reject or sort as major |
| Thread deform | Mold defect, wear | Not relevant | Cap cross-thread or loose | Reject as critical/major |
| Bore ID drift | Process drift | Wrong cork compression | Can change cap seating | Reject as major |
Do not skip a closure-on-bottle check
A gauge is great, but a real closure test is the final proof. A small sample should be assembled with the actual cork or cap. It should then be checked for:
- Torque or extraction force trend
- Leak under vacuum or pressure
- Visual seating and liner contact
This check catches issues that pure dimension checks can miss, like small waviness on the sealing land.
Premium bottles feel stable, look balanced, and survive handling better. Many of those traits come from glass distribution at the base and along the body.
Punt symmetry and stable weight do not prove “premium,” but they reveal mold control and glass distribution. A centered punt, even heel thickness, and tight weight spread often correlate with higher top-load strength, better stability, and fewer impact failures.
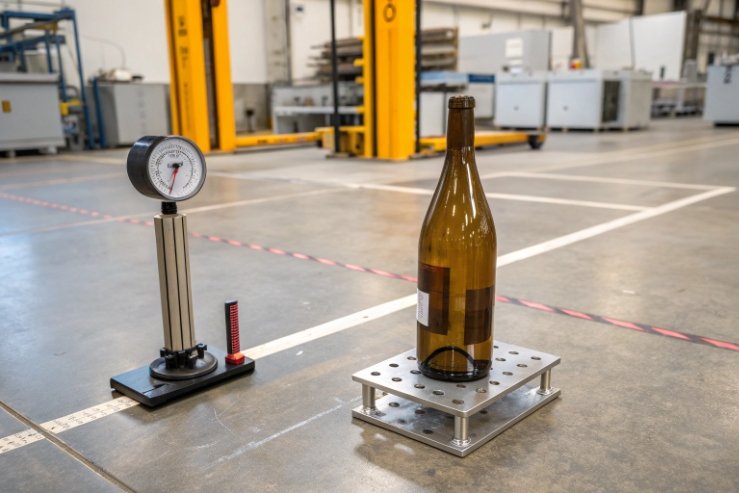
Punt symmetry is a fast proxy for mold and forming control
The punt (push-up) should sit on the centerline. When it is off-center, it often means:
- Uneven gob distribution
- Misalignment in mold set
- Wear or damage in base mold parts
Off-center punts can cause wobble on conveyors and unstable standing on shelf. The punt is also tied to base thickness distribution, so a symmetry issue can also signal a weak heel area.
Weight spread tells more than the average weight
A “premium” bottle often has a tighter weight spread. That does not mean it must be heavy. It means the process is stable. A stable process usually gives:
- Even wall thickness
- Lower residual stress variation
- Better impact consistency
A receiving team should track average weight and standard deviation. A batch with the same average but larger spread is more risky than it looks.
A better check: weight plus thickness at key points
A smart plan uses weight as the first screen, then uses thickness checks to confirm glass distribution. The key points are:
- Finish area (too heavy can signal poor distribution elsewhere)
- Shoulder (risk of thin sections)
- Sidewall mid-body
- Heel
- Base around punt
If the heel is thin while the finish is heavy, the bottle may look solid but still break in transport.
Symmetry checks that can be done fast on the floor
Not every plant has metrology labs on receiving. Simple checks still work:
- Flat plate wobble test: the bottle should not rock.
- Rotation under a fixed pointer: watch the punt center and base ring runout.
- Base ring contact: look for uneven contact marks on the standing ring.
These checks should not replace dimension tools, but they catch clear failures fast.
This table links the premium feel to measurable traits that quality teams can control.
| Premium signal | What it suggests | How to measure | What can go wrong |
|---|---|---|---|
| Centered punt | Good mold alignment and gob control | Visual center check, runout | Wobble, base stress issues |
| Even standing ring | Stable contact and stacking | Flat plate + visual | Tilt, conveyor instability |
| Tight weight spread | Stable forming and anneal | Weight sampling by cavity | Hidden thin spots if spread is high |
| Even heel thickness | Strongest impact zone is protected | Thickness at heel points | Heel breaks in transport |
| Clean base surface | Better handling and fewer scuffs | Low-angle light inspection | Abrasion and strength loss |
Premium is also about performance tests, not only looks
A bottle can look premium and still fail. That is why a serious program ties punt and weight checks to performance tests like:
- Vertical (top) load
- Impact resistance
- Internal pressure or burst (as needed)
- Thermal shock resistance (when hot-fill or temperature swings exist), often benchmarked with the ASTM C149 thermal shock resistance test method 5
- Annealing quality checks using polariscopic methods such as a polariscope (strain viewer) 6
When these tests match the look and feel, the bottle is not only premium. It is also reliable.
Conclusion
A premium amber bottle passes four gates: strong UV protection, even thickness, clean sealing finishes, and stable base geometry. When those match, breakage and leaks drop fast.
Footnotes
-
Research on which wavelengths drive wine light-strike and how bottles transmit UV/violet light. ↩ ↩
-
Understand UV–Vis scans to set pass/fail transmission curves for amber glass. ↩ ↩
-
Practical defect atlas for cords, blisters, inclusions, and other container faults on production lines. ↩ ↩
-
Guide to neck finishes, threads, and closure matching to prevent leaks and capping issues. ↩ ↩
-
Reference method for testing thermal shock resistance of commercial glass bottles and jars. ↩ ↩
-
Shows how polariscopes reveal residual stress patterns that correlate with breakage risk. ↩ ↩


