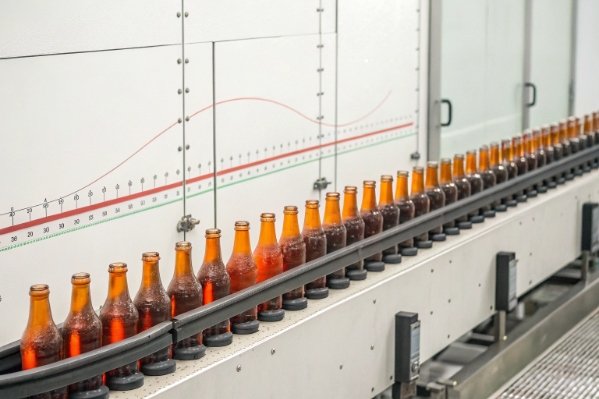
Is there anything more frustrating than a bottle that shatters spontaneously on the filling line? This "phantom breakage" is almost always a ghost of the manufacturing process—a symptom of residual stress caused by missing the critical annealing window.
We determine the annealing temperature window by identifying the glass’s specific viscosity points—the "Annealing Point" (where stress releases in minutes) and the "Strain Point" (where the glass becomes rigid). For standard soda-lime bottles, this window is typically between 520°C and 560°C, a zone where we must hold the bottles to equalize their internal temperature before controlled cooling begins.

The Science of Stress Relief
At FuSenglass, we view the annealing lehr 1 (oven) as the most critical quality control machine in the factory. When a glass bottle is molded, it is subjected to violent thermal forces. Molten glass at 1100°C hits a mold at 450°C. The skin freezes instantly, while the core remains hot. As the bottle cools, the core contracts, pulling on the already-hardened skin. This creates Residual Stress.
If left unchecked, this stress turns the bottle into a ticking time bomb. It might look fine, but a slight tap or a hot liquid fill will cause it to explode. Annealing 2 is the process of erasing this thermal memory. We don’t just "cool" the bottles; we reheat them to a specific temperature window where the molecules are mobile enough to relax and relieve tension, but not so hot that the bottle melts or deforms. Finding this "Goldilocks zone" is a matter of precise physics, dictated by the chemical composition of the glass batch.
The Viscosity Scale
Glass doesn’t freeze like water; it stiffens. We measure this stiffness in Poise (viscosity). The annealing window is defined by two specific viscosity values:
-
Upper Limit (Annealing Point): Viscosity = 10^13 Poise. Stress releases in ~15 minutes.
-
Lower Limit (Strain Point): Viscosity = 10^14.5 Poise. Stress releases in ~4 hours (effectively solid).
Our job is to keep the bottle between these two points long enough for every molecule to align perfectly.
What are the annealing point and strain point, and how do they define the safe annealing window?
Why can’t we just cool the bottles down to room temperature immediately? Because between liquid and solid lies a dangerous state of "plasticity" where permanent stress is born.
The Annealing Point (~554°C for soda-lime) is the temperature where internal stress is relieved rapidly, while the Strain Point (~510°C) is the temperature below which the glass is virtually solid and no permanent stress can be introduced. The "Safe Annealing Window" is the gap between these two figures; cooling through this range must be incredibly slow and linear to prevent re-introducing tension.
Defining the Boundaries
To engineer a safe bottle, we must navigate this thermal corridor with precision.
1. The Annealing Point (The Ceiling)
For our standard soda-lime glass 3, this is roughly 554°C.
At this temperature, the glass is still a solid, but the atomic network can shift slightly. If we hold the bottle here (the "Soak"), the internal tension relaxes. If we go much higher (Softening Point ~720°C), the bottle will slump and ovalize. We must hit this ceiling to reset the stress to zero.
2. The Strain Point (The Floor)
This is roughly 510°C.
Below this temperature, the glass is rigid. Cooling it fast won’t cause permanent stress (though it might cause temporary thermal shock).
Above this temperature, the glass is still "plastic." If we cool it too fast within the 554°C–510°C window, the outside will harden while the inside is still plastic. When the inside finally hardens, it will pull on the shell, locking in permanent stress.
The "Critical Range"
Therefore, the safe window is the Critical Cooling Range.
-
Action: We must drop the temperature from 554°C to 510°C very, very slowly (often at a rate of 1°C to 5°C per minute).
-
Result: This ensures that the temperature difference between the inner wall and outer wall is near zero. If ΔT is zero, stress is zero. Once we pass the Strain Point (the floor), we can speed up the cooling fans to get the bottles ready for packing.
| Viscosity Point | Temperature (Approx for Soda-Lime) | State of Glass | Manufacturing Action |
|---|---|---|---|
| Softening Point | ~725°C | Deformable | Avoid (Slumping risk) |
| Annealing Point | ~554°C | Stress Relief | Hold / Soak |
| Strain Point | ~510°C | Rigid Solid | End Slow Cool |
| Room Temp | 25°C | Brittle Solid | Cold End Spray / Pack |
How do bottle design factors (wall thickness, base thickness, embossing) change the ideal lehr temperature profile?
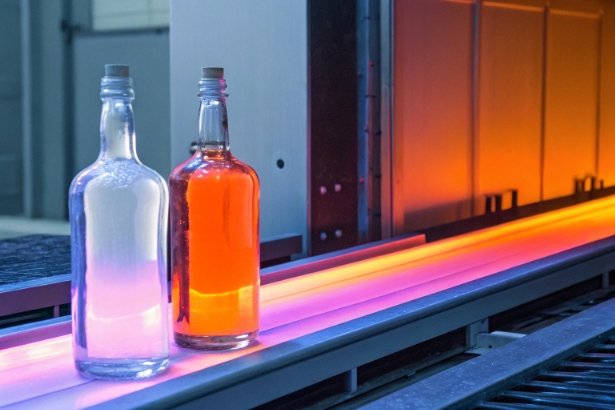
Does a heavy whiskey decanter need the same treatment as a lightweight hot-sauce bottle? Absolutely not. Mass dictates time.
Bottle design factors, specifically the glass mass and thickness distribution, dictate the "Soak Time" and cooling rate; heavy bases (punts) and thick walls hold heat longer, creating a "thermal lag" that requires a longer annealing curve to equalize. Embossing creates stress concentration points ("stress risers"), necessitating a gentler cooling gradient to prevent micro-cracks around the design details.
The Heavy Bottom Challenge
We often work with clients like Liam, our Whiskey Distiller persona, who wants a "heavy luxury feel" with a 20mm thick glass base.
This design is an annealing nightmare.
-
The Problem: The thin neck (3mm) cools instantly. The thick base (20mm) holds heat like a battery.
-
The Risk: As the bottle enters the cooling zone, the neck drops below the Strain Point 4 while the base is still hot (above Annealing Point). The base tries to contract later, pulling on the rigid neck.
-
The Fix: We must slow the belt speed. A heavy bottle might need a 60-minute cycle, whereas a lightweight beer bottle needs only 30 minutes. We have to give the thick base time to naturally release its heat without forcing it.
Embossing and Geometry
Sharp corners and heavy embossing (logos raised from the glass) act as Stress Risers.
Stress flows through glass like water. It concentrates at sharp changes in geometry.
-
Smooth Round Bottle: Easy to anneal. Stress distributes evenly.
-
Square Bottle / Embossed Logo: Stress gathers at the corners of the square or the edges of the logo.
If we cool these complex shapes too fast, the stress at these specific points will exceed the tensile strength of the glass. For complex molds (like our client JEmma’s custom perfume bottles), we flatten the cooling curve, reducing the "ramp down" speed to ensure these delicate features don’t crack.
| Design Feature | Thermal Characteristic | Lehr Adjustment |
|---|---|---|
| Heavy Punt (Base) | High Thermal Mass | Increase Soak Time / Slower Belt |
| Thin Walls | Low Thermal Mass | Faster Belt / Rapid Cooling Safe |
| Square Shape | Corner Stress Concentration | Slower Cooling Rate (Critical Range) |
| Heavy Embossing | Surface Area Variation | Gentle Airflow / Prevent Drafts |
Which QC methods confirm the window is correct (polariscopy stress checks, breakage rate tracking, thermal shock tests)?
How do we prove the invisible? We use light physics and destructive torture tests.
We confirm the annealing window using a Polariscope to visualize residual stress as colorful "birefringence" patterns (aiming for Grade 1 or 2), and verify structural integrity through ASTM C149 Thermal Shock testing. Additionally, tracking "cold end" breakage rates and analyzing fracture patterns helps identify if the stress is thermal (annealing issue) or mechanical (handling issue).

The Polariscope: Seeing the Rainbow
The standard tool for checking the annealing window is the Polariscope 5.
Glass is normally isotropic (light travels at the same speed in all directions). Stressed glass becomes birefringent 6 (anisotropic).
-
The Test: We place the bottle between two polarized lenses.
-
The Visual: Stress appears as a rainbow.
-
Grade 1 (Excellent): No color, or a faint grey shadow. Perfect annealing.
-
Grade 3 (Commercial): Faint blue/red bands. Acceptable for standard jars.
-
Grade 5 (Reject): Bright, defined rings of yellow, orange, and blue. This bottle is a bomb. It means the annealing window was missed.
-
Thermal Shock Testing (ASTM C149)
While the polariscope looks at light, the Thermal Shock Test looks at reality.
-
The Test: We heat a basket of bottles to 60°C and then plunge them instantly into 20°C water. (ΔT = 40°C).
-
The Logic: If the bottle has residual tension, this sudden shock will combine with the internal stress and snap the glass.
-
Pass/Fail: A properly annealed bottle should survive a ΔT of 42°C easily. If we see failures at ΔT 35°C, we know our lehr settings are wrong (likely cooling too fast).
Fracture Analysis
When a bottle breaks, we read the cracks.
-
Annealing Break: Usually a simple, clean split, often separating the bottom from the body, or a vertical crack running up the side.
-
Thermal Shock Break: Often a wavy, jagged crack around the base (the baffle line).
| Test Method | What it Measures | Standard | Target |
|---|---|---|---|
| Polariscope | Optical Retardation (Stress) | ASTM C148 7 | < Grade 2 (Premium) |
| Thermal Shock | Resistance to Temp Change | ASTM C149 8 | Survive ΔT 42°C |
| Impact Test | Mechanical Strength | In-house | Survive standard drop/impact |
| Fragmentation | Breaking Pattern | Visual | Safe/Standard break |
How can manufacturers tune lehr settings (soak time, conveyor speed, cooling zones) to avoid residual stress and post-filling cracks?
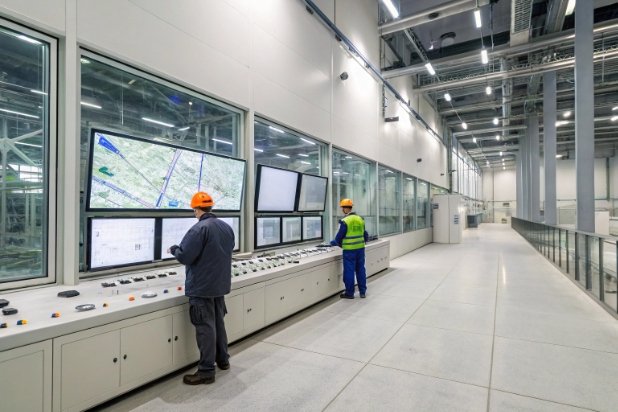
Tuning a lehr is like tuning an orchestra; every zone must be in harmony to create a perfect product.
Manufacturers tune lehr settings by adjusting the belt speed to ensure the "Soak Time" is sufficient (typically 10-15 minutes) for the glass mass, and modulating the burner and damper settings in individual zones to create a linear cooling gradient. Preventing "lehr drift" (cold air drafts) and balancing left-to-right temperature uniformity are critical to avoiding uneven stress and "checking."
The "Time-Temperature" Recipe
We control the process with three main levers:
1. Conveyor Speed (Time)
This is the master control.
-
Too Fast: The bottle doesn’t spend enough time in the Soak Zone to relax. It comes out stressed.
-
Too Slow: We lose production capacity, and the bottle might slump if it stays hot too long.
-
Tuning: For a 500g bottle, we might run at 0.5 meters/minute. For a 1kg bottle, we slow down to 0.3 meters/minute.
2. Zone Temperatures (The Curve)
A modern lehr has multiple zones (e.g., Heating, Soak, Slow Cool A, Slow Cool B, Fast Cool).
-
Re-Heat: We blast the bottles at the entrance to ensure the neck (which cooled down on the conveyor) gets back up to 554°C.
-
The Gradient: We set the dampers to drop the temp by only 5-10 degrees per minute in the Critical Range. If sensors show a drop of 20 degrees, we close the dampers to trap heat.
3. Cross-Belt Uniformity (Drift)
The lehr is wide (often 2-4 meters).
-
The Risk: The sides of the lehr are often cooler than the center (heat loss through walls). This means a bottle on the left of the belt might be annealed differently than a bottle in the center.
-
The Fix: We use "side burners" or adjust the airflow pattern to force heat to the edges. We run a "traveling thermocouple" (a sensor that rides the belt) regularly to map the temperature across the full width.
Avoiding "Cold Shock"
Finally, we ensure the exit isn’t too abrupt.
If the bottles exit the lehr at 150°C into a cold factory hall (20°C), they will suffer Cold Shock or "Checking" (surface micro-cracks).
We tune the final zones to bring the glass down to roughly 40°C-50°C before it hits the packing room air.
Conclusion
Determining the annealing window is the invisible discipline that defines the safety of glass packaging. By respecting the physics of the Strain and Annealing points and adjusting the "time-temperature" curve to match the specific geometry of the bottle, we ensure that the beautiful container you hold is as strong as it is clear.
Footnotes
-
A continuous oven used to reheat and slowly cool glass to relieve internal stress. ↩
-
The critical process of removing residual thermal stress from glass containers. ↩
-
The most common type of glass used for bottles, composed of silica, soda, and lime. ↩
-
The temperature below which glass is essentially a solid and can be cooled rapidly without creating permanent stress. ↩
-
An optical instrument that uses polarized light to detect stress patterns in transparent materials. ↩
-
An optical property where a material refracts light in two different directions, revealing stress. ↩
-
Standard test method for examining glass containers for residual stress using a polariscope. ↩
-
Standard test method for thermal shock resistance of glass containers. ↩


