A good reagent can turn unreliable because the wrong bottle lets in light, moisture, or fumes. Then the lab blames the chemistry, not the container.
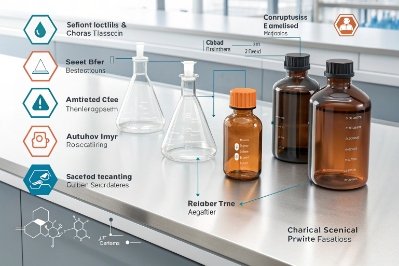
The right reagent bottle is a system: glass type + closure/liner + light protection + size that matches use rate, all backed by standards for hydrolytic resistance, light transmission, and workplace labeling.

Most people pick a reagent bottle by habit. That works until it does not. A solvent evaporates, a standard drifts, a cap sticks, or the bottle “mysteriously” cracks after a hot rinse. The better way is to choose the bottle like a small risk project. First, define what can ruin the chemical: light, oxygen, water vapor, leaching, pressure, or heat. Next, choose the container system that blocks that risk with the least friction for daily work.
This is also where lab operations matter. A teaching lab needs fast pouring and clear labels. A QC lab needs low extractables and tight sealing. A production lab needs thread standardization and inventory control. When those needs are clear, the choice becomes simple. When they are not clear, the lab ends up with ten cap types, mixed bottle grades, and constant “where is the right lid” problems.
The quick decision logic used on real shelves
1) Decide whether the chemical is light-sensitive.
2) Decide whether purity and extractables matter.
3) Decide whether volatility and fumes matter.
4) Decide whether heat cycles matter.
5) Pick the bottle size to match use rate and reduce headspace time.
| Main risk | Best first-choice container | Closure/liner default | Common mistake that causes failures |
|---|---|---|---|
| Light degradation | Amber glass | PTFE-faced liner or good PP cap system | Clear bottle “just for convenience” |
| Volatility / fumes | Glass with tight screw cap | PTFE-faced liner | Loose caps “to vent” and then solvent loss |
| High-purity analytics | Type I glass | PTFE-faced liner, minimal plastics | Cheap liners that add extractables |
| Hot cleaning or sterilization | Borosilicate Type I | Heat-stable cap/liner | Assuming all caps survive autoclave |
| Routine aqueous buffers | Type II or III (as allowed) | PP cap, simple liner | Overspending on high-spec bottles |
A reagent bottle should feel boring after it is chosen. That is a success sign. It means the bottle quietly reduces failure modes and the workflow stays smooth.
Now the choice gets easier when each part is handled one at a time: glass + closure, then light protection, then volume and markings, then standards and safety features.
This is the part that saves the most money: choosing fewer bottle systems, but choosing the right ones.
Which glass type and closure/liner match your chemicals?
The wrong match does not always fail fast. It fails slowly, then it shows up as drift, smell, haze, stuck joints, or surprise pressure.
Match glass grade to chemical aggressiveness and purity needs, then match the closure to volatility and compatibility. In most labs, Type I borosilicate with a standardized GL screw cap and PTFE-faced liner covers the widest range with the least drama.
Glass choice starts with chemical durability. Type ratings matter because they describe how glass behaves with water and aqueous solutions over time. Type I is usually the safest default for sensitive work because it has the highest hydrolytic resistance and strong thermal performance. Type II is often soda-lime glass with a surface treatment that improves hydrolytic resistance, so it can work for many aqueous reagents when the risk is moderate. Type III is soda-lime glass and is often fine for dry solids, short storage, and less demanding aqueous use, but it is not the first pick for high-purity or long storage in water.
Closure choice is often the true difference between “stable” and “annoying.” Ground-glass stoppers reduce polymer contact, but they can seize and they are slower in daily use. Screw caps are faster and safer for routine handling, but the liner becomes the real contact surface. PTFE chemical compatibility data 1 is a practical reference when choosing PTFE-faced liners for solvents and aggressive reagents. For routine buffers, a good PP cap system can be enough.
A practical workflow also benefits from standardization. GL45 (DIN 168-1) thread system 2 reduces cap chaos. One cap size across many volumes makes inventory and training easier. It also reduces the risk of cross-threading and “almost fits” sealing mistakes.
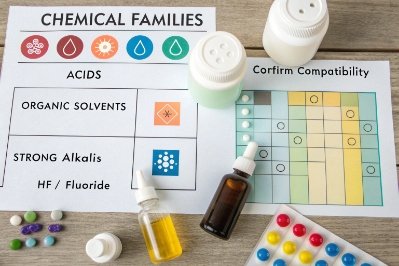
A simple compatibility map that works in real labs
- Volatile organics: glass + tight cap + PTFE-faced liner
- Strong acids: glass + PTFE-faced liner, plus good secondary containment
- Strong bases: glass can be attacked at extremes, so check SDS and consider shorter storage time or alternative materials when needed
- Oxidizers that off-gas: use supplier-recommended venting closures, not improvised loosening
| Chemical group | Glass preference | Closure preference | Notes that prevent surprises |
|---|---|---|---|
| HPLC/GC solvents | Type I | PTFE-faced liner | Low extractables and low vapor loss matter most |
| Concentrated mineral acids | Type I or suitable treated glass | PTFE-faced liner | Keep caps clean; fumes attack labels and metal parts |
| Strong alkaline solutions | Type I with caution | PTFE-faced liner | Very high pH and heat can etch glass over time |
| Salts and dry powders | Type III often OK | Wide mouth + simple cap | Choose wide mouth to reduce spills and crusting |
| Peroxide formers / oxidizers | Type I | Approved vented cap system | Pressure control must be designed, not guessed |
A “one-bottle-fits-all” approach can work if the lab chooses a strong default: Type I borosilicate + standardized GL cap system + PTFE-faced liners for the chemical groups that need it. Then add a small set of special cases, instead of buying a new bottle style for every reagent.
Do amber/UV coatings protect light-sensitive reagents?
Light damage is easy to ignore because it is silent. Then a standard shifts and the lab wastes a week checking instruments.
Amber glass is the first-line control for light-sensitive reagents because it cuts UV and blue light that drives photodegradation. UV coatings can help, but they must be proven to survive your cleaning and chemical exposure without haze or peeling.
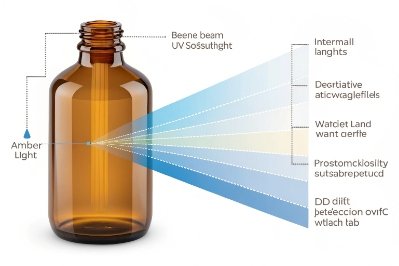
Light protection starts with wavelength, not just “darkness.” Many photosensitive chemicals respond most strongly to UV and the short visible range. Amber containers are widely used because they reduce transmission in that band. In regulated packaging contexts, “light-resistant” has measurable meaning, and the ICH Q1B photostability guideline 3 is a common reference for how light exposure is evaluated and controlled.
UV coatings and tinted coatings are a second option. They can be useful when the lab wants partial visibility or when a bottle supplier offers coating protection on clear glass. Still, coatings introduce a new failure mode: surface haze. Haze often comes from under-cured coatings, detergent attack, or micro-scratching during repeated handling. In daily lab use, the bottle gets wiped, washed, and sometimes autoclaved. If the coating cannot survive that, the bottle looks bad and the label can fail.
For many workflows, the best answer stays simple:
- amber bottle for storage
- smaller amber working bottle or amber vial for daily dispensing
- outer carton or cabinet for very sensitive chemicals
When amber is not enough
Some reagents degrade even under typical lab lighting. In those cases, amber helps, but the workflow must also reduce exposure time. Aliquoting into smaller containers reduces repeated opening and repeated light hits. That also reduces headspace exchange.
| Protection method | What it protects against | Pros in daily work | Limits to watch |
|---|---|---|---|
| Amber glass | UV + some blue light | Passive, no training needed | Not total darkness; thickness and supplier matter |
| Outer carton / cabinet | Broad light reduction | Strong protection | Slower access; needs discipline |
| UV coating on clear | Targeted wavelength reduction | Keeps visibility | Must prove durability; haze risk |
| Foil wrap | Near-total light block | Very strong | Ugly, slows handling, labels can fail |
| Aliquots | Reduces repeated exposure | Improves stability and traceability | More containers; needs labeling control |
A lab does not need to over-engineer this. It needs one clear rule: if the SDS or method says “protect from light,” amber becomes the default storage container, and the team limits exposure during transfers.
What volumes and graduation needs fit your workflow?
Wrong volume looks harmless, but it causes waste, evaporation, contamination risk, and inventory confusion.
Choose volumes that match your use rate, and choose mouth style and graduations that match how people pour, dispense, and document. In most labs, a small working bottle plus a larger stock bottle reduces headspace exposure and reduces errors.
Volume is not only “how much liquid fits.” It is also how often the bottle is opened, how much headspace sits above the liquid, and how easy it is to pour without drips. A bottle that is too large for a slow-used reagent creates long headspace time. That increases evaporation and moisture pickup. A bottle that is too small for a high-use solvent creates constant refills, which increases contamination and mislabeling risk.
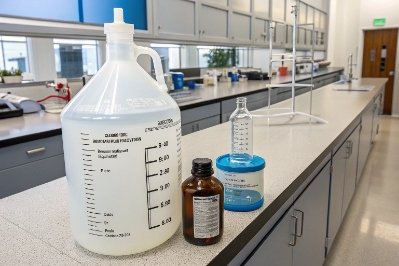
A clean pattern works well:
- store bulk in a larger bottle that stays closed most of the time
- dispense daily from a smaller working bottle
- refill the working bottle on a schedule, not randomly
Graduations are another common trap. Many reagent bottle graduations are for estimation, not for volumetric accuracy. That is still useful for inventory control and quick checks, but it should not replace a cylinder or balance when accuracy matters. For some teams, the most valuable “graduation feature” is a clear labeling panel that holds chemical-resistant labels and barcodes.
Mouth style should match the material state:
- narrow mouth: liquids and solvents, lower evaporation and fewer spills
- wide mouth: powders, viscous liquids, crystalline reagents, easier scooping and cleaning
Shape also matters in storage. Square bottles use cabinet space better and reduce rolling, but they can feel less comfortable in the hand. Round bottles pour smoothly and are easy to clean.
| Workflow situation | Recommended setup | Why it works | Small detail that helps |
|---|---|---|---|
| High-use solvent station | 1 L stock + 250–500 mL working | Fewer openings on stock | Standard GL cap across both |
| Slow-used standard solution | 100–250 mL bottle | Less headspace time | Amber if light-sensitive |
| Powders and salts | Wide mouth, 250–1000 mL | Easy access, less spill | Add a clean scoop and label it |
| Viscous reagents | Wide mouth + drip-control lip | Reduces mess | Use a compatible pouring ring |
| Inventory-controlled lab | Bottles with marking panel | Faster traceability | Barcode-ready labels |
When volume and mouth style are matched to real behavior, the lab sees fewer drips, fewer mixed-up caps, and fewer “why is this bottle half-empty” surprises.
Which standards and safety features are mandatory?
A bottle can meet your chemistry needs and still fail a safety audit. Good labs plan for both from the start.
Mandatory features depend on your sector, but most labs must meet recognized bottle standards, use compliant hazard labels for stored chemicals, and apply safety controls for leaks, pressure, and storage compatibility.

Standards matter because they reduce argument and increase repeatability. For general laboratory reagent bottles, ISO 4796-1 Laboratory glassware — Bottles — Part 1: Screw-neck bottles 4 defines common bottle series and helps keep threads and dimensions predictable for sourcing. For pharmaceutical and regulated workflows, Container Closure Systems for Packaging Human Drugs and Biologics 5 is a useful reference for qualifying container materials and closure performance in regulated contexts. Even when a lab is not “pharma,” these frameworks help the lab choose bottles that behave consistently.
Safety features are often less about the glass and more about the total storage system:
- leak resistance and clean pouring (reduces exposure events)
- chemical-resistant labeling surfaces (reduces misidentification)
- closure systems that match volatility (reduces vapor release)
- secondary containment (reduces spill spread)
- venting only when the chemical requires it, using designed caps
Labeling is a daily safety requirement in many workplaces. For secondary containers that are not for immediate use, workplace labeling must identify the chemical and communicate hazards in a way employees understand, aligned with the OSHA Hazard Communication Standard (29 CFR 1910.1200) 6 and the UN Globally Harmonized System of Classification and Labelling of Chemicals (GHS) 7. That is why label-ready panels, solvent-resistant labels, and consistent naming rules matter more than fancy bottle shapes.
A practical “mandatory” checklist stays short:
1) Bottle standard and glass grade are documented.
2) Cap and liner material are documented.
3) Light protection is documented when needed.
4) Labeling rule is enforced for stored containers.
5) Off-gassing chemicals use approved pressure management.
6) Storage segregation and secondary containment are in place.
| Area | What is “must-have” in most labs | What is “nice-to-have” | Why it matters |
|---|---|---|---|
| Bottle standard | ISO-series bottle dimensions and threads | Special ergonomic shapes | Interchangeable caps and predictable sourcing |
| Glass classification | Type by hydrolytic resistance for sensitive work | Highest grade for everything | Right grade reduces leaching risk and drift |
| Light resistance | Proven amber/light-resistant spec | Decorative tint | Protects photosensitive reagents |
| Labeling | Product ID + hazard info for stored secondary containers | Full supplier-style label on every bottle | Prevents unknowns and audit findings |
| Pressure control | Designed vented caps when required | “Loose cap” habits | Reduces rupture and vapor exposure |
| Pour safety | Drip control lip or pouring ring | Fancy spouts | Reduces skin contact and bench contamination |
When standards and safety features are treated as part of selection, the lab ends up with fewer bottle types, fewer exceptions, and fewer incidents. That is the real win. The bottle becomes a quiet control, and the chemistry stays the focus.
Conclusion
The right reagent bottle is chosen by risk: compatibility, sealing, light control, and workflow fit, then confirmed by standards for glass performance and workplace safety labeling.
Footnotes
-
Quick reference for PTFE compatibility when selecting liners for solvents, acids, and bases. ↩︎ ↩
-
Shows GL45/DIN-thread bottle details to standardize cap fit across common reagent volumes. ↩︎ ↩
-
Defines photostability testing expectations that guide light-protection choices for sensitive substances. ↩︎ ↩
-
Official screw-neck bottle standard for predictable dimensions and cap interchangeability. ↩︎ ↩
-
FDA guidance for qualifying container-closure systems in regulated drug and biologics packaging. ↩︎ ↩
-
Full text and requirements for workplace hazard communication labeling and program obligations. ↩︎ ↩
-
Official GHS framework for hazard classes, pictograms, and standardized label communication. ↩︎ ↩


