
Bad bottles do not fail in the factory. They fail on the line, in the carton, or in a customer’s hand, and the brand pays for it.
A solid quality check starts with the finish and closure fit, then moves to strength data that matches your route-to-market, and ends with tight grading rules for color, weight, and defects using clear AQL limits.

The real goal is not “pretty glass.” The goal is a bottle that seals every time, runs fast, ships safely, and still looks premium under retail lights. A good system uses measurements and simple tests, not opinions.
How do I verify T-top fit with the right neck ID/OD and finish geometry?
A T-top that feels fine by hand can still leak, pop, or sit crooked after filling, because the neck bore and finish land are slightly off.
The key checks are neck ID/OD with gauges, finish concentricity and ovality, insertion feel, and a short leak check using your exact T-top and filling conditions.
Use the closure spec sheet as the “boss”
For bar-top (T-top) closures, the closure supplier usually defines the target neck bore range, finish outer geometry, and insertion depth. That document should drive the bottle drawing, not the other way around. If the closure spec is missing, the project is already at risk.
A common failure pattern shows up when samples were made with one mold set, then mass production moved to a different set and the neck bore shifted slightly smaller. The stopper still enters, but it compresses too much and rebounds later. Leaks start during distribution.
Measure the neck like a machinist, not like a shopper
Three dimensions matter most:
- Neck ID (bore): drives stopper compression and seal.
- Neck OD / finish OD: drives cap skirt clearance and aesthetics.
- Finish land geometry and depth: drives how the top sits and how straight it looks.
Basic tools that keep people honest:
- Plug gauge for neck ID (go/no-go)
- Ring gauge or calipers for key OD points
- Simple concentricity check (visual + dial indicator if available)
- Ovality check at two angles (90° apart)
Fit test: focus on repeatability, not “one good bottle”
A fit test should use a small sample set, not one hero sample. For example, pull 30–50 bottles across a run, then test with closures from the same lot you will use in production. Track how many:
- insert smoothly without tearing
- sit flush at the target height
- show visible tilt or rocking
- need “extra force” that operators will hate
| Fit item | What to record | What it tells you |
|---|---|---|
| Neck ID | Go/no-go pass rate + measured range | Seal risk and insertion force risk |
| Ovality | Max-min ID or OD | “Crooked” tops and uneven seal |
| Concentricity | Visual tilt + simple runout | Premium look and label alignment |
| Insertion depth | Target vs actual | Consistent shelf appearance |
| Removal feel | Subjective + pull-out test later | Consumer experience and tamper feel |
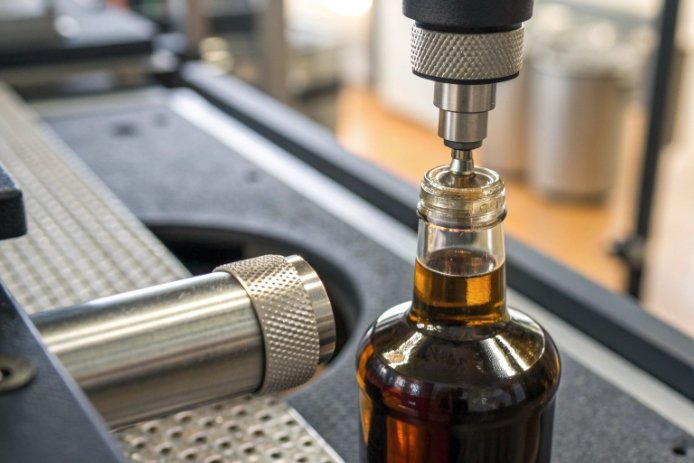
Which torque, insertion, and pull-out tests prove the closure will hold during real use?
Closures fail in boring ways. A customer pours, the top lifts, or the closure slowly walks out during vibration, and the bottle becomes a refund.
For T-tops, focus on insertion force, pull-out force, leakage checks, and vibration/handling retention; for screw caps, add application torque, removal torque, and strip checks tied to your capper settings.
T-top: “torque” is not the main number
With T-tops, the best predictors are usually:
- Insertion force: too high means slow line speed and torn stoppers.
- Pull-out force: too low means pop-outs and walk-outs.
- Leak check: quick and practical beats fancy and slow.
A simple test plan that works:
1) Condition bottles and closures to the same temperature you fill at.
2) Insert closures with a consistent method (hand jig or small press).
3) Wait a set time (example: 24 hours) to allow elastic recovery.
4) Run pull-out force on a basic force gauge.
5) Do a leak test with inverted bottles for a set time and temperature.
If there is any coating or lubrication on the bore, it changes friction. That must be stable from run to run.
Screw caps: torque is a system, not a single spec
If your spirits bottle uses a screw closure, torque depends on:
- finish thread accuracy
- cap liner material
- capper head and speed
- lubrication and coating
- glass surface condition
If you want a reference for how torque retention is measured in a repeatable way, use ASTM D2063/D2063M torque retention test methods for continuous-thread closures 1.
Key numbers to track:
- Application torque (capper target): what the line applies.
- Removal torque: what the user sees.
- Bridge break / TE band behavior: if tamper-evident is required.
- Strip torque / thread damage: whether threads fail under stress.
Build “pass/fail” bands that match real production
The best torque targets come from your closure supplier and your capper capability. The worst target is one invented in a meeting. A short line trial with 100–300 bottles is often enough to set realistic bands.
| Closure type | Test | Why it matters |
|---|---|---|
| T-top | Insertion force | Line speed, stopper damage |
| T-top | Pull-out force | Walk-out and pop-out risk |
| T-top | Inversion leak hold | Seal under real use |
| Screw cap | Application torque | Seal and TE performance |
| Screw cap | Removal torque | Consumer experience |
| Screw cap | Strip check | Thread integrity and rejects |
Do drop and pressure tests really match route-to-market risks for spirits?
A lab drop test can pass and the shipment can still arrive with breakage, because the real risk is not a single drop. It is repeated shocks, stacking load, and carton crush.
Drop data helps when it matches your actual pack format and handling points, while pressure data matters mainly for stacking and impact behavior, not carbonation; route-to-market needs carton, pallet, and vibration thinking.
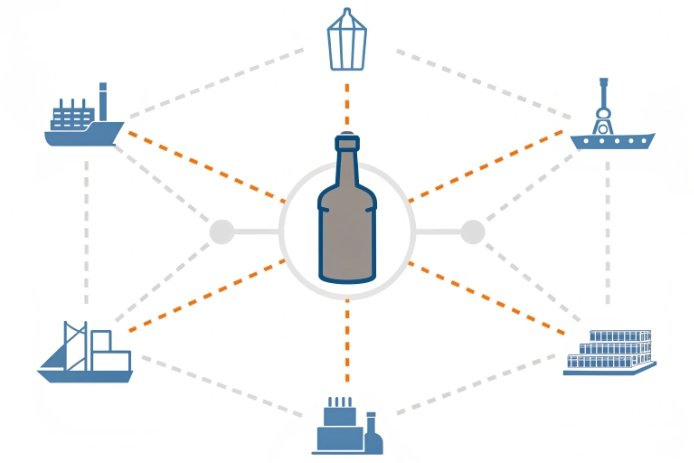
Map your route-to-market first
Before any test, write down the path:
- factory palletizing
- container loading
- ocean transit vibration
- port handling
- warehouse stacking
- distributor handling
- retail shelf or direct-to-consumer shipping
Each channel has a different “damage fingerprint.” Ocean freight often creates scuffs and micro-cracks from vibration—exactly what ASTM D999 vibration testing of shipping containers 2 is designed to reveal in the lab.
Drop tests: make them honest
A useful drop test is not “drop a single bottle on concrete.” It is:
- Drop the packed shipper carton from realistic heights (many teams align this to ASTM D5276 drop testing of loaded containers 3)
- Hit the weak spots: corners, edges, and flat faces
- Use the exact divider design and tape pattern
- Check not only breakage, but also scuffing and label panel damage
If bottles are shipped empty in bulk cartons, carton integrity is the main barrier. If bottles are shipped filled (less common for import), then headspace and closures add new risks.
For DTC parcels, it’s often practical to benchmark your shipper against ISTA 3A parcel delivery simulation guidance 4 so your test sequence matches carrier-style shocks and drops.
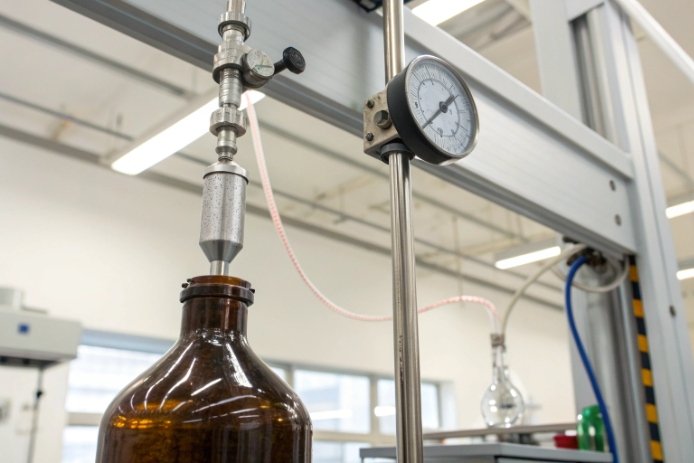
Pressure data: use it for strength and consistency
Spirits are not pressurized like soda, but pressure testing can still help as a proxy for:
- glass strength consistency
- weak points at shoulder and heel
- forming defects that hide until stress appears
Also use top-load (vertical load) to model pallet stacking—carton and unit-load limits are commonly tied to ASTM D642 compressive resistance testing 5. Many losses happen from carton crush and pallet shift, not from pressure alone.
| Risk point | Best test focus | What to look for |
|---|---|---|
| Ocean freight | Vibration + pallet stability | Scuffs, micro-cracks, carton wear |
| Warehousing | Top-load + carton compression | Crushed cartons, leaning pallets |
| DTC parcels | Pack drop tests | Corner hits, divider failure |
| Retail handling | Bottle-on-bottle contact checks | Heel chips, shoulder scuffs |
Premium glass is judged in seconds. A slight color shift or a light bottle in a heavy-base set can make a shelf look uneven, even if the bottle is “within spec.”
Premium grading uses tight weight and dimension bands plus objective color control, often with approved masters; color uniformity and glass distribution matter as much as total weight for the premium feel.
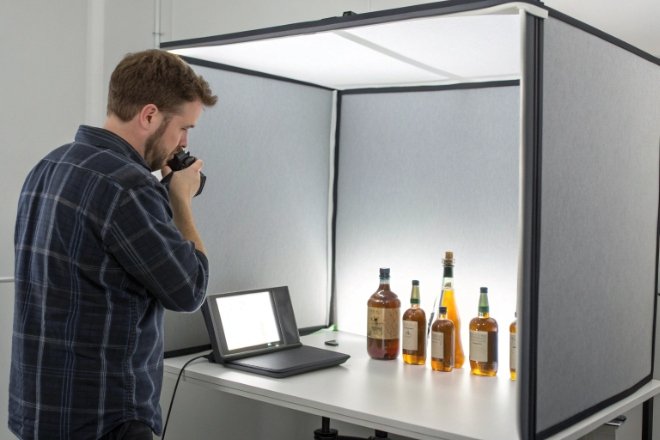
Color: control what customers notice
Color problems show up as:
- batch-to-batch shade shift
- streaky panels
- haze or poor clarity
- uneven thickness that changes how light passes through
The cleanest method is to use an approved master sample under a defined light source, and then measure color using CIE 1976 L*a*b* colour space 6 values if the program is large enough. When brands skip a master, every shipment becomes an argument.
Premium programs often tighten:
- shade variation limits
- allowable cords and haze
- clarity requirements on label panels and front faces
Weight: heavy is not always better, but consistency is
Weight affects:
- perceived value in hand
- freight cost
- breakage behavior in cartons
For premium SKUs, the target is usually tight weight tolerance and stable wall thickness, so every bottle feels the same. Underweight pieces often have thin shoulders or heels. Those areas chip and crack first.
A fast floor check that catches issues:
- weigh a sample set across a run
- do simple wall-thickness comparisons at known points (even a basic thickness gauge helps)
- compare heel and shoulder feel against an approved bottle
| Grade level | Color control | Weight control | Typical use |
|---|---|---|---|
| Premium | Master sample + tight visual match, optional Lab* tracking | Tight tolerance and stable distribution | Flagship spirits |
| Standard | Visual match to master under normal light | Moderate tolerance | Core range |
| Economy | Broad visual acceptance | Broad tolerance | Price-led SKUs |
What AQL levels separate cosmetic from critical defects in spirits bottles?
If every small bubble is treated like a crisis, production becomes slow and expensive. If serious defects are treated like “cosmetic,” leaks and injuries become the brand’s problem.
Critical defects should use near-zero acceptance, major defects should be very tight, and minor cosmetic issues can use looser AQL; the split depends on whether the defect can hurt sealing, safety, or line efficiency.
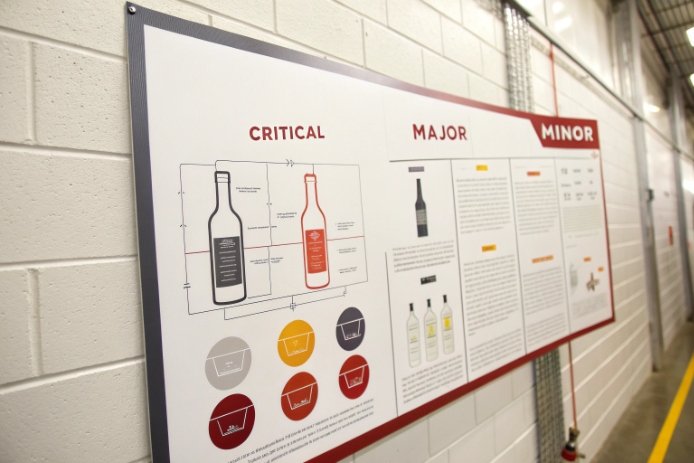
Define defects by consequence, not emotion
A simple rule works:
- Critical: can cause injury, leakage, or regulatory failure.
- Major: can stop the line or cause high rejects at filling.
- Minor: does not affect function, only appearance, and is not visible at normal distance.
Examples:
- Critical: cracks, sharp edges, chips on sealing surface, wrong finish, severe deformation
- Major: heavy scuffs on display face, serious ovality, stones near the surface, bad printing that affects legal info
- Minor: small bubbles in non-display zones, light scuffs under a defined size, faint mold marks
Use tight AQL for function, looser AQL for looks
In many spirits programs, a practical structure is:
- Critical defects: effectively zero tolerance (very low AQL, or 100% check on critical points like finish)
- Major defects: tight AQL
- Minor defects: higher AQL, but still controlled on premium SKUs
To keep sampling consistent between supplier and buyer, base your lot-by-lot inspection plan on ISO 2859-1 AQL sampling schemes 7 instead of inventing pass/fail rules mid-shipment.
What matters is that the plan is written and consistent. When AQL is vague, the supplier inspects one way and the buyer inspects another way.
| Defect class | What it impacts | Typical control approach |
|---|---|---|
| Critical | Safety, seal, compliance | Near-zero acceptance + finish checks |
| Major | Line efficiency, premium look | Tight AQL + clear defect photos |
| Minor | Small visual issues | Looser AQL, tighter for premium SKUs |
Make inspection repeatable with photos and zones
AQL works best when paired with:
- defect photo standards
- inspection lighting definition
- viewing distance and angle
- defined zones (front face vs back, label panel vs heel)
This turns “looks bad” into “fails rule X,” and the argument disappears.
Conclusion
A quality spirits bottle is proven by closure fit data, route-to-market strength tests, and tight grading rules for premium looks, all backed by clear AQL defect limits.
Footnotes
-
Standard torque retention method for continuous-thread closures; set realistic torque specs. ↩︎ ↩
-
Vibration test methods to simulate transport shaking and expose micro-crack/scuff risks. ↩︎ ↩
-
Drop-test procedures for loaded cartons to validate pack design and handling heights. ↩︎ ↩
-
ISTA overview of 3A parcel testing; align DTC packs with carrier hazards. ↩︎ ↩
-
Compression testing standard for cartons/unit loads; supports top-load limits and stacking validation. ↩︎ ↩
-
Official CIE guidance for calculating Lab* coordinates and color differences. ↩︎ ↩
-
ISO AQL sampling schemes for attribute inspection; define cosmetic vs critical acceptance clearly. ↩︎ ↩


