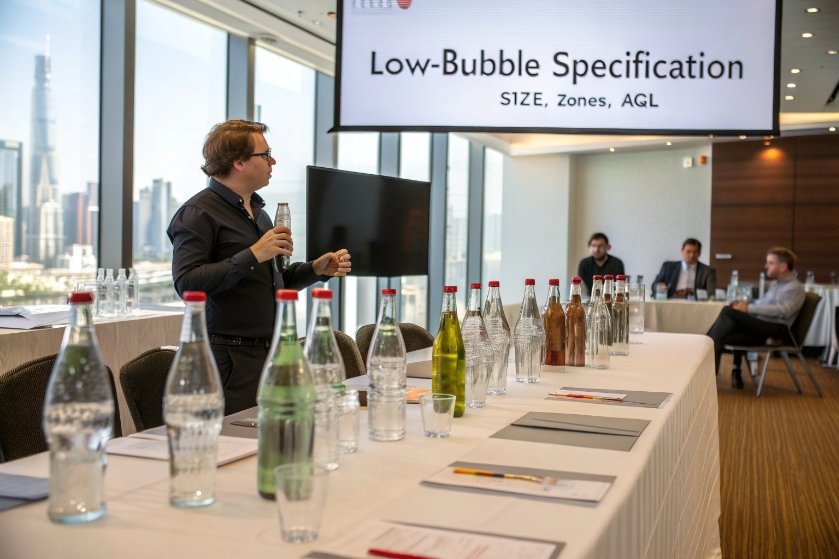
Many buyers ask for “no bubbles at all,” then discover that without a clear spec, every factory and every inspector has a different idea of what that means.
To source low-bubble glass bottles, you need clear bubble/cord specs on drawings, robust supplier audits and sampling plans, proven furnace process controls, and simple inspection tools like light tables and polariscopes in your QA routine.

In my experience, the biggest shift happens when bubbles stop being a “feeling” and become measurable. Once you define size, zone, AQL, and test methods, you can compare suppliers fairly, reject bad lots with confidence, and reward good process control instead of lucky runs.
What specifications and AQLs should drawings state for bubbles and cords?
Most bubble problems start at the drawing and PO level. If the spec only says “no visible bubbles,” you will get endless arguments at incoming inspection.
Your drawings and QA spec should define bubble and cord types, size limits, zones, and AQL levels, using clear defect categories like seeds, blisters, cords, and stones.
Turning “no bubbles” into a clear, inspectable spec
A good bubble/cord spec does three things: it uses standard language, it describes where defects matter most, and it connects those rules to a sampling and AQL plan.
1. Use common defect names
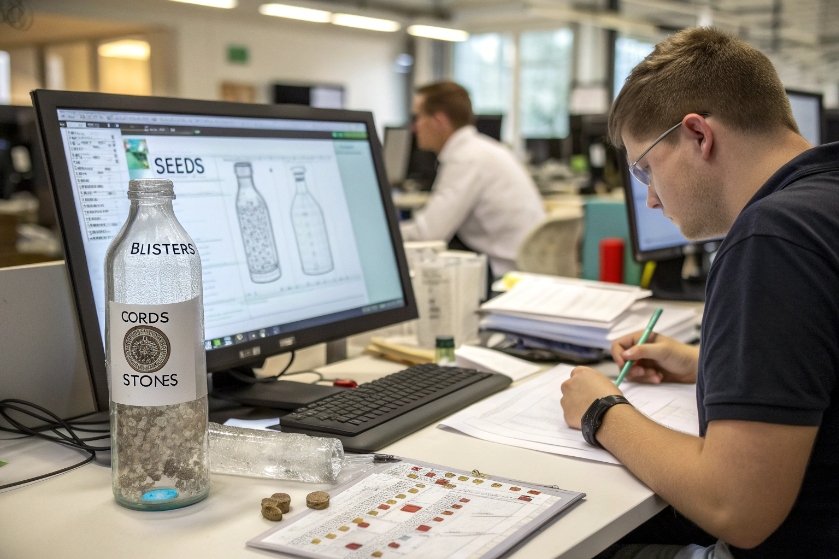
Start by naming defects the same way your glassmaker and inspectors do. If you need a neutral reference to align terminology, use glass industry glossary definitions for seeds, blisters, and related bubble terms 1. For example:
- Seeds – tiny internal bubbles, fully enclosed in the glass.
- Blisters – larger bubbles, often near the surface; may be open or closed.
- Cords / lines – streaks or strings of different refractive index (unmixed glass).
- Stones / knots – unmelted or devitrified bits, not bubbles but often grouped with them.
Once these terms are on the drawing and QA spec, everyone talks about the same thing.
2. Define zones, size bands, and counts
Not all parts of a bottle are equal. You can protect critical areas while being realistic in less visible zones.
Common practice:
- Zone 1 – finish, sealing surface, upper neck.
- Zone 2 – shoulder and main viewing panel.
- Zone 3 – back panel and lower body.
- Zone 4 – base and push-up.
Then set size bands (you can use millimeters or simple “pinhead / match-head” references with master samples). For example:
- Seeds ≤ 0.5 mm
- Medium bubbles 0.5–1.0 mm
- Large bubbles > 1.0 mm
Now combine zones and size bands:
| Zone | Seeds (≤0.5 mm) | 0.5–1.0 mm bubbles | >1.0 mm bubbles / open blisters |
|---|---|---|---|
| Zone 1 | Not allowed in sealing surface | Not allowed | Critical defect, automatic reject |
| Zone 2 | Max 1–2 per bottle within AQL | Limited, no clusters | Not allowed |
| Zone 3 | Small number allowed within AQL | Limited, size and count defined | Not allowed |
| Zone 4 | Limited seeds allowed | Case by case, depending on product | Not allowed if on support surface |
You do not need very complex rules. Simple tables like this remove most of the debate at inspection.
3. Link to AQL and sampling
Once sizes and zones are clear, connect them to a sampling plan. For example:
- Critical defects (finish bubbles, open blisters, large cords crossing the seal): AQL 0.
- Major defects (large bubbles in shoulder or viewing panel): tight AQL (for example, 0.4–0.65).
- Minor defects (tiny seeds in back panel): more relaxed AQL (for example, 1.5–2.5).
Use a standard such as ISO 2859-1 sampling schemes indexed by acceptance quality limit (AQL) 2 and define sample size per lot. If your team needs a simple baseline definition to avoid “AQL means whatever we want,” align on ASQ’s Quality Glossary definition of Acceptance Quality Limit (AQL) 3. This turns “too many bubbles” into a simple pass/fail decision against an agreed plan.
Which supplier audits, sampling plans, and PPS checks reduce bubble defects?
A beautiful drawing is only useful if the factory can truly meet it. That is where audits, sampling plans, and pre-production samples make the difference.
To reduce bubble defects, audit your suppliers’ melting and inspection systems, use structured sampling and AQL at incoming, and always run Pre-Production Samples (PPS) or First Article Approval focused on seeds and blisters before full decoration or filling.
Building a supply chain that naturally produces low-bubble glass
Instead of chasing bubbles lot by lot, the target is to choose and train suppliers whose process makes bad lots rare.
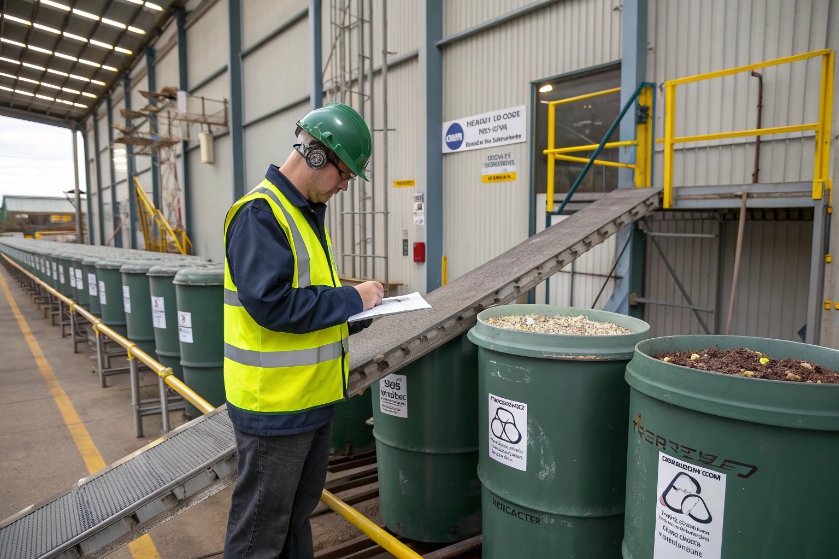
1. What to check during supplier audits
During on-site audits, spend real time at:
- Batch house and cullet yard – How do they clean, sort, and cover cullet? How do they control batch moisture?
- Furnace control room – Do they log melting and refining temperatures? Redox? Fining agent dosing?
- IS machine and hot-end – What is their mold maintenance and vent-cleaning routine? How often do they adjust gob temperature?
- Inspection line – Do they use automatic sidewall/finish inspection? How are thresholds set for bubbles and blisters?
Look for written work instructions and actual practice. A factory with clear SOPs, trained staff, and records for adjustments is more likely to keep bubble levels stable.
2. Sampling plans for incoming QC
At your own warehouse or filling site, treat bubbles as a defined defect group in incoming inspection:
- Use the same zones and size bands from your drawing.
- Apply an AQL sampling plan to each lot.
- Record bubble type, location, and count per sample.
This data gives you a pattern. If a supplier’s bubble rate is drifting up, you will see it early and can start a joint investigation before a major complaint or recall.
3. PPS / First Article Approval focused on bubbles
Before any large run, especially when:
- You use a new mold,
- You change color, cullet ratio, or glass type, or
- You move production to a new plant,
ask for PPS or First Article samples and check:
- Bubble density and distribution under strong backlight.
- Cords or refractive streaks in the viewing area.
- Finish integrity with magnification.
Approve the bottle only after bubble quality meets the spec. This is much cheaper than rejecting decorated or filled product.
4. Partner mindset, not just policing
Suppliers respond much better when they see you as a partner, not just an inspector. Share your defect photos, your risk zones, and your test results (for example burst or impact failures near bubbles). When they see how bubbles hurt your line, they are more willing to tune their process for you.
What process controls—fining agents, refining time, annealing—help reduce bubbles and cords?
Even the best supplier cannot deliver low-bubble glass if the furnace is starved of time, temperature, or fining agents. These controls live inside the factory, but you can still ask smart questions about them.
Low-bubble glass comes from clean batch and cullet, enough melting and refining time, correct fining chemistry, good redox and temperature control, and proper annealing that removes stress without creating new defects.
What a well-controlled furnace does differently
You do not need to run the furnace yourself, but if you understand the main levers, you can tell which suppliers take them seriously.
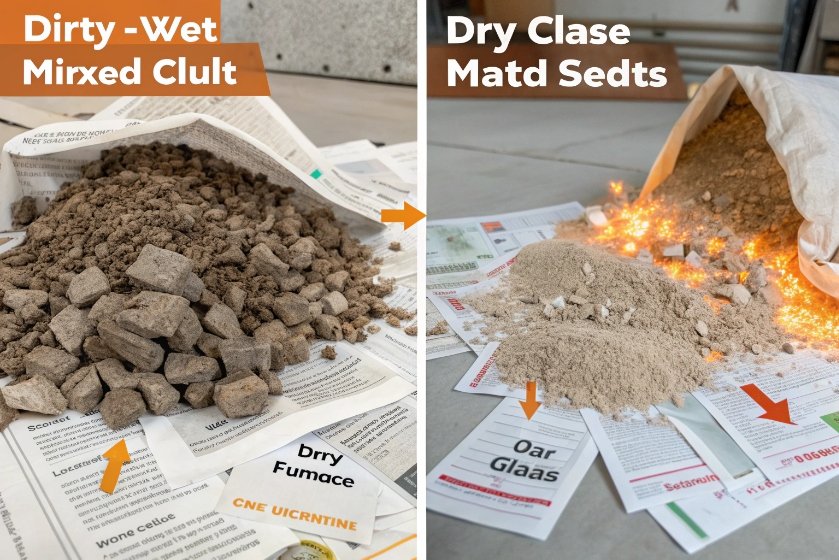
1. Clean batch and controlled cullet
The process starts before the furnace:
- Clean cullet with labels, paper, and organics removed reduces gas from burning contaminants.
- Dry batch and cullet avoid steam bubbles from moisture.
- Even particle size and good mixing prevent local pockets of gas release and cords.
If you want an “outside the factory” reference point for what counts as acceptable cullet cleanliness, look at how cullet must meet rigorous industrial specifications for closed-loop container-glass recycling 4.
When suppliers cut corners here, you see it later as more seeds and cords, especially in deep-section bottles.
2. Fining agents and refining time
In the furnace, fining agents help tiny gas seeds grow and rise out of the melt. The exact agents vary by glass type, but the idea is simple: high enough temperature, enough time, and the right chemistry to let bubbles escape before the glass moves forward. If you want a technical refresher to guide your audit questions, this lecture on melting and fining processes in industrial glass furnaces 5 lays out the core mechanisms.
Key questions you can ask:
- What is the target refining temperature range for this color/glass?
- How long is the glass held in the refining zone?
- How do they monitor bubble counts (for example, with routine melt checks or set “seed counts” per ton)?
When fuel prices go up, some plants try to reduce temperature or shorten refining time. If your product is sensitive, insist that your spec is tied to stable refining conditions, not just output volume.
3. Redox, combustion, and cords
If the furnace runs too “reducing” (too much fuel, not enough oxygen), more gases like CO can form in the melt. Oxidizing conditions, if not balanced, can cause other issues. Stable redox control helps keep both bubbles and cords down.
Cords often come from poor mixing or temperature stratification in the furnace and forehearth. They show up as streaks that bend light. For premium flint, insist on cord limits in the spec, not just bubbles.
4. Annealing and residual stress
Annealing does not remove existing bubbles, but it protects you from a dangerous combination: bubbles plus high residual stress.
In a poorly annealed bottle, stress inside the wall may be very high. A seed bubble in a stressed region becomes a perfect start point for cracks, especially under internal pressure or thermal shock.
Ask suppliers:
- How do they control the annealing lehr curve for your bottle?
- Do they use a strain viewer or polariscope to check residual stress regularly?
- Is stress part of their release criteria for each run?
A good plant will answer easily and show records. A weak plant will treat annealing as a black box.
Which inspection tools (polariscope, light table) help you verify quality?
You do not need a full lab to control bubbles and stress. Simple, low-cost tools already tell you a lot if you train people to use them.
Use a good light table for visual bubble and cord checks, a polariscope or strain viewer for residual stress, and, where possible, automated camera inspection to catch bubbles and blisters in high-speed production.
Building a practical inspection toolkit
The goal is not to see “everything,” but to have consistent, repeatable ways to judge each lot against your spec.
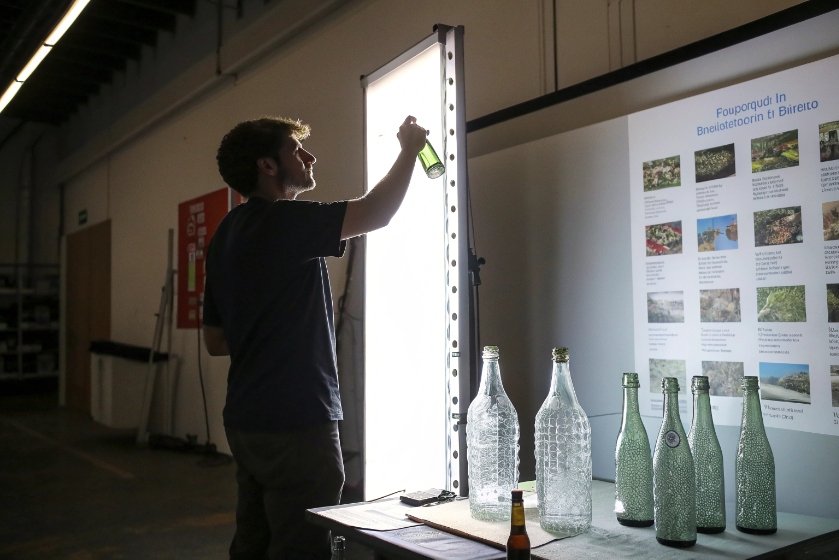
1. Light table or light box
A simple white-light table or vertical light screen is still one of the most powerful tools:
- Inspect bottles in rotation to see bubbles and cords move across the background.
- Compare samples to master reference bottles that represent the worst acceptable level.
- Use this for PPS, first article approvals, and routine incoming checks.
With a stable light source and defined viewing distance, different inspectors will make more consistent decisions.
2. Polariscope / strain viewer
A polariscope shows residual stress as colored patterns in the glass. If your team needs a quick, practical reference for what the colors mean, start with polariscope strain viewers for qualitative residual-stress verification 6. While this does not measure bubbles directly, it tells you how dangerous those bubbles might be in use.
- Strong color bands at the finish, shoulder, or base suggest high stress.
- If a bottle has visible bubbles and strong stress, treat it as higher risk for breakage.
- Use polariscope checks as part of supplier qualification and periodic audits.
For premium or high-pressure applications, this tool is worth its cost many times over.
3. Automatic camera inspection
If you work with medium or large volumes, ask your supplier to use automatic inspection for:
- Sidewall defects – bubbles, cords, and stones.
- Finish defects – blisters, chips, and checks.
- Base inspection – bubbles or stones near the standing ring.
Share your defect catalog and ask them to tune thresholds to your bubble spec. This avoids a gap where the supplier’s system says “OK” but your inspector says “reject.”
4. Simple QC aids on your side
Even without heavy equipment, your own QA team can:
- Use a 10× loupe or small microscope to judge bubble size and whether blisters are open or closed.
- Keep a photo library of acceptable and non-acceptable examples, matched to your zones/spec.
- Run stress-related performance tests (internal pressure, vertical load, thermal shock) on lots that show unusual bubble levels.
For troubleshooting and supplier conversations, it also helps to keep a shared reference like the Emhart Glass container defect causes and remedies guide 7 so both sides use the same defect names and likely causes.
Conclusion
To source truly low-bubble glass, combine a clear bubble/cord spec, disciplined AQL and PPS routines, strong furnace process control at your suppliers, and simple but effective inspection tools like light tables and polariscopes.
Footnotes
-
Standardizes “seed” and “blister” terminology so suppliers and inspectors classify bubbles consistently. ↩ ↩
-
ISO baseline for acceptance-sampling plans tied to AQL, useful for pass/fail decisions in incoming inspection. ↩ ↩
-
Plain-language AQL definition to prevent misunderstandings when writing specs and negotiating defect limits. ↩ ↩
-
Explains why cullet cleanliness and contamination thresholds matter for remelt quality and bubble stability. ↩ ↩
-
Technical overview of fining, gas removal, and viscosity/time effects that directly influence bubble rates. ↩ ↩
-
Shows how polariscopes visualize residual stress, helping you judge risk when bubbles and stress overlap. ↩ ↩
-
Defect photo catalog and likely causes/remedies—useful for audits, corrective actions, and consistent inspection calls. ↩ ↩


