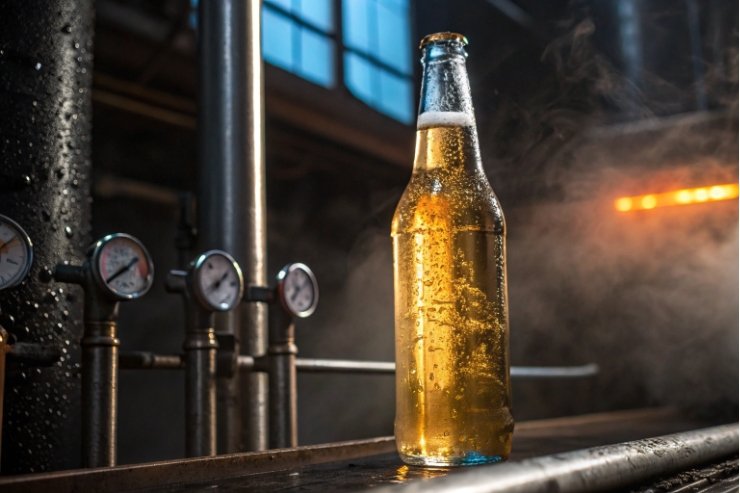
Hot-fill and carbonation can turn a weak bottle into a claim factory. One crack at the heel, one leak at the finish, and the whole batch becomes a problem.
Glass bottles survive heat and pressure because the glass recipe, thickness distribution, annealing, and surface protection work together to keep tensile stress low and prevent tiny scratches from becoming cracks.
A bottle is not “strong” by accident. Strength is designed into geometry, controlled in forming, protected by coatings, and proven by test plans that match hot-fill or carbonation reality.
How do geometry and thickness distribution raise burst strength?
A bottle rarely fails in perfect conditions. It fails when pressure rises, the bottle gets bumped, and stress concentrates at one weak zone.
Burst strength improves when the bottle uses smooth curves, strong heels and bases, and tight thickness control so internal pressure spreads evenly instead of focusing on thin spots.
Why shape matters more than people expect
Glass is very strong in compression and much weaker in tension. Internal pressure creates tensile stress in the sidewall and shoulder. The simplest way to think about it is: pressure tries to “inflate” the bottle, and the bottle fights back with wall thickness and curvature. When the bottle has continuous curves (rounded shoulders, smooth body transitions), stress flows around the surface. When the bottle has sharp transitions, stress concentrates and cracks start.
Thickness distribution is the second lever. A bottle does not need to be thick everywhere. It needs to avoid thin zones in high-stress regions. The usual danger zones are the shoulder transition, the heel (where the sidewall meets the base), the base ring, and the finish area near the sealing land. If any of those zones are thin or scratched, burst performance drops fast.
How manufacturing choices control thickness
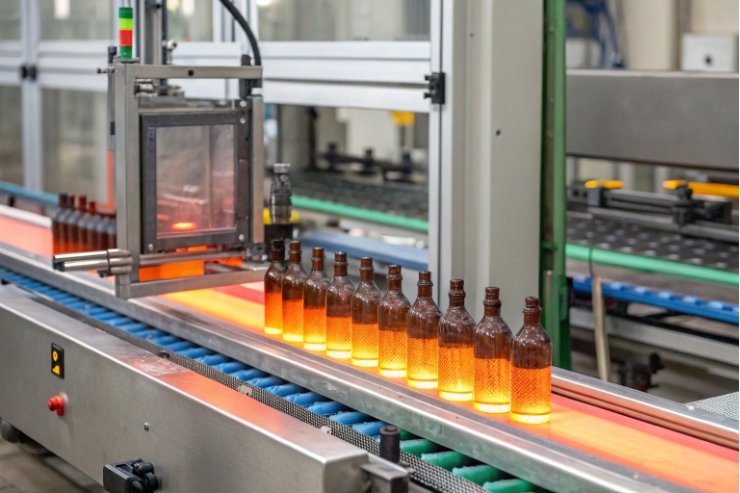
Forming method and timing influence distribution. The narrow-neck press-and-blow (NNPB) forming process 1 is often used when better distribution and lightweighting are required, because it places glass more predictably into the shoulder and body compared with traditional blow-and-blow. Better distribution means fewer thin spots and fewer “surprises” during pressure testing.
Design features that raise pressure tolerance
A strong pressure-capable bottle usually includes:
- Rounded shoulders with no sudden angle change
- A stable base ring and a well-designed push-up (punt) to support stacking and impact
- A generous heel radius to reduce crack initiation
- A finish that stays round (low ovality) so the closure can seal evenly
| Design lever | What it improves | Why it helps under pressure | Common mistake |
|---|---|---|---|
| Rounded shoulders | Burst + impact margin | Reduces stress concentration | Sharp shoulder “step” for styling |
| Controlled wall thickness | Burst consistency | Removes thin spots that fail early | Over-lightweighting without mapping stress |
| Strong heel radius | Crack resistance | Stops cracks at wall-to-base junction | Thin heel to save glass cost |
| Stable base ring/punt | Handling + stacking | Spreads load and reduces wobble | Cosmetic punt depth without structure |
| Low finish ovality | Seal reliability | Closure compresses evenly | Measuring only one diameter, missing ovality |
A practical rule used in real projects
When pressure is part of the product (carbonation, nitrogen dosing, or pressure cycles), bottle geometry should be chosen first, and branding details should be added second. A beautiful bottle that fails on the filler is not premium. It is expensive scrap.
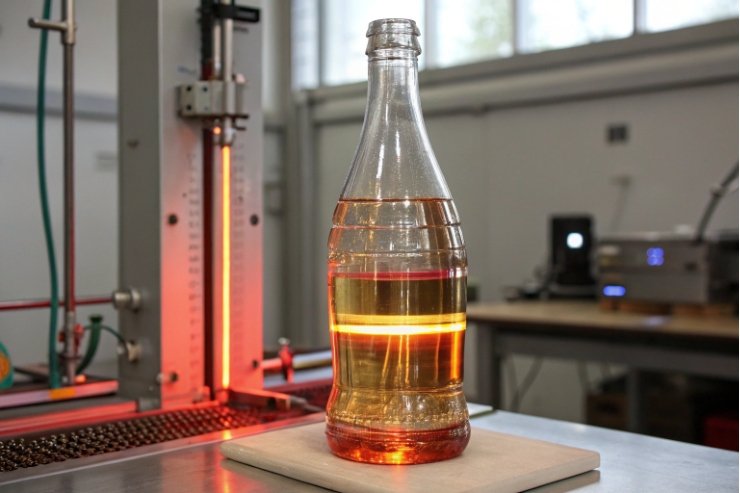
How do low-CTE glass and tempering improve delta T?
Thermal shock is not about “high temperature.” It is about temperature difference (ΔT) across the glass thickness. A bottle can handle hot liquid if the whole bottle warms evenly. It cracks when one part heats or cools much faster than another.
Low-CTE glass reduces thermal strain during ΔT swings, and tempering or proper annealing adds surface compression that resists crack growth during rapid heating or cooling.
What controls thermal-shock survival
Thermal stress rises with three things:
1) higher ΔT (bigger hot-to-cold jump),
2) faster heat transfer (sudden quench or rinse),
3) and higher residual stress from manufacturing.
Lower coefficient of thermal expansion (CTE) 2 helps because the glass expands and contracts less for the same temperature change. Borosilicate glass containers 3 are the classic low-CTE choice when thermal shock resistance is the main goal. Many food and lab containers use it for that reason. For most wine and spirits bottles, soda-lime container glass is still the standard because it is cost-effective and strong enough when the process window is controlled.
Tempered and strengthened options
Thermal tempering (tempered glass) 4 puts the outer surface in compression and the inner core in tension. That surface compression helps because surface cracks need tensile stress to open and grow. With compression, small cracks stay “closed” longer. Chemical strengthening (ion exchange) can create a similar compression layer for some glass types, though it is less common for large, high-volume bottles.
Tempering is not a free upgrade. Tempered containers can break into many pieces when they fail. That can be safer in some contexts, but it changes failure mode and may complicate line handling. For most hot-fill programs, controlled annealing and good bottle design are the more common solutions.
Annealing is the foundation
Annealing in a lehr reduces residual stress by reheating the newly formed bottle into a stress-relief range, then cooling it in a controlled way. If annealing is weak, thermal shock performance collapses because the bottle starts the process already “stressed.” Strong annealing control is often the quiet difference between bottles that survive pasteurization and bottles that crack at the base ring.
| Option | What it changes | Best use case | Trade-off |
|---|---|---|---|
| Low-CTE glass (e.g., borosilicate) | Lowers thermal strain | Wide ΔT, harsh rinse/pasteurization | Cost and supply differences |
| Better annealing control | Lowers residual stress | Almost every bottle program | Requires tight lehr control |
| Tempering/strengthening | Adds surface compression | Special safety or high-impact needs | Different break behavior |
| Design changes (thickness + radii) | Reduces local stress | Hot-fill + pressure combos | May add glass weight |
The practical hot-fill mindset
For hot-fill, the goal is to reduce peak ΔT at the bottle surface. That usually means controlling rinse temperatures, avoiding sudden cold-water quench, and ensuring bottles are not stored in a cold room and then hit with hot product instantly. Packaging design helps, but process discipline is what keeps ΔT predictable.
Which coatings reduce scuff and crack initiation?
Many failures that look like “pressure problems” are actually “scratch problems.” A tiny scuff at the heel can cut real strength dramatically, then pressure finishes the job.
Hot-end oxide coatings improve surface durability, and cold-end lubricity coatings reduce friction and scuffing, which lowers crack initiation during conveying, packing, and distribution.
Why scuff control protects pressure and heat performance
Glass cracks almost always start at the surface. A scratch is a ready-made crack starter. Once the surface is damaged, the bottle’s safety margin drops. That is why coating is not only cosmetic. It protects the strength designed into geometry and thickness.
Hot-end coatings: the “hard foundation”
Hot-end coating 5 is applied when bottles are still hot, right after forming and before full cooling. Tin-oxide-based systems are common in container lines. The hot-end layer improves scratch resistance and provides a good base for the cold-end layer to behave consistently. When hot-end coverage is uneven, scuff patterns can become uneven too, and some bottles take more damage than others in the same case.
Cold-end coatings: the “slip layer”
Cold-end coatings are applied later, when the bottle is cooler at the cold end. These are often polyethylene or wax-like systems that reduce friction on conveyors and between bottles. Lower friction reduces abrasion, reduces jam events, and improves pack-out quality. It also helps bottles retain more of their original pressure and thermal-shock tolerance because fewer micro-scratches accumulate.
Coatings must be compatible with labels and decoration
Coatings can change surface energy. That matters for pressure-sensitive labels, screen printing, hot stamping, and matte finishes. If a bottle will be labeled on a high-speed line, a coating system should be paired with the correct adhesive. If a bottle will be decorated (frosted, painted, electroplated), the coating plan must be aligned so adhesion and cleanliness stay stable.
Secondary packaging is part of “coating effectiveness”
Even a perfect coating cannot survive bad packaging rub. Dividers, anti-slip sheets, corner boards, and stable stretch wrap reduce bottle-to-bottle contact and carton collapse. That prevents scuffs and protects the coating layer. If the route is rough, packaging is the second line of defense after coatings.
| Protection layer | What it prevents | Why it matters for heat/pressure use | Quick QA check |
|---|---|---|---|
| Hot-end oxide | Early scratch damage | Preserves designed strength | Coverage uniformity + scuff inspection |
| Cold-end lubricity | Conveyor and case abrasion | Reduces micro-crack initiation | COF trend + rub marks in cases |
| Dividers/inserts | Glass-to-glass contact | Stops heel/shoulder scuffs | Shake test in carton |
| Pallet stability (wrap/boards) | Layer shifting | Prevents impact and rub in transit | Tilt/lean check after vibration |
A simple rule that prevents a lot of claims
If bottles will see pressure or hot-fill, scuff tolerance should be treated like a critical parameter, not a cosmetic one. A “minor rub” can become a “burst failure” later.
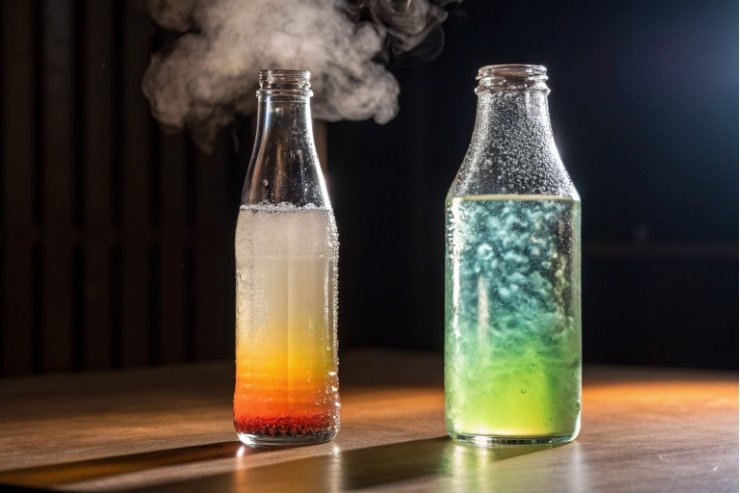
What tests certify hot-fill or carbonation safety?
A bottle is only “safe for hot-fill” or “safe for carbonation” when the tests match the real process: fill temperature, rinse cycles, pressure profile, storage, and transport.
Hot-fill safety is validated with thermal shock and stress control testing, while carbonation safety is validated with internal pressure (burst) testing and impact/top-load checks, plus closure integrity validation.

Internal pressure and burst qualification
For pressurized products, internal pressure strength testing is the core proof. Two widely used frameworks are ASTM C147 (internal pressure strength of glass containers) and ISO 7458 (internal pressure resistance test methods). These standards describe how to apply internal pressure either for a set time or with a controlled pressure ramp. :contentReference[oaicite:0]{index=0}
What matters operationally:
- performance is tracked by mold cavity,
- results are trended over time (not only pass/fail),
- and minimum safety margins are defined with the customer.
Thermal shock qualification for hot-fill and pasteurization
Thermal shock testing 6 validates how containers tolerate sudden temperature changes experienced in washing, pasteurization, or hot-pack processes. ASTM C149 is a commonly referenced method for thermal shock resistance of glass containers. :contentReference[oaicite:1]{index=1}
A practical hot-fill plan usually tests the worst-case ΔT the bottle may see, including cold storage to hot fill, and hot bottle to cold rinse.
Supporting tests that catch real-world failure modes
Pressure and thermal shock are not enough by themselves. Real-world failures also come from stacking, impacts, and closure issues. Good programs add:
- Top-load strength (stacking and pallet compression)
- Impact/drop testing at finish, shoulder, and heel
- Annealing stress checks (polariscopic stress viewing)
- Dimensional checks at the finish to protect sealing
- Closure validation after thermal cycling (torque retention, liner seal, leak tests)
“Certification” is usually a documented validation package
In most B2B programs, certification is not a single stamp. It is a pack of documents and test reports that show the bottle meets the agreed spec and process window. This package often includes:
- bottle drawing and finish standard references,
- COA with measured dimensions and weight,
- burst/pressure test report,
- thermal shock test report (when hot-fill/pasteurization applies),
- and traceability (date, furnace/line, mold/cavity codes).
| Use case | Primary risk | Must-have tests | “Nice-to-have” tests |
|---|---|---|---|
| Carbonated beverage | Internal pressure burst | ASTM C147 / ISO 7458 style pressure tests | Impact + top-load + closure retention |
| Hot-fill / pasteurization | Thermal shock cracking | ASTM C149 style thermal shock tests | Stress map + process simulation cycles |
| Combined heat + pressure | Stress stacking | Pressure + thermal shock combined plan | Long-run vibration + scuff simulation |
| Export routes | Damage before filling | Rub/scuff + impact + pallet validation | Vibration + packaging ISTA-style plans |
The practical factory-to-filler handoff
The safest programs align three parties early: bottle maker, closure supplier, and the filler. When finish dimensions, coatings, and tests are aligned, the line runs with fewer stoppages and fewer “mystery leaks.”
Conclusion
Glass bottles handle heat and pressure when geometry, stress relief, surface protection, and real-world testing work as one system, not as separate checkboxes.
Footnotes
-
Watch NNPB forming steps and why it improves glass distribution. ↩ ↩
-
Learn how CTE drives thermal strain during temperature swings. ↩ ↩
-
See why borosilicate glass resists thermal shock better than soda-lime. ↩ ↩
-
Understand how tempering adds surface compression to resist crack growth. ↩ ↩
-
Practical overview of hot-end coating benefits for abrasion and burst performance. ↩ ↩
-
Quick explanation of thermal shock and why rapid ΔT can crack glass. ↩ ↩


