Bottle graphics fail for one reason: the ink is not bonded to the glass. That turns a premium pack into a scratched, ugly return.
Graphics stick to glass when the surface is clean and high-energy, and the decoration is cured the right way. Ceramic enamels fuse in a lehr for maximum durability. UV inks rely on primers and UV cure for speed and flexibility. Decals sit between them for detail and special effects.

The decoration stack, from bare glass to finished artwork
A glass bottle is not “just glass” by the time it reaches a decoration line. It often has hot-end and cold-end coatings 1 that help it run fast on conveyors and resist scratches. Those coatings are great for handling, but they can block ink wetting. That is why the same ink can pass on one bottle and peel on another. A stable decoration plan starts by treating decoration like a stack of layers, not a single print step.
What really holds the graphic in place?
There are three bonding routes. Each route likes a different process.
1) Fusing (ceramic enamel / fired decal): the pigment layer softens and fuses into the glass surface during firing.
2) Chemical/physical anchoring (UV inks): a primer plus UV-curable ink forms a polymer network that grips the glass.
3) Adhesive film transfer (hot stamping / heat transfer): a foil or printed film sticks to a primer or adhesive layer under heat and pressure.
A simple way to map options
| Layer | What can go wrong | Fix that works in real plants |
|---|---|---|
| Glass surface | Dust, oil, mold release, cold-end coating | Wash + controlled drying, then flame or plasma surface treatment 2 or primer as needed |
| Pretreatment | Low surface energy, poor wetting | Flame or silica-flame treatment, or a compatible adhesion promoter |
| Primer | Wrong chemistry or under-cure | Match primer to ink/foil system, confirm cure with rub/adhesion tests |
| Decoration | Color shift, pinholes, weak edges | Right mesh/viscosity for screen, right waveform for UV, right decal soak/dry |
| Cure | Under-cure or over-cure | Validate cure window, not just “set time” |
| Handling | Bottle-to-bottle scuffing | Add clear coat or change packing, and test in wet + dry abrasion |
This is the point many brands miss: decoration durability is not only “ink strength.” It is also surface prep, primer chemistry, cure energy, and how the bottle is packed and shipped. Next, the process choice becomes clearer.
If the goal is to pick one method quickly, start with the distribution reality: refillable or one-way, wet handling or dry, high-speed filling or hand packing, and how close the decoration is to the mouth or food-contact zone.
Ceramic screen print, UV inks, or fired decals: which one should be used for a glass bottle?
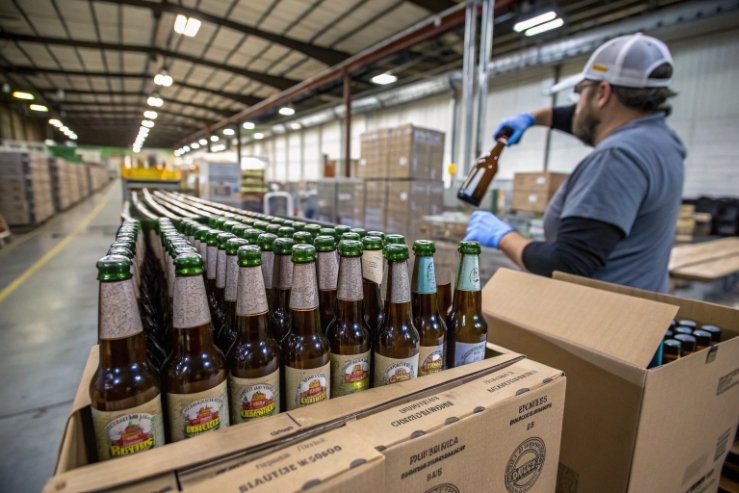
Most decoration problems come from picking a process based on looks only. The bottle then hits filling lines, cartons, and pallets, and the print starts to fail.
Ceramic screen printing is the best choice for maximum wear and chemical resistance. UV inks win when the design changes often or needs photo detail. Fired decals are ideal for complex art, small areas, and premium effects when firing is acceptable.
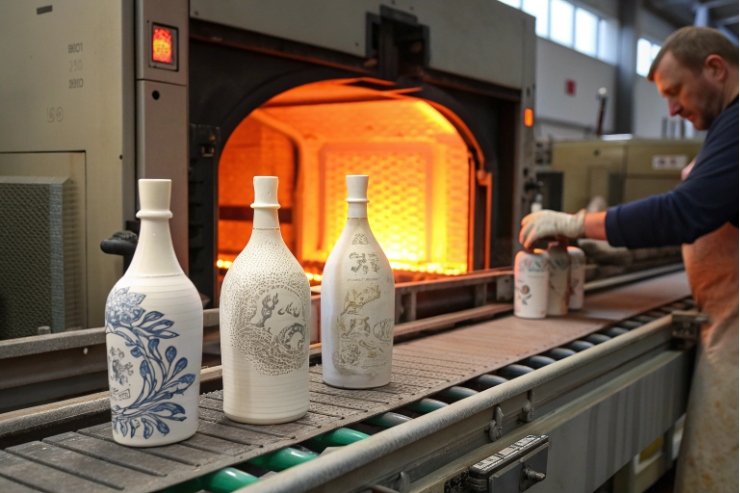
Ceramic screen print (fired enamel): where it shines
Ceramic screen print is the “workhorse” for spirits, beer, and many beverage bottles because the ink is fired in an annealing lehr kiln 3 and bonds strongly. That bond is why it survives ice buckets, wet hands, and fast packing lines. It also keeps sharp edges for simple logos and text. The trade-off is flexibility. Each color needs a screen, and changes cost time. Fine gradients and photo-like art are harder. Another trade-off is heat. The bottle must tolerate the firing profile without distortion or stress issues. In practice, this works best on standard glass shapes with stable supply, and on projects with long production runs.
A real example from past work: a limited-edition spirit once used UV print to meet a deadline. The look was great on day one. After carton rubbing during export, the black areas started to polish and show gloss change. The next run used ceramic screen print for the core logo and kept UV only for a short-lived neck detail. Returns stopped, and the cost impact was smaller than expected because the complaint cost disappeared.
UV inks (digital UV / UV screen): where it wins
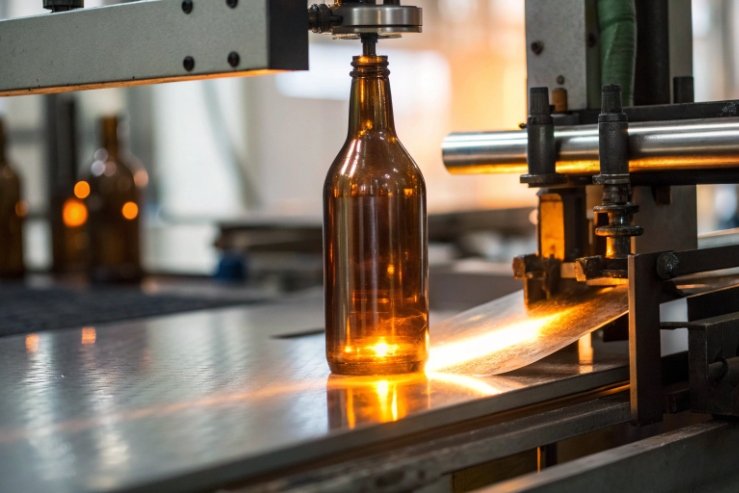
UV-curable inks 4 are fast, flexible, and good for short runs and variable designs. Digital UV also handles photo detail and gradients better than classic ceramic screen work. It is also easier to combine with white ink underprints for dark bottles. The risk is adhesion consistency. UV needs clean glass, stable pretreatment, and the right primer. If a bottle has heavier cold-end coating, UV can fail unless pretreatment is tuned. UV also needs proper cure energy. Under-cure can feel “dry” but still be weak under solvent rub and abrasion.
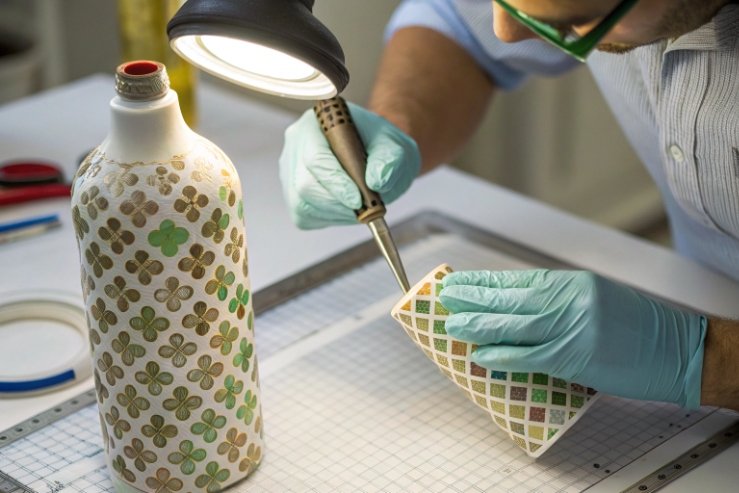
Fired decals work well when the artwork is complex, multi-color, or placed on a tricky bottle shape where screens are hard to register. Decals also enable special colors and small text without building many screens. The trade-off is process control. Decals need proper soaking, sliding, positioning, drying, and then firing. Trapped moisture and air can cause blisters. The firing step adds lead time and cost, but the result can be very durable if the firing is correct.
Quick selection table
| Need | Best fit | Why |
|---|---|---|
| Highest abrasion + chemical resistance | Ceramic screen print | Fused layer resists wear and solvents |
| Photo detail, gradients, frequent artwork changes | UV inks | Digital flexibility and fast changeover |
| Complex multi-color art in small areas | Fired decals | Fine detail without many screens |
| Lowest unit cost at high volume | Ceramic screen print | High line speed after setup |
| Lowest setup cost for small runs | UV inks | Minimal tooling, fast setup |
| Premium handcrafted look | Decals (or ceramic + hot stamp) | Visual richness and placement freedom |
Do hot stamping and transfer processes beat inks for true metallic effects?
Metallic ink often disappoints in real light. It can look “grey” instead of “gold,” and it can lose shine after rubbing.
Hot stamping usually gives the brightest and cleanest metallic finish on glass. Heat transfers can add multi-color metallic looks but may scuff if not protected. Fired metallic decals can be very durable, but they cost more and need careful firing control.
Why metallics behave differently
Metallic “ink” is usually flakes in a binder. The binder sits on glass, so abrasion hits it first. The flakes also need a smooth surface to reflect like a mirror. Any orange peel, dust, or under-cure kills the shine. Metallic foils are different. They are a thin, continuous metallic layer. That is why foil looks brighter than metallic ink.
Hot stamp decoration on glass containers 5 uses heat and pressure to transfer foil to a primed area. For glass, the primer step matters. The foil sticks to the primer, not to bare glass. If the primer is too thin, under-cured, or contaminated, foil edges lift. When it is right, hot stamping gives sharp edges and high reflectivity. It is ideal for logos, borders, and small premium highlights. It is less ideal for full-wrap artwork because dies and setup become heavy.
Heat transfers and modern “DTF/UV transfer” styles
Heat transfer decoration uses a pre-printed film that is transferred onto the bottle. It can carry multi-color graphics, gradients, and even metallic areas in one step. This can be useful for promotional runs or many SKUs. The weakness is edge durability. Film edges can catch and peel if the bottle rubs in cartons. Clear coating can help, but it adds steps. This route works best when bottles are individually packed, or when the decoration sits in a recessed area.
Fired metallic decals: the sleeper option for durability
Some premium projects use fired decals with metallic pigments, and sometimes even precious metal looks. When fired correctly, the metallic effect can be stable and resistant. The cost is higher, and the process window is tight. Over-firing can dull the metallic. Under-firing can reduce adhesion. This is best for small metallic details that must survive hard use.
Metallic decision table
| Metallic goal | Best process | Main risk | Simple control point |
|---|---|---|---|
| Mirror-bright gold/silver logo | Hot stamping | Primer/cure issues | Cross-hatch + tape + edge check |
| Multi-color metallic look | Heat transfer | Edge scuff/peel | Wet rub + carton rub simulation |
| Highest durability metallic detail | Fired metallic decal | Narrow firing window | Trial firing ladder + abrasion test |
| Budget “metallic” | Metallic UV/screen ink | Shine drops with rub | Add clear coat, validate rub cycles |
How do cure temperatures change adhesion, shelf life, and food-safety risk?
Many teams treat cure like a checkbox. They run “until it feels dry.” That is when failures show up months later.
Higher cure energy usually improves adhesion and chemical resistance, but only inside a safe window. Ceramic systems need high-temperature firing to fuse. Organic UV systems need full UV cure and sometimes post-heat to reach final strength. Food safety improves when cure is complete and heavy-metal risks are controlled.

Ceramic curing: why high temperature changes everything
Ceramic enamels and many fired decals use a lehr firing profile. At those high temperatures, the enamel layer softens and bonds to the glass surface. That bond is why ceramic decoration resists abrasion and many chemicals. It also means the decoration becomes part of the bottle, not a film sitting on it. The cure window is defined by peak temperature, soak time, and cooling. Too low and the enamel does not fuse well. Too high and color can shift, metallic effects can dull, and the bottle can pick up stress if the cooling is wrong.
Low-temperature “glass inks”: the middle ground
Some systems cure at much lower temperatures than classic ceramic firing. These can be useful when full firing is not possible, or when energy use must be reduced. The trade-off is that the bond is not the same as a fully fused enamel. Durability can still be good, but it must be proven with tests that match the route to market.
UV cure: temperature is not the only “cure”
UV inks cure when UV energy triggers polymer crosslinking. Heat can still matter because it changes viscosity, wetting, and post-cure behavior. Under-cure is the common enemy. Under-cure can look fine at first, but it often fails in solvent rub, abrasion, or chemical exposure. It can also raise food-safety concerns if the print is near the mouth area, because incomplete cure can leave more unreacted components. This is why UV lines often use a primer, controlled surface treatment, and measured UV dose, not just lamp “on/off.”
Food safety: what matters for decorated bottles
Most bottle decoration is on the outside, so it is not intended to contact food. Still, risk can appear through set-off (printed surfaces touching food-contact surfaces during stacking), or if decoration is on the rim or inside. A safe approach uses: (1) compliant raw materials, (2) good manufacturing practice, and (3) testing when the decoration can contact food or lips. For EU-bound projects, teams often align specs and documentation with the EU food contact materials framework (Regulation (EC) No 1935/2004) 6 when set-off or mouth-area contact is plausible. If the decoration is in a true food-contact area, migration or metal release limits may apply, and enamel systems often have specific test methods.
Cure and safety checklist table
| Topic | What to control | What to record |
|---|---|---|
| Ceramic firing | Peak, soak, cooling curve | Lehr profile + color + adhesion |
| UV curing | UV dose, lamp aging, speed | Dose log + rub test result |
| Primers | Coat weight, flash time, cure | Primer batch + cure conditions |
| Mouth-area risk | Ink chemistry + cure + set-off | Compliance docs + targeted tests |
Which abrasion and chemical tests prove the decoration will survive real distribution?
A decoration sample can pass a quick scratch with a fingernail and still fail in a carton. Validation needs repeatable tests.
Use adhesion tests (cross-hatch + tape), cure checks (solvent rub), abrasion tests (Taber or bottle rub rigs), and chemical resistance tests (spot or immersion). Then add a simple packaging simulation like wet carton rub or bottle-to-bottle scuffing.
Start with adhesion, because it predicts everything
Adhesion is the base. If adhesion is weak, abrasion and chemical resistance will look random. The most common method is a cross-hatch or cross-cut plus tape pull. It is fast and cheap. It also helps compare primers and pretreatments. On curved bottles, a lab often uses small flat witness panels decorated in the same run, or it uses a curved cutting jig.
Check cure, not just dryness
Solvent rub tests are popular because they show under-cure fast. A common version uses MEK rubs. If the print softens, smears, or loses gloss early, cure is not complete. This test also catches primer problems.
Abrasion that matches the real world
ASTM D4060 Taber abrasion testing 7 is widely used for coatings. It is most natural on flat panels, but it still helps rank systems. For bottles, many teams also run a bottle-to-bottle rub test, or a carton rub test with a set number of cycles, both in dry and wet conditions. Spirits and beverage bottles often see moisture, so wet rub matters.
Chemical resistance that matches the product and handling
Chemical spot tests can use alcohol, detergent, sanitizer, oils, acids, and common household cleaners. The right liquid list depends on the product category. A bar bottle sees ethanol and ice water. A kitchen bottle sees oils and detergents. A cosmetic bottle sees surfactants and fragrances. Use a spot test or immersion method, then rate for color change, gloss change, softening, and edge lift.
| Risk | Test to run | What it tells you |
|---|---|---|
| Peeling / flaking | Cross-hatch + tape | Adhesion strength and primer fit |
| Under-cure | MEK rub (or agreed solvent) | Degree of cure and crosslinking |
| Scuffing in cartons | Carton rub (dry + wet) | Realistic abrasion failure mode |
| Bottle-to-bottle damage | Bottle rub / tumble scuff | Handling and packing sensitivity |
| Cleaner / sanitizer exposure | Chemical spot test | Resistance to common chemicals |
| Alcohol exposure | Ethanol spot/immersion | Bar and spirits handling durability |
One rule keeps projects safe: tests must match the route to market. If the bottle ships long distance in cartons, carton rub is not optional. If the bottle sits in ice buckets, wet abrasion matters. If the bottle is refillable, the test plan must include washing and rehandling.
Conclusion
Pick the decoration process by the bond mechanism, cure window, and shipping reality. Then prove it with adhesion, cure, abrasion, and chemical tests before mass production.
Footnotes
-
AGR overview of hot-end/cold-end coatings and how they impact decoration performance. ↩︎ ↩
-
3M primer on surface energy explains flame/plasma treatment and why it boosts adhesion. ↩︎ ↩
-
Lehr basics for understanding kiln profiles and thermal control in glass lines. ↩︎ ↩
-
UV ink overview covering how UV inks cure and what affects final durability. ↩︎ ↩
-
Hot stamping on glass details primer dependence and common failure points for foil edges. ↩︎ ↩
-
EU food-contact framework for compliance context when set-off or mouth contact is possible. ↩︎ ↩
-
ASTM D4060 defines the Taber abrasion method for comparing coating wear resistance. ↩︎ ↩


