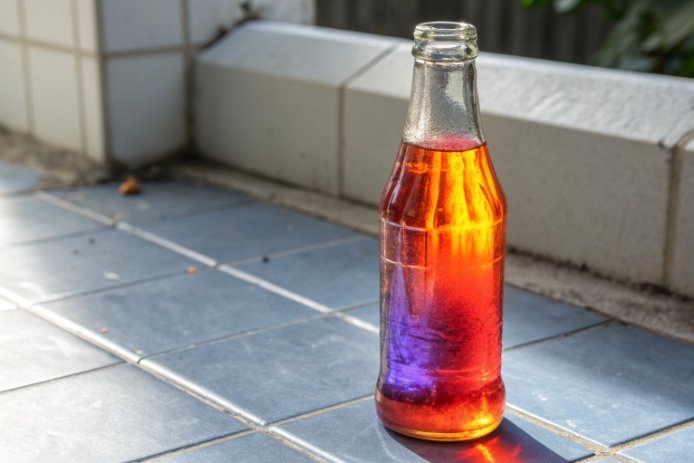
A bottle can have the right chemistry and still crack in hot-fill. Thickness is often the quiet reason, because it changes how fast heat moves and where stress builds.
Thickness does not meaningfully change the intrinsic CTE of a soda-lime bottle glass. It mainly changes thermal gradients, cooling/heating rates, and stress concentration, so thicker or uneven sections raise thermal shock risk even when CTE stays the same.

Thickness controls thermal stress more than it controls CTE
Thermal expansion 1 is a material property. For a given glass composition, the mean linear CTE stays almost the same whether the wall is 2 mm or 6 mm. The atoms do not “know” the part is thicker. What changes is the temperature profile across the glass and the time it takes for the whole cross-section to reach the same temperature.
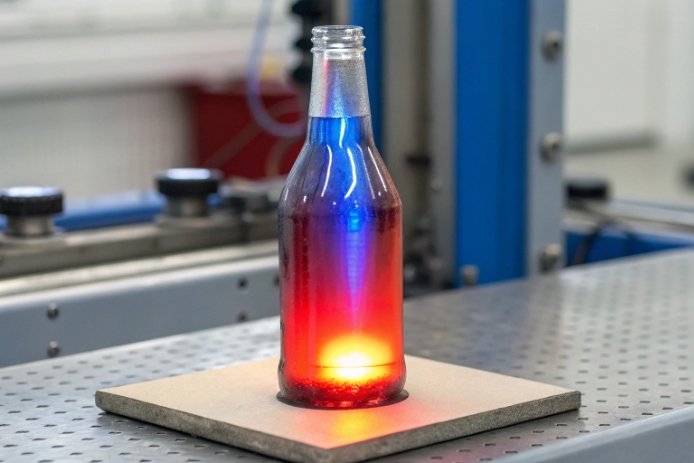
In bottle production and filling lines, that difference is everything. A thin wall heats and cools quickly, so the inside and outside temperatures stay closer. A thick base heats slowly, so the inside can expand while the outside is still cold and resisting. That mismatch creates tensile stress 2. Glass is strong in compression, but it is fragile in tension. So thickness becomes a stress amplifier.
Why the same CTE can still crack differently
Two bottles made from identical glass can behave opposite in hot-fill:
-
Bottle A has uniform walls and a moderate base.
-
Bottle B has a heavy base and a thick heel with local mass.
Bottle B will develop larger thermal gradients 3 in the first seconds after filling, so stress spikes higher. The crack feels “mysterious” because chemistry is the same, but the heat path is not.
Thickness also couples with residual stress from forming and annealing
If annealing 4 quality is not stable, thicker areas can trap more residual stress. Then thermal stress adds on top of residual stress. That is why some cracking events appear only when thickness variation rises and annealing control drifts in the same week.
| What is changing | Does CTE change? | What actually changes | What production sees |
|---|---|---|---|
| Same glass, thicker section | no | larger ΔT across thickness | base/heel cracks |
| Uneven wall thickness | no | local stress concentration | shoulder or panel cracks |
| Thicker finish/neck | no | slower heat equalization at cap zone | finish checks after capping |
| Poor annealing + thick zones | no | residual + thermal stress combine | delayed cracks after storage |
The sections below answer your four questions with practical rules and tests that can be used on real production batches.
Does thickness change the glass CTE itself, or does it mainly affect thermal gradients and thermal shock risk?
CTE is a material property tied to composition and the temperature interval used for reporting. Thickness is a geometry property.
Thickness does not change the glass CTE itself in any meaningful way for normal bottle dimensions. Thickness mainly increases thermal gradients during heating and cooling, which raises thermal stress and lowers the apparent thermal shock resistance of the bottle.
When people think thickness “changes CTE”
In practice, teams see thicker bottles fail more often and assume the glass “expands more.” What actually happens is that one side expands while the other side lags. The average expansion is the same, but the mismatch creates stress.
The key physics in one sentence
Thermal stress scales with:
-
the temperature difference across the glass section (ΔT),
-
the elastic stiffness 5 (modulus),
-
and the CTE,
and it is reduced by stress relaxation if the glass is hot enough.
Thickness increases ΔT during fast heating or cooling. So even if CTE is constant, stress rises.
The only times thickness can appear to change CTE
There are edge cases where measured expansion looks different:
-
Different annealing history can slightly change structure and expansion curve shape.
-
Measurement errors happen if specimens have gradients or residual stress.
These are not thickness changing CTE. These are thickness affecting the test conditions or glass structure through annealing.
| Statement | True meaning in production | What to do |
|---|---|---|
| “Thick bottles expand more” | thick zones develop larger ΔT | reduce thickness variation and ramp rate |
| “CTE spec failed after redesign” | sampling or annealing changed | re-test CTE with same method and range |
| “Same glass, more cracks” | thermal gradients and residual stress rose | inspect stress + thickness maps |
The practical takeaway: hold CTE steady with composition control, and control cracking with thickness, uniformity, and process ramps.
How do thick-bottom and uneven wall thickness designs increase stress during hot-fill, pasteurization, or sterilization?
Thick-bottom designs are common because brands want stability and premium feel. Uneven walls happen when weight is reduced or when the mold/IS machine drifts.
Thick bottoms and uneven walls increase stress because they create “hot core, cold skin” conditions and local stiffness changes. During hot-fill and sterilization, thick zones lag in temperature, so expanding hot zones pull against cooler zones, creating tensile stress at the heel, base corner, and shoulder transitions.
Thick base: the classic heel crack mechanism
During hot-fill 6, the inner surface sees hot liquid first. The base interior expands. The outside base can stay cool for a while, especially if the bottle sits on a cool conveyor or starwheel. The highest risk zone is usually:
-
the heel (base-to-wall transition),
-
the push-up area,
-
and sharp radius transitions.
Those areas combine three risks: thick mass, geometry stress concentration, and contact cooling from equipment.
Uneven walls: stress concentration plus uneven heat flow
If one panel is thick and another is thin:
-
the thin side heats faster and expands faster,
-
the thick side resists and stays cooler,
-
the bottle ovalizes under stress.
That can create shoulder cracks or vertical splits, depending on shape and residual stress direction.
Sterilization and pasteurization: cycling amplifies weak spots
Sterilization cycles add repeated heating and cooling. If the base is thick and the ramps are fast, microcracks can start and then grow over cycles. Some failures appear hours later, which is why they are often blamed on handling.
| Design feature | Why it raises thermal stress | Typical crack location | Simple design fix |
|---|---|---|---|
| Heavy base / thick heel | slow heat equalization | heel, base corner | increase radius, reduce mass |
| Sharp thickness transition | stress concentration | at transition line | smooth thickness gradient |
| Uneven wall distribution | differential expansion | shoulder, panel | improve parison control |
| Thick finish ring | cold cap + hot neck mismatch | finish checks | balance finish mass |
A good design avoids “thermal bottlenecks.” It also avoids sudden thickness jumps. In real filling lines, smooth geometry can be more important than 30–50 g of extra weight.
What thickness tolerances and design rules help reduce cracking while keeping bottle weight and cost controlled?
The best thickness strategy is not “make everything thick.” Thick glass can crack more if it creates gradients. The goal is uniform, smooth thickness in the critical zones.
Use tight thickness uniformity in the heel, shoulder, and finish zones. Avoid sharp thickness transitions. Use generous radii at base and shoulder transitions. Set realistic minimum wall thickness for handling strength, but control maximum base mass to reduce thermal gradients.
Design rules that work in most bottle projects
1) Control the heel radius and base corner radius
A larger radius reduces stress concentration and improves heat flow. Sharp corners crack first.
2) Avoid abrupt thickness changes
A smooth thickness gradient is safer than a step. Abrupt steps create a stress hinge.
3) Control push-up geometry
Deep push-ups can create thick regions and complex stress fields. If a push-up is needed for stability, keep transitions smooth.
4) Keep wall thickness distribution balanced
Uniform parison and stable IS settings reduce one-side-thick problems. A lighter bottle with uniform walls is often safer than a heavier bottle with uneven walls.
5) Define both minimum and maximum thickness in the base
Minimum thickness protects impact strength. Maximum thickness protects thermal shock. Many teams forget the maximum.
Practical tolerance thinking (how to write it)
Exact numbers depend on bottle size and design, but the logic should be:
-
specify minimum wall thickness in body and shoulder for mechanical strength
-
specify maximum base thickness or maximum base mass to control ΔT
-
specify max thickness variation around the circumference
-
specify minimum radii and smoothness at transitions
| Spec item | Why it matters | How to control it in production |
|---|---|---|
| Min body wall thickness | mechanical strength | gob weight + mold cooling balance |
| Max base thickness / mass | thermal gradient control | push-up design + cooling contact |
| Circumference thickness variation | avoids oval stress | IS alignment + takeout handling |
| Min heel/shoulder radius | lowers stress concentration | mold design and maintenance |
| Smooth transition requirement | removes stress hinges | CAD rules + sampling checks |
A useful internal habit is to treat “thickness uniformity” as a top KPI like ΔE or seed count. When thickness stability improves, hot-fill cracking complaints usually drop without changing glass chemistry.
A redesign or a new customer process needs proof. Testing must connect to the real thermal cycle and to the real weak zones.
Confirm thickness-related heat resistance by combining: (1) a thermal shock or thermal cycling test that matches the filling/sterilization profile, (2) annealing quality checks for residual stress, and (3) stress inspection focused on thick zones like heel, base, and finish. Add fracture pattern review to link failures back to geometry.
1) Thermal shock / thermal cycling tests that match the real process
For hot-fill, use a controlled fill temperature and controlled cooling, including worst-case line stops. For pasteurization or sterilization, use the exact cycle profile. The goal is to reproduce gradients, not just hit a peak temperature.
Key good practices:
-
test bottles from the start, middle, and end of a production run
-
include bottles from the different cavities
-
test at least one “worst thickness” subgroup (heavier base or higher variation)
2) Annealing quality checks (residual stress)
Residual stress makes thermal cracking easier. Use:
-
polariscope 7 inspection for stress patterns
-
stress measurement methods used in container plants (internal standards vary)
-
focus checks on heel, finish, and shoulder transitions
If stress is high in thick regions, the thermal test result will look worse than a design-only prediction.
3) Thickness measurement and correlation
A test is more powerful when it links failure to thickness:
-
thickness mapping (manual gauges or automated measurement systems)
-
weight distribution checks
-
cavity-level trend charts
4) Post-test inspection and failure analysis
After thermal tests:
-
inspect for microcracks, especially at heel and finish
-
document crack origin points
-
correlate crack origin with thickness transitions
| Test | What it proves | How it links to thickness | Pass signal |
|---|---|---|---|
| Thermal shock/cycling | real thermal resistance | creates ΔT gradients | no cracks at worst-case cycle |
| Polariscope stress check | low residual stress | thick zones trap stress | stress pattern within limits |
| Thickness mapping | geometry stability | identifies hot spots | variation inside tolerance |
| Cavity capability study | repeatability | finds one bad cavity | Cp/Cpk meets target |
| Crack origin review | root cause | links to heel/transition | failure point matches fix plan |
The best production practice is to treat these tests as a gate before mass rollout. Once the line is running, the same tests can be used as ongoing assurance, especially when molds, IS settings, or cullet ratio change.
Conclusion
Thickness does not change CTE, but it controls thermal gradients and stress. Uniform walls, smooth transitions, and strong annealing 8 checks are the fastest path to fewer hot-process cracks.
-
Definition of thermal expansion coefficient in materials. ↩
-
Explanation of tensile stress and crack propagation mechanics. ↩
-
How temperature differences create internal stress in glass. ↩
-
The process of cooling glass to remove internal stress. ↩
-
Stiffness property that determines stress from expansion. ↩
-
Bottle requirements for withstanding hot-fill temperatures. ↩
-
Instrument for visualizing internal stress patterns in glass. ↩
-
Importance of proper annealing for thermal shock resistance. ↩


