
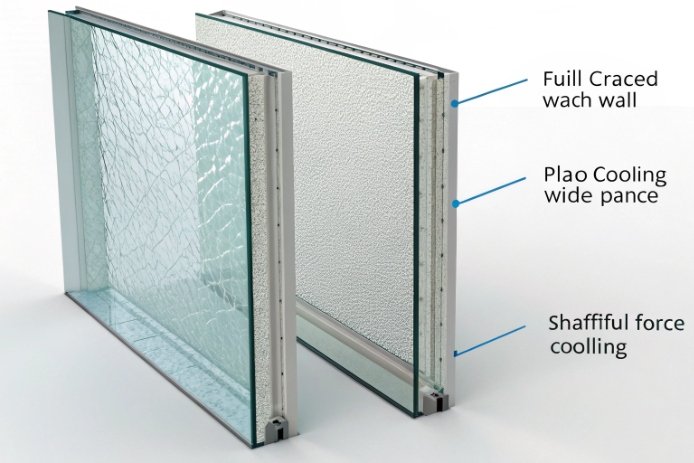
A bottle can survive the line, pass visual checks, then fail in a customer warehouse. That is often microcrack growth, not “random breakage.”
Yes. Thermal expansion can accelerate microcrack growth because heating and cooling cycles create tensile stress at the surface. Small flaws can open, extend, and then grow faster over repeated cycles, especially at the heel, shoulder, and finish.

Microcracks grow when thermal strain turns into surface tension
Glass is strong in compression and weak in tension. Microcracks 1 live on the surface, often created by scuffing, tooling contact, or tiny inclusions. Thermal expansion becomes dangerous when it is uneven. A temperature gradient 2 across the wall forces one layer to expand or shrink while another layer resists. That mismatch creates tensile stress at one surface. Tensile stress opens a microcrack like a zipper.
Once a crack opens, growth becomes easier. Even if the bottle cools back to room temperature and the crack “closes,” it often does not return to its original state. The crack tip can extend a small amount during each cycle. Over time, that small growth becomes a large crack that fails under a normal handling impact.
Thermal cycling also interacts with residual stress from annealing 3. If a bottle leaves the lehr 4 with tensile stress locked into the heel or finish, a thermal cycle adds extra stress on top. That pushes crack tips closer to their growth threshold. This is why a bottle can pass a single hot-fill run but fail after pasteurization 5 cycles or after repeated warm/cold warehouse swings.
The biggest trap is that microcracks are often invisible. They can sit under a label, in a heel scuff band, or in a finish thread root. Standard visual inspection misses them. The correct approach is to control the drivers and use tests that expose hidden cracks before shipment.
| Microcrack driver | What thermal expansion does | Where it matters most | How it shows up |
|---|---|---|---|
| Thermal gradients | creates tensile surface stress | heel, shoulder | delayed cracks |
| Residual stress | reduces margin for crack growth | finish, heel | cavity-biased failures |
| Thickness steps | amplifies gradients | base corner, push-up | base checks |
| Surface damage | provides crack starters | heel scuffs, guide rails | late breaks in packs |
Now the detailed answers: how cycles turn flaws into growing cracks, which factors accelerate propagation most, how hot-fill and cycling tests reveal hidden cracks, and which design and process controls reduce risk.
How do heating and cooling cycles turn small surface flaws into growing cracks in glass bottles?
A flaw does not need to be large to be dangerous. It only needs to be sharp, and it needs to see tension repeatedly.
Heating and cooling cycles grow microcracks by repeatedly opening crack tips under tensile stress created by thermal gradients. Each cycle can extend the crack tip slightly. Over time the crack reaches a critical size and then propagates rapidly under normal handling or pressure loads.
Step-by-step mechanism in bottle terms
1) A surface flaw exists
This can be a heel scuff, a scratch from a guide rail, a tiny chip at the finish, or a micro-inclusion mark.
2) A temperature gradient forms
Hot-fill heats the inside quickly. Cooling sprays chill the outside quickly. Label tunnels heat a band while other areas remain cold.
3) Tensile stress appears on one surface
The hot zone wants to expand or the cold zone wants to shrink while the other side resists. That puts one surface in tension.
4) The microcrack opens and the crack tip advances
The tip is the most stressed point. Even a tiny extension matters because it increases stress intensity 6 at the tip next time.
5) The bottle cools and the crack closes, but damage remains
The crack does not “heal.” The tip is now longer and sharper.
6) After repeated cycles, the crack reaches a failure size
Then it can fail during pallet movement, case packing, or a small impact.
Why crack growth is often worse at the heel
The heel has:
-
thick glass mass (slow equalization)
-
sharp curvature
-
common scuffing from conveyors
So the heel is both a gradient hotspot and a flaw hotspot.
Why “one big cycle” is not the only danger
Pasteurization and repeated warm/cold storage cycles can be worse than one hot-fill event. Repetition matters. A bottle can survive a single ΔT, but repeated smaller ΔT cycles can still grow a microcrack.
| Cycle type | Typical gradient behavior | Microcrack growth risk | Why |
|---|---|---|---|
| Hot-fill + cold rinse | steep and fast | high | strong tensile spikes |
| Pasteurization cycles | moderate, repeated | medium to high | fatigue-like growth |
| Warehouse thermal swings | slow, repeated | medium | long-term crack extension |
| Shrink sleeve tunnel | local hot band | medium | localized stress ring |
Microcrack growth is the reason many failures appear far from the hot station that created the first damage.
Which factors most accelerate microcrack propagation (thermal gradients, residual stress, wall thickness variation, and surface damage)?
Microcrack growth accelerates when stress is high, flaws are sharp, and the bottle sees repeated cycles. These factors often combine at the same location.
The strongest accelerators are steep thermal gradients, high residual tensile stress from under-annealing, sharp thickness transitions that concentrate stress, and surface damage that creates sharp crack starters. The highest risk occurs when two or more of these factors overlap at the heel or finish.
Thermal gradients: the primary stress engine
Faster ramps create higher surface tension. Early cold rinses and strong air jets are common triggers. Contact cooling at the base is also a big driver, because it makes one side of the wall cool much faster.
Residual stress from the lehr can be the difference between “microcrack stays dormant” and “microcrack grows.” Uneven cooling in the lehr can create high stress by cavity or by lane position. That causes “random” failures that are not random at all.
Wall thickness variation: turns gradients into stress hinges
A thick-to-thin step forces uneven expansion. A heavy base plus thin body creates a hinge at the heel. One-side thickness variation creates circumferential stress imbalance and can grow cracks on one side.
Surface damage: the crack starter you can control
A microcrack needs a starter. Conveyors, guide rails 7, accumulation tables, and case packers can create the starter. Surface damage is especially dangerous when it happens while the bottle is still warm because warm glass scratches more easily.
| Accelerator | Why it speeds crack growth | Typical origin zone | Practical control |
|---|---|---|---|
| Early cold cooling | high tensile spike | heel/base | staged cooling, delayed rinse |
| Under-annealing | stored tensile stress | finish/heel | lehr profile + airflow balance |
| Thickness step | stress hinge | heel/shoulder | smooth transition, better parison |
| Guide-rail scuffing | sharp crack starter | heel scuff band | rail material, lubrication, spacing |
| Stones/cords | local stress raisers | random along cord path | melt quality control |
In troubleshooting, the most useful tactic is to identify which accelerator is dominant. Crack origin mapping plus stress inspection usually reveals this quickly.
Microcracks hide during visual inspection. Tests must either grow them or expose them as leak paths. That is why thermal cycling is so valuable.
Thermal cycling tests reveal hidden microcracks by repeatedly applying temperature gradients that open and extend cracks until they become visible or cause failure. Hot-fill simulations expose heel and shoulder crack risk, pasteurization cycles expose fatigue-like growth, and controlled thermal shock tests provide a baseline ΔT threshold for comparison.
Hot-fill simulation: best for real process cracks
A hot-fill simulation should replicate:
-
bottle start temperature (including worst-case cold bottles)
-
fill temperature and hold time
-
cooling steps and timing (especially rinses)
-
stop/start scenarios
Microcracks often show after cooling, not during fill. So inspection should include a time delay and handling simulation.
Pasteurization/retort cycling: best for repeated stress growth
Repeated cycles can grow cracks that a single cycle does not. This is useful for products that see multiple heat steps or warm storage.
Controlled thermal shock step tests: best for comparison and screening
A step test increases ΔT in controlled increments. It is useful for:
-
comparing designs
-
checking cavity consistency
-
monitoring drift after mold or lehr changes
How to inspect for microcracks after thermal tests
-
visual inspection with strong lighting at heel and finish
-
crack origin mapping (mark and record location)
-
dye penetration tests 8 (for surface-connected cracks and leak paths)
-
pressure/vacuum decay tests for seal-related micro-leaks after cycling
| Test | What it reveals | Where it usually fails | Best use stage |
|---|---|---|---|
| Hot-fill simulation | real gradient and timing risk | heel/base corner | before mass rollout |
| Pasteurization cycles | repeated growth risk | shoulder/finish | qualification for thermal products |
| Thermal shock step test | baseline ΔT threshold | heel/shoulder | design comparison + QC |
| Dye penetration | microcrack connectivity | heel scuffs, finish | audits and investigations |
| Leak/pressure tests | closure-related micro-leaks | finish land | after thermal cycling |
A good program uses at least one real-process simulation and one comparative step test. That creates both practical proof and a stable screening method.
What design and process controls reduce microcrack risk (better annealing, protective coatings, smoother transitions, and handling standards)?
Microcrack risk drops when stress is lower, flaws are fewer, and gradients are smoother. That requires a system approach across design, annealing, and line handling.
Reduce microcrack risk by improving annealing consistency, smoothing heel and shoulder transitions, controlling thickness variation, using protective surface treatments where needed, and enforcing handling standards that prevent scuffs and scratches. Then validate with thermal cycling plus stress and leak testing.
Design controls: remove stress hotspots
-
Increase heel and base corner radii.
-
Reduce sharp thickness steps at heel and shoulder.
-
Avoid placing embossing or hot label heat bands on transition zones.
-
Improve wall thickness uniformity and reduce one-side thick panels.
These changes reduce the stress concentration 9 that drives crack growth.
Annealing controls: remove residual stress and stabilize by cavity
-
Ensure adequate reheat and soak so thick zones relax.
-
Balance airflow and bottle spacing to avoid one-side cooling.
-
Track stress patterns by cavity using a polariscope.
-
Treat lehr speed changes as a re-qualification trigger.
Annealing does not change CTE much, but it changes how close the bottle is to the crack-growth threshold.
Process controls: smooth the thermal gradient
-
Pre-warm bottles if they are cold before hot-fill or hot labeling.
-
Use staged cooling: warm rinse first, cold rinse later.
-
Reduce cold base contact early after fill.
-
Control stop-start events with a defined restart protocol.
Surface protection and handling standards: reduce crack starters
-
Use hot-end or cold-end surface treatments 10 where applicable.
-
Control guide rail materials and lubrication.
-
Reduce accumulation pressure and bottle-to-bottle contact.
-
Improve heel scuff protection in conveyors and packers.
| Control | Microcrack driver addressed | KPI to track | What success looks like |
|---|---|---|---|
| Smoother radii | stress concentration | crack origin map | fewer heel-origin cracks |
| Thickness uniformity | gradient mismatch | cavity weight spread | lower variation, fewer one-side breaks |
| Annealing improvement | residual stress | polariscope trend | stable low-stress patterns |
| Staged cooling | thermal gradient | cracks vs cooling timing | crack rate drops sharply |
| Handling upgrades | surface damage | heel scuff rate | fewer late breaks |
| Protective coating | scratch sensitivity | break rate in packing | improved survival margin |
The best projects treat microcracks like a controllable defect class. They reduce stress peaks and reduce damage sources, then prove the improvement with cycling tests and cavity-level tracking.
Conclusion
Thermal expansion accelerates microcrack growth by creating repeated tensile stress under temperature gradients. Control gradients, residual stress, thickness steps, and surface damage, and validate with hot-cycle testing before shipment.
Footnotes
-
Explains how microscopic defects initiate material failure under stress conditions in brittle materials like glass. ↩ ↩
-
Describes how temperature changes over distance cause differential expansion and structural stress in materials. ↩ ↩
-
The heat treatment process used to remove internal stresses and prevent spontaneous breakage in glass manufacturing. ↩ ↩
-
A long kiln used for annealing glass to slowly cool it and relieve stresses created during forming. ↩ ↩
-
A heat treatment process for food safety that can introduce repeated thermal stress cycles to glass packaging. ↩ ↩
-
A critical fracture mechanics parameter that predicts when a crack will begin to propagate under load. ↩ ↩
-
Components in conveyor systems that can cause surface scuffing if not properly maintained or lubricated. ↩ ↩
-
A widely used inspection method to locate surface-breaking defects in non-porous materials like glass. ↩ ↩
-
How geometric irregularities like sharp corners cause localized stress increases, leading to potential failure. ↩ ↩
-
Coatings applied to glass containers to improve scratch resistance and facilitate smooth movement on filling lines. ↩ ↩


