Shattered glass at the cold end or delayed breakage on the filling line destroys efficiency and profits. If your lehr profile is not tuned to your specific bottle geometry, you are locking destructive stress into every container.
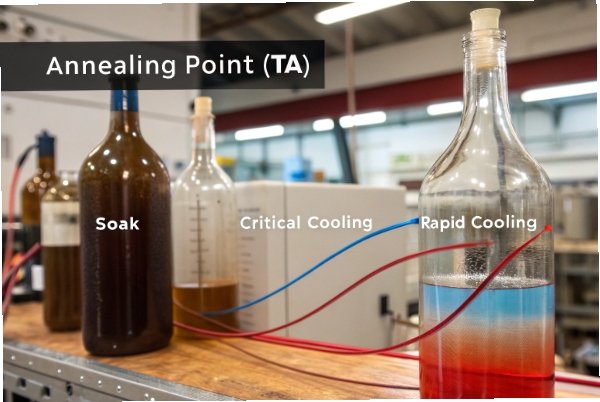
The annealing curve must be set by bringing glass to its Annealing Point (~554°C), soaking it to equalize temperature, and then cooling it slowly through the Strain Point. The profile is defined by glass mass, belt speed, and wall thickness to ensure core and skin cool in unison.

The Critical Science of Stress Relief
The annealing lehr 1{#fnref1} is often the most neglected machine in the glass plant, yet it is the gatekeeper of quality. After the violent process of forming—where molten glass at 1100°C is sheared, blown, and pressed into molds—the material is riddled with thermal gradients. The outer skin chills rapidly upon touching the mold, while the inner core remains molten. If allowed to cool naturally, these gradients lock into permanent mechanical stress: tension on the inside, compression on the outside.
Annealing is the process of erasing this thermal history. It is not merely "cooling down"; it is a precise thermodynamic reset. We heat the glass to a specific viscosity (approx. $10^{13}$ Poise) where the atomic structure can relax and rearrange itself, relieving internal strain—using the standard viscosity “fixed points” described in viscosity–temperature characteristic points for glass 2{#fnref2}. We then control the cooling rate so strictly that no new temperature differences—and thus no new stresses—are introduced until the glass is rigid.
At FuSenglass, we consider the lehr curve to be a "living recipe." A curve that works for a 330ml beer bottle will shatter a 750ml heavy-base spirit bottle. The stakes are high: improper annealing leads to "spontaneous breakage" where bottles explode on shelf, or failures during the pasteurization process at your facility.
Key Variables in Annealing
| Variable | Impact on Process | Management Strategy |
|---|---|---|
| Glass Viscosity | Determines relaxation speed. | Must reach Annealing Point ($T_A$) exactly. |
| Thermal Conductivity | Glass is an insulator. | Thicker glass needs longer soak times to heat the core. |
| Expansion Coefficient | Rate of size change. | Higher expansion glass (like Flint) is more sensitive to shock. |
| Belt Speed | Time available in zone. | Slow down for heavy ware; speed up for light ware. |
Understanding the fundamental physics is mandatory, but the real challenge lies in translating this theory into machine settings. Let’s examine how to define the specific temperature profile for your ware.
How should the lehr temperature profile be defined based on glass type, bottle weight, and wall-thickness distribution?
One size does not fit all in glass manufacturing. Relying on a generic "factory default" curve for complex bottle shapes is a recipe for high rejection rates and dangerous structural instability.
Profiles must be customized: heavy bottles require slower belt speeds and longer heating zones to penetrate the core, while variable wall thicknesses demand gentler cooling slopes to prevent differential contraction between thick corners and thin panels.

Adjusting for Mass and Geometry
The mass of the bottle dictates the "Thermal Inertia." A heavy bottle (e.g., >700g) absorbs heat slowly and releases it slowly. If you run a heavy bottle on a curve designed for a lightweight one, the skin will reach annealing temperature, but the core will remain too cold to relax. Conversely, during cooling, the skin will drop below the strain point while the core is still hot. As the core finally cools, it contracts and pulls on the rigid skin, creating tension.
For Heavy-Bottomed Bottles ("Slug" Bottoms), the challenge is acute. The thick base holds heat like a reservoir. The lehr profile must be set to "over-anneal" the sidewalls just to ensure the base is treated. We often use bottom-heating elements in the early zones to drive heat specifically into the heel of the bottle.
Wall Thickness Distribution
The most treacherous profile is one with uneven distribution—such as a square bottle with thick corners and thin sides.
- Thick Sections: Cool slow.
- Thin Sections: Cool fast.
If the lehr cooling rate is too aggressive, the thin panels will solidify while the corners are still soft. When the corners finally solidfy, they pull the panels apart. The temperature profile must be flattened (made less steep) to allow conductive heat transfer between the thick and thin sections, keeping them at a uniform temperature as they cross the critical strain barrier.
Glass Composition Factors
While most container glass is soda–lime–silica container glass 3{#fnref3}, slight variations in chemical composition affect the Annealing Point ($T_A$) and Strain Point ($T_S$).
- Flint (Clear): Standard settings usually apply.
- Amber/Green: Iron and sulfur content can shift the radiation absorption characteristics. Dark glass absorbs infrared heat from the lehr burners more efficiently than clear glass. This means amber bottles heat up faster but may also develop surface-to-core gradients more easily. We often lower the top-burner temperatures slightly for dark glass to prevent surface overheating.
| Bottle Feature | Thermal Challenge | Lehr Profile Adjustment |
|---|---|---|
| Standard Round (300g) | Uniform heat transfer. | Standard "Bell Curve" profile. |
| Heavy Spirit (800g) | High thermal inertia. | Reduce belt speed by 15-20%; Extend Soak Zone. |
| Square Shape | Corner vs. Panel differential. | Flatten cooling gradient in Zones 4-5. |
| Dark Glass (Amber) | High IR absorption. | Lower burner intensity; rely more on convection. |
What soak temperature and dwell time around the annealing point best relieve residual stress without causing deformation?
You must walk a fine line between stress relief and physical collapse. Soaking too hot ruins the shape; soaking too cold leaves the bottle dangerous.
Target a soak temperature of 554°C ±5°C with a dwell time of 15 to 20 minutes. This specific window allows full molecular relaxation of the glass structure without lowering the viscosity enough to cause ovality, sidewall slumping, or bent necks.

The Physics of the Soak Zone
The "Soak" or "Annealing" zone is where the magic happens. The goal is to bring the entire mass of the bottle—from the outer skin to the inner core—to a uniform temperature where the glass viscosity is approximately $10^{13}$ Poise. At this viscosity, the internal stresses relax exponentially with time; measured datasets like the NIST soda-lime-silica viscosity standard sample 4{#fnref4} show how rapidly viscosity changes near annealing temperatures.
- Temperature: For typical soda-lime silica glass, the annealing point is around 554°C.
- If > 565°C: The glass becomes too soft ($10^{12}$ Poise). The bottle’s own weight causes it to sag. You will see "out of round" defects or "leaners."
- If < 540°C: The glass is too stiff. Stress relief would take hours instead of minutes, which is impossible on a production line.
Calculating the Dwell Time
Time is just as important as temperature. It takes time for the heat to penetrate, and time for the molecules to move.
- The Rule of Thumb: A standard rule is 15 minutes of "Time at Temperature."
- Thickness Calculation: A more precise engineering formula is $t = K \times d^2$, where $t$ is time and $d$ is thickness. Since thickness is squared, a bottle that is twice as thick requires four times the soak duration.
In practice at FuSenglass, we adjust the belt speed (lehr time) to ensure that the bottles spend at least 3 zones (typically Zones 1, 2, and 3) at the peak soak temperature. For a high-speed line producing lightweight bottles, we might fire the burners in Zone 4 to extend the effective soak length because we cannot slow the belt (which is tied to the IS machine speed).
| Condition | Temperature Setting | Time Setting | Result |
|---|---|---|---|
| Optimal | 554°C | 15-20 mins | Perfect Stress Relief (Grade 1-2). |
| Over-Heating | > 560°C | > 20 mins | Deformed ware; ovality issues. |
| Under-Heating | < 545°C | < 10 mins | Residual Stress (Grade 3-4); "Ring off" breakage. |
| Uneven Soak | Fluctuating | Standard | Asymmetric stress; crooked necks. |
How can conveyor speed and zone-by-zone cooling rates be tuned to control stress through the strain-point range?
The most critical phase is not the heating, but the cooling immediately following the soak. This is where most annealing faults are actually created.
Control conveyor speed to keep the cooling rate below 3°C per minute in the "Critical Annealing Range" (550°C down to 500°C). Once the glass passes the Strain Point (~470°C-500°C depending on composition), it becomes a rigid solid, and cooling rates can be aggressively increased to maximize production throughput.

The temperature range between the Annealing Point ($T_A \approx 554^\circ C$) and the Strain Point ($T_S$) is the danger zone.
- The Mechanism: As glass cools through this range, it transitions from a plastic state to a rigid solid. If the cooling is too fast, the surface hardens while the interior is still plastic. When the interior eventually cools and contracts, it is restricted by the hard shell, creating permanent tension.
- The Tuning Strategy: In this zone (usually Zones 4 and 5), we close the dampers and run the recirculation fans at low speed. We want a "Natural Cooling" curve that is very shallow. The target slope is a drop of no more than 3°C to 5°C per minute, consistent with broader annealing guidance in annealing and tempering process fundamentals 5{#fnref5}.
Accelerating After the Strain Point
Once the entire bottle is below the Strain Point, the glass structure is "frozen." Permanent stress can no longer be generated by differential cooling.
- Rapid Cooling: In Zones 6, 7, and 8, we open the dampers wide and blast fresh air. We can drop the temperature at 10°C or even 20°C per minute.
- Belt Speed Synchronization: The belt speed is the master clock. If production requires a belt speed of 500mm/min, the physical length of the cooling zones determines the rate. If the lehr is too short for the speed, we cannot cool slowly enough. In these cases, we must raise the temperature of the early cooling zones to artificially flatten the curve, even if it means the bottles exit the lehr hotter (requiring longer open-air cooling at the cold end).
A practical way to communicate this to engineering teams is to document your zone setpoints and expected residual stress using a simple modeling framework like the DOE reference on lehr residual stress objectives and process simulation 6{#fnref6}.
Zone-by-Zone Configuration
- Zones 1-3 (Heating/Soak): Burners Active. Temp flat at 555°C.
- Zones 4-5 (Critical Cooling): Burners Off/Low. Dampers Closed. Indirect cooling. Target gradient: Slow descent to 480°C.
- Zones 6+ (Forced Cooling): Dampers Open. Drift fans High. Target: Rapid drop to 150°C for Cold End Coating application.
| Temperature Zone | Phase | Max Cooling Rate | Operational Setting |
|---|---|---|---|
| 554°C $\to$ 500°C | Critical Range | < 3-4°C / min | Dampers Closed, Recirculation Low. |
| 500°C $\to$ 400°C | Transition | < 10°C / min | Dampers 25%, Recirculation Med. |
| 400°C $\to$ 150°C | Fast Cooling | > 20°C / min | Dampers 100%, Drift Fans High. |
| < 150°C | Discharge | Max possible | Cold Air Spray. |
Which QC methods (polariscopic stress checks, thermal-shock trials, breakage tracking) should be used to validate and adjust the annealing curve?
A theoretical curve is useless if the bottles are breaking. You need a rigorous feedback loop from the cold end back to the lehr operator.
Use polariscopes to visualize residual stress patterns (targeting Grade < 2), and cross-validate with ASTM C149 thermal shock tests ($\Delta T$ 42°C). These destructive and non-destructive tests provide the immediate data needed to adjust zone temperatures or belt speeds in real-time.

Visualizing Stress: The Polariscope
The polariscope is our primary window into the internal state of the glass. By passing polarized light through the bottle and viewing it through an analyzer, we can see interference patterns (birefringence) caused by stress.
- The ASTM C148 Standard: We compare the color observed against standard strain discs using ASTM C148 polariscopic examination of glass containers 7{#fnref7}.
- Grade 1-2: Commercial perfect. Safe for all uses.
- Grade 3: Acceptable for general ware, risky for hot-fill.
- Grade 4-5: Reject. Dangerous tension.
- Pattern Analysis: The shape of the stress tells us the cause. A "cross" in the bottom indicates rapid cooling of the base. A ring in the shoulder suggests insufficient soak time to normalize the thick neck/shoulder transition.
For teams that want deeper material context behind birefringence, a solid refresher is this overview of glass properties and thermal expansion behavior 8{#fnref8}.
Destructive Validation: Thermal Shock
Visual checks aren’t enough. We must torture the glass. The Thermal Shock Test (ASTM C149) mimics the worst-case scenario on a filling line using ASTM C149 thermal shock resistance 9{#fnref9}.
- The Test: Bottles are heated in a water bath to 65°C and plunged into 23°C water ($\Delta T = 42^\circ C$).
- The Verdict: If the bottle cracks, the annealing is failed, regardless of what the polariscope says.
- Shoulder Check: If the shoulder separates, the lehr heating curve was too steep (skin hot, core cold).
- Bottom Drop: If the bottom disk falls out, the lehr cooling curve was too fast (bottom stayed hot while walls cooled).
If you run cross-supplier validations, it’s often helpful to align your internal method with the international analogue: ISO 7459 thermal shock resistance/endurance test methods 10{#fnref10}.
Breakage Tracking Loop
We monitor "Lehr Breakage" counters at the cold end.
- Cold Checks: If we hear "tinking" sounds at the lehr exit, the final cooling zones are shocking the glass. We reduce the drift fan speed.
- Validation Frequency: QC should perform a polariscope check every 30 minutes and a thermal shock test every 2 hours (or at every job change).
| QC Method | Target Metric | Diagnosis if Failed | Adjustment |
|---|---|---|---|
| Polariscope | Grade < 2 (Apparent Temper) | "Cross" pattern in bottom. | Slow down belt; flatten cooling in Zone 4. |
| Thermal Shock | Pass $\Delta T$ 42°C | Shoulder separation. | Increase Soak Temp or Time (Zone 1-3). |
| Dimensions | Ovality within spec | Bottle is "slumped". | Reduce Soak Temp (Zone 2) by 5°C. |
| Visual | No Cold Checks | Surface fissures. | Reduce final cooling fan speed. |
Conclusion
Setting the perfect annealing curve is the art of balancing thermodynamics with production efficiency. By anchoring your profile to the glass’s Annealing Point (~554°C), respecting the thermal mass of your specific container, and strictly limiting the cooling rate through the critical strain range, you can eliminate residual stress. At FuSenglass, we validate this process continuously with polariscopic and thermal shock testing, ensuring that the only thing our bottles break is the competition.
Footnotes
-
Explains why lehr temperature setpoints and cooling curves must match container thickness and size. ↩ ↩
-
Defines characteristic viscosity points (annealing/strain/softening) used to design practical lehr curves. ↩ ↩
-
Quick property reference for lime/soda-lime glass, including typical annealing and strain point ranges. ↩ ↩
-
Primary-source viscosity dataset for soda-lime-silica glass near annealing temperatures. ↩ ↩
-
Teaching reference on cooling through annealing/strain ranges and why rapid cooling locks residual stress. ↩ ↩
-
Shows how lehr settings and zone control relate to residual stress targets in process modeling. ↩ ↩
-
Official method for grading container anneal quality via polariscopic optical retardation. ↩ ↩
-
Material overview connecting thermal expansion and thermal stress sensitivity in common commercial glasses. ↩ ↩
-
Official thermal shock resistance test for bottles/jars used in hot pack, pasteurization, and wash cycles. ↩ ↩
-
International standard for thermal shock resistance/endurance testing to align multi-site or multi-supplier validation. ↩ ↩


