Tunnel pasteurization is the ultimate stress test for glass packaging, turning your production line into a high-stakes thermal gauntlet. Are you pushing your glass past its breaking point without even realizing it?
Tunnel pasteurization subjects glass bottles to aggressive heating and cooling cycles that test their thermal shock resistance. The rapid "Delta T" transitions between spray zones can exploit structural weaknesses like uneven wall thickness or poor annealing, leading to catastrophic line breakage.

The Thermal Gauntlet: An Overview of Tunnel Dynamics?
The Mechanics of the Tunnel
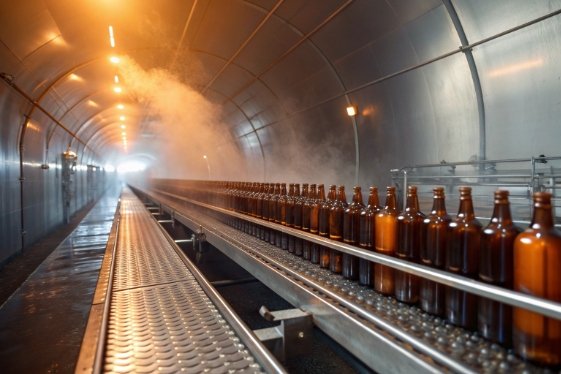
As the face of FuSenglass, I have walked dozens of bottling lines, and the tunnel pasteurizer is always the most critical control point. Unlike a retort (static batch), a tunnel is dynamic. Bottles move on a conveyor belt through varied "zones" where water is sprayed onto them. The goal is to heat the core of the product to a target temperature (usually 60-65°C) for a specific time (Pasteurization Units 1 or PUs) to kill bacteria. However, for the glass bottle, this is a physical assault. The bottle is first subjected to thermal expansion (heating), held at equilibrium, and then—crucially—subjected to rapid thermal contraction (cooling).
Thermal Performance Factors
A glass bottle’s ability to survive this journey depends on its Thermal Shock Resistance 2 (TSR). While standard soda-lime glass has a theoretical TSR of about 40-50°C, the effective performance in a tunnel is dictated by three external factors:
-
Heat Transfer Efficiency: How fast the sprays transfer energy. High-pressure, high-volume sprays shock glass faster than gentle mists.
-
Product Interaction: The liquid inside acts as a thermal reservoir. During cooling, the liquid stays hot while the glass skin cools, creating a massive temperature gradient through the glass wall.
-
Mechanical Stress: The bottles are not sitting still; they are vibrating, bumping, and sliding. A bottle under mechanical load (conveyor pressure) has a lower thermal threshold than a static one.
Assessing the Risk Zones
The danger isn’t uniform. The entrance and exit are where the physics of glass are pushed to the limit.
| Tunnel Zone | Thermal Action | Stress State on Glass Surface | Risk Level |
|---|---|---|---|
| Pre-Heat | Rapid Surface Heating | Compression (Pushing together) | Low |
| Pasteurization | Equilibrium | Neutral / Slight Internal Pressure | Very Low |
| Pre-Cool | Surface Cooling | Tension (Pulling apart) | High |
| Final Cool | Rapid Surface Contraction | Maximum Tension | Critical |
Understanding the zones is step one. Now, let’s analyze specifically where the process goes wrong and breaks your bottles.
Which Temperature Ramps Create the Highest Thermal Shock Risk?
We often blame "bad glass" for breakage, but aggressive machine settings are often the silent killer. Is your cooling profile too steep for the laws of physics?
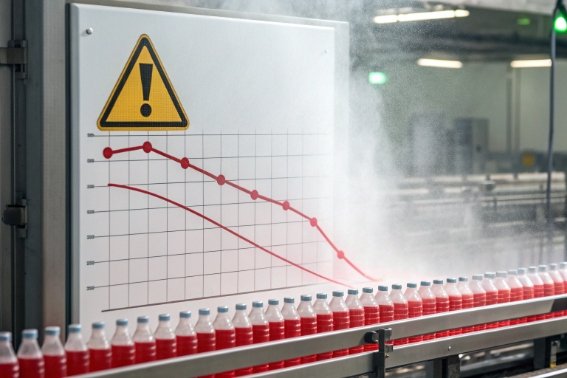
The highest risk occurs during the transition from the pasteurization zone to the first cooling zone, specifically if the temperature difference (Delta T) exceeds 35-40°C. Aggressive "crash cooling" strategies to save water or time are the primary cause of thermal shock failure.
The "Deadly Delta" Calculation
Thermal shock is defined by the difference between the temperature of the glass and the temperature of the water hitting it.
-
The Scenario: Your bottles are exiting the holding zone. The glass and liquid are at 65°C. They enter Cooling Zone 1.
-
The Mistake: To cool the product fast, the operator sets Zone 1 sprays to 20°C.
-
The Result: ΔT = 65°C – 20°C = 45°C. This exceeds the safe limit for most standard commercial glass. The outer surface contracts instantly, tearing itself away from the hot, expanded core. Crack.
Spray Nozzle Dynamics
It is not just about the set point temperature; it is about where the water hits.
-
Shoulder vs. Base: If the cooling sprays are directed heavily at the neck/shoulder area (which is often thinner) while the base (thick glass) remains submerged or shielded by the conveyor belt, you create a vertical thermal gradient 3. The top shrinks, the bottom doesn’t. This shears the bottle in half horizontally.
-
Clogged Nozzles: Uneven spray patterns cause "hot spots" and "cold spots" on the same bottle. If one side is cooled by a jet and the other side is dry, the circumferential stress will snap the bottle vertically.
The "Suez Canal" Effect (Conveyor Stops)
The most dangerous moment is an unplanned line stop inside the tunnel.
-
If the conveyor stops, bottles sitting right under a spray nozzle bar get continuously hammered with cold water, while bottles six inches away might be in a "dead zone" retaining heat.
-
When the belt restarts, the "hot" bottles suddenly hit the "cold" curtain. The breakage rate after a line restart is typically 10x higher than during steady-state running.
| Ramp Strategy | Description | Glass Impact | Verdict |
|---|---|---|---|
| Linear Cooling | Gradual drop (e.g., 5°C per zone). | Low Stress. Glass equilibrates. | Best Practice |
| Step-Down | Moderate drops (e.g., 10-15°C steps). | Manageable Tension. | Standard |
| Crash Cooling | Huge drop (>30°C) to lock in flavor. | Critical Tensile Shock. | Dangerous |
| Spray Overlap | Mixing hot/cold water between zones. | Unpredictable Thermal Spikes. | Avoid |
How Do Bottle Design and Wall Thickness Influence Cracking?
You cannot cheat geometry. Does your bottle design have hidden flaws that make it a ticking time bomb in the tunnel?
Uneven wall thickness is the greatest design flaw for tunnel pasteurization. A heavy base (heel) retains heat longer than thin sidewalls, creating differential contraction that snaps the bottom off. Sharp transitions at the shoulder also act as stress concentrators.

The "Thermal Inertia" of the Heel
At FuSenglass, we often have to redesign clients’ bottles because they want a "premium heavy base" (push-up) without understanding the thermal cost.
-
The Problem: Glass is an insulator. A 20mm thick glass base stores a massive amount of heat. A 3mm sidewall stores very little.
-
The Mechanism: In the cooling zone, the thin sidewall cools down and contracts in seconds. The thick base is still hot and expanded for minutes. The sidewall effectively tries to shrink smaller than the base it is attached to.
-
The Failure: The stress accumulates exactly at the "heel" radius. The bottom separates cleanly, often looking like it was cut with a laser. This is the classic "thermal shock ring-off."
Base Design: Push-Up and Knurling
-
High Push-Up (Punt): A deep punt creates a complex geometry. If the glass distribution is poor (thin in the center of the punt, thick at the corners), the thermal stress becomes multi-directional.
-
Knurling (Base Texture): Believe it or not, the "bumping" texture on the bottom of the bottle helps. It reduces the contact surface area with the hot conveyor belt, allowing better water circulation under the bottle for more even cooling. Flat-bottomed bottles trap heat, exacerbating the heel/wall differential.
Shoulder Radius
The shoulder is the second most common failure point.
-
Square Shoulders: A tight radius (sharp corner) concentrates mechanical and thermal stress. During the expansion phase (heating), the shoulder is pushed outward by internal pressure. If the glass is thin at the corner (a common molding defect called "thin shoulders"), it will burst.
-
Sloped Shoulders: A gentle slope distributes the stress over a wider surface area, making the bottle much more resilient to the "breathing" (expansion/contraction) of the process.
| Design Feature | Thermal Behavior in Tunnel | Risk Assessment |
|---|---|---|
| Even Wall Distribution | Uniform expansion/contraction. | Ideal |
| Heavy Base (>15mm) | Base stays hot, walls cool. Heel fracture. | High Risk |
| Square Cross-Section | Corners concentrate tension. | Moderate Risk |
| Embossed Logos | Varied thickness creates stress points. | Low-Moderate |
How Does Annealing Quality Affect Survival?
Even a perfect design will fail if the manufacturing process left "ghost stress" in the glass. Is your glass fighting itself before it even enters the tunnel?
Annealing relieves the residual stress formed during bottle manufacturing. If annealing is poor, the bottle holds "locked-in" tension. The added thermal stress of pasteurization pushes this total stress over the material’s limit, causing spontaneous breakage.
The Concept of "Pre-Load"
Think of a glass bottle like a spring.
-
Properly Annealed: The spring is relaxed. It has the capacity to absorb the stress of the pasteurization tunnel.
-
Poorly Annealed: The spring is already pulled tight (pre-loaded with tension). It might hold together at room temperature, but it has no "spare capacity." As soon as the tunnel sprays hit it, adding just a little more tension, it snaps.
The Polariscope Check
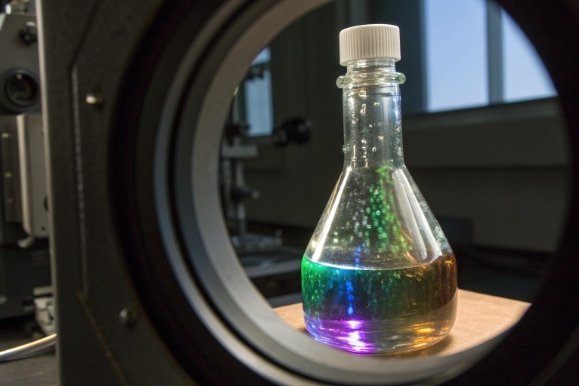
We use a Polariscope 4 to visualize this stress. Under polarized light, stress appears as colorful patterns.
-
Grade 1-2 (Acceptable): Minimal, diffused color. Safe for tunnels.
-
Grade 4-5 (Reject): Bright, defined bands of color (often at the base or neck). These bottles are "ticking time bombs." If you put Grade 4 glass into a tunnel with a 35°C Delta T, you will see breakage rates spike from 0.01% to 5.0%.
The Role of Scuffing (Surface Damage)
Annealing is internal, but surface condition matters too.
-
Pristine Glass: Has a high tensile strength.
-
Scuffed Glass: Bottles that have rubbed together on the line (abrasion) have microscopic surface flaws.
-
The Tunnel Effect: Thermal stress seeks out weak points. A poorly annealed bottle plus a surface scratch is a guaranteed failure. The stress concentrates at the scratch tip, leveraging the internal tension to rip the bottle open.
| Annealing Grade | Internal Stress State | Pasteurization Survivability |
|---|---|---|
| Grade 1 (Excellent) | Neutral / Relaxed | Can survive ΔT 50°C+ |
| Grade 3 (Marginal) | Moderate Tension | Risks failure at ΔT 40°C |
| Grade 5 (Bad) | High Tension | Fails at ΔT 30°C (likely in-tunnel explosion) |
| Cord Stress (Defect) | Chemical heterogeneity | Unpredictable/Catastrophic failure |
What Tests and Process Controls Qualify Bottles?
You cannot manage what you do not measure. What validation steps stand between you and a production disaster?
Qualify your glass using ASTM C149 thermal shock testing to determine the failure threshold, use Polariscope inspection for incoming annealing quality, and run a "Data Logger" through the tunnel to map the actual thermal profile.
1. Thermal Shock Testing (ASTM C149)
This is the definitive test. We take bottles from the production lot and subject them to a hot bath followed immediately by a cold bath.
-
The Pass Mark: For tunnel pasteurization, we typically require survival at ΔT 42°C.
-
The Stress Test: We recommend testing to destruction (incrementally increasing ΔT) to find the "Mean Failure Temperature." If your mean failure is 45°C and your tunnel operates at 40°C, your safety margin is too slim. You want a mean failure >50°C.
2. Internal Pressure Testing
Pasteurization increases internal pressure (CO2 expansion + liquid expansion).
-
The Test: Pressurize the bottle to 150-200 psi (depending on beverage type) for 1 minute.
-
Why: This ensures the bottle won’t burst during the "Pasteurization Zone" (heating phase) where internal pressure 5 is highest.
3. The "Data Logger" (Process Validation)
You must validate the machine, not just the glass. A "Data Logger" is a dummy bottle fitted with temperature probes that goes through the tunnel with the production run.
-
Reality Check: The tunnel HMI might say "Zone 2: 45°C", but the logger might record a shock of 38°C due to spray drift.
-
Cold Spots: It reveals if the bottom of the bottle is cooling slower than the top, identifying the dangerous thermal gradients mentioned earlier.
4. Closure Venting Test
Don’t forget the cap.
-
The Risk: If the cap seal is too good, the internal pressure can blow the bottle up. Some closure systems are designed to "vent" excess pressure (release gas) without leaking liquid.
-
The Test: Secure Seal Test (SST) under heated conditions to verify the closure performs correctly at 60°C.
| Control Measure | Frequency | Target Metric |
|---|---|---|
| ASTM C149 (Shock) 6 | Every Pallet/Lot | 100% Survival at ΔT 42°C |
| Polariscope | Hourly on Line | < Grade 3 Annealing |
| Data Logger | Weekly / Setup | Confirm Tunnel Profile matches Standard |
| Burst Pressure | Start of Run | > 1.5x Max Process Pressure |
Conclusion
Tunnel pasteurization is a necessary stress, but it doesn’t have to be a destructive one. By matching your bottle’s design and annealing quality to a carefully calibrated thermal profile, you can ensure your product survives the heat and arrives safely in the hands of your customer.
Footnotes
-
A standardized measurement of the total heat exposure received by a product, used to ensure sterilization. ↩ ↩
-
The capability of a material to withstand sudden changes in temperature without failing. ↩ ↩
-
The rate of temperature change across a given distance, critical in assessing stress in glass walls. ↩ ↩
-
Optical instrument used to inspect transparent materials for internal stresses and defects. ↩ ↩
-
The outward force exerted by the contents of a bottle, which increases significantly during heating. ↩ ↩
-
Standard test method for evaluating the resistance of glass containers to rapid temperature changes. ↩ ↩


