Old sauce, sticky oil, and that “pickle smell” can turn a good jar into a problem. If the jar still holds grease or moisture, mold wins fast.
Clean jars in two stages: first remove grease and films with hot wash and a real degreaser, then sanitize for the food risk level. Dry fully and store unsealed to stop odors and mold.

What level of cleaning does your reuse need?
Not every reuse needs the same hygiene. A jar for dry rice is not the same as a jar for fridge kimchi or baby food. In my own kitchen routine, most failures came from mixing these uses. A jar that was “clean enough” for pasta became risky when it held something wet for a week.
Clean vs sanitize vs sterilize
- Clean means removing visible food, grease, and biofilm. This is where most odor problems start and end.
- Sanitize means reducing microbes to a safer level for food storage. This matters for wet foods and longer storage.
- Sterilize is a higher bar and is mainly used for real canning processes (see sterilization of empty jars guidance 1). Most home reuse does not need true sterilization.
A simple rule works well: if the food will be wet and stored longer than a few days, add a sanitizing step. If it is dry goods, cleaning and full drying usually works.
| Reuse scenario | Risk level | Best approach | Notes |
|---|---|---|---|
| Dry goods (rice, beans, spices) | Low | Degrease + fully dry | Odor control matters most |
| Fridge leftovers (3–7 days) | Medium | Degrease + sanitize | Keep lids clean and dry |
| Ferments (kombucha, pickles) | Medium to high | Strong clean + sanitize | Avoid scratches and chips |
| Long-term shelf canning | High | Use proper canning jars + new lids | Follow a water-bath canning checklist 2 |
What to check before any washing
- Chips at the rim: discard for food. Chips can cut, and they also trap dirt.
- Hairline cracks: discard. A crack can break under heat.
- Cloudy etched glass: still usable, but it may hold odor more easily.
- Old lid liners: inspect early, because liners hold smells and mold more than glass.
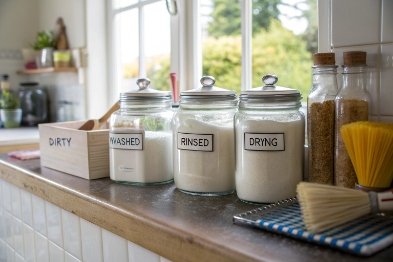
What tools make jar reuse easy?
A bottle brush and a narrow rim brush do more than extra soap ever will. Threads and rims are where films hide. When a jar smells “clean but weird,” the smell is often trapped in the lid liner or in the neck threads.
The small kit that covers 90% of jars
- Dish soap that cuts grease
- Bottle brush + small toothbrush-style rim brush
- Baking soda (odor) + washing soda (sodium carbonate) 3 (heavy grease)
- White vinegar (mineral film and smell)
- Isopropyl alcohol (label glue, not for soaking lids)
- Food-safe sanitizer (optional, for wet storage)
| Problem | Best tool | Why it works | Common mistake |
|---|---|---|---|
| Greasy film | Hot wash + washing soda | Lifts oils and protein films | Washing in cool water |
| Garlic/pickle odor | Baking soda soak | Neutralizes and lifts odors | Sealing jars while damp |
| Sticky label glue | Oil + baking soda paste | Breaks adhesive bond | Scraping hard and scratching |
| Rim grime | Small brush | Removes hidden biofilm | Only washing “inside” |
A good process is simple: scrape, soak, scrub, degrease, rinse hot, sanitize if needed, then dry fully.
The next sections answer the practical questions that decide whether the jar stays clean after Day 1.
This is where most people slip: the wash seems done, but the lid, drying, and storage decide if the jar stays fresh.
Which degreasers and hot-cycle settings remove residues?
Grease looks gone long before it is gone. A thin oil film can hold odors and feed mold later. If the jar held chili oil, peanut butter, or meat sauce, plain soap may not be enough.
Use hot water plus a real degreaser: strong dish detergent for daily jobs, washing soda or oxygen cleaner for heavy films, and a dishwasher “heavy/sanitize” cycle when available. Heat and time matter more than scrubbing harder.
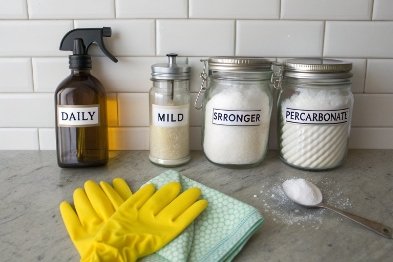
Degreasers that work well for food jars
Daily degreasing
- Dish soap made for grease cutting (a small amount, but with very hot water).
- Baking soda as a gentle abrasive for rims and threads.
Heavy degreasing (thick oils, nut butters, waxy sauces)
- Washing soda (sodium carbonate): add a spoonful to a sink of hot water. It cuts grease fast. Wear gloves if skin is sensitive.
- Oxygen cleaner (sodium percarbonate) 4: great for organic films and smells. Choose unscented versions and rinse well.
- Brewery cleaners (PBW-style): strong on biofilm and sticky residues. Use only as directed and rinse fully.
Label glue removal (after soaking)
- Cooking oil or mineral oil + baking soda paste (rub, then wash).
- Isopropyl alcohol for stubborn adhesive spots (wipe, then wash again).
Avoid harsh industrial degreasers that are not meant for food-contact items. If a product does not clearly state safe use instructions, it is not worth the risk.
Hot-cycle settings that actually help
For dishwashers, the goal is high heat + strong detergent + enough time.
- Choose Heavy/Intensive wash for greasy jars.
- Turn on High Temp Wash if available.
- Use Sanitize setting if your machine has it (it usually raises final rinse temperature and holds it longer).
- Use a heated dry or let jars air-dry inside the closed dishwasher.
For hand washing, heat still matters:
- Use water as hot as hands can safely handle.
- Soak 10–20 minutes when residue is thick.
- Scrub threads, rim, and shoulder, not only the inside wall.
| Residue type | Best degreaser | Best method | Quick test |
|---|---|---|---|
| Cooking oil / salad dressing | Dish soap + hot water | Soak + scrub threads | Water should sheet, not bead |
| Nut butter / tahini | Washing soda | Hot soak + bottle brush | No slick feel on glass |
| Tomato/meat sauce film | Oxygen cleaner | Long soak + hot rinse | No smell when warm |
| Wax / oily label glue | Oil + baking soda paste | Rub + rewash | No sticky drag on finger |
A simple check is the hot-water sheet test: rinse with hot water and watch the surface. If water beads in round drops, oil is still present. If it sheets evenly, the film is mostly gone.
How do you sanitize with boiling/steam/food-safe sanitizers?
A jar can be clean but not sanitary. That matters most for wet foods, fridge storage, ferments, and anything shared with kids or guests. Sanitizing is also useful when a jar had visible mold.
After degreasing, sanitize based on your risk level: boiling water or steam for simple home use, dishwasher sanitize for convenience, or a measured food-safe sanitizer for reliable results. Always sanitize after cleaning, not before.
Boiling and steam methods
Boiling
- Place jars in a pot with a rack or towel at the bottom.
- Cover with water and bring to a steady boil.
- Keep boiling for a set time (common home practice is around 10 minutes), then remove with tongs.
- Let jars drain and air-dry upside down.
Steam
- A steamer basket works well for wide-mouth jars.
- Steam exposure should be long enough to heat the whole jar, not just the outside.
- Steam is useful when you want less water handling.
These heat methods are simple, but they only work well when jars are already fully clean. Heat does not “fix” grease.
Food-safe sanitizers that work
When consistency matters, a measured sanitizer is easier than guessing.
- Unscented chlorine bleach solution: effective when properly diluted and given enough contact time (use CDC bleach dilution guidance 5). Let items air-dry. Do not mix bleach with vinegar or acids.
- No-rinse acid sanitizers used in brewing (like Star San contact-time and dilution instructions 6): effective at low concentration with short contact time. Follow label directions.
- Hydrogen peroxide-based sanitizers: some are food-safe, but follow the exact product label.
For any sanitizer, follow the product label for dilution and contact time. Too strong can leave odor and can damage some lid liners. Too weak does nothing.
| Sanitizing method | Best for | Pros | Limits |
|---|---|---|---|
| Dishwasher sanitize cycle | Most households | Easy and repeatable | Depends on machine and loading |
| Boiling | Simple wet storage | No chemicals | Needs safe handling, time |
| Steam | Small batches | Less mess than boiling | Must heat evenly |
| Bleach solution (unscented) | Mold history, high-risk jars | Very effective | Must measure, avoid mixing chemicals |
| No-rinse sanitizer | Ferment tools, frequent reuse | Fast and consistent | Must follow label exactly |
What not to do
- Do not sanitize a jar that still feels oily. Oil blocks sanitizers.
- Do not use scented bleach or cleaners that leave fragrance behind.
- Do not towel-dry “sterile” jars with a kitchen towel. Towels carry odors and microbes.
For true shelf-stable canning, follow proper canning standards (see the USDA Complete Guide to Home Canning principles 7) and use the right jars and new lids. Reusing random jars for pressure canning is not the same as safe home reuse.
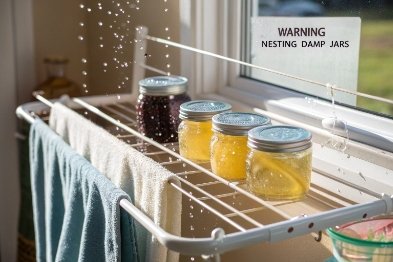
What drying/storage practices prevent odors and mold?
Most jar problems are not from washing. They are from sealing moisture. A clean jar with a damp lid can smell bad in two days. A clean jar stored sealed can smell musty even when it is “empty.”
Dry jars fully with airflow, store them unsealed or loosely capped, and keep lids and gaskets separate when possible. Odor control comes from dryness, not from more perfume cleaners.
Drying practices that work in real kitchens
- Air-dry upside down on a rack so water drains off the rim.
- After drip-drying, flip jars upright for a short time so trapped moisture can escape.
- Let lids dry fully on their own. Lid liners hold water at the edge.
- If you need speed, use a clean drying rack in a spot with moving air, not a closed cabinet.
Avoid cloth towels for inside drying. If a towel smells like detergent or fabric softener, the jar will take that smell.
Storage practices that stop the “stale jar smell”
- Store jars with lids off or loosely placed. This prevents trapped humidity.
- If stacking, place a paper towel between jars to avoid trapped moisture pockets.
- Keep jars away from strong odor sources like spices, onions, and cleaning products.
- For jars that held strong smells, store them with a dry spoonful of baking soda inside for a day, then rinse.
A habit that helped a lot in my own routine is simple: jars only go into the cupboard when they feel “bone dry” and smell like nothing, even when warmed by hot water.
| Storage choice | Odor risk | Mold risk | Best use |
|---|---|---|---|
| Lid tightened | High | Medium | Only for already-filled food |
| Lid loosely placed | Low | Low | Clean jar storage |
| Lid stored separately | Lowest | Lowest | Best for long storage |
| Jars stored upside down sealed | Medium | High | Avoid |
| Jars stored in damp area | High | High | Avoid |
Deodorizing strong jars without damaging them
- Baking soda soak: warm water + baking soda, sit overnight.
- Vinegar rinse: good for mineral film and some smells, but rinse well.
- Sunlight + airflow: a few hours can help, but avoid leaving decorated jars in harsh sun for long periods if coatings exist.
If a jar still smells strong after two rounds, the lid liner is often the real problem, not the glass.
When should lids and gaskets be replaced, not reused?
Glass can last for years. Lids and liners are the weak link. Many reused-jar failures come from a lid that looks fine but no longer seals, or a gasket that hardened and cracked.
Replace lids and gaskets when they rust, bend, smell, crack, lose elasticity, or show liner damage. For true canning, use new sealing lids each time. Reuse old lids only for dry goods or short-term fridge storage when the liner is still perfect.
Clear signs a lid should not be reused for food
- Rust anywhere near the sealing edge.
- Dents or warping that prevent even contact.
- Peeling liner or bubbles in the sealing compound.
- Persistent odor that stays after washing.
- Mold staining inside the liner or under rolled edges.
For two-piece canning systems:
- The flat sealing lid is generally designed for one-time sealing in canning.
- The metal band can be reused if it is not rusted or bent.
For swing-top bottles or clip-top jars:
- Rubber gaskets should stay soft and springy.
- Replace if the gasket is hard, cracked, stretched, sticky, or stained with mold.
Matching lid reuse to the job
- Dry goods: many lids are fine if clean and odor-free.
- Fridge storage: reuse can work if the liner is intact and the jar is not leaking.
- Hot fill and canning: do not gamble. Use the right canning jars and fresh lids.
| Lid type | Reuse OK for dry goods? | Reuse OK for fridge? | Replace when |
|---|---|---|---|
| Twist-off lug lid (jam/sauce) | Often yes | Sometimes | dents, rust, liner wear, odor |
| Two-piece canning lid (flat) | Yes (as cover) | Yes (as cover) | any liner damage; do not reuse for sealing |
| Two-piece band | Yes | Yes | rust, bent threads |
| Swing-top gasket | Yes | Yes | hard, cracked, stretched, moldy |
| Cork/T-top | No (for sealing) | No | always replace for product packaging |
A simple test for gaskets is the pinch test: pinch the gasket edge. If it does not bounce back, it is done.
Conclusion
Clean first, sanitize when risk is higher, then dry and store unsealed. Most odor and mold comes from trapped moisture or tired lids, not from the glass.
Footnotes
-
Official steps for when jars need sterilizing and how to do it safely. ↩ ↩
-
Clear checklist for water-bath canning, including when sterilizing jars is required. ↩ ↩
-
Reference data for sodium carbonate (washing soda) and why it functions as a strong alkaline cleaner. ↩ ↩
-
Reference data for sodium percarbonate, the common “oxygen bleach” behind many unscented cleaners. ↩ ↩
-
CDC guidance on making diluted bleach solutions for cleaning and disinfecting. ↩ ↩
-
Manufacturer tech sheet with dilution and contact-time instructions for a common no-rinse acid sanitizer. ↩ ↩
-
Core USDA/NCHFP canning principles covering safe jar prep, lids, and process basics. ↩ ↩


