A Champagne bottle failure is not a small defect. It is a safety event that can injure people, destroy product, and trigger recalls.
Champagne bottle pressure testing uses standardized internal-pressure methods (proof and burst), plus sampling plans and thermal-shock checks. A good program ties pass/fail limits to real CO₂ pressure, temperature swings, and full traceable documentation.

The safest way to manage CO₂ risk is to treat the bottle, closure, and process as one system. A thick bottle alone is not enough. A strong cork alone is not enough. The test plan must prove the system can survive pressure, time, temperature, and handling.
Which proof and burst protocols validate CO₂ safety?
A “good-looking” bottle can still hide weak spots. Pressure testing is how a lot becomes a safe lot, not a guess.
Proof and burst protocols validate safety by checking two things: bottles survive a set pressure for a set time, and bottles have a high failure pressure margin above real-world CO₂ loads.
What pressure is the bottle really holding?
Traditional-method sparkling wines usually sit at a traditional-method sparkling wine pressure of around 5–6 bar 1 during normal life, depending on style and temperature. That working pressure is not the test pressure. A safety program aims for a large margin above working pressure, since pressure rises when bottles warm and since handling can add impact stress.
A practical pressure map often includes:
- Working pressure: what the product holds during storage and sale
- Warm exposure pressure: what pressure becomes after a temperature spike
- Proof pressure: a pass/fail checkpoint pressure
- Burst pressure: the pressure where the bottle fails during a ramp test
Proof test (pass/fail hold)
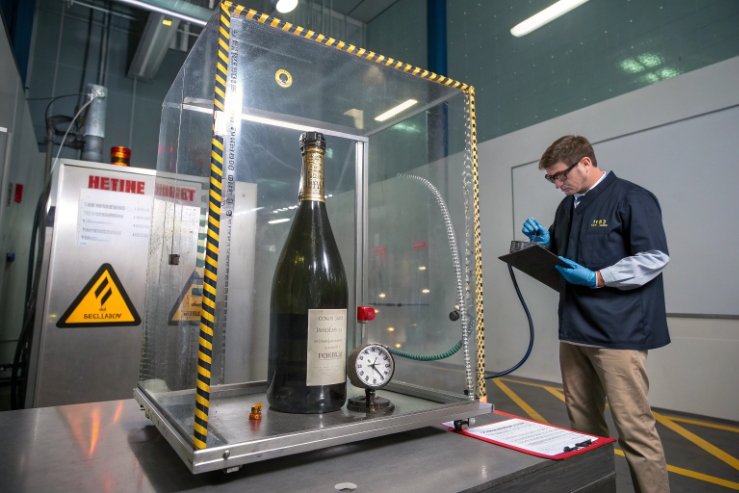
A proof test is a controlled internal pressure hold. Many labs use hydrostatic pressure (water) because it is safer than compressed gas. The bottle is connected to a pressure head that seals on the finish. The tester increases internal pressure at a controlled rate to a preset proof level. The tester holds pressure for a fixed time. The bottle passes if there is no breakage and no leakage at the seal.
Standards like ISO 7458 internal pressure resistance test methods 2 describe two common approaches:
- a uniform pressure applied for a set time (proof/hold style)
- a pressure ramp at a constant rate (often used for burst)
In a Champagne program, proof tests are usually paired with visual checks for chips, checks for finish dimensions, and checks for surface stress because pressure strength and impact strength interact.
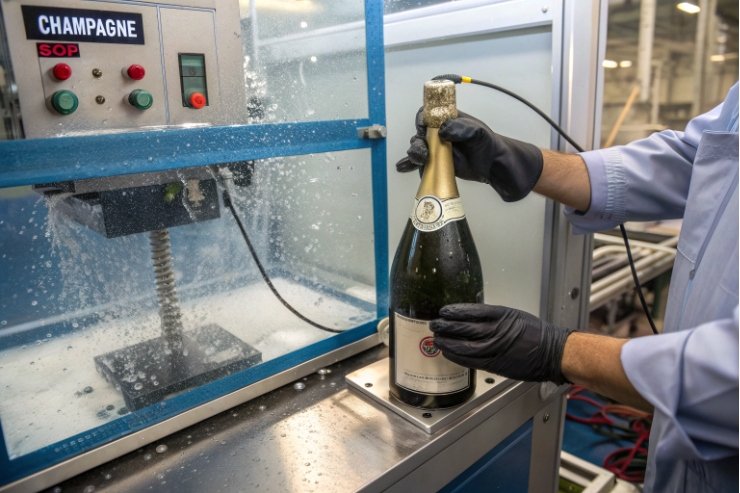
Burst test (ramp-to-failure)
A burst test ramps pressure until the bottle breaks. It is destructive by design. It answers one question: “How far above real life is the failure point?”
Burst testing is useful for:
- mold approval on new bottle designs
- lightweighting validation
- supplier qualification
- process drift detection (wall thickness changes, annealing drift)
The test setup often records:
- ramp rate
- failure pressure
- failure mode (base, heel, shoulder, finish)
- mold and cavity identity
A stable bottle family shows a stable failure distribution. A drifting process shows lower burst values or more “brittle” failure modes.
CO₂ pressure retention checks on filled bottles
Bottle pressure testing is not only done at the glass factory. Many wineries and cellars also verify internal pressure in filled bottles using an aphrometer-style gauge method. This is not a glass-strength test. It is a product pressure check. It helps confirm fermentation performance and long aging pressure stability.
One table that keeps teams aligned
| Protocol | Goal | Typical medium | Output | Best use |
|---|---|---|---|---|
| Proof/hold | confirm “no failure” at set pressure | water (hydrostatic) | pass/fail + leak notes | lot release, routine QA |
| Burst/ramp | measure margin and distribution | water (hydrostatic) | burst pressure + failure mode | design approval, drift detection |
| In-bottle pressure check | verify product CO₂ pressure | gauge/aphrometer | pressure at reference temp | cellar monitoring, aging checks |
A strong program uses proof testing to protect people every day. It uses burst testing to protect the brand over time.
How are sample size and pass/fail criteria set?
Testing every bottle is not realistic, so sampling becomes the control lever. The weak point is not “too few tests.” The weak point is unclear rules.
Sample size and pass/fail criteria are set by lot definition, risk class, and ISO 2859-1 acceptance sampling by attributes (AQL) 3 rules (often AQL-based), plus clear definitions of critical failures like breakage below proof pressure.
Step 1: Define the lot in a way that matches risk
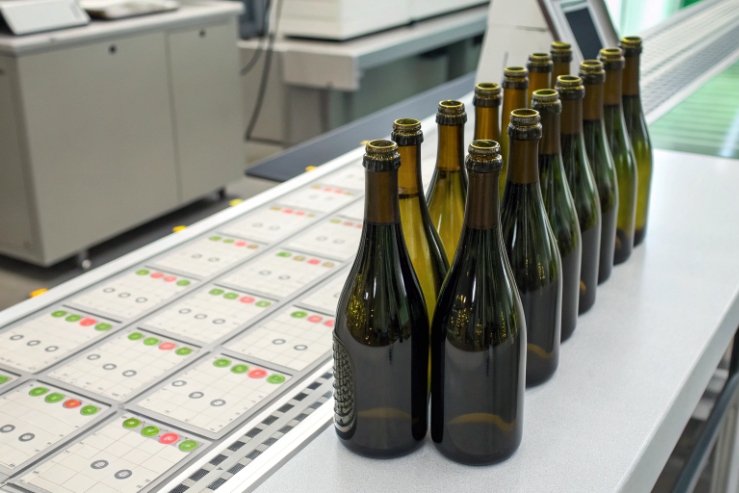
A “lot” must be traceable and consistent. Many glass plants define lots by:
- production time window
- furnace and feeder
- mold set and cavity numbers
- annealing lehr settings
- bottle weight class and finish type
This matters because Champagne bottles are sensitive to small changes. A mold change can shift wall thickness. An annealing drift can raise internal stress. A good lot definition makes the test meaningful.
Step 2: Classify what is critical, major, and minor
Pass/fail criteria must match the risk. For sparkling wine glass, these defect classes are common:
- Critical: bottle breaks below proof pressure, cracks during hold, finish seal leakage that suggests a structural issue, wrong finish dimensions that risk closure retention
- Major: burst distribution shifts down, high variation between cavities, high surface stress readings, frequent heel checks or sharp seams
- Minor: cosmetic issues that do not change pressure safety (light scuff, small appearance marks)
This classification links directly to AQL settings. Critical defects often have very tight acceptance rules, sometimes “zero acceptance.”
Step 3: Choose a sampling plan that fits destructive testing
Acceptance sampling standards for inspection by attributes are often used to select sample size and acceptance numbers for each lot size. For destructive burst tests, teams often use smaller samples but track results with statistical controls across time, since each bottle tested is destroyed.
A balanced approach looks like this:
- Routine proof testing: moderate sample size per lot, simple pass/fail
- Routine burst testing: smaller sample size per shift or per mold, trend-based control
- Escalation testing: larger sample size when a drift is detected or after maintenance
Step 4: Set numeric pass/fail rules that people can execute
A pressure test plan should answer these questions in plain language:
- What proof pressure must be achieved?
- How long is the hold time?
- What is the ramp rate?
- What counts as failure?
- What happens after one failure?
- When is the lot blocked, sorted, or scrapped?
A clear “reaction plan” is part of pass/fail. Without it, results do not change outcomes.
A simple criteria framework that works in audits
| Control point | Metric | Pass rule | Fail rule | Action |
|---|---|---|---|---|
| Proof test | survival at proof pressure | 0 breaks, 0 leaks | any break or leak | block lot, investigate mold/anneal |
| Burst test | burst pressure distribution | meets minimum + stable trend | below minimum or trend drop | increase sampling, stop shipment |
| Finish dimensions | gauge checks | within spec | out of spec | stop line, adjust tooling |
| Surface stress | stress check | within limit | above limit | review annealing, reduce speed |
In real projects, the biggest improvement comes from writing the reaction plan in the same document as the test method. It forces fast decisions when results go bad.
Do thermal-cycle tests simulate cold-chain abuse?
Many failures happen after temperature swings, not inside the factory. Cold chain is not “cold only.” It is cold, then warm, then cold again.
Thermal-cycle tests simulate abuse by applying sudden temperature changes (thermal shock) and repeated hot/cold cycles (endurance). These tests help expose stress, weak heels, and crack starters that pressure tests alone may miss.
Why temperature matters for sparkling bottles
Temperature changes impact risk in two ways:
- Pressure rises as bottles warm. CO₂ becomes less soluble at higher temperature, so headspace pressure increases (see Henry’s Law constant data for carbon dioxide 4 for reference behavior).
- Glass stress rises during fast temperature change. The outside and inside wall can be at different temperatures, which creates stress through thickness.
A cold chain event can be simple: a pallet sits at 2–4°C, then it sits on a warm dock, then it goes back into cold storage. A few hours can matter.
Thermal shock and endurance tests
Container thermal shock methods typically use hot and cold water baths to apply a sudden ΔT. A thermal endurance method repeats cycles to see if small damage grows.
These tests are valuable for Champagne bottles because:
- the bottle is thick, so thermal gradients can be larger
- the heel and base can trap stress
- small chips from handling can become cracks under ΔT
A good thermal test plan controls:
- water bath temperatures
- dwell time in each bath
- transfer time between baths
- bottle conditioning before the test
- inspection method after cycles (visual, dye penetrant, stress check)
If you want a standard reference point for test structure, ISO 7459 thermal shock resistance and endurance tests 5 are commonly cited for glass containers.
Combine thermal cycling with packaging reality
Thermal shock testing checks glass behavior. Cold-chain abuse also includes vibration and impact. So many brands pair thermal tests with transport simulation using ISTA package testing procedures 6:
- vibration on packed cases
- drop and edge impacts on packed cases
- compression on unit loads
This is where partitions, dividers, and pallet wrap become part of “bottle safety.”
A practical mapping from abuse to test
| Real-world abuse | What it can cause | Test idea | What to watch |
|---|---|---|---|
| cold storage → warm dock | pressure rises + thermal gradient | thermal shock + pressure margin review | heel cracks, finish cracks |
| tunnel pasteurization (for some products) | repeated heat exposure | thermal endurance cycles | haze, stress shift |
| e-commerce handling | impacts + vibration | packaged drop + vibration | chips at heel, neck impact |
| long export lanes | vibration + temperature drift | unit-load vibration + conditioning | micro-cracks that later fail |
Thermal-cycle tests are not perfect copies of life, but they are good “stress multipliers.” They help find weak designs before the market finds them.
What documentation is required for audits?
Audits do not only ask “did testing happen.” Audits ask “can the results be trusted and traced.”
Audit-ready documentation usually includes the standards list, approved test methods, calibration records, sampling plans, traceability to molds and shifts, raw data and summaries, and a clear nonconformance and corrective-action trail.
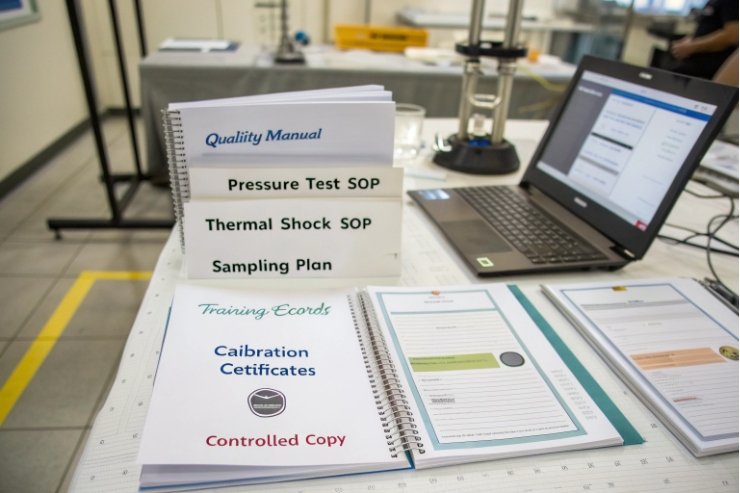
The documents auditors usually want first
- Quality manual and scope
- SOPs for internal pressure testing (proof and burst)
- SOPs for thermal shock testing
- Sampling plan documents with acceptance criteria
- Training records for operators and lab staff
- Calibration certificates for pressure gauges, transducers, timers, and temperature probes (many labs align their system with ISO/IEC 17025 for testing and calibration laboratories 7)
- Equipment maintenance logs for pressure rigs and safety shields
If one item is missing, auditors often treat the whole test system as weaker, even if the test results look good.
Traceability is the center of the audit
For Champagne bottles, traceability should link every test record to:
- furnace or production line
- mold set, cavity numbers, and mold maintenance history
- production date/time window
- annealing lehr settings and change history
- bottle code, weight class, and finish type
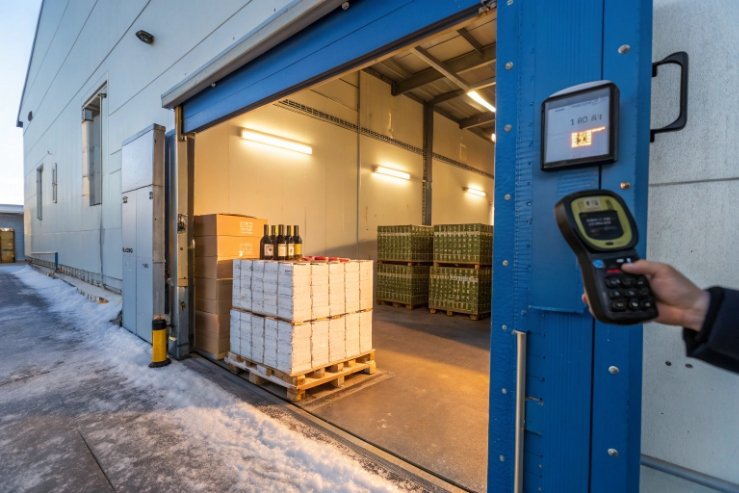
- pallet or pack identifiers (when used)
This makes it possible to isolate risk fast if a failure appears later.
What a complete test report should show
A strong report, even for routine testing, usually includes:
- test standard or internal method number
- sample count and lot size
- sample conditioning (temperature, time)
- ramp rate and hold time
- proof pressure and/or burst pressure results
- pass/fail decision and sign-off
- anomalies (seal leaks at the test head, chipped samples removed, equipment alarms)
The key is that someone else can reproduce the test from the record.
Nonconformance control that looks professional
Auditors look for a closed-loop process:
- a blocked lot record
- a root-cause worksheet or investigation note
- corrective action (mold repair, annealing adjustment, handling fix)
- verification (re-test results)
- release approval
This is not paperwork for paperwork’s sake. It is the record that proves risk is managed.
The “bonus” documents that reduce questions
- supplier qualification file (closure and wire hood suppliers too)
- change control records for lightweighting or new designs
- capability summaries per mold (burst distribution trends)
- packaging validation reports for export lanes (drop, vibration, compression)
When these are ready, audits become calmer. The team can show control, not just intent.
Conclusion
Champagne bottle safety comes from proof and burst pressure tests, smart sampling rules, thermal-shock checks, and full traceable documentation that proves every lot meets CO₂ risk margins.
Footnotes
-
Confirms typical Champagne bottle pressure levels for setting realistic safety margins. ↩ ↩
-
Defines proof/hold and ramp internal-pressure test methods for glass containers. ↩ ↩
-
Explains AQL-based acceptance sampling plans for setting sample sizes and acceptance numbers. ↩ ↩
-
Provides reference CO₂ Henry’s-law data and temperature dependence for pressure–temperature modeling. ↩ ↩
-
Describes thermal shock resistance and endurance test methods for glass containers. ↩ ↩
-
Lists common package drop, vibration, and compression test procedures used in transport simulation. ↩ ↩
-
Summarizes lab competence and calibration controls that support audit-ready test results. ↩ ↩


