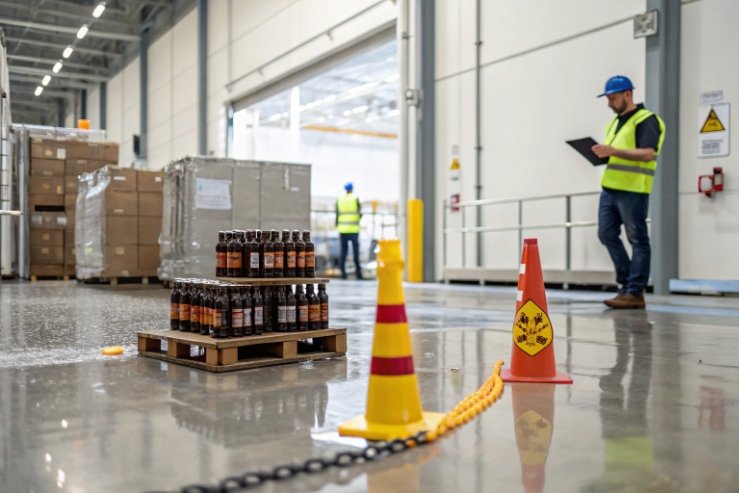
Broken bottles are not only a glass problem. They become a brewery problem, a logistics problem, and a consumer trust problem. A stable process prevents all of that.
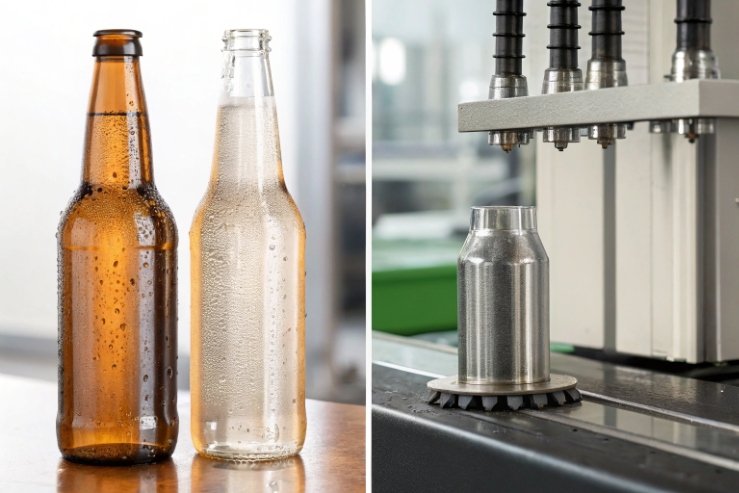
Beer bottles are made by melting a glass batch, cutting molten glass into gobs, forming bottles on IS machines, annealing to remove stress, adding protective coatings, and running strict inspections and strength tests before shipment.

Many people only see the finished bottle. In production, every step is built to control thickness, stress, and surface damage. Those three decide whether the bottle survives carbonation, filling lines, and transport.
What are the main production steps that make a beer bottle?
Small defects usually start early. Then they grow quietly through forming, cooling, and handling. Later, the brewery sees cracks, chips, or random breakage.
The core route is batch → furnace melt → forehearth conditioning → gob cutting → forming on an IS machine → annealing lehr → hot-end and cold-end coating → 100% inspection → strength sampling tests.
Batch, melt, and conditioning
Beer bottles begin with a glass recipe. The main inputs are silica sand, soda ash, limestone, and cullet 1. Cullet matters because it melts faster and lowers energy use. The batch goes into a continuous tank furnace and becomes molten glass. After refining, the glass flows into a forehearth 2. The forehearth is where temperature becomes stable. This step is important because a small temperature swing changes thickness distribution later.
Gob cutting and IS forming
From the forehearth, molten glass is cut into gobs. Each gob is a controlled weight. That weight is the starting point for bottle weight control. The gob drops into the blank mold of an IS (Individual Section) machine 3. Most beer bottles are narrow-neck, so blow-and-blow is very common. Some plants use narrow-neck press-and-blow (NNPB) to improve thickness control and enable lightweighting.
Annealing, coatings, and inspection
After forming, bottles are still hot and full of internal stress. They pass through an annealing lehr 4 to cool in a controlled way. This removes stress and improves strength consistency. Then coatings are applied. A hot-end coating is applied when glass is still hot. A cold-end coating is applied after cooling. Together, they reduce scratching and scuffing, which protects real strength in the field.
Finally, bottles go through automated inspection. Cameras and sensors look for checks, stones, blisters, and dimensional issues. Sampling tests confirm pressure strength, top-load strength, and thermal shock resistance.
| Process step | What it controls | Why it matters for beer | Typical failure if weak |
|---|---|---|---|
| Forehearth conditioning | Temperature stability | Stable thickness and weight | Thin spots, oval neck finish |
| IS forming | Wall and base geometry | Strength under pressure and impact | Heel cracks, weak shoulders |
| Annealing lehr | Internal stress | Predictable strength | Random breakage, thermal shock cracks |
| Hot/cold-end coating | Surface protection | Less scuff, less strength loss | Abrasion damage, label line scuffs |
| Inspection | Defect removal | Safer deliveries and filling | Burst risk, leaks, line stoppage |
In daily production work, the biggest “hidden hero” is consistency. A good recipe is not enough. Stable heat, stable gob weight, stable timing, and stable coating create bottles that behave the same across millions of units.
Which forming routes and weights suit carbonation loads?
Carbonation pressure is silent force. It sits inside the bottle for months. Heat in transport can raise it. A weak bottle does not warn you before it fails.
Beer bottles are usually formed by blow-and-blow or narrow-neck press-and-blow. Lightweight bottles can work when thickness is well distributed, but returnable and high-abuse routes often need heavier designs, stronger heels, and tougher surface protection.
Blow-and-blow vs narrow-neck press-and-blow
Blow-and-blow forms a parison by air, then blows the final shape. It is reliable and fast. It also works well for standard beer bottles with proven designs.
Narrow-neck press-and-blow uses a plunger to press the parison shape before final blowing. This often gives better thickness control, especially in the shoulder and body. Better thickness control supports lightweighting because glass can be moved to the right zones instead of being “average everywhere.”
What “right weight” means for carbonation
Beer is not champagne, but it is still pressurized packaging. A bottle must survive internal pressure plus external abuse. Internal pressure depends on carbonation level and temperature. A warm bottle has higher pressure. That is why brewers and glassmakers care about worst-case temperature, not only cold storage.
Bottle weight alone does not equal strength. Geometry and thickness distribution matter more. A well-designed lightweight bottle can outperform a poorly designed heavy bottle. Still, weight is a practical lever. If the route includes long transport, rough handling, or high stacking loads, a heavier spec often reduces complaints because it adds margin.
Key design zones for pressure safety
-
Heel and base: Many failures start here from impacts and standing stress.
-
Shoulder: Thin shoulders can fail under impact and pressure interaction.
-
Finish and neck: Must seal well and handle capping force.
| Forming route | Best fit | Strength advantage | Trade-off |
|---|---|---|---|
| Blow-and-blow | Standard long runs | Proven, stable production | Thickness variation can limit lightweighting |
| Narrow-neck press-and-blow | Lightweighting programs | Better thickness control | Tooling and process control demands rise |
| Press-and-blow (wide-mouth) | Jars, wide-mouth packs | Strong finish control | Not typical for beer bottles |
| Bottle program | Typical weight direction | Why | What must be controlled |
| — | — | — | — |
| One-way “standard” beer | Medium | Balanced cost and strength | Coating, inspection, pallet handling |
| Lightweight beer | Lower | Freight and glass savings | Thickness distribution, scuff protection |
| Returnable beer | Higher | Reuse abuse and washing | Impact margin, caustic resistance, coating life |
| Export / long route | Medium to higher | Heat and handling risk | Pressure margin, packaging stability |
When a customer asks, “How light can we go?”, the most honest answer is, “As light as your route allows.” The route includes filling line speed, case packing, pallet pattern, transport temperature, and retail handling. Forming route selection is the tool that makes lightweighting safer.
How do amber and green colors defend against light-strike?
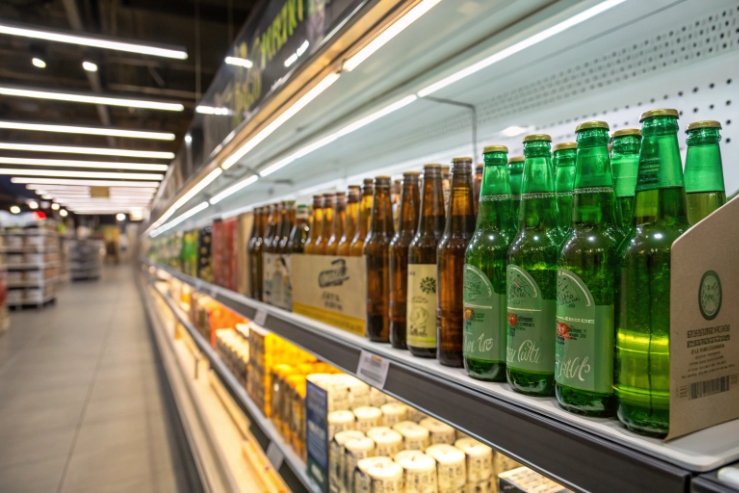
Light-struck beer is one of the fastest ways to lose repeat buyers. The taste can change even when the beer is fresh. The bottle color is a cheap insurance policy.
Amber glass blocks more UV and blue light, which slows the reaction that creates skunky off-notes. Green glass offers less protection, so it relies more on secondary packaging, labels, cartons, and hop chemistry choices to reduce light-strike risk.
What light-strike really is
Light-strike 5 happens when light hits beer and triggers a reaction involving hop compounds and riboflavin (a light-sensitive component). The result is a sulfur compound that smells skunky. This can happen in minutes under strong light. So protection is not only about long storage. It is also about bright retail shelves.
Why amber usually wins
Amber (brown) glass filters more of the wavelengths that trigger the reaction. It does not block all light, but it reduces risk enough that many mainstream beer brands use it as the default.
Green glass can look premium or traditional in some markets. But green blocks less of the harmful wavelengths. That means green bottles depend more on:
-
full wrap labels or sleeves
-
cartons and cases that block light
-
faster turnover and controlled shelf lighting
-
recipe choices like light-stable hop extracts (when used)
Color control in production
Glass color is created in the melt by adding colorants. Amber and green do not change the forming route. But they can change process control needs because color consistency is part of brand identity. Customers notice a drift in shade across pallets.
| Color choice | Light protection | Brand effect | Common support tactic |
|---|---|---|---|
| Amber | High | Classic beer look | Standard labels and cartons |
| Green | Medium to low | Premium/traditional cue | Full wrap label, carton-first merchandising |
| Flint (clear) | Low | Modern and clean look | Strong secondary pack + light-stable beer strategy |
Practical packaging strategy for green bottles
If green is chosen for brand reasons, the protection plan should be built around it. In my projects, the cleanest solution is not “hope the store is dark.” It is to design the pack system:
-
use cases that block light
-
reduce bottle exposure during display
-
consider sleeves or high-coverage labels
-
control warehouse lighting and dwell time
Bottle color is both product protection and marketing. Amber leans toward protection first. Green leans toward shelf look first. Both can work, but green needs more help from packaging and distribution discipline.
What changes for returnable beer bottles: thickness, coatings, and wash life?
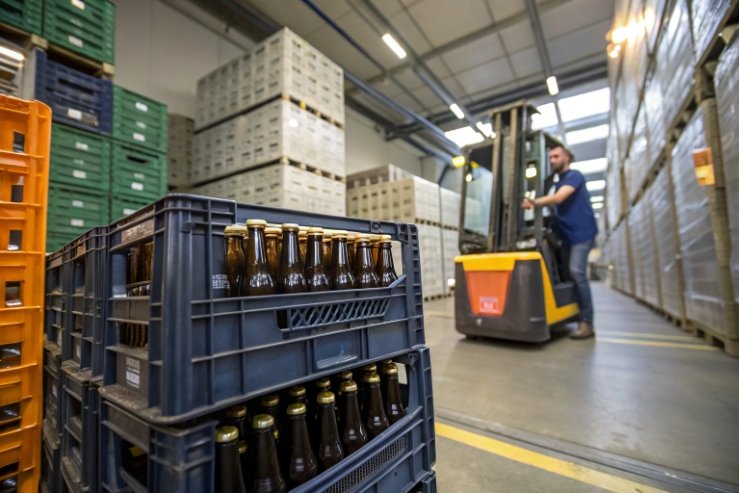
Returnable bottles face repeated stress. They are dropped into crates, knocked in transit, and washed in hot caustic solutions. A one-way bottle often fails in that environment.
Returnable beer bottles are usually heavier, with stronger heels and more conservative thickness, plus more durable hot-end and cold-end coatings. They also need scuff resistance, caustic wash resistance, and tighter inspection rules for reuse cycles.
Why returnables need a different design philosophy
A one-way bottle is designed for one trip. Returnables are designed for many. The damage mode changes. For returnables, the biggest enemy is surface wear. Every scratch reduces strength because glass fails from surface flaws. So returnables focus on keeping the surface smooth through many loops.
That pushes specs in three directions:
-
More glass in critical zones: heel, shoulder, and impact areas
-
Better surface protection: coatings that survive scuff and washing
-
Stricter reuse inspection: remove damaged bottles before refill
Coatings: hot-end and cold-end matter more for reuse
Hot-end coatings reduce abrasion during early handling when glass is still sensitive. Cold-end coatings improve lubricity and reduce scuffing in contact. For returnables, coating selection and application stability become a major quality driver. If coating is weak or uneven, crates turn into sandpaper over time.
Returnable systems may also use stronger external coatings or optimized cold-end chemistry to improve scratch resistance. The key is compatibility with caustic wash and with label removal steps.
Thickness and geometry changes
Returnables often have:
-
thicker walls and heavier bases
-
stronger heel radius
-
more conservative lightweighting
-
sometimes a more standardized shape to fit national crate systems
| Returnable spec area | What changes vs one-way | Why it matters | Risk if ignored |
|---|---|---|---|
| Weight and thickness | Higher, more conservative | Impact margin over many trips | Rising breakage per reuse cycle |
| Heel and base geometry | Stronger ring and radius | Heel is common crack start point | Base/heel checks after crates |
| Coatings | More durable, wash-compatible | Keeps surface flaws low | Strength loss from scratches |
| Inspection for reuse | Stricter reject rules | Removes weakened bottles | Burst events at the filler |
| Label system | Wash-off compatible | Supports reuse loop | Label residue and line issues |
A returnable bottle is a system product. It is not only the bottle. It is crate design, conveyor guides, washer chemistry, and sorting rules. When one piece is weak, the whole loop pays for it.
Which burst and drop tests certify beer bottle safety?
A bottle can look perfect and still fail under pressure or impact. Testing is how safety becomes measurable. It is also how a buyer can compare suppliers without guessing.
Beer bottle safety is proven through internal pressure (burst) tests, top-load tests, impact and drop tests, and thermal shock checks. Returnable bottles often add abrasion, caustic wash, and repeated-impact validation to match real reuse hazards.
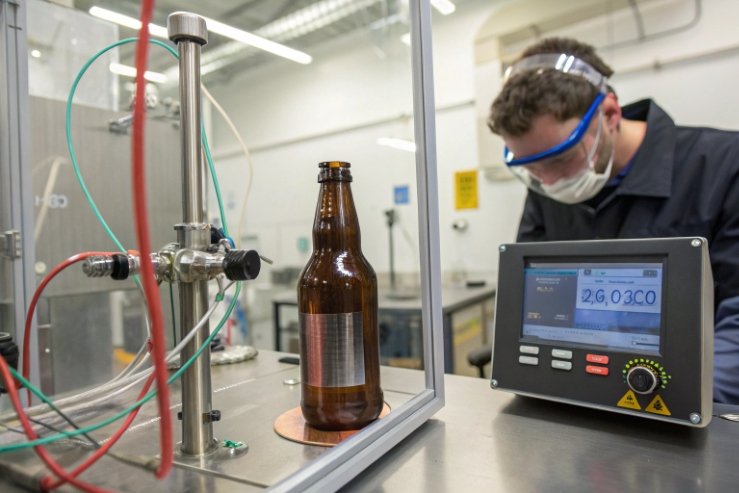
Internal pressure and burst validation
Internal pressure testing is usually done with water or air systems under controlled conditions. The goal is to confirm that bottles withstand a target pressure with a safety margin. For routine control, plants often run sampling tests by shift and track trends. A drop in pressure strength often points back to:
-
surface damage (scuffing)
-
poor annealing
-
thickness drift
-
defects like checks at the heel
A useful practice is to test bottles both “as made” and after simulated handling abrasion. Glass strength drops with scratches. A strong bottle must stay strong after normal wear.
Drop, impact, and packaging interaction
Drop tests can be done on empty or filled bottles, depending on the hazard being modeled. Impact tests often focus on the shoulder and heel because those zones see real hits in crates and conveyors. For packaged bottles, case drop tests are very important because most bottles fail after the carton collapses or shifts.
For returnables, crate drop and crate vibration are realistic because bottles impact each other inside crates. That is why separation control and coating quality matter so much.
Top-load and thermal shock
Top-load tests check vertical strength. Bottles must survive stacking loads in pallets and in warehouses. Thermal shock tests check resistance to rapid temperature change, which can happen during filling, washing, or cold storage transitions.
| Test type | What it simulates | Key pass focus | What it protects |
|---|---|---|---|
| Internal pressure / burst | Carbonation pressure + heat | No burst below target | Consumer safety, brewery line safety |
| Top-load / vertical load | Pallet stacking and conveyors | No collapse at target load | Warehousing and transport stability |
| Impact / pendulum / side hit | Line knocks, crate hits | No critical cracks | Returnable reuse life |
| Drop test (pack or unit) | Handling drops | Pack holds bottles stable | Distribution damage reduction |
| Thermal shock | Hot/cold transitions | No cracking | Filling and wash compatibility |
| Abrasion / scuff simulation | Crates and cartons rubbing | Strength retention | Real-life strength over time |
| Caustic wash resistance (returnable) | Bottle washer cycles | Coating and surface stability | Reuse durability and appearance |
A strong certification mindset is simple: test the bottle, then test the bottle after realistic handling. In real routes, “perfect glass” does not exist. The bottle must survive the scratches and still keep margin.
Conclusion
Beer bottles are built through controlled melting, IS forming, annealing, coatings, and inspections. The right forming route, color choice, returnable specs, and pressure/impact testing keep carbonation safe and breakage low.
Footnotes
-
Crushed glass waste used as a raw material in glassmaking to accelerate melting and reduce energy consumption. ↩ ↩
-
A channel that conditions molten glass to a uniform temperature before it enters the forming machine. ↩ ↩
-
The primary automated machine used for forming glass containers, operating with independent sections for flexibility. ↩ ↩
-
A long kiln used for annealing glass or firing ceramic decorations to relieve stress and fuse materials. ↩ ↩
-
A chemical defect in beer caused by UV light exposure, creating 3-methyl-2-butene-1-thiol (skunky odor). ↩ ↩


