A bottle can look perfect, then feel greasy in the customer’s hand. That one detail can kill label adhesion, add dust pickup, and trigger returns.
Oily residue usually comes from process oils (mold release, conveyor lubricants), over-applied coatings, or wash/rinse chemistry that leaves a thin film. The fix is finding the true source with simple tests, then locking in a wash SOP and audits that stop rework and repeat claims.

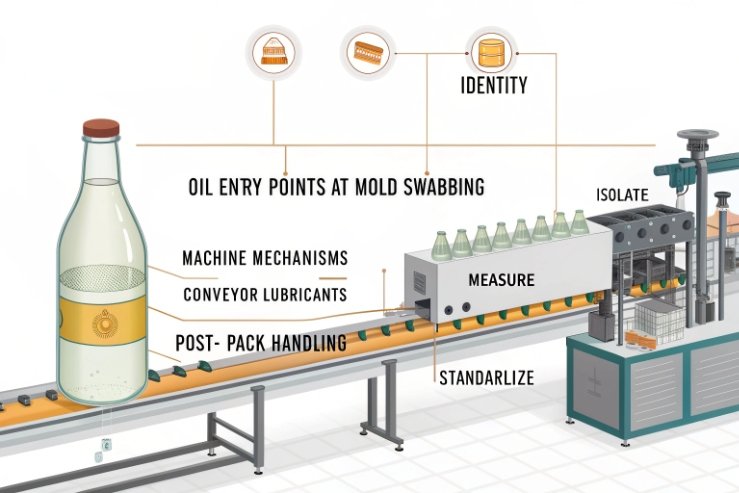
When “oil” shows up, it is rarely one single mistake. It is often a small transfer happening at the hot end, the cold end, or after packing. The fastest path is to treat it like contamination control: identify, isolate, measure, then standardize.
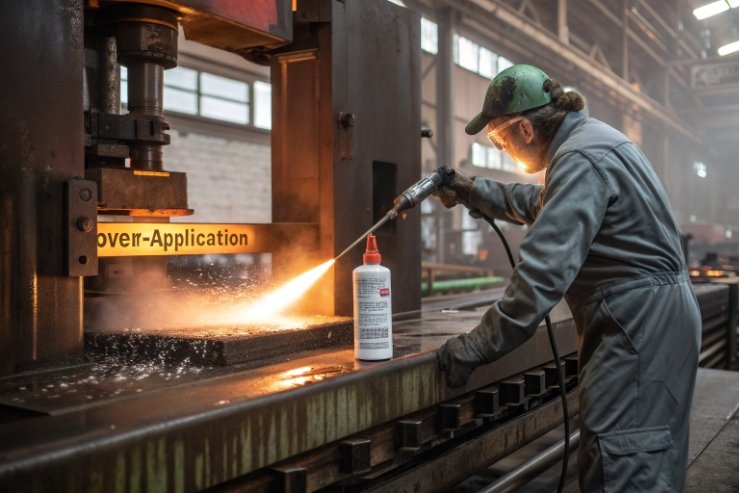
Are mold release agents or line lubricants the source?
Greasy bottles often get blamed on “bad glass.” In reality, the glass is fine. The film is usually something added to make production run smoothly.
Yes. Mold release oils, swab oils, plunger lubrication, and conveyor lubricants are the most common sources, especially when application is uneven, burned-in residue builds up, or oil mist settles on bottles after the lehr.
Where oil can enter the system
In a typical container line, oil can land on the bottle in several places:
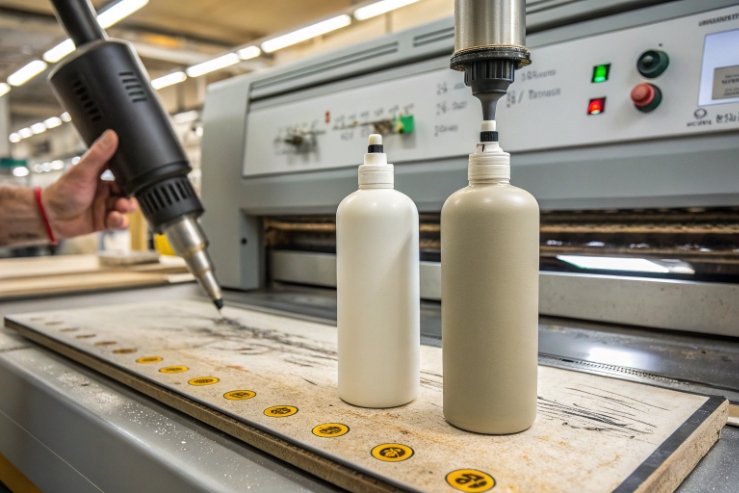
- Mold lubrication / swabbing: Too much swab oil, poor atomization, or wrong oil grade can leave unburned residue that survives into the cold end.
- Mechanism lubricants: Greases and oils from machine components can fling or aerosolize. A tiny mist is enough to make a whole pallet feel slick.
- Cold-end lubricants on conveyors: Chain oils and rail lubricants can transfer through contact points, especially where bottles rub at the shoulder or heel.
- Handling contamination: Gloves, hands, or tools with oil can smear film on high-touch zones like the label panel.
The pattern on the bottle is often the clue. A uniform slick feel across the whole bottle usually points to airborne mist or coating over-application. Streaks or bands often point to conveyor contact or handling.
Simple tests to confirm “oil from the line”
A fast plant-level toolkit catches 80% of cases:
- Water-break test (see ASTM F22 water-break test method 1): Clean glass holds a continuous water sheet. Oily glass breaks water into islands and beads.
- White wipe test: A clean lint-free wipe shows visible smears. Use a consistent wipe pressure and count strokes.
- UV tracer (if available): Some lubricants fluoresce under UV, which helps find transfer points.
- Location mapping: Check bottles by station (post-lehr, post-coating, post-inspection, post-pack). The first station where oil appears is the source zone.
| Suspected source | Typical residue pattern | Where it appears first | Most effective fix |
|---|---|---|---|
| Mold release/swab oil | random smears, sometimes dull haze | right after lehr | reduce dosage, improve burn-off, clean molds |
| Aerosol oil mist | uniform slick feel | cold end, accumulation table | fix leaks, shield, improve ventilation |
| Conveyor lubricant | rings/bands at contact height | after long conveyor runs | reduce overspray, change lube, adjust rails |
| Handling oils | fingerprints/smudges | after inspection/packing | gloves policy, handling fixtures |
Practical controls that stop recurrence
- Set a maximum lubricant rate and lock it with a checklist at each shift.
- Add drip trays and shields near known leak points.
- Use NSF H1 lubricant registrations as a baseline for incidental-contact risk control, then still control dosage (NSF guidance 2).
- Track complaints by cavity and line time, because spikes often correlate with a specific shift change or maintenance event.
Do rinse water quality and detergents leave films?
Some “oily” films are not oil. They are surfactant residue, wax-like additives, or mineral + detergent interactions that feel slick.
Yes. Hard water, high TDS, incorrect detergent dosing, and poor rinse steps can leave a slippery film that looks like oil, especially on flint bottles under bright light.
How wash chemistry creates a “greasy feel”
There are three common mechanisms:
1) Overdosed surfactants: Too much detergent can leave a thin layer that reduces surface tension. The bottle feels slick and labels may “swim” during application.
2) Hardness interaction: Calcium and magnesium in hard water can react with some detergents and create deposits. These can feel smooth in thin layers and show as haze in thick layers.
3) Incomplete rinsing: If rinse stages are weak, any chemical used upstream can remain. The bottle can pass visual inspection but fail label adhesion and water-break tests.
This problem shows up more in returnable systems and pre-fill washing lines, but it can also happen in new-bottle rinse tunnels if water quality control is weak.
What to monitor every day
Water is a raw material. It needs specs.
- Hardness (as CaCO₃) (definitions and ranges: USGS hardness reference 3): High hardness raises film risk.
- Conductivity / TDS (how specific conductance tracks dissolved solids 4): Tracks dissolved solids and rinse effectiveness.
- pH of wash and final rinse: Drift can change residue behavior.
- Nozzle condition and pressure: Poor spray leads to dead zones and carryover.
- Detergent concentration control via alkaline titration concentration control 5 to prevent both under-cleaning and residue.
| Parameter | Why it matters | Common symptom when off | Quick audit method |
|---|---|---|---|
| Water hardness | drives deposits and film | haze, slippery feel | hardness strip or titration |
| Detergent concentration | residue risk | label slip, water-break failure | dosing logs + titration |
| Final rinse conductivity | rinse carryover | “clean” look but poor adhesion | daily conductivity check |
| Rinse temperature | dissolves residues | streaks and patches | temp log at each stage |
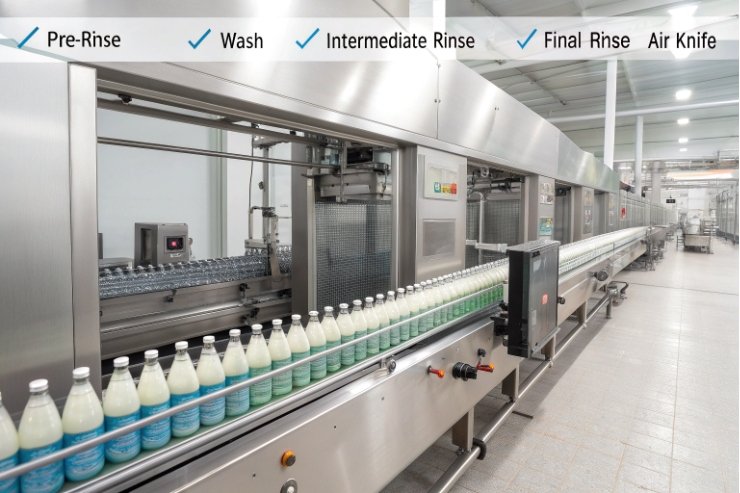
Best practice rinse design for “no film”
A reliable wash design uses stages, not one tank:
- Pre-rinse to remove loose dust
- Alkaline wash for oils/organics (controlled time and temperature)
- Intermediate rinse(s)
- Final rinse with low-mineral water (often softened or DI, depending on program)
- Air knife / blow-off with filtered air to prevent spotting
When customers demand ultra-clean glass for premium labels, the final rinse quality is usually the deciding factor.
Can decoration or coating traps create residue zones?
A bottle can be clean at the cold end, then feel greasy after decoration. That often happens when overspray, under-cure, or trapping geometry creates “sticky zones.”
Yes. Matte coatings, soft-touch lacquers, and some anti-scuff layers can feel oily if they are over-applied, under-cured, or contaminated. Embossing and recessed panels can also trap oils and dust, creating localized residue zones.
Coatings that are meant to be “slippery”
Some coatings are designed to lower friction. That is good for scuff reduction, but it can feel like oil if:
- the coating thickness is too high,
- curing is incomplete,
- or the surface energy is too low for your label system.
This is common with:
- spray frost / matte lacquers
- certain cold-end lubricity coatings
- specialty “soft-touch” finishes
A key point: a coating can be “working as designed” and still be wrong for your brand if it ruins label adhesion or attracts dust.
Geometry traps that create residue patterns
Residue often builds in:
- deep emboss
- sharp shoulders
- heel rings
- recessed label panels
These are high-contact zones in cartons and conveyors. If a lubricant is present anywhere on the line, these zones collect it first.
Tests that separate coating feel from true oil contamination
- Solvent wipe test: A controlled IPA wipe can remove some oils but may also attack uncured coatings. The wipe response tells you what you are dealing with.
- Contact angle / dyne test: Use dyne testing for surface energy 6 to flag low-energy surfaces that predict label risk.
- Cure verification: Track output using UV curing dose measurement with radiometers 7, plus tack testing for your coating system.
- Adhesion trial: Apply the real label and do a 24-hour peel and humidity hold.
| Scenario | What it feels like | What it breaks first | Most likely root cause |
|---|---|---|---|
| Slick everywhere | “oily” overall | dust pickup and label slip | over-applied cold-end or mist |
| Sticky matte zones | tacky/smudgy | scuff marks and fingerprints | under-cured matte coating |
| Bands at one height | ring-like slickness | carton rub scuff | conveyor lube transfer |
| Patchy residue in recesses | localized slick spots | label edge lift | trap zones + handling |
Which wash SOPs and audits prevent recurrence?
One cleaning “hero effort” can make bottles look fine for a day. Without SOPs and audits, the film returns, and the next lot fails again.
A strong SOP prevents oily residue by controlling sources (lubricant rate, coating dosage), validating wash chemistry (hardness, dosing, rinsing), and auditing outcomes with repeatable tests like water-break, wipe checks, and label-adhesion trials.
Build the SOP around cause categories
A practical SOP is not one long document. It is a control plan with triggers.
1) Source control
- Lock lubricant types and application points
- Set maximum dosage and verify each shift
- Fix leaks fast and document repairs
- Shield high-risk zones to prevent mist settling
2) Wash control
- Define detergent type, concentration range, and temperature range
- Define dwell time and nozzle pressure
- Define rinse stages and final rinse quality targets
- Define blow-off air filtration and maintenance
3) Verification
- Water-break test frequency
- Wipe test frequency and acceptance standard
- Label adhesion checks on each lot (especially after decoration)
- Periodic chemical residue checks when claims appear
An audit rhythm that works in real factories
- Per shift: water-break + wipe check at a fixed sample size
- Daily: hardness/conductivity + detergent titration
- Weekly: full line walk to check mist, leaks, and overspray
- Monthly: packaging rub test + vibration trial on packed cases
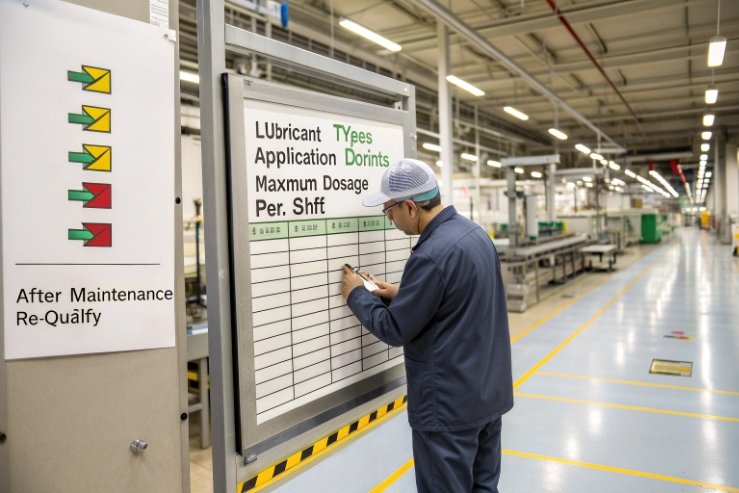
- After maintenance: re-qualify before release
| Audit item | Frequency | Pass signal | Fail trigger |
|---|---|---|---|
| Water-break test | each shift | continuous film | beading/islands |
| Detergent titration | daily | within range | drift beyond range |
| Final rinse conductivity | daily | stable low value | sudden rise |
| Label adhesion spot check | each lot | no edge lift | slip/silvering |
| Lubricant rate check | each shift | stable dosage | visible mist or drips |
Prevent the “fix the symptom” trap
If the team only adds stronger detergent, film may disappear for a week, then return. The root cause was still a lube leak or coating overspray. The best plants close the loop:
- When residue rises, they find the first station where it appears.
- They correct the source.
- They document the change.
- They confirm with the same test method every time.
Conclusion
Oily residue is usually process oil, coating carryover, or wash-film chemistry. The winning approach is source control, rinse discipline, and simple audits that catch drift before customers do.
Footnotes
-
ASTM method describing water-break testing to detect hydrophobic contamination during cleanliness checks. ↩ ↩
-
Explains what NSF H1 lubricant registrations mean and how to manage incidental-contact risk. ↩ ↩
-
USGS guide to hardness ranges (as CaCO₃) and why hard water causes deposits and “slick” washing feel. ↩ ↩
-
USGS overview linking specific conductance to dissolved solids for tracking rinse carryover. ↩ ↩
-
Practical titration guidance to keep wash chemistry in range and avoid residue from overdosing. ↩ ↩
-
Quick explanation of dyne testing to estimate surface energy and predict adhesion problems. ↩ ↩
-
Defines UV “dose” and how radiometers monitor curing energy for process control. ↩ ↩


