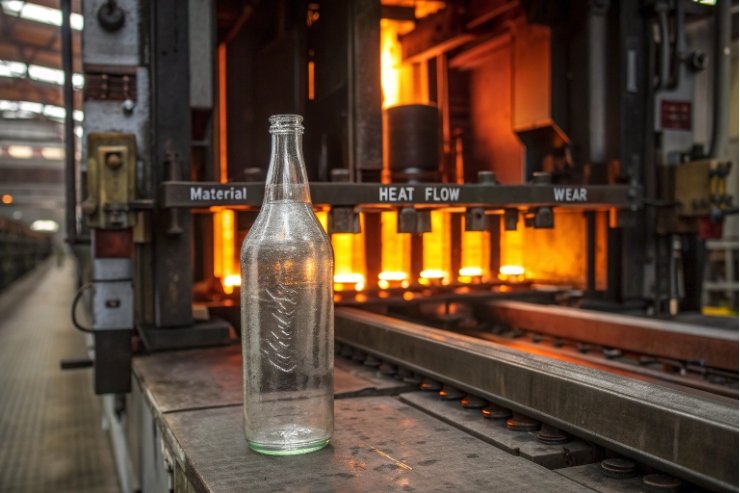
A glass bottle can look perfect in CAD and still come out dull, scuffed, or out of spec. Most of those problems start with the mold, not the glass.
Yes—mold materials directly affect surface gloss, seam quality, wall uniformity, and reject rates. Cast iron, bronze, venting design, wear state, and PM discipline together decide how “premium” the glass looks and performs.

A bottle is a thermal and mechanical copy of its tooling. On Individual Section (IS) machines 1, the mold decides how fast the skin freezes, how clean the parting line stays, and how stable dimensions remain across long runs. So the most reliable way to improve bottle quality is to treat mold material and maintenance as part of product design, not as a factory detail.
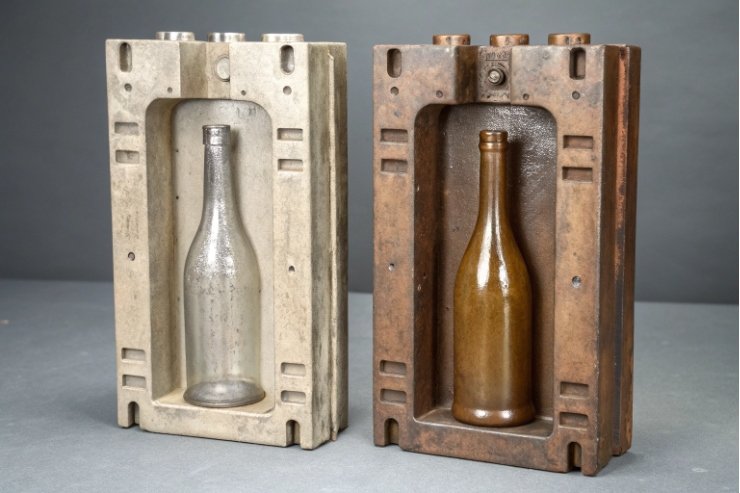
How do cast iron vs bronze molds change surface finish?
When a spirits bottle loses gloss or shows a “dirty” haze, brands often blame the furnace or the coating. Many times, the mold material and its heat flow are the real cause.
Cast iron tends to give stable, repeatable forming with good wear resistance, while bronze (copper-alloy) molds pull heat faster and can improve skin finish and productivity, but they need tighter thermal control to avoid chill marks and scuff.
What changes when the mold conducts heat faster
A bronze mold usually has higher thermal conductivity than cast iron 2. That means the glass “skin” freezes faster against the mold wall. Faster skin set can improve sharp detail and reduce some surface waviness, which helps premium embossing and crisp edges. It can also support higher machine speeds.
But the same fast heat pull can create problems when conditions drift. If the mold face gets too cold or the cooling is uneven, the bottle can show chill lines, dull patches, or inconsistent gloss between cavities. That effect often looks like random cosmetic variation, but it follows mold temperature.
Cast iron does not pull heat as fast, but it is often more forgiving. It can hold a more stable temperature profile across a long shift, and it typically resists certain types of mechanical wear well. That stability can help keep a consistent “brand look” over many pallets.
In many plants, “bronze” in this context often means aluminium bronze alloys 3 or related copper alloys chosen for heat flow and durability, not just aesthetics.
Surface finish is also about mold face condition
Material choice sets the baseline, but the mold face condition sets the real outcome:
- Micro-pitting prints into glass as haze.
- Oxide scale prints into glass as dull spots.
- Deposits and lubricant burn can show up as streaks.
So a bronze mold can look amazing early and drift fast if cleaning and temperature control are weak. A cast iron mold can be consistent and still look tired if it is worn or scaled.
| Mold material | Typical advantage | Typical risk | Best fit |
|---|---|---|---|
| Cast iron (alloy) | Wear resistance and repeatability | Slower heat pull can limit speed | Standard spirits and wine bottles |
| Bronze / copper alloys | Faster heat pull, crisp detail | Chill marks, thermal management demand | High-speed lines, sharp embossing |
| Hybrid/inserts | Local performance where needed | Complexity and PM planning | Neck rings, high-wear zones |
A practical decision rule
If the program is a heavy, premium spirits bottle that must look identical across long production windows, a stable mold system often wins over peak speed. If the program is high volume with detailed embossing and tight cycle time targets, bronze or hybrid tooling can pay back fast, but only with disciplined temperature control and cleaning routines.
Does venting design influence seams and scuff?
Many “mold-related” defects are not really material problems. They are airflow problems. Venting decides how smoothly the glass fills the mold and how cleanly air escapes.
Yes—venting strongly influences seam sharpness, finning, scuff risk, and repeatability. Good venting lets air escape evenly, reduces parting-line stress, and avoids trapped air marks that later turn into scuff and haze.
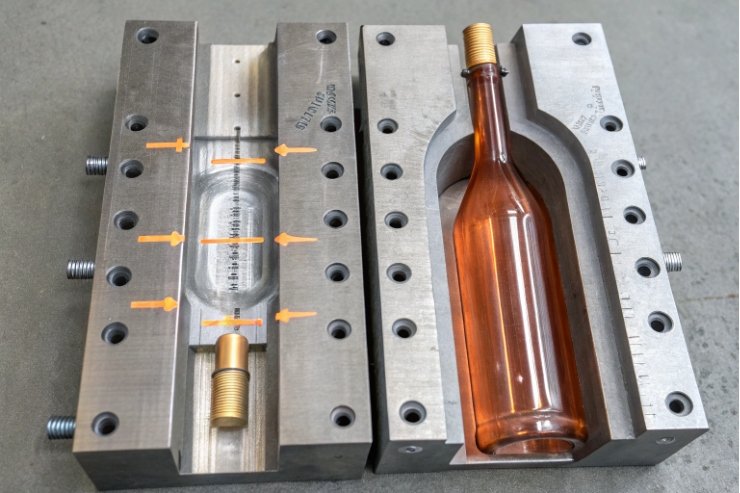
A bottle seam is the signature of the parting line 4. When venting is poor, air pockets fight the glass as it fills. That can push glass into the parting line unevenly. It can create:
- sharp seams and finning (flash),
- local distortion near the seam,
- or a seam that “opens” and looks offset.
Even when the bottle passes dimensions, a rough seam makes a premium bottle feel cheap in hand. It also increases scuff risk because rough seam edges contact rails, dividers, and neighboring bottles.
Venting also affects how the mold releases the bottle
If the mold cannot breathe, the bottle can stick or drag during take-out. That dragging can create scuffs that look like “packing damage” but really start at forming. In fast IS machine runs, a small release issue becomes a large scrap issue.
Vent design is not only “more vents”
More vents can help, but bad vent placement can cause its own issues:
- Too much venting can create visible vent marks.
- Poor vent maintenance can clog vents and create cycle-to-cycle instability.
- Uneven venting can create cavity-to-cavity gloss differences.
So the best strategy is balanced venting with a cleaning plan that keeps vent paths open.
| Venting feature | What it improves | What can go wrong | Control action |
|---|---|---|---|
| Parting-line venting | Seam quality and flash control | Sharp seam if clogged | Daily cleaning and seam checks |
| Base venting | Base clarity and release | Base marks, checks | Inspect base vents by cavity |
| Shoulder venting | Fill uniformity | Local haze, drag marks | Monitor cavity gloss drift |
| Vent cleanliness | Repeatability | “Random” defects | Vent cleaning checklist per shift |
A simple way to judge venting quality
When defects repeat in the same location and the same cavity, venting is a strong suspect. When defects rise with speed increases or lubrication changes, venting and release are often tied together. In premium programs, a small venting improvement can reduce scuff and seam complaints more than any label redesign.
How does mold wear impact wall uniformity?
A bottle can look smooth and still fail strength or leak tests. Thin spots and thickness drift often start with subtle wear that is hard to see until claims show up.
Mold wear impacts wall uniformity by changing heat transfer and cavity geometry. As surfaces pit, parting lines open, and neck rings wear, the glass distribution shifts, causing thin zones at the shoulder, heel, or finish that later crack or leak.
Wear changes both shape and cooling
Wear is not only “material removal.” It is also surface chemistry and roughness changes:
- Pitting increases local roughness and changes how glass slides and freezes.
- Oxide and scale change heat flow and create dull zones.
- Erosion at gates or corners changes how glass enters and spreads.
These changes alter thickness distribution even if total bottle weight stays the same. That is why some “mystery breaks” appear after weeks of good production. The mold drifts slowly, then the safety margin collapses.
To keep teams aligned across suppliers and shifts, it helps to standardize terminology with glassmaking glossary terms 5 so defect locations and tooling parts are described consistently.
The most sensitive zones for spirits bottles
For spirits bottles, I watch these zones first:
- Finish and bore: wear here affects closure fit, especially T-tops.
- Neck ring area: this controls roundness and sealing geometry.
- Heel and base ring: wear increases chipping risk and weakens drop performance.
- Shoulder transition: thin shoulder rings lead to cracks during handling.
Wear can also cause mismatch between blank and blow molds, which increases seam offset and creates one-sided thickness drift. That drift shows up as bottles that feel “fine” but crack during vibration or small drops.
| Wear symptom | Visual clue | Quality impact | Fast containment |
|---|---|---|---|
| Pitting/roughness | haze, dull patches | scuff + cosmetic rejects | polish or recondition |
| Parting-line opening | sharp seam, finning | cut risk + scuff | adjust, then refurbish |
| Neck ring wear | oval finish, closure issues | leaks, cork damage | swap neck rings first |
| Base wear | heel chips, wobble | breakage in transit | rotate molds, check cooling |
How to keep wall uniformity stable
Uniformity stays stable when the plant ties three signals together:
1) cavity-level defect data,
2) temperature monitoring by mold set,
3) periodic thickness mapping (spot checks).
When one cavity starts trending thin at the heel, a fast mold swap is cheaper than a customer complaint. Premium brands should treat cavity control like a brand-protection tool, not only a factory KPI.
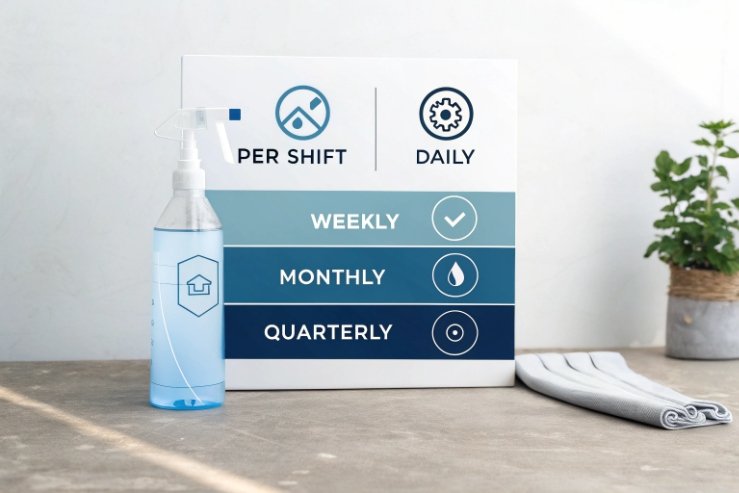
What PM schedules extend mold service life?
A mold does not “suddenly fail.” It tells the team for days or weeks through gloss drift, seam changes, and rising scuff. A disciplined preventive maintenance schedule 6 turns those signals into planned actions.
A strong PM schedule extends mold life by keeping vents open, surfaces clean, temperatures stable, and high-wear inserts refreshed before defects spike. The best schedule is layered: per-shift cleaning, weekly checks, and planned refurbishment cycles by cavity.
PM is about avoiding defect momentum
Once a mold starts scuffing, the bottle surface gets weaker, and breakage risk rises in shipping. Once a seam gets sharp, packing rub gets worse. Those effects multiply. So PM should happen before the defect becomes visible to customers.
A practical PM schedule that fits real factories
Below is a simple structure that works across many bottle programs. The exact timing depends on line speed, glass chemistry, and decoration demands.
| PM interval | Actions | Why it matters | Records to keep |
|---|---|---|---|
| Every shift | Clean vents, remove deposits, check seam sharpness | Prevents seam drift and drag scuff | cavity notes + photos |
| Daily | Inspect neck rings and finish area, verify lubrication | Protects sealing and closure fit | insertion/fit notes |
| Weekly | Measure key dimensions, check mold face roughness zones | Catches drift before scrap spikes | trend charts by cavity |
| Monthly | Rotate mold sets, recondition/polish faces, replace inserts | Resets gloss and release | refurb log + set ID |
| Quarterly (or by run hours) | Full overhaul: parting lines, coatings, weld repair/hardface | Extends life and stability | overhaul certificate |
PM tactics that pay back fast
- Use inserts in high-wear zones (neck ring, baffle areas) so the plant replaces small parts instead of whole molds.
- Track defects by cavity so the team can remove one problem cavity without stopping the whole job.
- Control mold temperatures so bronze or hybrid molds do not swing too cold or too hot.
- Protect molds from abrasive contamination (refractory grit, dirty lubrication) because contamination prints instantly into glass.
- When specifying refurbishment materials or new tooling stock, align alloy supply and consistency with references like continuous casting for glass moulds 7 to reduce variability across rebuilds.
A short story slot for later
A strong story here could be a time when one cavity created 80% of finish chips, and a planned neck-ring swap cut complaints immediately. This kind of story makes PM feel concrete to buyers who only see the final bottle.
Conclusion
Yes, mold materials and design shape glass quality. Cast iron vs bronze changes heat flow and finish, venting shapes seams and scuff, wear shifts thickness, and disciplined PM protects premium consistency.
Footnotes
-
Overview of how IS machines form glass containers and why cavity/tooling stability affects quality. ↩ ↩
-
Compare metal thermal conductivity values to understand why bronze molds freeze glass skin faster. ↩ ↩
-
Material background on aluminium bronze alloys often used where high heat transfer and corrosion resistance are needed. ↩ ↩
-
Learn what a parting line is and how poor control can create sharp seams or flash on molded parts. ↩ ↩
-
Definitions of common glassmaking terms like neck rings, blank molds, and finish geometry for clearer supplier communication. ↩ ↩
-
Practical background on preventive maintenance programs and why scheduled cleaning/inspection beats reactive repairs. ↩ ↩
-
See how continuous-cast bar stock is used for glass mould components and why alloy choice matters. ↩ ↩


