A Mason jar feels sturdy, so it is easy to assume it belongs in the microwave. Then one day it cracks, leaks, or builds pressure and scares everyone in the kitchen.
Most Mason jars are only microwave-safe when the manufacturer explicitly says so. The biggest risks come from sealed lids, thermal shock, and uneven heating—not from “microwave energy” itself.

Microwaving a jar is less about the word “Mason” and more about how the jar was made, how cold it is, what is inside it, and whether steam can escape. When those details are controlled, the jar can be used safely for light reheating. When they are ignored, the jar becomes a failure point.
Which markings or standards indicate microwave safety?
A jar can look identical to another jar and still behave very differently under heat. That is why relying on “it worked last time” is risky.
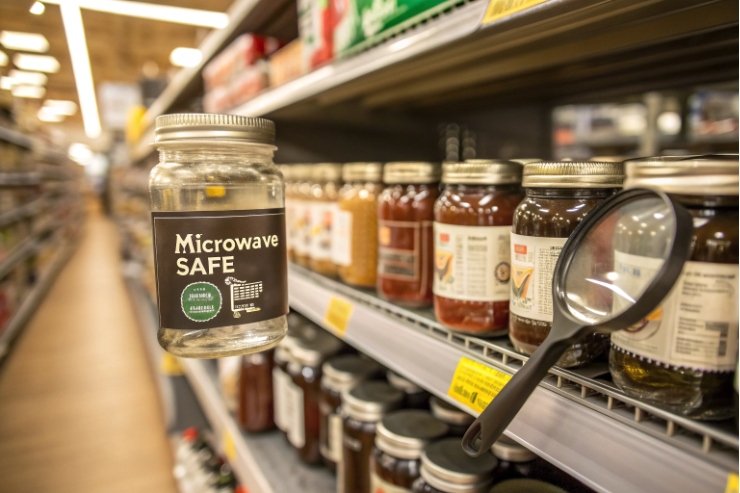
Microwave safety should be judged by clear markings and brand statements, not by guesswork. If the jar has a microwave-safe symbol or explicit wording on the packaging, that is the green light. If it has no claim, it should be treated as “not rated.”
What “microwave-safe” usually means in practice
A microwave does not heat glass directly the same way it heats water-rich food. The food heats first, then the glass heats by contact. That creates hot spots and temperature gradients. A “microwave-safe” claim usually means the jar can tolerate those gradients within normal heating times, and it will not crack under typical household use.
Manufacturers may also mean the material will not leach or degrade under heat. For plain container glass, leaching is usually not the core problem for reheating. Breakage from fast temperature gradients and household thermal-shock risk is the real issue. 1
The markings to look for (and how to interpret them)
The safest signals are:
- A microwave-safe icon (often a stylized microwave with waves) 2
- Text like “microwave safe” or “microwaveable”
- Care instructions that explicitly include microwaving
If the only marks are volume, brand, and “canning” language, that does not automatically mean microwave safe. Canning jars are designed for canning workflows, not for rapid reheating from the fridge to boiling hot.
Don’t treat “Mason” as a microwave rating
Many people assume “Mason jar” is a performance standard, but use is brand-specific. If you’re using Ball jars, follow the published Ball® canning jar Use & Care guidance 3 rather than assumptions.
A quick buyer checklist for brands and distributors
If a brand is selling jars for consumer reheating, the packaging should not rely on implied behavior. I prefer to see:
- explicit microwave statement
- clear “remove lid / vent” directions
- and a temperature-use range that fits real consumers
| Marking on jar/pack | What it tells me | Risk level | What I do |
|---|---|---|---|
| “Microwave safe” text | The product is rated for it | Low | Use with venting + short cycles |
| Microwave icon | Same, but verify lid notes | Low | Follow the icon + instructions |
| No microwave claim | No performance promise | High | Avoid microwaving |
| “Canning / preserving” only | Designed for canning, not reheating | Medium to high | Avoid or use only for very mild warming |
| Decorative paint/frost/metal | Coating may not like heat | High | Do not microwave |
Do lid components and seals limit microwave use?
Most “microwave accidents” with jars are not glass failures first. They are pressure failures first. A sealed jar is a small pressure vessel.
Cap liners and thread tolerances matter more than a frosted surface. In fact, a perfect seal is the problem inside a microwave, because steam needs a path to vent.
Why the lid is the main limit
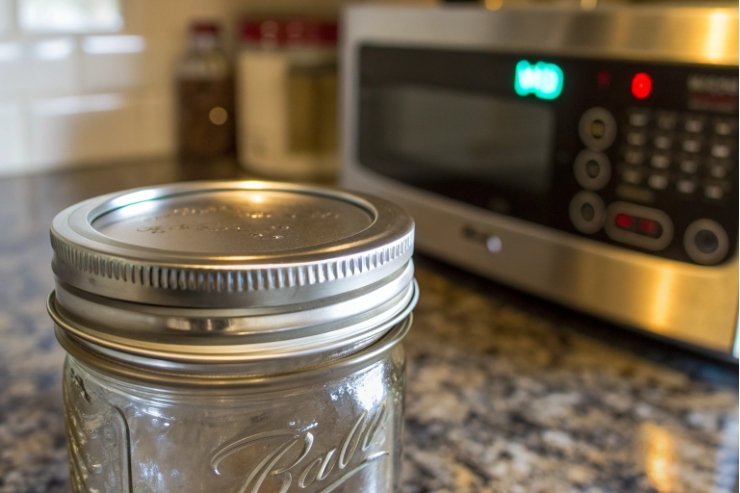
A standard two-piece Mason jar lid system uses a metal flat lid and a metal band (ring). 4 Metal should not go in a microwave. Even when sparking does not happen immediately, it is still a bad practice. (This is also why kitchen safety guidance often emphasizes never microwaving aluminum foil or other metals.) 5
More importantly, if the lid is tightened, it traps steam. Trapped steam raises internal pressure. Pressure pushes up on the lid and pushes out on the neck. That can cause leakage, sudden release, or in the worst case, a jar crack—especially with pressure buildup in tightly sealed containers. 6
Plastic lids are not a full solution
Many aftermarket plastic lids exist. Some are microwave-safe plastics. Even then, a tight plastic lid can still trap steam. The lid material is not the main decision. Venting is the main decision.
This is where many users get confused: a lid can be “microwave safe,” yet the sealed system can still be unsafe because pressure builds.
Does frosting on threads matter here?
For Mason jars, thread frosting is not a typical factor. The bigger issue is whether the closure creates an airtight seal. In microwave use, airtight is usually the wrong goal. The goal is controlled venting.
For specialty jars with decorative matte finishes near the mouth, the risk is not “torque loss.” The risk is contamination on the sealing surface and uneven seating. That can lead to messy leaks as the contents boil.
Best venting options that keep things clean
The simplest safe approach is:
- remove the lid completely
- cover the top with a microwave-safe vented cover, or
- use a paper towel as a loose splash guard
If the user insists on keeping a lid on, it must be loose and designed to vent. A clamp-style sealed top should not be microwaved.
| Closure situation | Pressure risk | Spill risk | Recommended move |
|---|---|---|---|
| Metal lid + ring (tight) | Very high | Medium | Do not microwave |
| Metal ring removed, lid off | Low | Medium | Use paper towel cover |
| Plastic lid (tight) | High | Low to medium | Loosen or use vented cover |
| Vented microwave cover | Low | Low | Best balance |
| “Burping” a sealed jar mid-heat | High | High | Avoid (sudden steam release) |
How does thermal shock risk change with fill level, and what best practices prevent pressure build-up?
Thermal shock is not random. It increases when temperature differences inside the glass become large, fast. Fill level and food type control that.
A cold jar with a small amount of thick food heats unevenly. The food can create hot zones while the glass remains cool in other zones. That is where cracking starts.
Why fill level changes the risk
When a jar is nearly full of a water-based food, the food heats more evenly and warms the glass more uniformly. That reduces sharp temperature gradients.
When the jar is mostly empty or has a small portion of dense food, heating can become uneven:
- the food gets very hot in one zone
- the glass near that zone expands
- other glass zones stay cool
- stress concentrates at the boundary
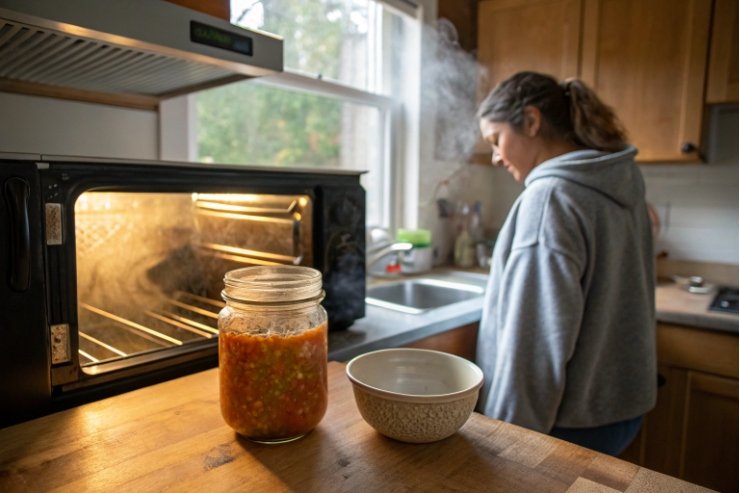
That is why heating an empty jar is the worst idea. There is no liquid buffer to carry heat evenly.
Food chemistry changes heating behavior
Sugary syrups, oils, and thick sauces heat differently than soups. They can superheat and suddenly erupt in localized zones, which drives both thermal stress and pressure events. 7 For premium brands that sell sauces, honey, or infused oils in jars, the “consumer microwave habit” should be treated as a real-use scenario, not a rare edge case.
Best practices that reduce both cracking and pressure
The safest habits are simple:
- Do not microwave sealed jars. Always vent.
- Avoid microwaving cold jars straight from the fridge. Let them warm a bit or use lower power first.
- Use short cycles (15–30 seconds) and stir between cycles.
- Leave headspace so bubbling does not push product into the threads and sealing land.
- Do not heat oily or sugary products aggressively in the jar. Transfer to microwave cookware if needed.
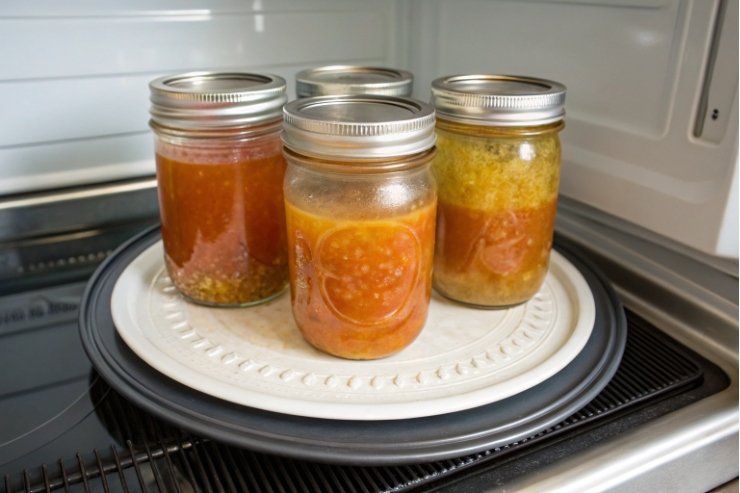
- Place the jar on a microwave-safe plate to spread heat and catch spills.
- After heating, do not place the hot jar on a cold countertop. Use a towel or wooden board to avoid a second thermal shock.
For teams that need a measurable way to talk about temperature stress in glass, the ASTM C149 thermal shock resistance method 5 is a commonly referenced framework.
If you are selecting jars specifically for high ΔT tolerance (beyond casual reheating), understanding how coefficient of thermal expansion (CTE) relates to thermal shock helps set expectations. 6
A simple “safe use” decision matrix
This is the approach I use when advising customers who want a clear rule:
- If the jar is not labeled microwave-safe → do not microwave.
- If it is labeled microwave-safe, but the product is thick/oily/sugary → heat gently or transfer.
- If the jar is cold and the heating request is intense → use low power and step heating.
| Situation | Thermal shock risk | Pressure risk | Safer alternative |
|---|---|---|---|
| Cold jar + high power + thick food | High | Medium | Low power + stir cycles or transfer |
| Warm jar + soup (vented) | Low | Low | Short heat + stir |
| Sealed jar (any contents) | Medium | High | Remove/loosen lid, use vented cover |
| Nearly empty jar heating | High | Low | Never heat empty; add liquid or transfer |
| Hot jar onto cold stone counter | High | None | Use towel/board |
A short personal story slot
A simple story fits well here: a customer who microwaved a sealed jar to “save time,” then the lid popped and the product stained labels and cartons. That moment usually convinces teams to write venting instructions clearly.
Conclusion
Mason jars can be microwaved only when they are explicitly rated for it, never sealed, and heated gently to avoid thermal shock and pressure spikes.
Footnotes
-
Explains thermal shock and why fast temperature gradients crack glass even when it “looks strong.” ↩ ↩
-
See common microwave-safe symbols and what they typically mean for cookware labeling. ↩ ↩
-
Ball’s official care notes clarify jar use limits, including microwaving guidance. ↩ ↩
-
Background on Mason jars and their typical two-piece lid construction. ↩ ↩
-
Learn why metals (like foil) are unsafe in microwaves and how thermal shock is formally tested. ↩ ↩ ↩
-
Shows how CTE relates to thermal shock resistance—useful when comparing glass types for heat swings. ↩ ↩ ↩
-
Explains superheating and sudden boiling events that can cause splatter, pressure spikes, and burns. ↩ ↩


