
Bad bottles do not fail in the factory. They fail at the filler, on the pallet, or in a customer’s hand. That is where costs explode.
Glass wine bottles are made by melting batch materials into refined molten glass, conditioning it into gobs, forming bottles on IS machines (blow-and-blow, press-and-blow, or NNPB), annealing to remove stress, adding hot-end/cold-end coatings, then inspecting at speed before packing.
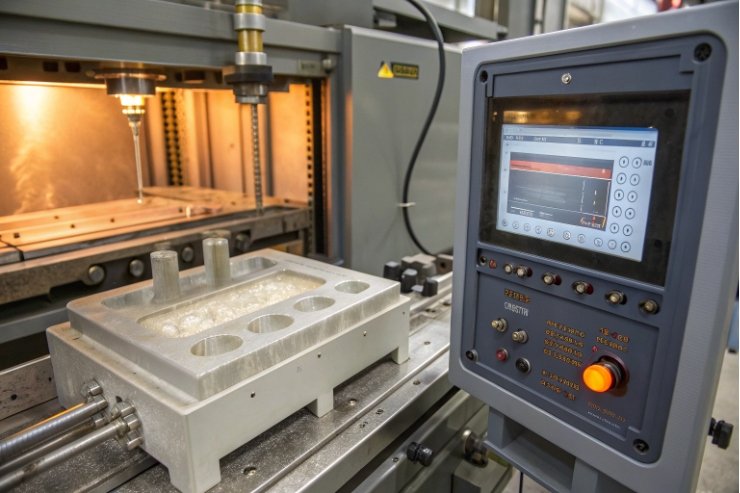
At the front end, consistent glass batch materials 1 and melt control determine how stable everything downstream will be.

Most wineries only see the final bottle. The real story is a continuous line where heat, timing, and tooling decide everything. When the forming method, coatings, annealing, and inspection work together, the bottle runs smoothly on filling lines and survives export routes with fewer claims.
How do blow-and-blow, press-and-blow, and NNPB differ?
A wine bottle looks simple, but its thickness map is hard to control. If the shoulder gets thin, it breaks. If the heel gets thin, it chips. If the finish is oval, it leaks.
Most wine bottles are formed on Individual Section (IS) machines 2, where gobs are dropped into a blank mold, shaped into a preform (parison), then transferred to a final mold for the finishing blow. The difference is how the parison is created and how well thickness is distributed.
Blow-and-blow: air does most of the shaping
In blow-and-blow, air forms the parison inside the blank mold. The process usually includes a settle step and one or more blowing steps to shape the neck and initial cavity. Then the parison inverts into the final mold and gets the final blow to reach full shape.
This method is proven and flexible. It handles many wine bottle styles. It is also forgiving when shapes change often. The trade-off is distribution control. Air shaping can leave more variation in wall thickness, especially in the shoulder and lower body. That can force heavier bottles to hit strength targets.
Press-and-blow: a plunger controls glass placement
In press-and-blow, a metal plunger presses the gob inside the blank mold to form the parison. Then the parison transfers to the blow mold for final blowing. The plunger gives stronger control of where glass goes. That usually improves thickness uniformity.
Press-and-blow is common for wide-mouth containers, but it also matters as the foundation concept for narrow-neck improvements. The plunger also creates a repeatable internal shape, which helps reduce some common defects tied to unstable parison formation.
NNPB: narrow-neck press-and-blow for lightweighting and consistency
NNPB is the narrow-neck press-and-blow (NNPB) 3 version designed for bottles. It uses a plunger in the blank mold while holding the neck finish in the neck ring. The goal is better glass distribution with less total glass. In practice, NNPB is a key tool for lightweighting, especially when brands want lower carbon footprint without losing top-load or impact performance.
NNPB often improves:
- shoulder thickness control
- heel and base distribution
- finish geometry consistency
- bottle weight reduction with stable strength
The trade-offs include tighter tooling requirements and more sensitivity to plunger wear, lubrication, and timing. When controls drift, the process can create new defect patterns.
| Forming method | How the parison is formed | Typical strengths | Typical risks | When I recommend it |
|---|---|---|---|---|
| Blow-and-blow | Air shapes parison | Flexible, proven, wide design freedom | Less thickness control, heavier designs | Many standard wine bottles |
| Press-and-blow | Plunger forms parison | Better distribution control | Tooling and plunger management | Jars, and concepts for control |
| NNPB | Plunger + narrow-neck control | Best lightweighting, consistent thickness | Higher process discipline needed | Modern lightweight wine programs |
Which hot-end and cold-end coatings improve durability?
A bottle can pass strength tests and still get rejected because of scuffs. That is why surface protection is not optional in most serious supply chains. Coatings reduce friction, lower scratch risk, and help bottles move cleanly through conveyors and packers.
Two coating stages do most of the work: hot-end coating and cold-end coating. They are different in chemistry and purpose. They also work best as a pair.
Hot-end coating: build a hard anchor layer
Hot-end coatings are applied while the bottle is still hot after forming and before it cools fully. The surface is chemically active at that point, so the coating can bond well. The most common hot-end coating family uses metal oxide layers (often tin oxide, applied via chemical vapor deposition (CVD) 4 in many container-glass lines).
The hot-end layer does two big things:
- improves scratch resistance by hardening the surface
- creates an anchor surface that helps the cold-end lubricant spread evenly
A strong hot-end coating helps most on high-speed lines where bottles touch guides, rails, and each other. It also helps when bottles are heavy and the contact forces are higher.
Cold-end coating: add lubricity to stop scuff and jam events
Cold-end coatings are applied later, when bottles are cooler and moving toward inspection and packing. This layer is usually a lubricity coating, often built around polyethylene-based lubricity coatings 5. The goal is lower friction, less abrasion, and smoother travel.
Cold-end coating is the reason bottles feel slightly “slippery” when new. It reduces label scuff during packing and lowers damage during pallet vibration.
Coatings must match decoration and labeling plans
Coatings are helpful, but they can create problems if they clash with downstream decoration:
- Some coatings can reduce label adhesion if the label adhesive is not matched.
- Screen printing and hot stamping need clean surface energy control.
- Frosted or coated bottles may require different cold-end choices to avoid haze changes.
When a buyer wants high-performance labels, I prefer running a simple adhesion trial on coated bottles from real production, not on lab samples. Production coatings are never exactly like a sample run.
| Coating stage | Main purpose | Typical benefits | Watch-outs for brands |
|---|---|---|---|
| Hot-end oxide | Hard base layer | Higher scratch resistance, better cold-end performance | Must stay uniform or scuff patterns appear |
| Cold-end lubricant | Low friction | Less conveyor jam, fewer rub marks, better pack-out | Can affect label adhesion if not matched |
How does annealing remove residual stress?
Residual stress is invisible until it breaks something. It shows up as cracks after filling, chips at the base, or sudden failures in cold rooms. Most of these problems trace back to temperature gradients and uneven cooling.
Annealing is the step that makes the bottle “calm.” It does not make the glass stronger in a magical way. It makes the internal stress pattern smaller and more uniform. That improves impact resistance and reduces thermal shock failures.
Why stress exists right after forming
After forming, the outside of the bottle cools faster than the inside. Glass shrinks as it cools. If the skin locks up first, the inside is still moving. That creates tension and compression zones. Those zones are stored energy. Any scratch or knock can release that energy as a crack.
The base and heel are common danger zones because they are thick and cool differently. The shoulder is also sensitive because thickness changes quickly there.
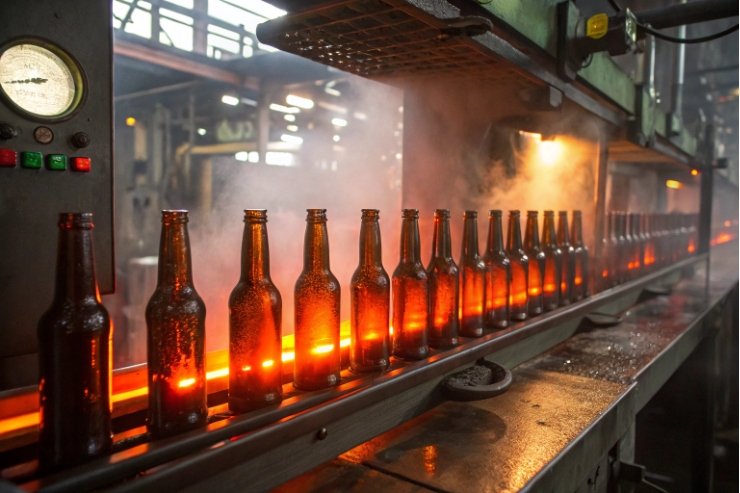
What the annealing lehr does
The annealing lehr 6 is a long temperature-controlled tunnel. Bottles enter hot, then go through a heat-up/soak zone and a controlled cool-down zone. The key idea is to bring the whole bottle closer to an even temperature, then cool it slowly enough that stress can relax as the glass structure stabilizes.
Good annealing control needs:
- stable belt speed (time in lehr)
- stable zone temperatures
- consistent bottle spacing (no hot spots from clustering)
- clean airflow control to avoid uneven cooling
How to know if annealing is correct
A simple, practical tool is a polarized stress check. When viewed under polarized light, stressed glass shows patterns and bright bands. The goal is consistent, low-stress patterns across cavities and shifts.
When annealing is too fast or uneven, common outcomes include:
- base cracks after small impacts
- thermal shock cracks during rinsing
- higher reject rates at inspection
- unpredictable breakage at the winery
| Annealing element | What it controls | What happens if it drifts | Field symptom |
|---|---|---|---|
| Soak temperature | Stress relaxation | Stress stays “locked in” | Random cracks after filling |
| Cooling rate | Gradient control | High stress gradients form | Base or shoulder cracks |
| Belt speed | Total anneal time | Under-anneal or overheat | Higher rejects or surface issues |
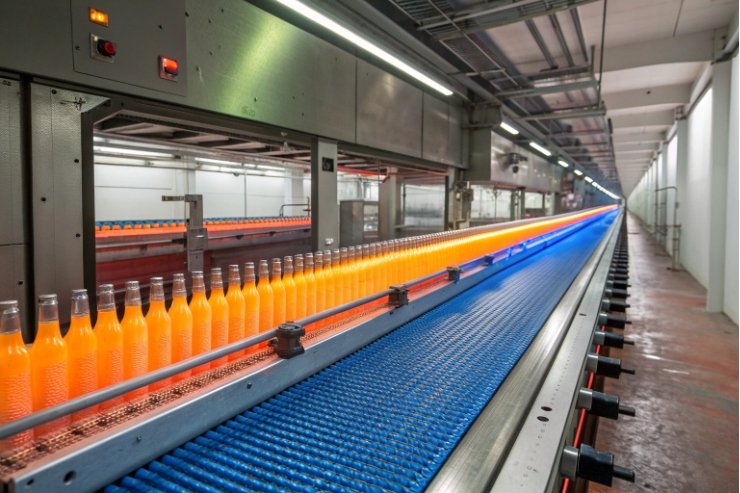
What in-line inspections verify quality at speed?
High-speed bottle production cannot rely on human eyes alone. At modern line speeds, inspection has to be automated, repeatable, and tied back to mold cavities so problems can be corrected fast.
In-line inspection is usually split into hot-end checks (early detection) and cold-end inspection (final gate). The best systems do not only reject defects. They also create feedback data that helps the forming team fix root causes.
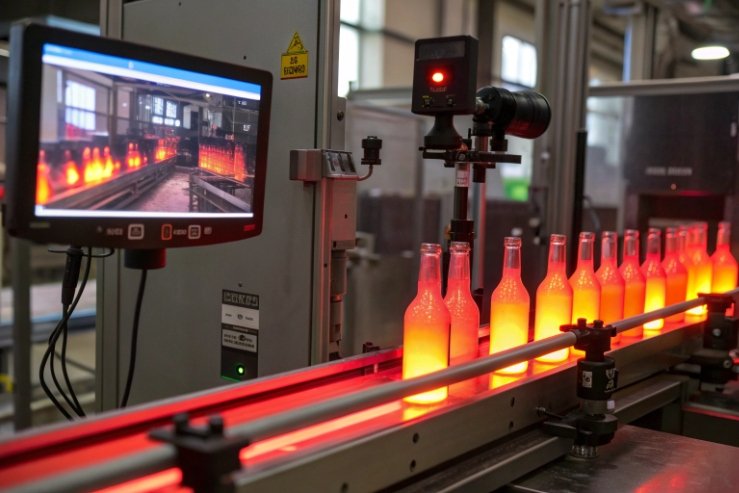
Hot-end inspection: catch forming problems early
Hot-end inspection often focuses on gross defects and safety risks that should not travel further:
- severe checks and cracks
- collapsed finishes
- major deformation
- obvious stones or heavy blisters
Catching these early reduces wasted coating, lehr capacity, and packing labor. It also helps the team react within minutes, not hours.
Cold-end inspection: finish, body, base, and contamination
Cold-end inspection is the main quality gate, typically using cold-end inspection systems 7 with multiple stations. Typical stations include:
- Finish inspection: chips, sealing surface damage, thread defects, ovality indicators
- Sidewall and body inspection: blisters, stones, bird swings, cords that distort appearance
- Base inspection: heel defects, unstable base rings, base checks
- Internal inspection: contamination or glass fragments in the bottle
Dimensional checks can be in-line via gauges, lasers, or camera-based metrology. The most important dimensions for wineries are finish-related because closures do not tolerate drift.
Quality at speed needs more than detection
Detection without action only creates scrap. The best setup links rejects to:
- mold number and cavity
- time window
- defect type code
- trend alerts when rates spike
That data supports fast containment. If one cavity starts making finish chips, it can be removed from production and serviced without shutting down everything.
Sampling tests still matter
Not every strength property can be tested on every bottle in-line. Many plants use sampling plans for:
- internal pressure (especially for sparkling bottles)
- top-load strength
- impact resistance
- thermal shock screening for new designs or process changes
Those tests confirm that inspection is not only cosmetic. They confirm performance.
| Inspection point | What it detects | Why it matters to wineries | Best feedback use |
|---|---|---|---|
| Hot-end cameras | gross cracks, shape collapse | reduces wasted downstream work | quick forming adjustments |
| Finish station | chips, ovality, thread issues | sealing and leak prevention | tooling maintenance per cavity |
| Body/base station | blisters, stones, checks | breakage and appearance control | furnace/forehearth and mold diagnosis |
| Internal check | contamination, fragments | food safety and brand risk | handling and cleaning control |
Conclusion
Wine bottles are made by melting and refining batch, forming on IS machines (blow-and-blow, press-and-blow, or NNPB), annealing to remove stress, applying hot/cold-end coatings, then using high-speed inspection to protect sealing, strength, and appearance.
Footnotes
-
Background on container-glass raw materials and the overall manufacturing flow. ↩ ↩
-
Practical overview of IS forming and how container-glass bottles are shaped at scale. ↩ ↩
-
Engineering discussion of NNPB vs blow-and-blow with stress/impact considerations. ↩ ↩
-
Quick primer on CVD—commonly referenced when discussing tin oxide hot-end coatings. ↩ ↩
-
Why polyethylene-wax lubricants are used for low-friction cold-end protection. ↩ ↩
-
Explains how a lehr’s controlled heating/cooling relieves stress in glassware. ↩ ↩
-
See how modern inspection stations detect finish, body, base, and internal defects at speed. ↩ ↩


