
A dropper looks simple, but the wrong choice can cause leaks, wrong doses, or swollen bulbs. Then customers lose trust and your formula does not perform.
The right dropper matches your formula, bottle, and market: safe bulb material, correct pipette length and tip, a neck finish that seals, and safety features that support your claims.

When a project moves from “nice idea” to mass production, the dropper becomes a technical part, not a small accessory. Many teams treat it like a container closure system 1, meaning you validate fit, materials, and performance together. Each element must fit together: bulb, pipette, cap, liner, neck, and any safety system. If one piece is wrong, you see leaks in transit, poor dosing, or customer complaints. So it is better to follow a clear set of questions before locking the spec.
Which bulb material—silicone, TPE, or nitrile—best resists your formula?
Formulators often notice that the bulb swells, cracks, or turns sticky after a few weeks of stability testing. This is almost always a material compatibility problem, not a quality problem.
Choose the bulb material based on your formula chemistry: TPE for many alcohol or water-based systems, nitrile for oils and acids, and high-purity silicone when you need top inertness and a soft feel.
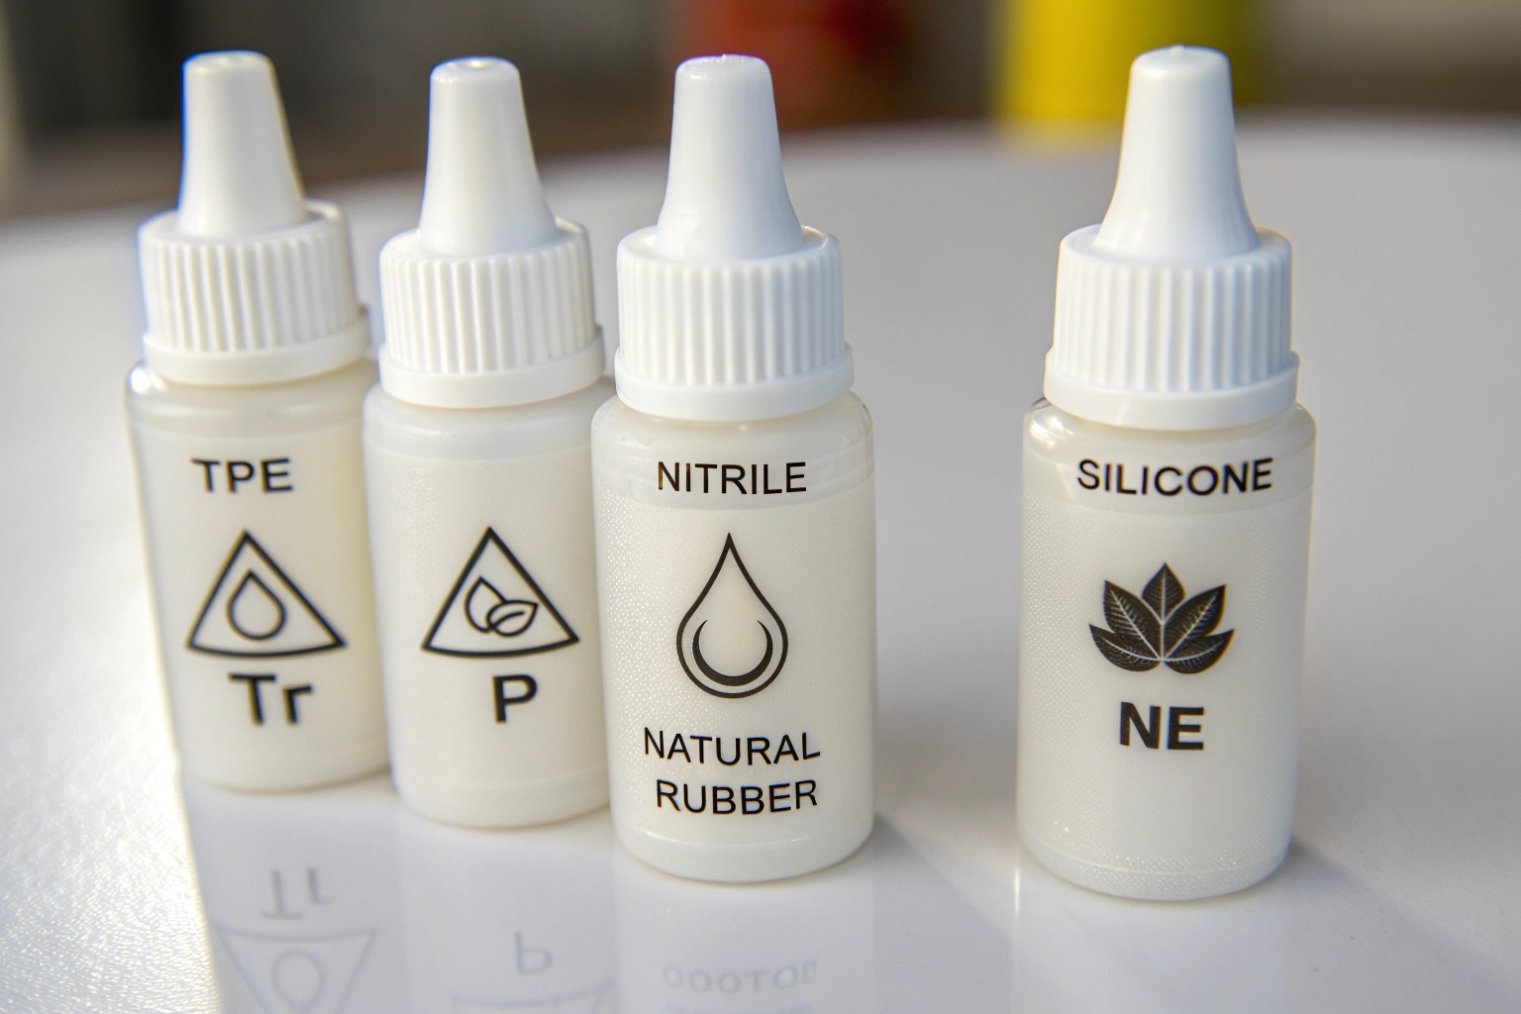
What each bulb material works best with
The bulb is in constant contact with your formula. Vapors sit in the air gap. Liquid stays inside after each dose. So the elastomer must resist swelling, hardening, and extraction.
Here is a simple way to see the main choices:
| Bulb material | Best for | Watch out for | Key benefits |
|---|---|---|---|
| TPE (thermoplastic elastomer) | Many alcohol and water-based serums, some light oils | Very strong solvents, very high essential oil load | Good price, good flexibility, no latex |
| NBR / nitrile | Oils, high-acidity systems, greasy blends | Some strong oxidizers and very high temperatures | Strong oil resistance, good durability |
| Silicone | Active-rich formulas, sensitive naturals | Some heavy oils can slowly swell certain grades | Very inert, soft feel, premium perception |
| Natural rubber | Old legacy use only | Latex allergies, strong extractables | Avoid when allergy risk or clean-label aim |
With thermoplastic elastomer (TPE) 2, brands get a good balance of cost, flexibility, and chemical resistance. It works well with many common skincare and cosmetic bases that have alcohol, water, and a moderate level of oils.
nitrile rubber (NBR) 3 is a good choice for high-oil, high-acid systems. Think facial oils, certain treatment oils, or formulas with strong organic acids. It resists swelling and keeps its shape so the dropper still pulls a proper dose after months on shelf.
Silicone is often used when the marketing story is “pure”, “clean”, or “high-tech active”. It has a soft, pleasant feel and low interaction with most ingredients. It also performs well across a wide temperature range.
How to choose capacity, safety, and testing
Bulb capacity sets your maximum draw volume. A larger bulb can pull more liquid in one squeeze, which is useful for bigger doses. A smaller bulb gives finer control, but it may need two squeezes to reach the target dose.
You also need to think about:
- Allergy risk: avoid natural rubber when there is any chance of latex sensitivity in your market
- Surface finish: matte or glossy bulbs can change grip and perceived quality
- Color: black, white, or tinted can support branding and also help shield light-sensitive vapors
Real testing is the final step. Place filled droppers in stability at high and low temperatures. Then check:
- Any change in bulb hardness or size
- Any smell coming from the rubber
- Any visible stress, cracks, or sticky feel
If the bulb still feels and looks the same after these tests, you have a good match. This step saves you from complaints later, when it is much more expensive to fix.
How do pipette length and tip style match bottle height and dosing needs?
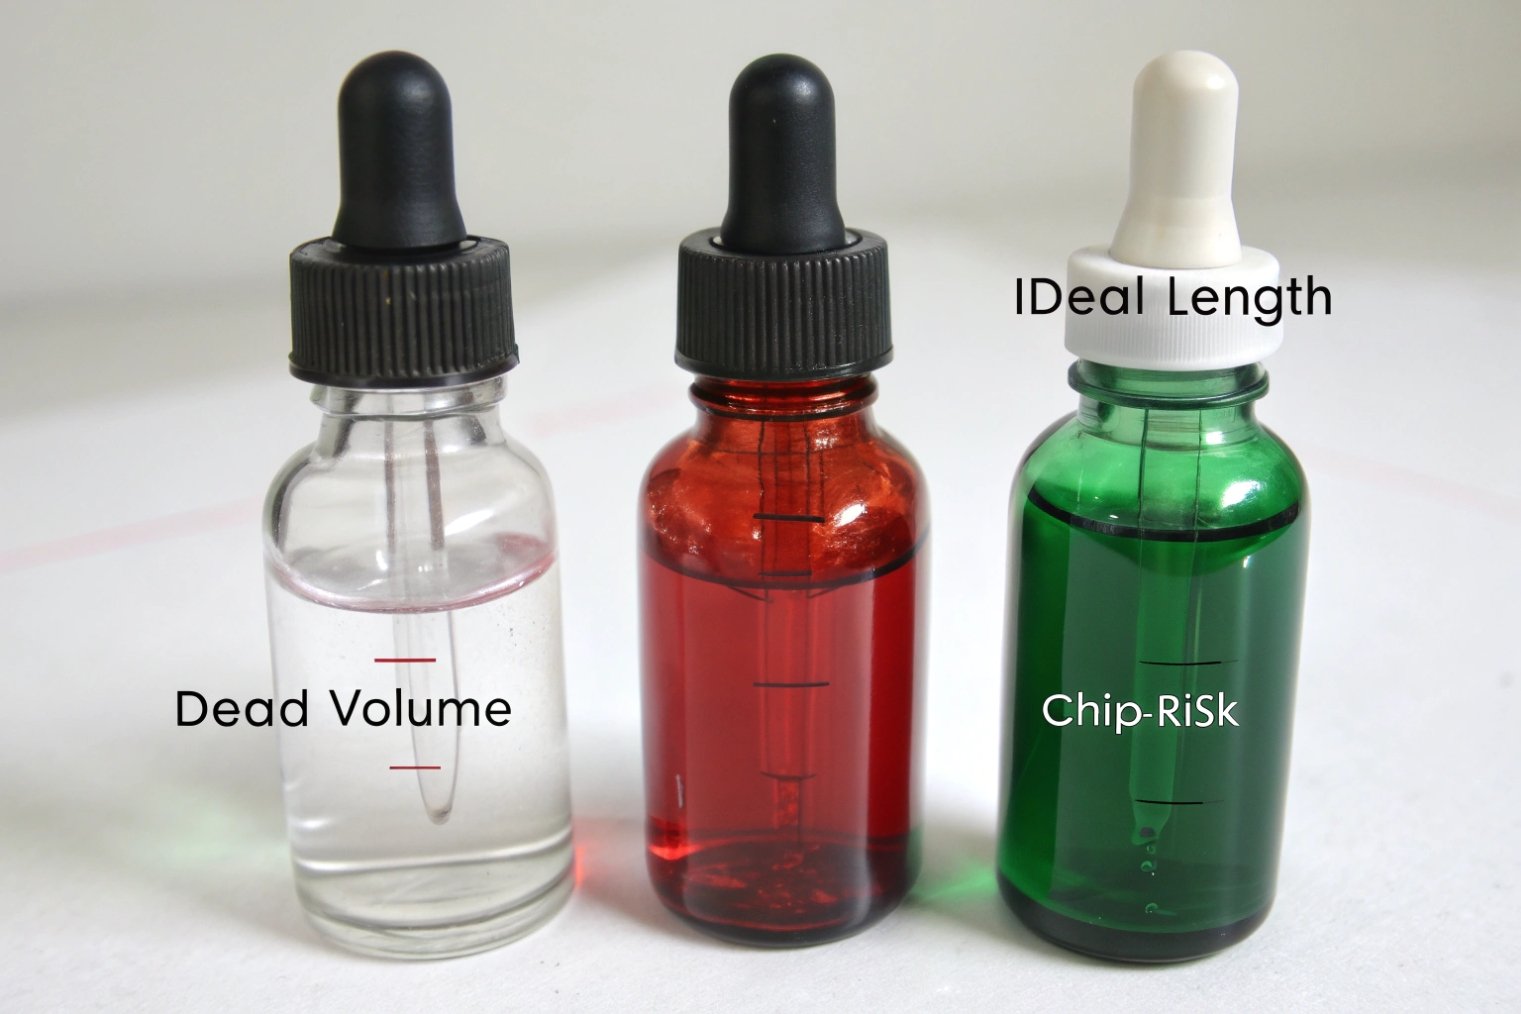
Many people focus on the bulb and forget the glass or plastic pipette. But this tube decides how much product users can pull, how clean the drop looks, and how much product stays in the bottle at the end.
Size the pipette so it almost reaches the bottle bottom without hitting it, then match the tip shape and orifice to your viscosity and target dose to get clean, repeatable drops.
Matching pipette length to bottle depth
The pipette should reach close to the bottom of the bottle so that users can access nearly all the product. If it is too short, you leave a large “dead volume”. If it is too long, the tip hits the bottom and can chip or block.
A good rule is:
- Measure the internal height of the filled bottle up to the sealing point
- Subtract a small safety gap (often 2–3 mm)
- Use that as your target pipette length
If there is a wiper insert in the neck, the pipette diameter must match that as well. Too thick and it will scrape or drag. Too thin and you will not get a clean wipe, so drops form on the outside and run down the bottle.
Graduation marks on the pipette are useful in markets where dose matters, like CBD, nutraceuticals, and some skincare treatments. The marks must match real volume, so you need to test with your actual formula, since surface tension and viscosity can change the way the liquid sits in the tube. If your product is dose-sensitive, the principles in FDA’s dosage delivery devices guidance 4 are a solid benchmark for readable markings and repeatable dosing.
Choosing tip style and orifice for viscosity and precision
Tip style is often a design choice, but it also affects performance. Here is a simple overview:
| Tip style | Best for | Main advantage |
|---|---|---|
| Straight / blunt | Medium viscosity serums, general use | Simple, robust, easy to manufacture |
| Fine / tapered | Low viscosity, high-precision dosing | Small, controlled drops |
| Ball tip | Spot application on skin or scalp | Soft contact, repeatable drop size |
| Bent tip | Hard-to-reach areas, angled bottles | Easier to reach corners and edges |
| Bent-ball tip | Targeted yet gentle applications | Combines control and comfort |
The orifice diameter sets your drop size. Thicker oils need a larger opening or the drops will hang and form strings. Thin water-like liquids need a smaller orifice or the drop will fall too fast and splash.
You can start with standard orifice sizes that your supplier suggests for “serum”, “oil”, or “tincture”. But the real answer comes from tests:
- Fill droppers with your real formula
- Dispense at room temperature and at a cooler condition
- Count how many drops make 1 ml
If you know the density of your formula, you can convert this to mg per drop. Then you can print clear dose instructions on the label, such as “Use 5 drops (about 0.25 ml) each time”.
When pipette length, tip style, and orifice match the bottle and the formula, customers get a smooth, repeatable dose every time. This builds trust and reduces misuse.
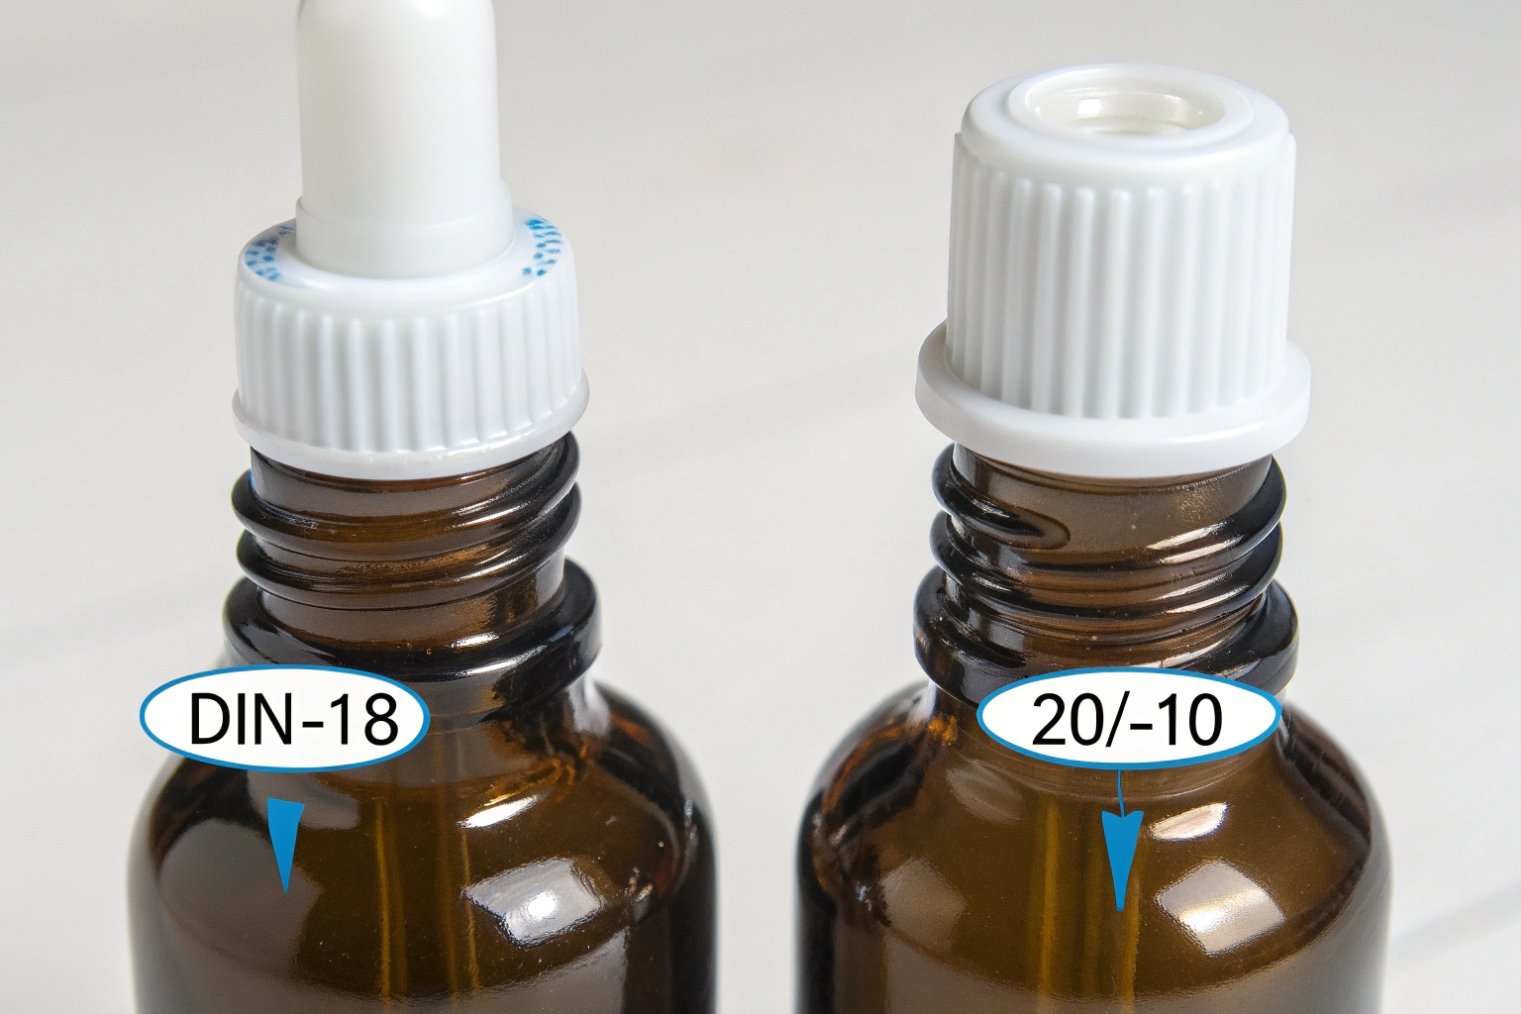
DIN-18 vs 20/410: which neck finish and cap ensure a leak-tight fit?
Some of the most expensive failures happen in cartons and shipping cases, not in the lab. A great formula and a nice bottle do not help if the closure does not match the neck standard.
Choose a neck finish that matches your bottle standard (DIN-18, 20/410, 20/415, etc.), then pair it with a cap and liner designed for that thread so you get a tight, repeatable seal.
Understanding neck finishes and standards
Neck finish codes describe the outer neck diameter and the thread design. If the dropper cap does not match this code, it may screw on, but the seal will not be reliable.
Common finishes for droppers include:
| Neck finish | Typical use | Notes on sealing and fit |
|---|---|---|
| DIN-18 | Many European dropper bottles | Narrow neck, common in pharma and aromatherapy |
| GL18 / GL series | European glass standards | Similar to DIN in many ways, check drawings |
| 20/410 | Global cosmetic and personal care | Wide use, many cap and liner options |
| 20/415 | Taller neck, some cosmetic lines | Slightly different thread height and profile |
The first number is the nominal neck diameter in millimeters. In the 20/410 style, the “410” refers to a GPI thread finish designation 5 (a shorthand that helps closures and necks match consistently across suppliers). DIN and GL systems use their own way of describing the thread but the logic is the same: one closure must match one neck drawing.
You should always ask for the technical drawing of both the bottle neck and the closure. Then you confirm that they are compatible. This is the first step to avoid leaks.
Liners, torque, and real-world leak testing
Even with a perfect match of neck finish and thread, the seal itself still depends on the liner and the torque.
Common liner types include:
| Liner type | Best use case | Features |
|---|---|---|
| PE foam / F217 | Many skincare and cosmetic liquids | Good general seal, good chemical resistance |
| Polycone | Extra-tight seal on glass or plastic | Conforms well to neck, good for volatile oils |
| Pulp + aluminum | Some solvent-heavy or aggressive formulas | Strong barrier, more traditional construction |
The liner must tolerate the formula and keep its properties over time. Strong solvents, high levels of essential oils, or low/high pH can attack some liner materials. So chemical compatibility testing is key.
Torque is the force used to close the cap. Too low, and the closure loosens during transport. Too high, and the liner can deform or the cap can crack. On the line, you set a target torque range and then check caps in production with a torque tester.
For leak testing, you can:
- Invert filled bottles for several days at high and low temperatures
- Apply pressure by squeezing or by using vacuum / pressure chambers
- Drop-test outer cartons to simulate rough handling
If the combination of neck finish, closure design, liner, and torque survives these tests without leaks or weeping, you can move to full production with more confidence.
Do child-resistant or tamper-evident options suit your market and claims?
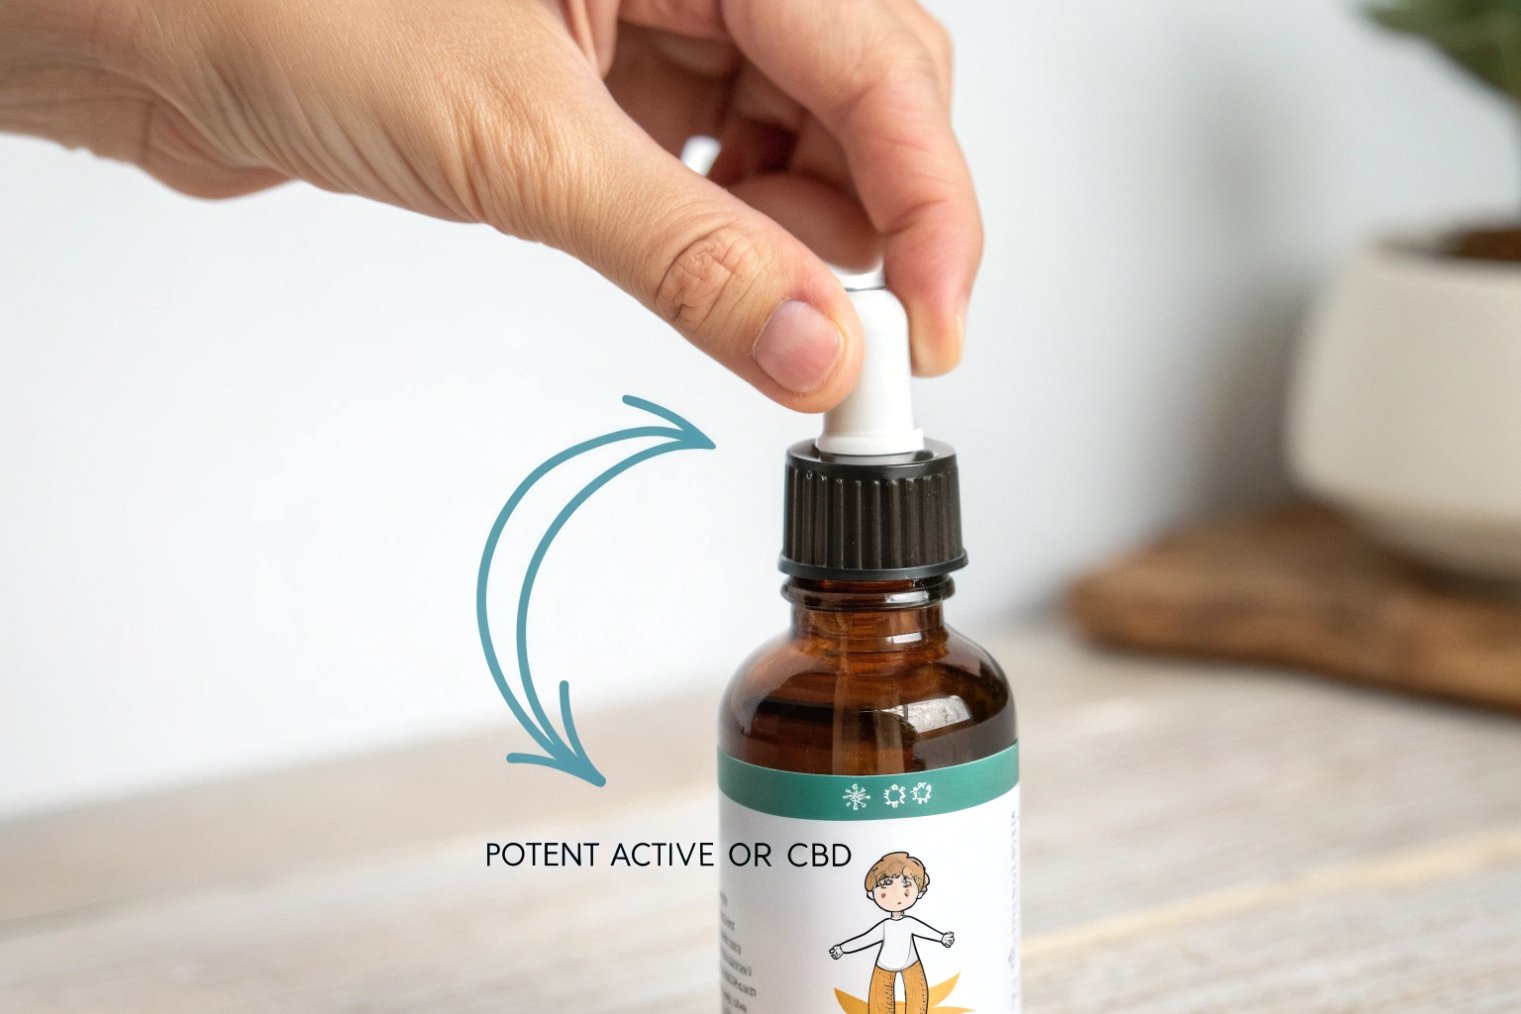
Many markets now ask stronger safety from brands, especially for active-heavy, CBD, nutraceutical, or certain cosmetic-like drug products. Safety features can protect users and also support a serious, trusted image.
Use child-resistant and tamper-evident droppers when your formula, claims, or regulations call for extra safety; choose designs that still feel premium and easy for adults to open and use.
When child-resistant designs make sense
Child-resistant (CR) closures usually use a “push-down-and-turn” or “squeeze-and-turn” action. The idea is simple: a young child cannot easily open the bottle, but an adult can once they read the instructions.
You may need CR droppers when:
- The product is regulated as a drug or controlled substance
- The formula contains strong actives or high-level essential oils
- The product can harm a child if ingested in small amounts
There are different CR standards in different regions. So you should check which standard applies, then make sure the closure has passing test reports for that market. If you need a widely recognized reference point for CR performance testing, ISO 8317 child-resistant packaging 6 is commonly used for reclosable packs.
Light-sensitive formulas also need some protection for the residual liquid that stays in the pipette tip between uses. Dark or coated pipettes, and black or opaque caps, can help shield this small volume from UV and strong light, which supports formula stability between doses.
Tamper-evident, senior-friendly, and brand alignment
Tamper-evident (TE) systems show if someone has opened the bottle before. A common method is a breakable band at the bottom of the cap. When the user unscrews the cap the first time, the band breaks and a small ring stays on the neck.
Here is a simple overview of safety options:
| Feature type | Purpose | Typical design example |
|---|---|---|
| Child-resistant | Keep children from opening | Push-down-and-turn, squeeze-and-turn |
| Tamper-evident | Show if opened before purchase or use | Breakable band, tear-off ring, perforated seal |
| Senior-friendly | Help older users still open safely | Larger grips, clear arrows and text |
You must balance safety with usability. Some brand owners worry that CR caps feel “pharma” instead of “luxury”. In many cases you can solve this with color, surface finish, and smart shape design. A matte black CR dropper with a clean logo can still look premium on a shelf.
In some product lines, you may use both CR and TE features in one closure. For example, a CR push-down-and-turn cap with a TE ring. In other lines, TE alone is enough, such as many skincare serums where the main goal is to show that the bottle was not opened before. If your item is regulated as an OTC drug in the U.S., the tamper-evident packaging requirements 7 are a key compliance reference.
As a last step, always test with real users. Watch how fast they open and close the bottle. Ask if the instructions are clear. And then ship test orders across your key markets to see if shipping and climate have any effect on the safety band or closure function.
Conclusion
A good dropper is not luck. It comes from matching bulb, pipette, neck, liner, and safety features to your formula, your bottle, and the real way your customers will use it.
Footnotes
-
FDA guidance on evaluating container/closure fit, materials, and performance—useful for dropper validation. ↩︎ ↩
-
Explains what thermoplastic elastomers are and why they behave like rubber but process like plastics. ↩︎ ↩
-
Quick reference on nitrile rubber’s oil resistance, supporting bulb selection for oily or acidic formulas. ↩︎ ↩
-
FDA benchmark for calibrated dosing devices—helpful when you add pipette graduations and dose instructions. ↩︎ ↩
-
Practical explainer of common GPI finishes (e.g., 410/415) to reduce thread mismatch and leaks. ↩︎ ↩
-
ISO standard describing test methods and acceptance criteria for child-resistant reclosable packaging. ↩︎ ↩
-
U.S. regulation text defining tamper-evident packaging expectations for OTC drug products. ↩︎ ↩


