
A glass bottle that looks “okay” on the pallet can still ruin a batch, damage a filler, or trigger a recall if incoming inspection is not structured.
A robust acceptance process uses risk-based sampling (AQL 0 for critical defects), dimensional and functional checks, full documentation review, and a closed CAPA feedback loop with the supplier to prevent repeats.

Done well, incoming inspection is not only about catching bad lots. It is a way to stabilize fill lines, protect stability data, and give suppliers the signals they need to keep improving.
Which sampling plans and AQL levels suit critical defects?
Most problems start when sampling is “informal”: fixed sample sizes, no clear AQL, and no link to defect criticality or supplier performance.
For pharma bottles, incoming inspection normally uses attribute sampling per ANSI/ASQ Z1.4 or ISO 2859-1, with AQL 0 for critical defects, low AQLs for major defects, and moderate AQLs for purely cosmetic, minor defects.
The inspection process usually begins as soon as the delivery arrives:
- Receive the shipment, check delivery notes, and quarantine the lot in the ERP or warehouse system.
- Verify packaging integrity, pallet count, and basic identification (supplier lot, date code, item code).
- Define the lot size (e.g., all bottles from one production run, one firing, or one labelled lot number).
Using standardized sampling plans
Most pharma companies rely on ANSI/ASQ Z1.4 sampling procedures and tables 1 or ISO 2859-1 acceptance sampling by attributes 2. The basic steps:
- Choose an inspection level (often General II for attribute inspection).
- Use the table to find the sample size code letter from the lot size.
- Read the sample size and the acceptance/rejection numbers for each AQL (see the NIST Engineering Statistics Handbook section on lot acceptance sampling plans 3).
- Classify every found defect as critical, major, or minor according to your defect catalogue.
A typical setup that works well in practice:
| Defect class | Examples | Usual AQL (incoming) |
|---|---|---|
| Critical | Cracked bottles, finish chips, foreign matter inside, severe dimensional out-of-spec that may cause leaks | 0.0 (accept on zero) |
| Major | Checks, heavy stones, large bubbles on sealing surface, strong deformation of finish or body | 0.25–0.65 |
| Minor | Light cosmetic marks, small seeds away from product path, light colour variation | 1.0–2.5 (sometimes 4.0) |
For critical defects, most sites use AQL 0.0 with c=0 logic: if the sample contains even one critical defect, the lot does not pass without formal concession and additional action (for example, 100% sorting or segregation).
Normal, tightened, and reduced inspection
Sampling plans also include switching rules:
- Start on normal inspection.
- Move to tightened inspection after repeated failed lots or serious complaints.
- Move to reduced inspection after a long run of good lots and stable process.
This link between supplier performance and sampling intensity is important. A good supplier should earn reduced inspection over time; a supplier with repeated nonconformances should face tighter sampling and possibly new qualification or audit.
On top of that, some sites use skip-lot or c=0 plans for very high-performing suppliers, especially for non-sterile, low-risk bottle types, while still keeping 100% traceability and a quick path back to normal inspection if issues appear.
How are dimensions, capacity, and cosmetic checks performed?
Even if AQL and sampling are clear, acceptance will still fail if the team does not measure the right things, in the right way, with the right tools.
Dimensional checks use calibrated gauges and drawings; capacity and weight checks confirm fill accuracy; cosmetic inspection uses a controlled light booth and a defect catalogue so the team rejects the same things the same way every time.
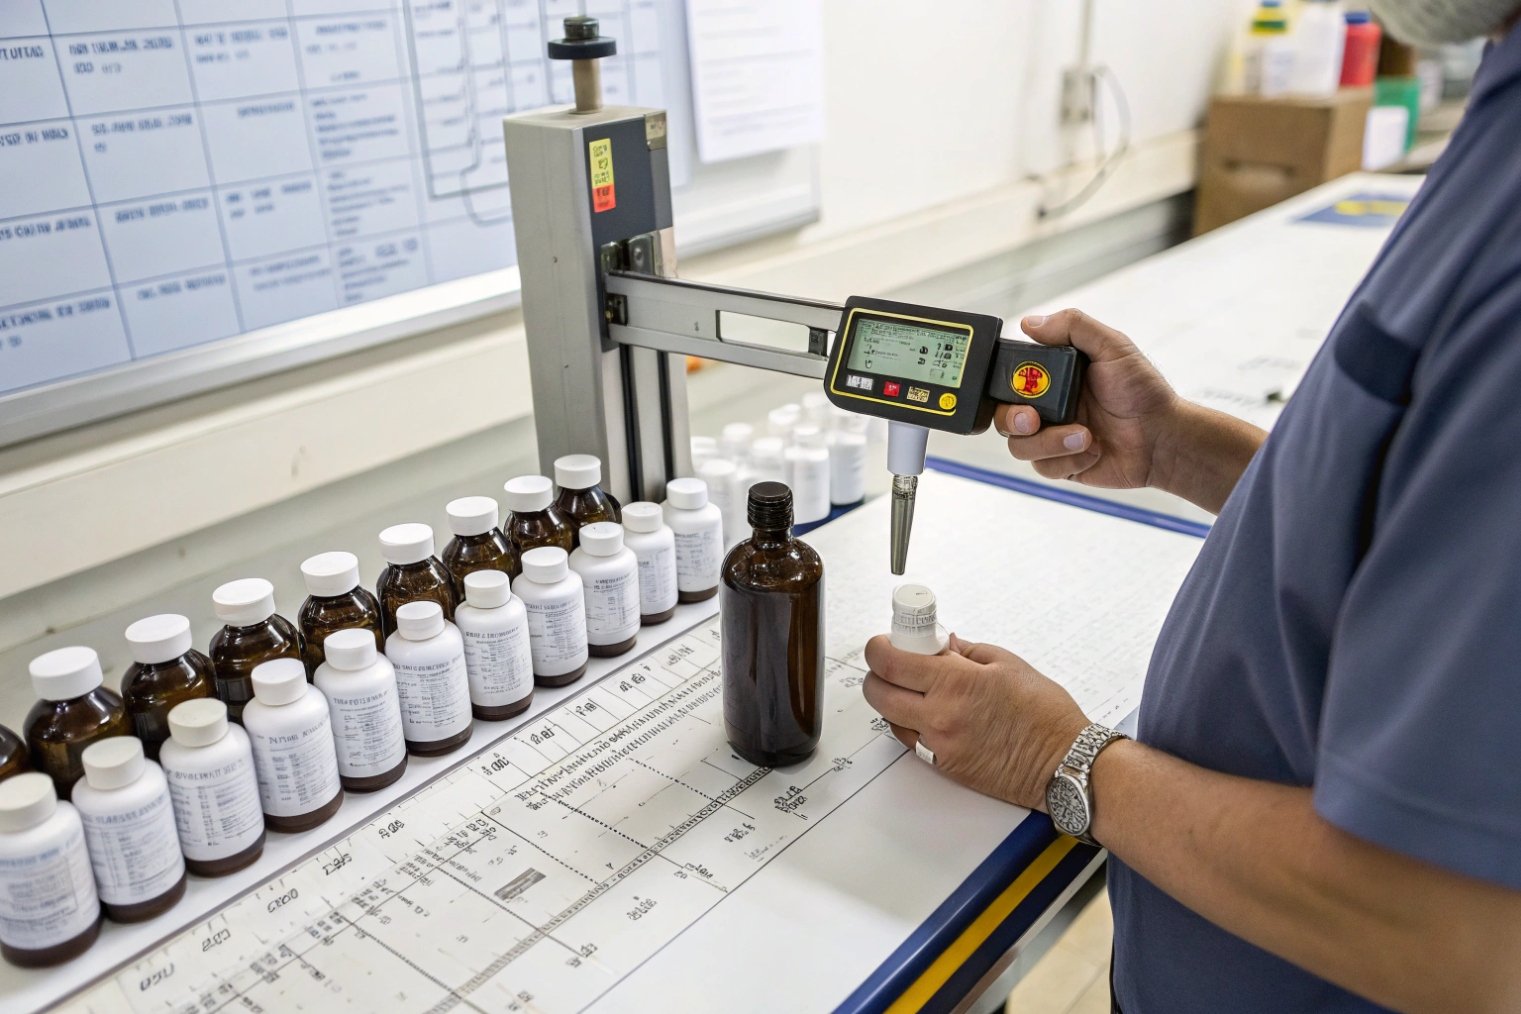
Dimensional and functional checks
For pharmaceutical bottles, dimensions are about filling, capping, and labelling. At a minimum, incoming QA usually verifies:
- Height and body diameter with calipers or automated gauges.
- Finish/neck dimensions with go/no-go gauges:
- Bore diameter
- Outer diameter
- Thread or bead profile
- Sealing surface flatness
- Verticality (lean) so bottles run correctly on conveyors and labellers.
- Weight to detect off-spec glass distribution or wrong gob weight.
Sample sizes for full dimensional checks can be smaller than for visual attributes (for example, 10–32 pieces per lot), but the pieces must come from different pallets and layers to avoid bias.
For capacity, typical options are:
- Brimful capacity: fill to overflow and measure by weight (using water) or by volume; compare to drawing.
- Nominal capacity at fill point: fill to the specified fill line, neck ring, or shoulder reference and confirm that volume meets label claim with defined tolerance.
These tests link directly to filler setup and legal metrology. If capacity is low, you must overfill to protect label claim; if it is high, you risk headspace or capping issues.
Functional or strength checks at incoming may be done:
- Every lot for high-risk containers (for example, pressure or hot-fill).
- On a periodic or first-article basis if the supplier does their own testing and provides data.
Common functional tests:
- Internal pressure/burst tests.
- Vertical load (top-load) tests.
- Thermal shock for containers that will see autoclave or hot-cold cycles.
- Stress checks under polarized light.
Cosmetic and structural visual inspection
Visual inspection is where many disputes arise, so it needs structure:
- Use a standard light booth (set brightness and background).
- Rotate bottles slowly and look at both inside and outside surfaces.
- Use a defect catalogue with photos and clear classification into critical/major/minor.
Typical defects to look for:
- Cracks, checks, and heavy impact marks.
- Finish chips, over-pressed or under-formed finishes.
- Bird swings, heavy cords, large stones.
- Bubbles, blisters, or seeds in the body, especially near the sealing area.
- Thin-wall appearance, heavy lean, base deformation.
- Internal contamination: glass dust, cardboard fibres, black specks.
Each detected defect is counted per its class, and counts are compared to the AQL acceptance and rejection numbers.
Where volumes are high, many sites add automatic camera inspection on a sample conveyor. These systems are good at finding repeatable defects and measuring lean or height, while trained humans still make the final call on borderline cosmetic issues.
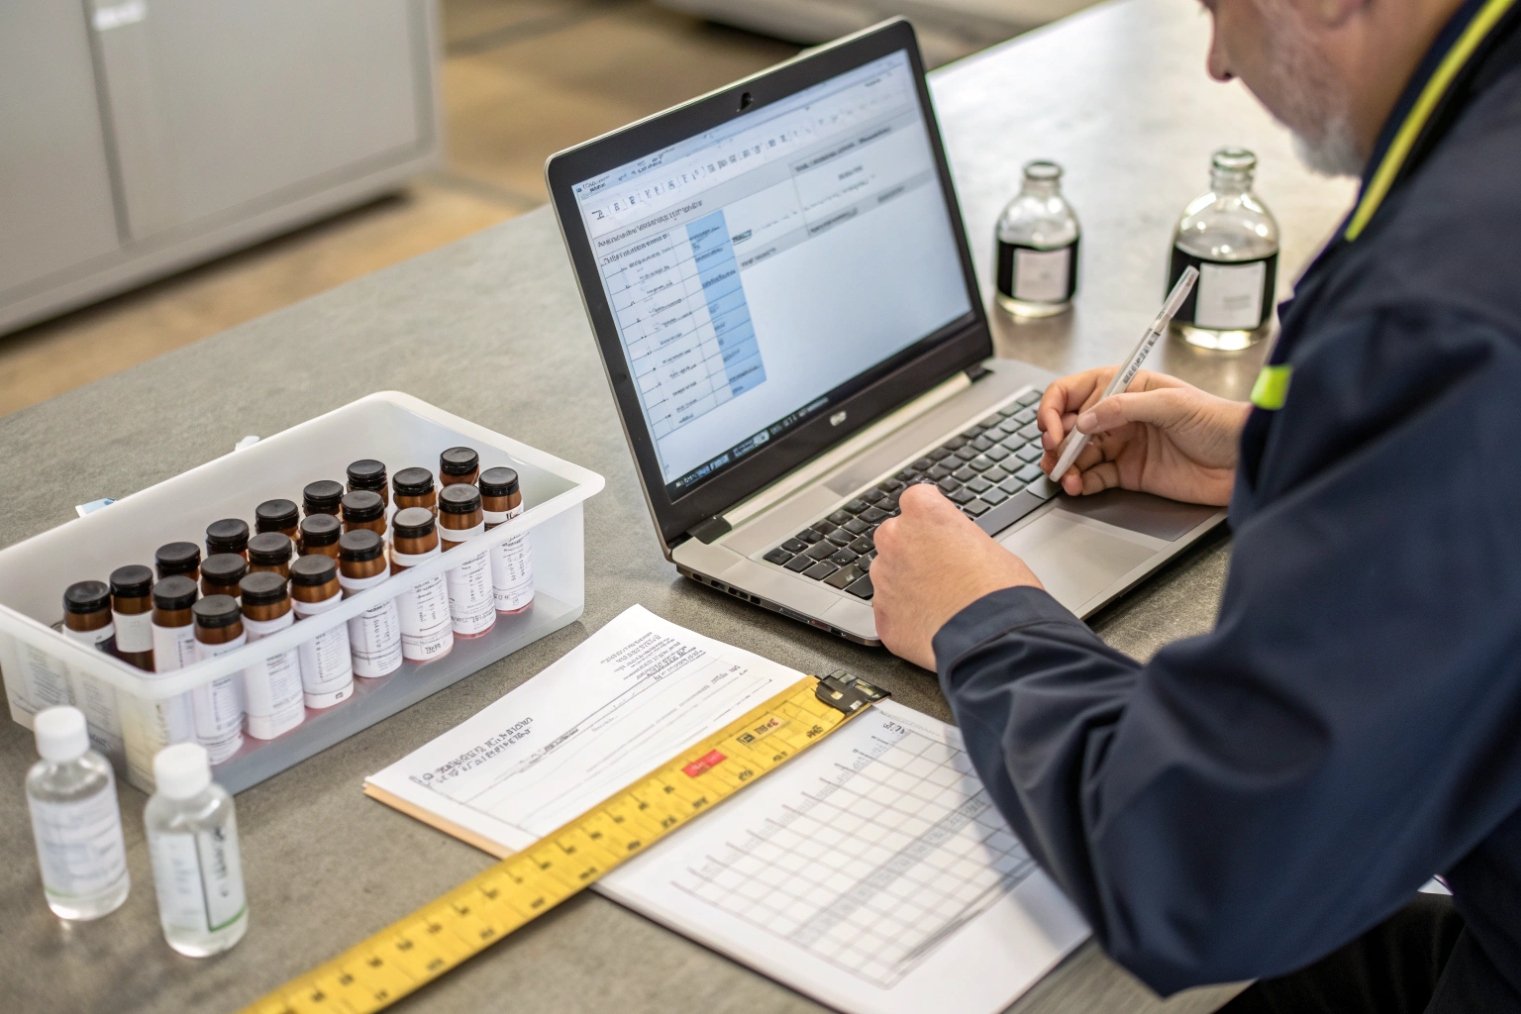
What documentation (COA, lot traceability) should be verified?
Even if the physical inspection looks good, using bottles with bad documentation breaks traceability and can cause big problems in audits or investigations.
Incoming QA should verify the supplier’s CoA/CoC, pharmacopeial and glass-type statements, sterilization or depyrogenation data (if applicable), and strong lot traceability that links your internal batch to the supplier’s production history.
Certificates and regulatory claims
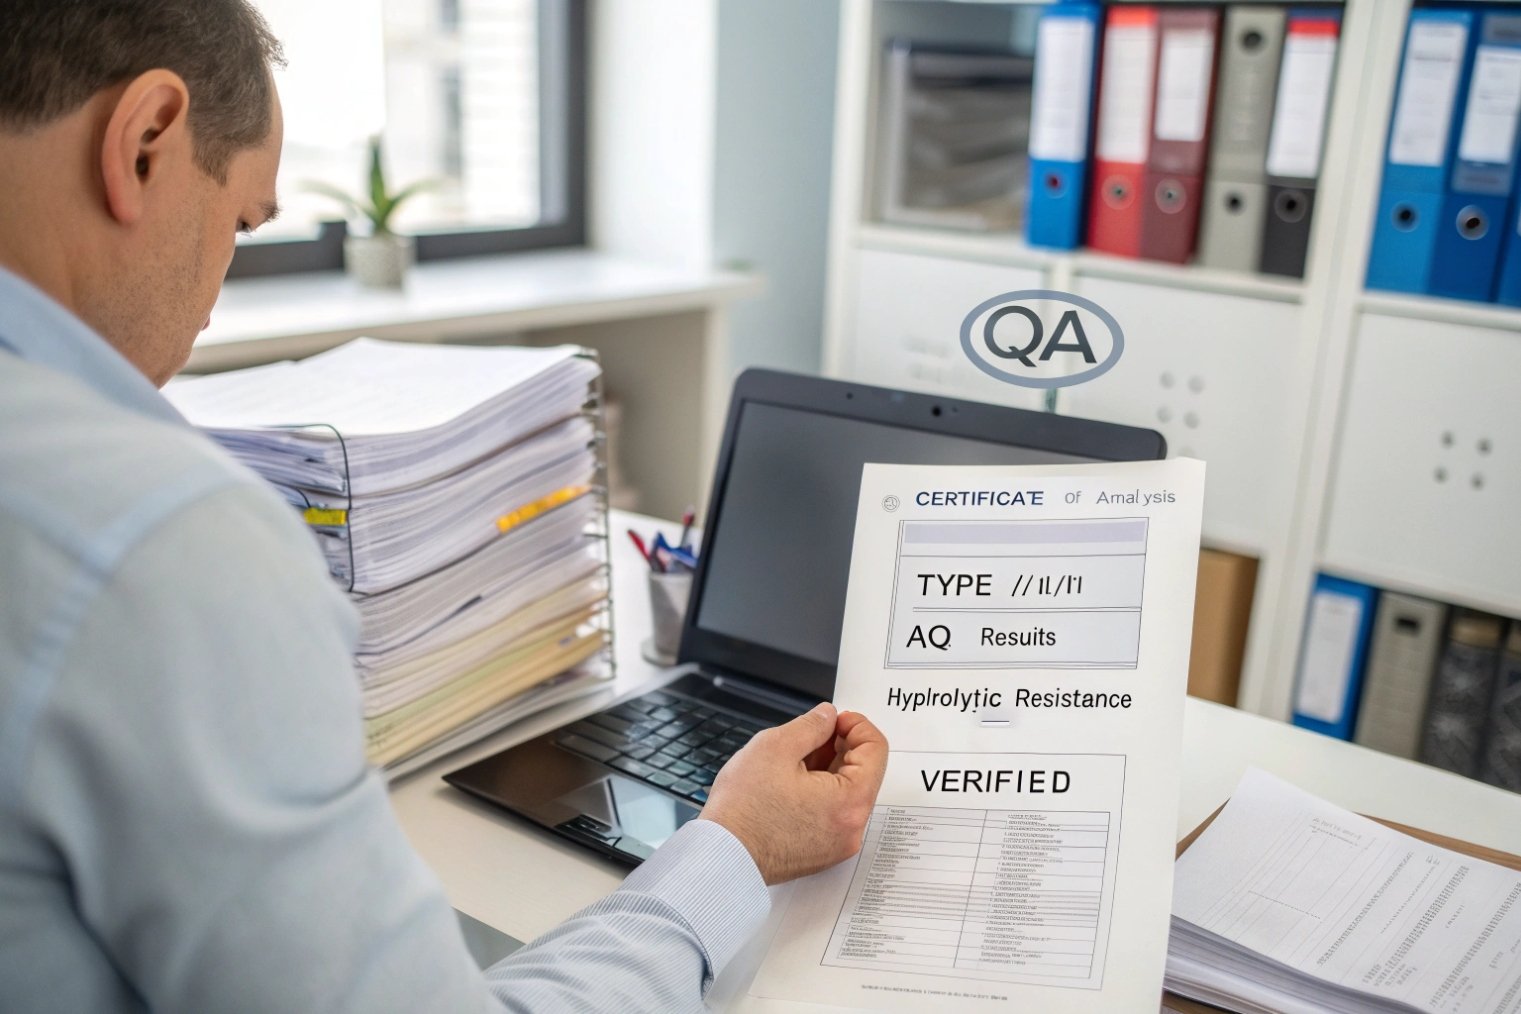
At receiving, we normally expect at least:
-
Certificate of Analysis (CoA) or Certificate of Conformance (CoC) for each lot, covering:
- Glass type (I, II, III) and relevant pharmacopeial references.
- Key dimensional checks and tolerances.
- Cosmetic AQL results and defect rates from supplier’s own inspection.
- Where relevant, hydrolytic resistance class and test conditions.
- Results of mechanical/thermal tests done at the supplier (for example, internal pressure, thermal shock).
-
Regulatory compliance statements, for example:
- Expectations aligned to the FDA container closure systems guidance 4.
- Declarations related to heavy metals, RoHS/REACH where relevant to your markets.
For sterile or depyrogenated bottles or kits, additional documentation is expected:
- Sterilization certificates (method, cycle, SAL).
- Endotoxin / bioburden results.
- Packaging design and handling instructions that protect sterility up to the point of use.
These documents should be linked to the supplier lot number, not just to a general product code.
Lot identification and traceability
Good traceability allows you to move both upstream (back to supplier process) and downstream (into your own filled product) fast.
Key practices:
- Each pallet or carton carries a clear lot ID, manufacturing date, and item code.
- Your receiving process records the link between supplier lot and your internal material batch number.
- Once bottles are used, your batch records show which finished drug lots used which bottle lots.
Inside the supplier’s system, that lot ID should trace back to:
- Furnace campaign and glass composition batch.
- Mould sets and manufacturing line.
- In-process QA data for that run.
On your side, the ERP or QMS should allow:
- Quick block or recall of affected finished goods if a bottle lot is later questioned.
- Trending of defects by supplier, plant, mould family, or colour, not only by your item code.
Many pharma–packaging Quality Technical Agreements (QTA) explicitly define:
- What must be on pallet and carton labels.
- Which tests and values must appear on CoAs.
- How long the supplier must keep production and test records for traceability.
If you want to formalize supplier-side controls for primary packaging, many organizations align to ISO 15378 primary packaging materials GMP requirements 5.
Incoming inspection is the gate where these expectations are checked lot by lot, not only once at supplier qualification.
How do you handle deviation, CAPA, and supplier feedback loops?
No matter how good your system is, some lots will fail. What you do next decides whether the same issue repeats every few months, or disappears for good.
When a lot fails, you quarantine it, log a deviation/NCR, perform risk assessment, and issue a structured CAPA that includes both your internal actions and a supplier corrective action; then you trend the data and adjust sampling and supplier status.
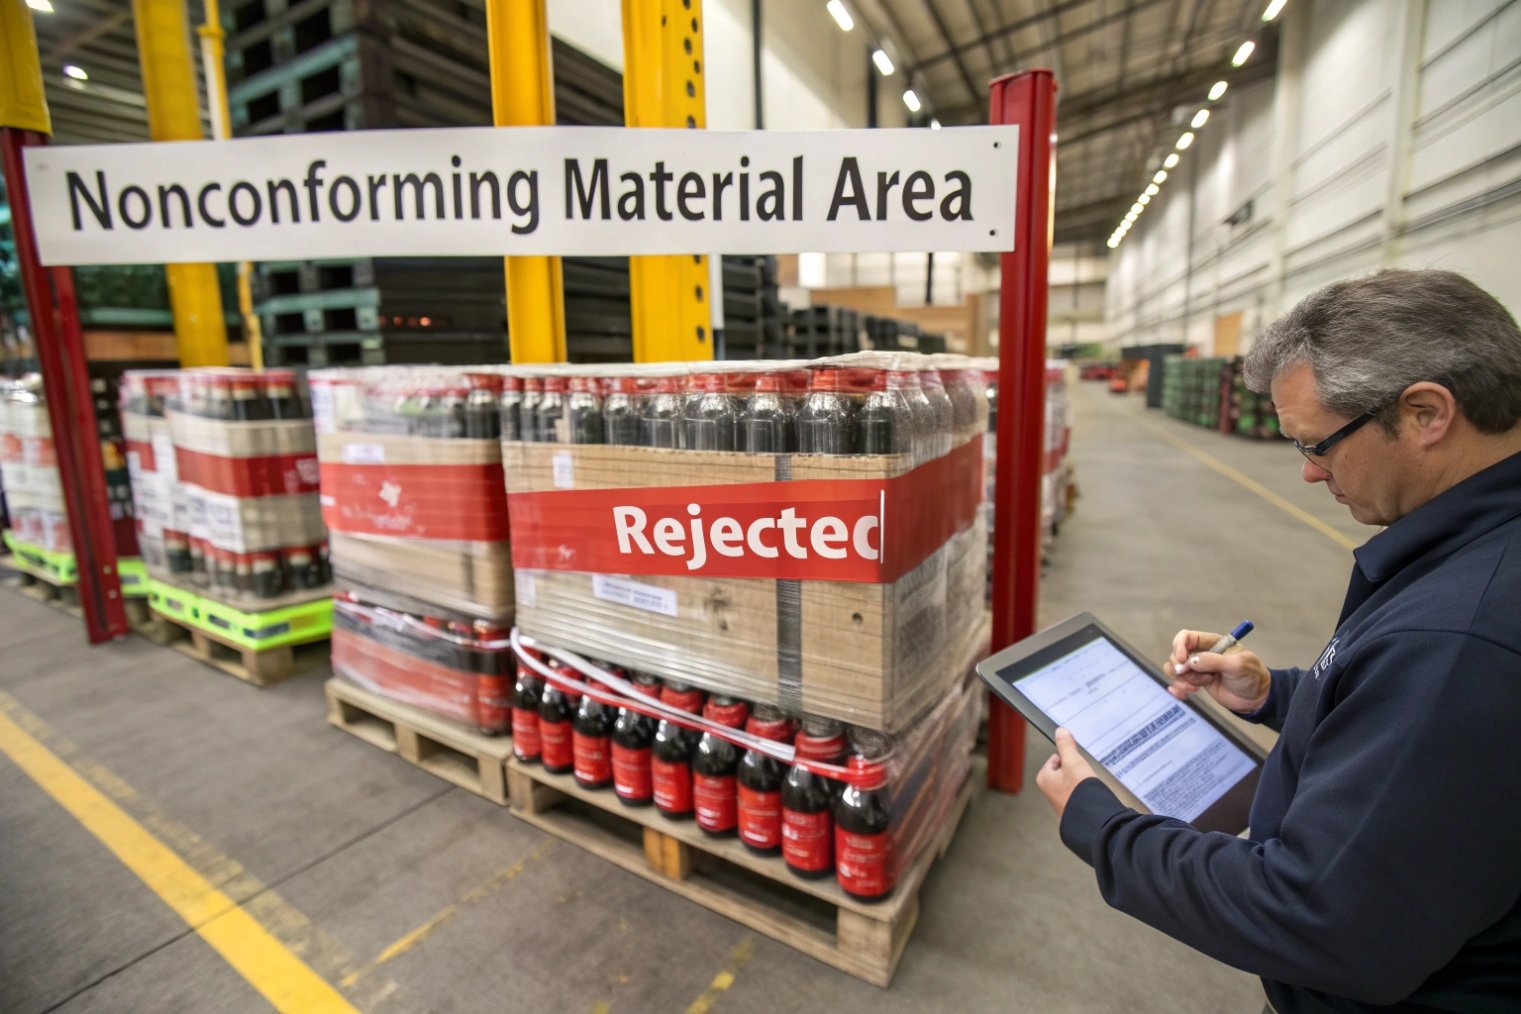
Handling nonconforming lots
A typical flow for a failed lot:
- Set the lot status to blocked/rejected in the system; mark pallets and move them to a designated area.
- Record a Non-Conformance Report (NCR) or deviation with:
- Lot IDs, supplier, date.
- Defect type, class, counts, photos.
- Reference to specification and AQL.
- Decide on an interim disposition while you investigate:
- Return to supplier.
- Scrap.
- 100% sorting (by you, by supplier on site, or third party).
- Conditional use with concession (for minor-only issues in low-risk use, if allowed).
Parallel to this, conduct a risk assessment aligned to ICH Q9(R1) Quality Risk Management 6 for any finished product already packed in the same bottle type and lot, if usage has started.
CAPA with root cause, not only sorting
A good CAPA goes beyond “we sorted the lot” or “supplier will be more careful”.
For your own site:
- Check internal factors: wrong spec in ERP, wrong sampling plan, mis-trained inspectors, mix-up of lots in warehouse.
- Update SOPs, training, or specifications if gaps are found.
- Adjust inspection level (tighten sampling, change AQL) if the risk profile changed or supplier performance dropped.
With the supplier:
- Issue a Supplier Corrective Action Request (SCAR) containing what you found and what you expect.
- Ask for a structured answer, often in 8D or at least clear 5-Why and action plan format.
- Request objective evidence: updated procedures, photos of changes, additional test data, or results of internal audits they performed.
For serious or repeated issues, add:
- On-site or virtual supplier audits.
- Enhanced first-article approval after mould changes, furnace rebuilds, or composition changes.
- Clear change-control rules in the QTA: supplier must notify and get approval before implementing changes that affect glass, dimensions, moulds, or coatings.
Building a feedback loop, not one-off complaints
To avoid living in a constant reactive mode, many teams:
- Maintain defect trend charts by supplier, bottle family, and defect type.
- Review trends in monthly or quarterly supplier meetings.
- Share photos, Pareto charts, and line disruption data so suppliers see the true impact (not only ppm numbers).
- Link supplier performance to practices described in ICH Q10 Pharmaceutical Quality System 7, such as CAPA effectiveness and continual improvement.
The goal is simple: each nonconformance fuels real learning on both sides. Over time, critical defects should approach zero, major defects drop to a stable low baseline, and minor cosmetic issues move into a reasonable band that your brands and regulators accept.
Conclusion
A strong acceptance process for pharma glass bottles is part inspection, part paperwork, and part relationship management. When sampling, measurements, documents, and CAPA loops all align, bottle quality becomes predictable instead of a constant surprise.
Footnotes
-
Learn how Z1.4 sets AQL-based attribute sampling with normal/tightened/reduced switching rules. ↩ ↩
-
See ISO’s official acceptance sampling standard indexed by AQL for lot-by-lot inspection. ↩ ↩
-
Understand how acceptance decisions use sample sizes and acceptance/rejection numbers in lot sampling. ↩ ↩
-
FDA guidance on documenting packaging components and container-closure systems in CMC submissions. ↩ ↩
-
Requirements integrating GMP into QMS expectations for suppliers of primary medicinal packaging materials. ↩ ↩
-
Practical principles for risk-based decisions in inspection, sampling intensity, and deviation impact assessment. ↩ ↩
-
Framework for CAPA, change management, and continual improvement across the pharma product lifecycle. ↩ ↩


