
Many people know borosilicate is “heat resistant,” but the real story is how we melt, shape, join, and test it so labware does not fail in real use.
Borosilicate labware starts as melted tubing or molded shapes, then passes through hot-working, precise annealing, cold finishing, joining, and strict thermal and mechanical tests to stay stable in harsh lab conditions.

From tubing lines and IS machines to lampworking benches, each process adds something: geometry, strength, sealing, or safety proof. When these steps align, the result is labware that behaves calmly in hot plates, ice baths, and aggressive chemicals.
What hot-working and cold-working techniques shape borosilicate labware?
It is easy to think “borosilicate = tube + joint,” but the way we hot-work and cold-work that tube decides how well it performs in the lab.
Hot-working uses tube drawing, molding, and lampworking to define the body and joints, while cold-working cuts, grinds, polishes, and sometimes strengthens borosilicate without damaging its low expansion and chemical resistance.
Main hot-working routes for labware
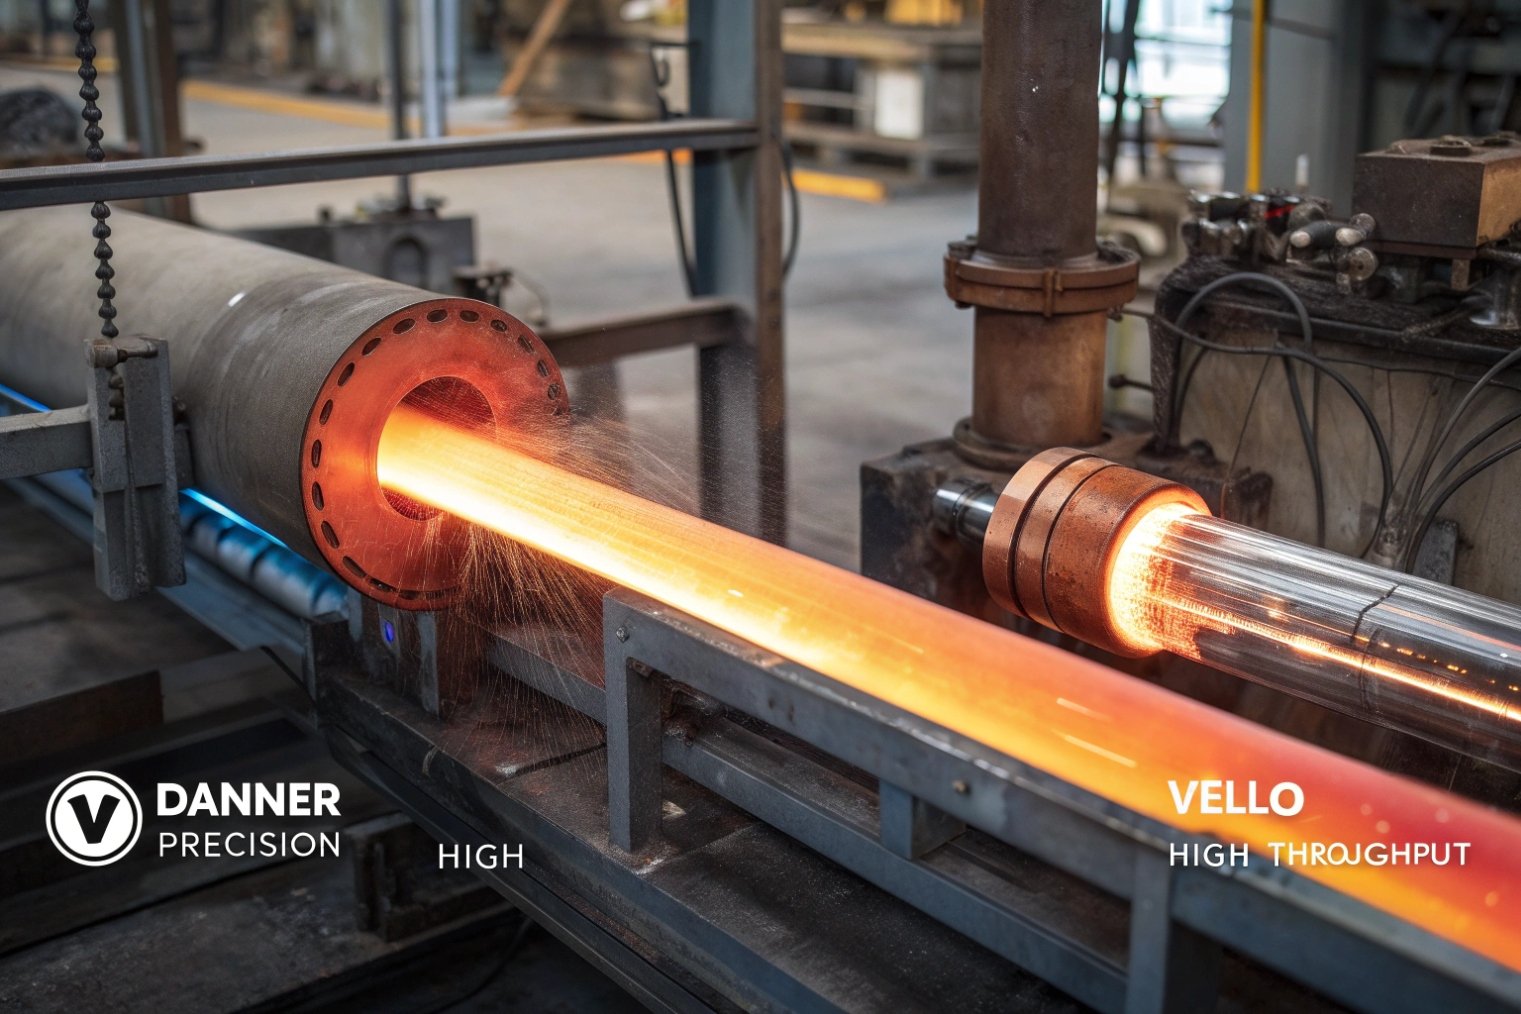
Most borosilicate labware starts as tubing, typically aligned to the published properties of ISO 3585:1998 “borosilicate glass 3.3 — Properties” 1. Large furnaces melt a borosilicate 3.3 composition and feed it to Danner or Vello lines:
- In the Danner tube-drawing process 2, molten glass flows onto a rotating mandrel and air forms the bore as the tube is drawn.
- In the Vello process 3, glass exits through a defined orifice and is shaped into tubing with controlled flow and air support.
We choose the route based on needs:
| Process | Typical strengths | Typical use cases |
|---|---|---|
| Danner | High precision, flexible for smaller runs | Lab-grade tubing, custom diameters, tight tolerances |
| Vello | High throughput, very efficient | Large volume standard tubing |
Drawn tubes then pass hot through straightening and an annealing section so they cool with low stress.
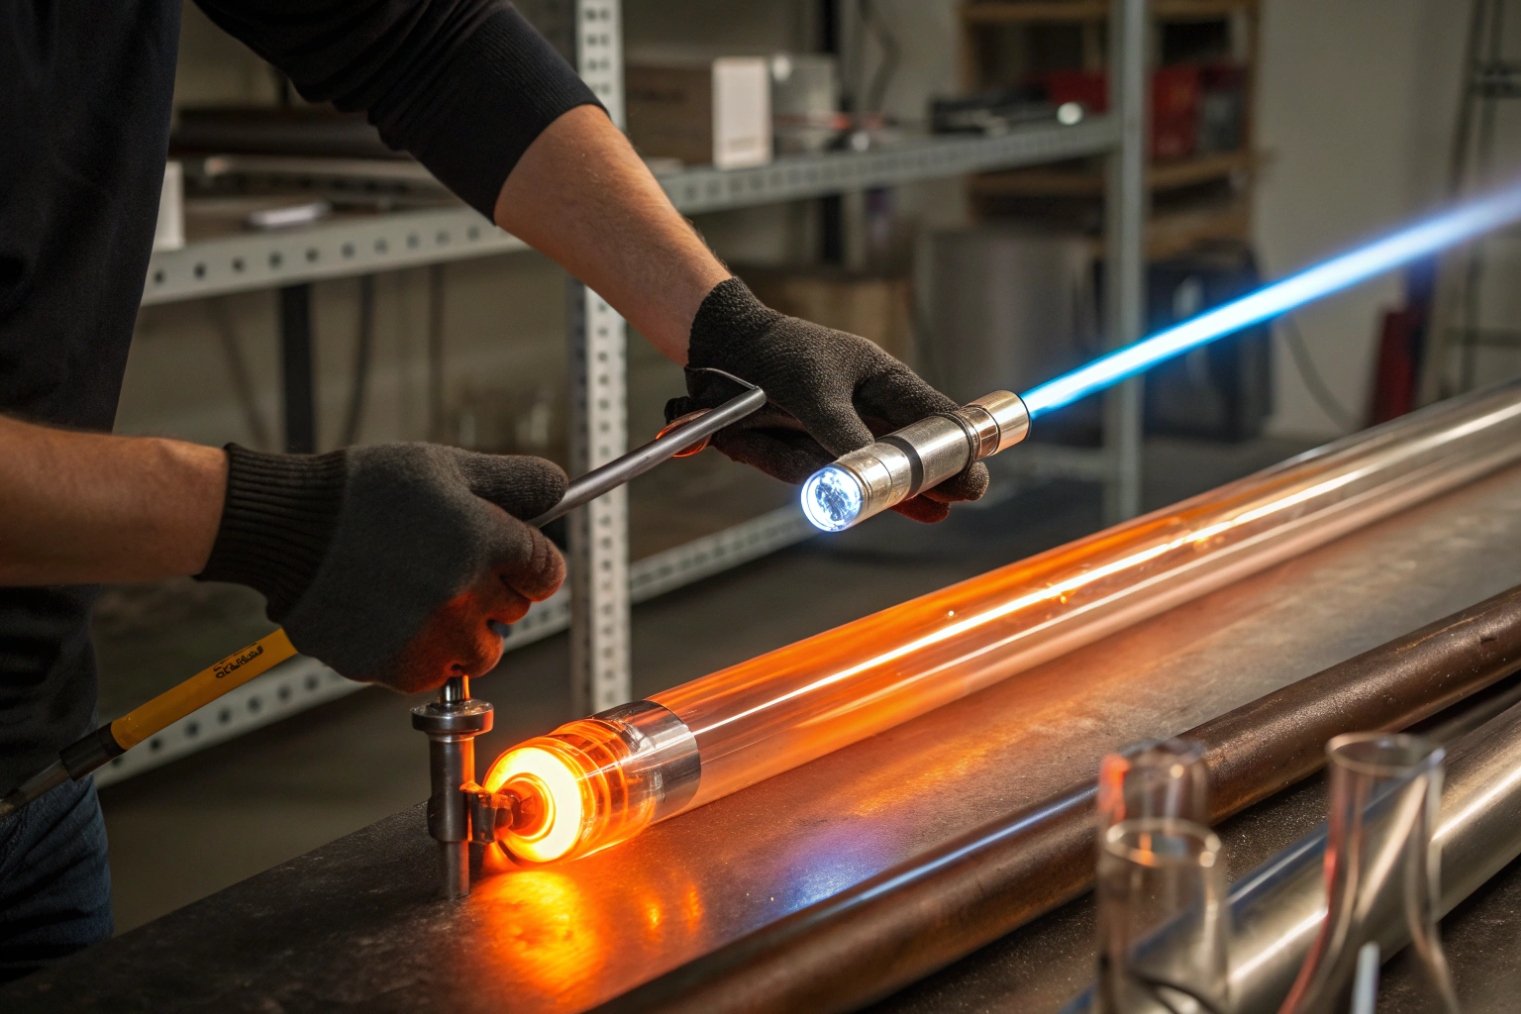
For custom scientific pieces, we often move to torch work and lathes, supported by practical references such as borosilicate flameworking/lampworking resources 4 that show how rods and tubes are shaped into joints, adapters, and assemblies.
Cold-working and finishing operations
Hot-formed parts are rarely ready to use without cold work. Key cold-working steps include:
- Cutting tubes to length, often with diamond wheels or hot scoring and snapping.
- Grinding and beveling edges to remove chips and prepare for fire polishing.
- Fire polishing rims and cut edges in a flame or furnace to heal micro-cracks while keeping ID/OD within tolerance.
- Drilling and slotting with diamond tools for ports and side arms.
- Surface finishing such as light grinding on ground joints and stoppers.
A quick view of hot vs cold roles:
| Stage | Main tools | What it defines |
|---|---|---|
| Hot-working | Furnace, Danner/Vello, IS, torches | Overall shape, diameter, wall profile |
| Cold-working | Saws, grinders, fire polish, drills | Length, edge quality, small features |
Some borosilicate parts also receive ion-exchange strengthening at the cold end. Alkali-bearing borosilicate can be soaked in molten potassium salt to create a thin compressive layer. The effect is smaller than in soda-lime, but it can still raise bending strength on thin parts like sight glasses or plates.
The key in cold-working is simple: remove flaws and shape details without adding new stress. That is why we keep tools sharp, manage cooling water, and send complex pieces back for a final anneal when needed.
How does annealing differ from soda-lime cycles and why?
If we anneal borosilicate like soda-lime, the labware may look fine but fail when someone moves it from flame to ice bath. The low expansion demands its own schedule.
Borosilicate needs higher annealing temperatures but narrower, slower cooling through the strain range than soda-lime, because its low thermal expansion means stress relaxes differently and thicker labware needs more soak time.
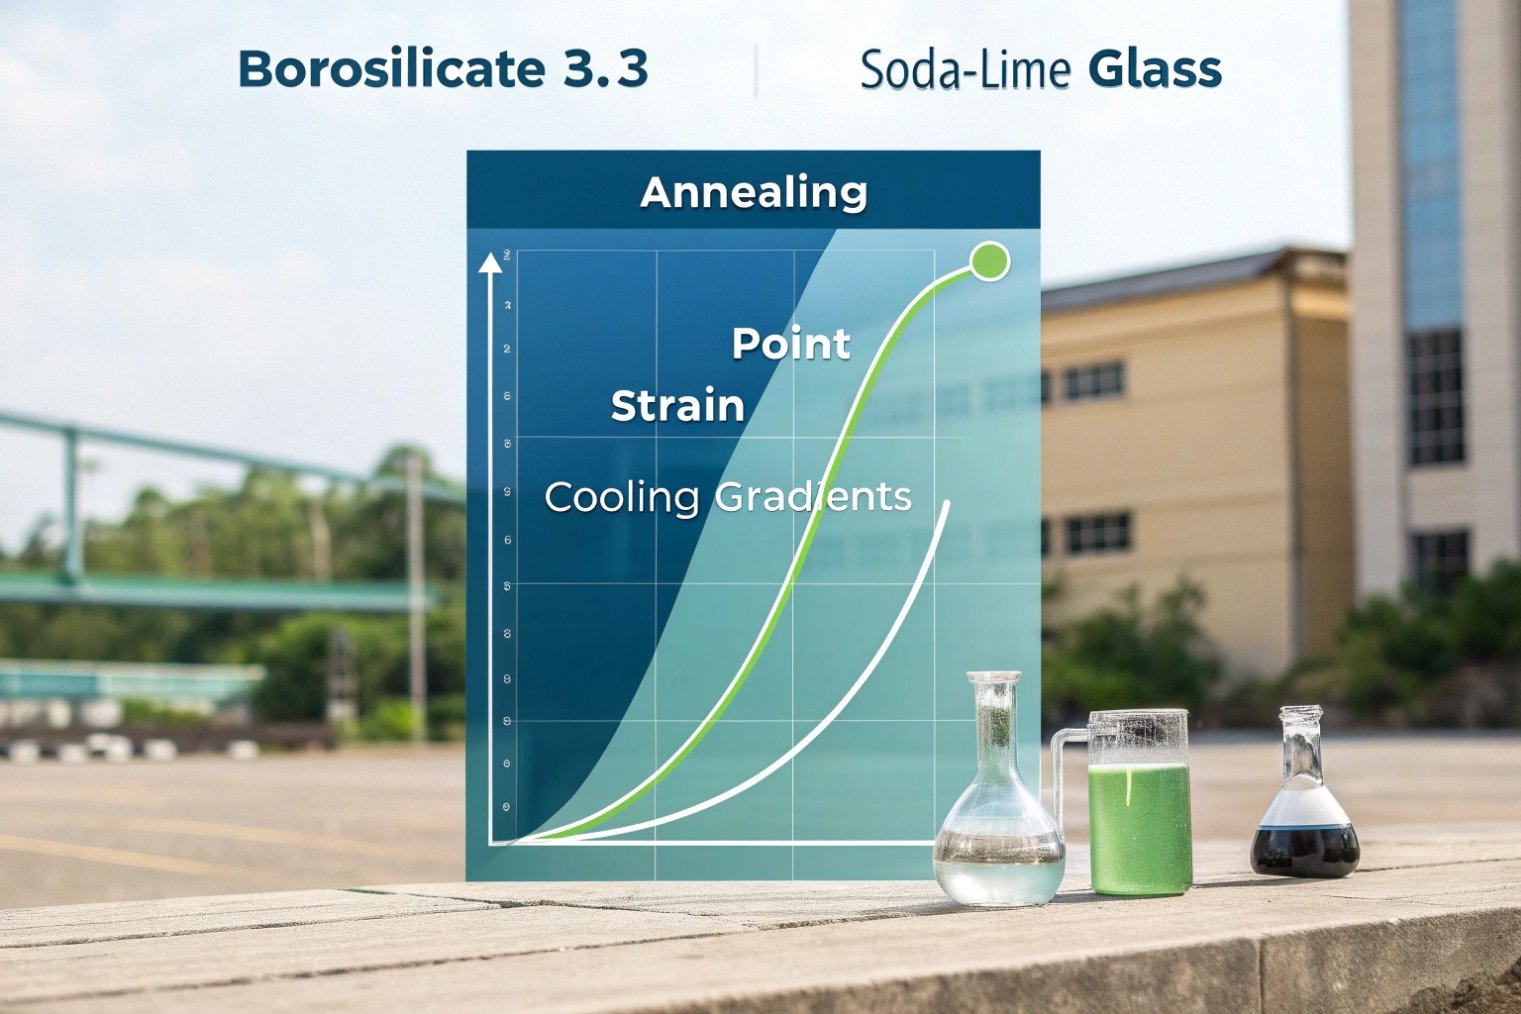
Critical temperatures for borosilicate vs soda-lime
Borosilicate 3.3 sits at different key temperatures compared with soda-lime:
- Annealing point for boro 3.3: roughly 560 °C
- Strain point: roughly 520 °C
- Softening point: roughly 820 °C
- Linear expansion: about 3.3 × 10⁻⁶ /K, much lower than soda-lime
The exact values vary slightly by brand, but the idea is stable: borosilicate’s lower expansion means it can handle larger temperature swings once it is properly annealed. To confirm that annealing is actually working, many labs and factories use polariscope strain viewers 5 to reveal residual stress patterns before parts ship.
What an annealing cycle looks like for borosilicate labware
A typical annealing process for borosilicate labware has three stages:
- Reheat or equalization: bring the entire piece close to the annealing point so the interior matches the surface.
- Soak: hold at or just below the annealing point long enough for internal stress to relax. Thick parts need longer.
- Controlled cool: slowly cool through the strain region to lock in a low-stress state, then cool more quickly down to room temperature.
Labware often combines thick and thin zones: flasks with heavy rims and thin bodies, condensers with sealed joints, complex manifolds. This makes annealing more delicate than for simple bottles.
To tune the cycle, we:
- Use polariscopes to see stress patterns as colored fringes.
- Adjust soak time and cool rate based on largest glass thickness.
- Run test pieces through thermal shock tests and refine the curve until failure rates fall to the required level.
Which joining and sealing methods maintain chemical resistance?
Borosilicate is famous for chemical resistance, but that advantage can disappear if we join parts with the wrong glass, metal, or adhesive.
To keep chemical resistance, we join borosilicate with carefully matched glass seals, ground joints, compatible metals, and minimal organic materials in wet-contact areas, while managing thermal expansion so seals do not crack.
Glass-to-glass joining in labware
Most lab joints are pure glass. Common methods:
- Torch sealing: lampworkers heat two tube ends to softening, fuse them, and draw or rotate to smooth the joint.
- Sidearm attachments: a small hole is opened in a main tube, then a side tube is fused on with careful heat control.
- Ground joints (taper joints): male and female tapers are hot formed, then ground with abrasives to a tight fit.
In all cases, we use the same borosilicate family for both parts. Mixing glasses with different expansion can create stress at the join, which shows up later as cracks under thermal cycling.
Glass-to-metal and other special seals
Some labware must connect glass to metal electrodes, flanges, or feedthroughs. Here the challenge is matching expansion, often using materials such as CarTech® Kovar® alloy 6 where a matched-expansion seal is required.
For routine labware, we try to keep metal parts outside the main wet-contact zone. Metal caps and fittings often use:
- PTFE liners or ferrules to protect glass and seal without strong point loads.
- Elastomer seals with known chemical resistance and low extractables.
Where adhesives must be used (for example, attaching non-glass labels or holders), we keep them outside any liquid contact area if possible. In aggressive chemical service, we avoid adhesives inside the wetted zone altogether.
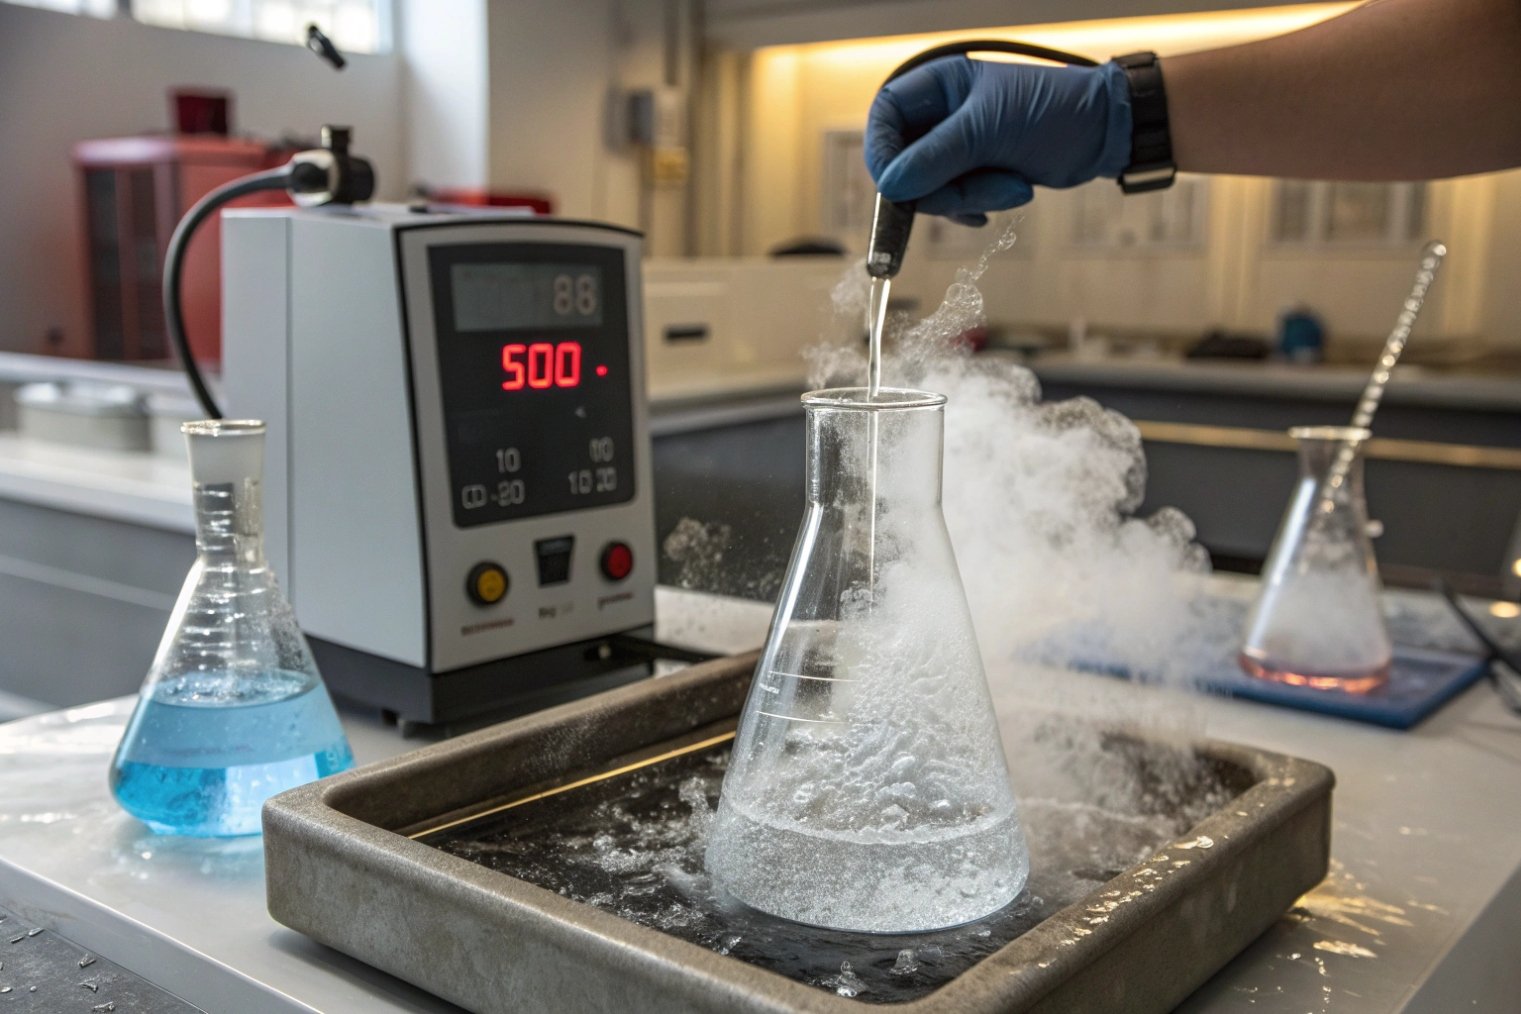
What tests validate thermal shock and mechanical durability?
Borosilicate has a strong reputation in the lab, but users prove it every day with hot plates, burners, vacuum, and centrifuges. Our tests must mirror these real stresses.
We validate borosilicate labware with thermal shock tests, impact and bending checks, internal pressure and vacuum tests, and stress evaluations so pieces survive fast temperature swings and rough handling.
Thermal shock testing
Thermal shock is the signature test for borosilicate. Many teams structure their method around well-known procedures like the ASTM C149 thermal shock resistance test method 7 (or an equivalent internal method), then adapt it to the geometry and use case of the specific labware.
We record the maximum safe ΔT the piece can take without cracking. For borosilicate labware, this allowable temperature difference is often much higher than for soda-lime, especially when annealing is correct and wall thickness is even.
We also run thermal cycles, not just single shocks, to see if micro-cracks grow over repeated use.
Mechanical strength and handling tests
Mechanical tests check how the glass behaves under daily stress:
- Impact tests: controlled taps or pendulum strikes on likely weak zones (heel, shoulder, joints).
- Bending tests for plates, rods, or sight glasses.
- Internal pressure tests for bottles, filter assemblies, and pressure-rated items.
- Vacuum tests for flasks, desiccators, and condensers used under reduced pressure.
Stress evaluation with a polariscope helps us find local stress peaks before they turn into cracks—especially on flame-worked assemblies where multiple joins and thickness changes meet in one area.
Conclusion
Borosilicate labware earns its reputation through careful hot-working, tuned annealing, clean joining, and hard testing, so it stays stable while chemists push it through heat, cold, vacuum, and aggressive liquids.
Footnotes
-
ISO’s baseline properties for borosilicate glass 3.3 used to align specs across suppliers. ↩ ↩
-
Clear overview of tube drawing and hot forming, including how the Danner method shapes tubing. ↩ ↩
-
Quick definition of the Vello process and how it fits into glass tubing manufacture. ↩ ↩
-
Practical borosilicate lampworking resources that help explain real torch-based forming and joining. ↩ ↩
-
Explains how polariscopes reveal residual stress patterns to verify annealing quality before shipment. ↩ ↩
-
Technical reference for Kovar alloy used in matched-expansion glass-to-metal sealing applications. ↩ ↩
-
Recognized thermal shock test method that helps standardize pass/fail criteria for sudden temperature changes. ↩ ↩


