High-borosilicate sounds simple on paper, but one wrong decision in batch, melting, forming, or annealing can turn “heat resistant” into a cracked return from your customer.
High-borosilicate bottles come from a low-expansion batch (high silica, high boron, low alkali), melted around 1600–1700 °C, formed by IS or tubular processes, then carefully annealed, stress-tested, and decorated with inks and coatings that match borosilicate’s surface chemistry.

In daily work with buyers, many people only ask for “borosilicate like 3.3” and stop there. To get stable quality, we must think through the full chain: batch formulation, melting window, forming route, annealing curve, and decoration system. When these parts match, the bottle survives ovens, dishwashers, and filling lines without drama.
Which batch formulations and melting temps achieve low expansion?
Many people accept “borosilicate = heat resistant” and never ask what is inside the glass. Then they are surprised when one supplier’s “borosilicate” survives 150 °C thermal shock and another shatters at 90 °C.
Low expansion in high-borosilicate bottles comes from a batch with about 70–80% SiO₂, ~12–20% B₂O₃, low alkali (≈3–5% Na₂O/K₂O), a few percent Al₂O₃, melted and refined around 1600–1700 °C in a stable furnace.
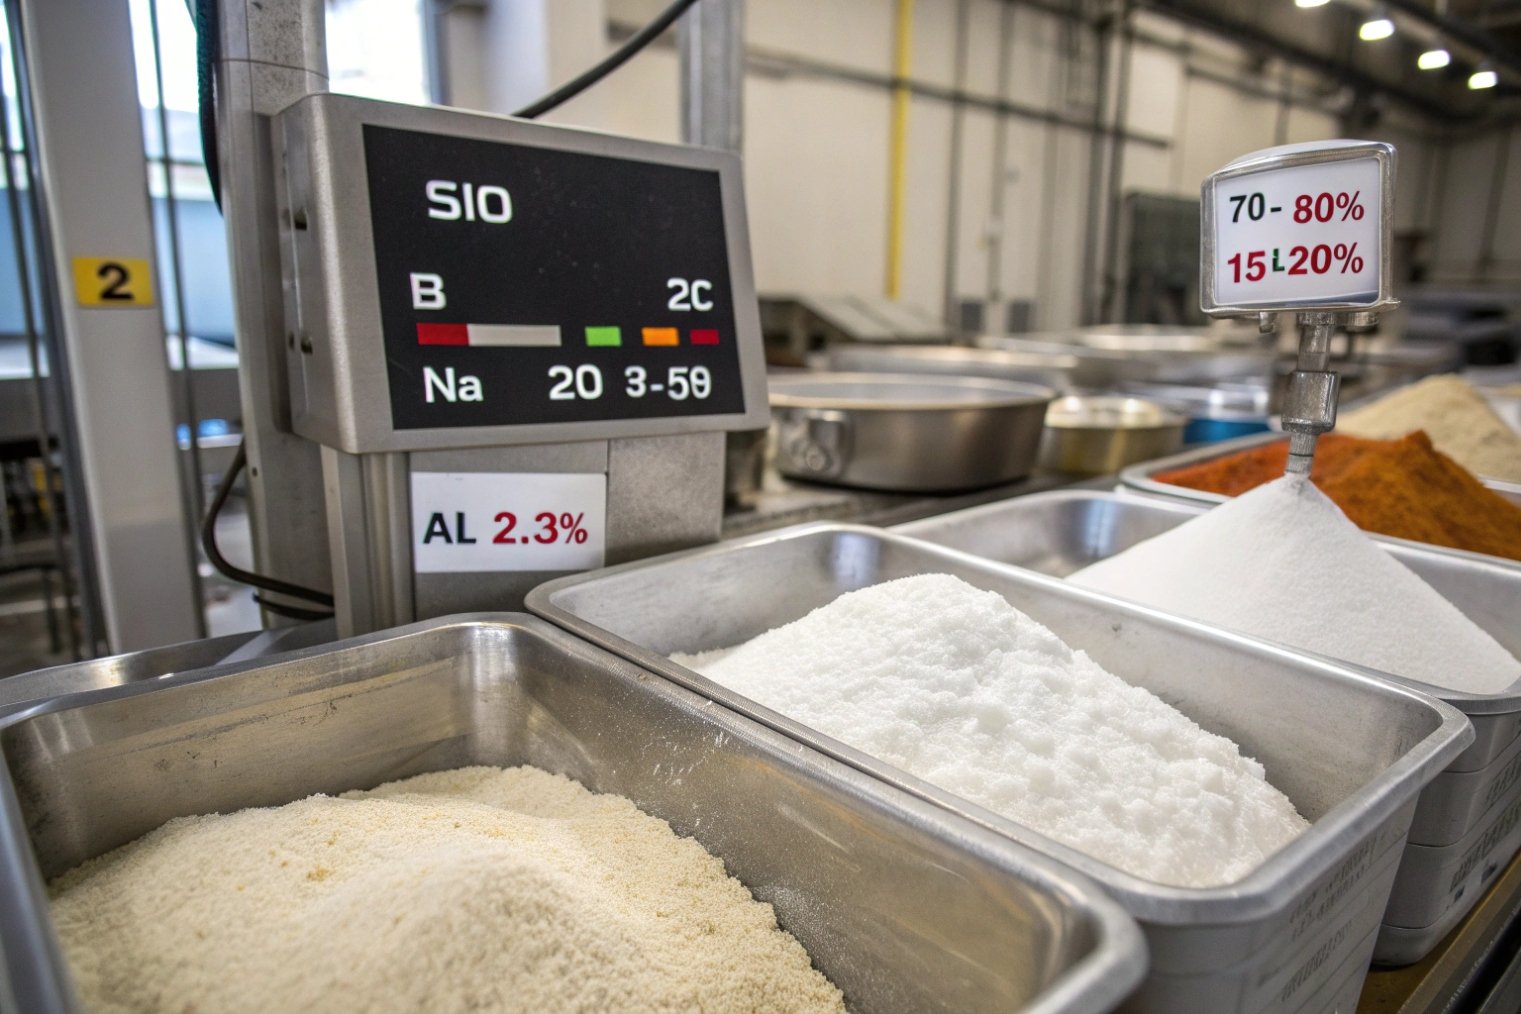
Typical high-borosilicate bottle recipe
For high-borosilicate bottles, the batch is the main “design tool” for thermal expansion. Many buyers reference “3.3” because it aligns with ISO 3585:1998 Borosilicate glass 3.3 — Properties 1 rather than a brand name.
A common range looks like this:
| Component | Typical range (wt%) | Main role |
|---|---|---|
| SiO₂ (silica) | 70–80 | Builds the network, gives chemical stability |
| B₂O₃ (boron oxide) | 12–20 (sometimes higher) | Lowers expansion, improves thermal shock |
| Na₂O + K₂O (alkali) | ≈3–5 | Lowers melt temperature, adjusts viscosity |
| Al₂O₃ | 2–3 | Improves durability and strength |
| Others (CaO, etc.) | Small amounts | Fine-tune properties |
If you want a quick “sanity check” reference for composition ranges and the classic low-expansion positioning, SCHOTT’s overview of borosilicate glass 3.3 composition and properties 2 is a useful benchmark for how technical suppliers describe the family.
When we push B₂O₃ higher and keep alkali low, the coefficient of thermal expansion (CTE) drops. Classic “3.3” borosilicate sits around 3.3 × 10⁻⁶ /K. This low expansion is why the bottle can handle rapid temperature swings.
At the same time, higher SiO₂ and B₂O₃ make the melt more viscous. This gives good chemical resistance and stability but makes forming harder. So batch design is always a balance between thermal performance, furnace life, forming speed, and cost.
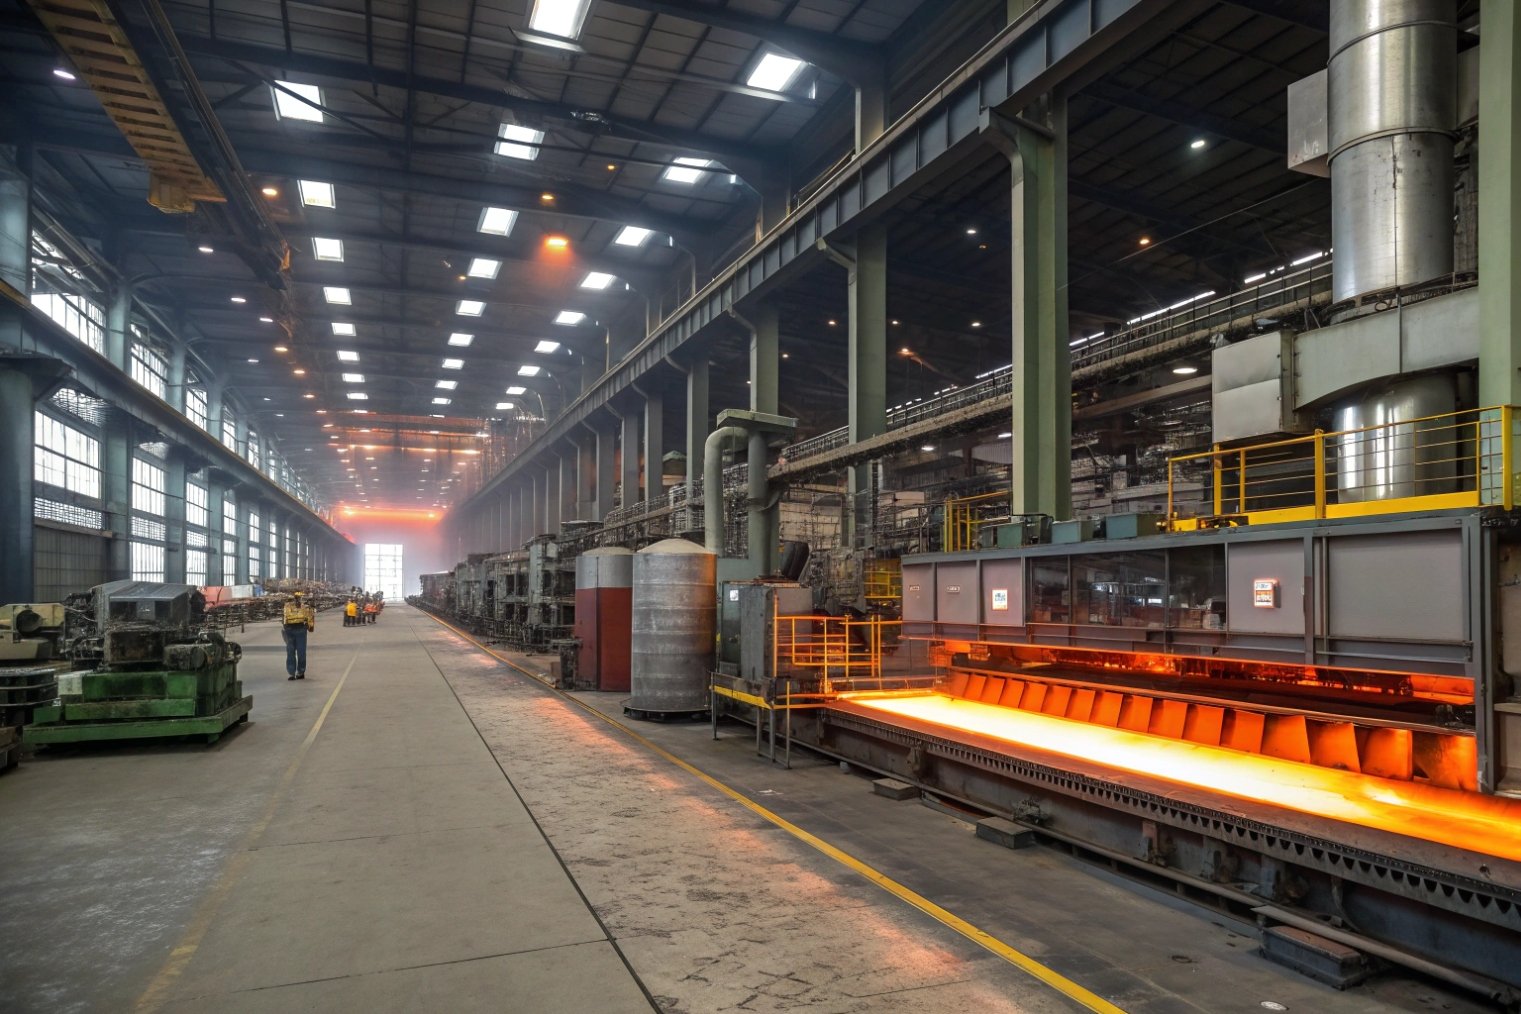
Melting window and furnace demands
High-borosilicate does not melt as easily as soda-lime glass. A typical high-borosilicate tank or electric furnace works in the 1600–1700 °C range for melting and refining. The glass must stay at high temperature long enough to fully melt the raw materials, refine out bubbles, and homogenize composition and color—exactly the kind of practical constraints summarized in Lehigh’s lecture on melting and fining processes in industrial glass furnaces 3.
We usually use high-purity silica, borax or boric acid, alumina sources, and controlled alkali. Impurities like iron must stay low if you want clear, colorless bottles.
Because the glass is more viscous at a given temperature than soda-lime, we often need longer refining times and stronger burners or electric boosting. Furnace refractories must also handle higher temperatures and more boron in the melt, which can attack some bricks. So the glass formula and furnace design must match.
How to tune the batch for your project
For a practical buyer, the key questions are simple:
- What ΔT (thermal shock) must the bottle survive?
- What forming route will we use (IS molding or tubing)?
- What color and clarity does the brand want?
If you need very low expansion and high ΔT (laboratory, bakeware), the batch will sit toward the high B₂O₃ side. Melting will be harder and slower, but thermal performance improves.
If the bottle is mainly for room-temperature drinks with some pasteurization, the batch can move a bit closer to the “easier-melt” side with slightly more alkali. You still get better thermal resistance than soda-lime, but forming is faster and cost is lower.
For thick-wall bottles, extra care is needed. Thick glass sections store more stress, so the CTE and annealing behavior must be very consistent. In our plant, we work with tight batch controls and automatic weighing to keep each melt within narrow limits. This way, when the bottle goes into the lehr, the stress pattern is predictable and repeatable.
What forming methods (press-and-blow vs. blow-and-blow) fit thick-wall bottles?
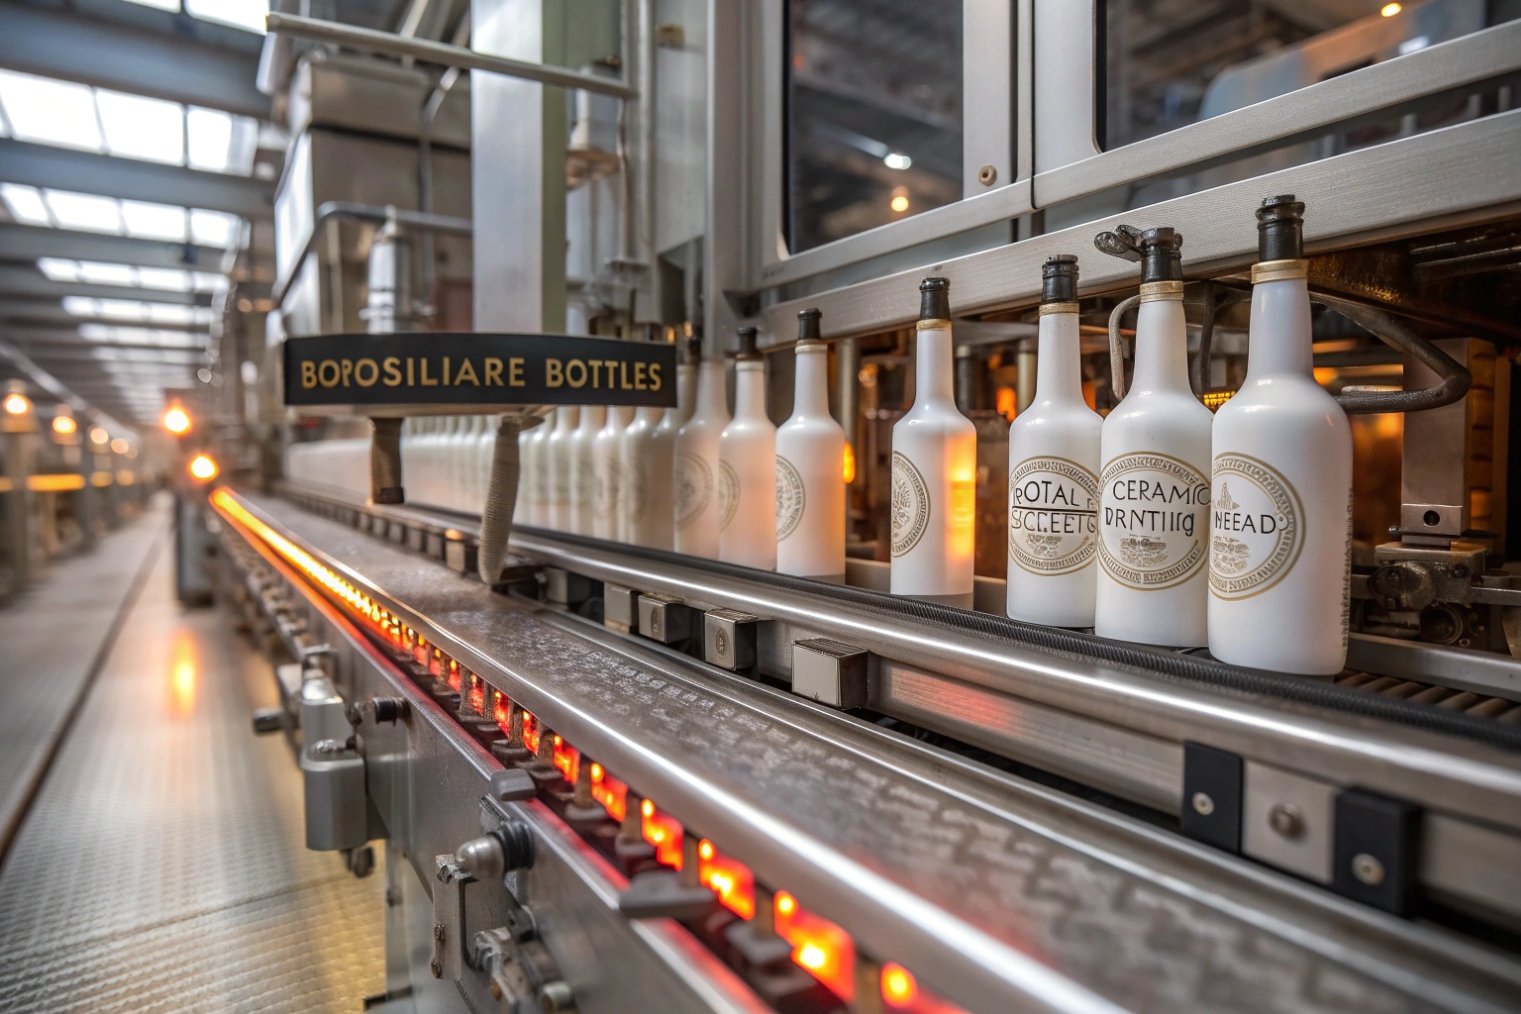
Many designers fall in love with heavy, thick-wall borosilicate bottles on paper. Then the forming shop tells them the weight distribution is a nightmare and rejects skyrocket.
For thick-wall high-borosilicate bottles, press-and-blow usually gives better wall control than blow-and-blow, while tubular forming from drawn glass tubing suits small-volume, tight-tolerance containers like pharma and labware.
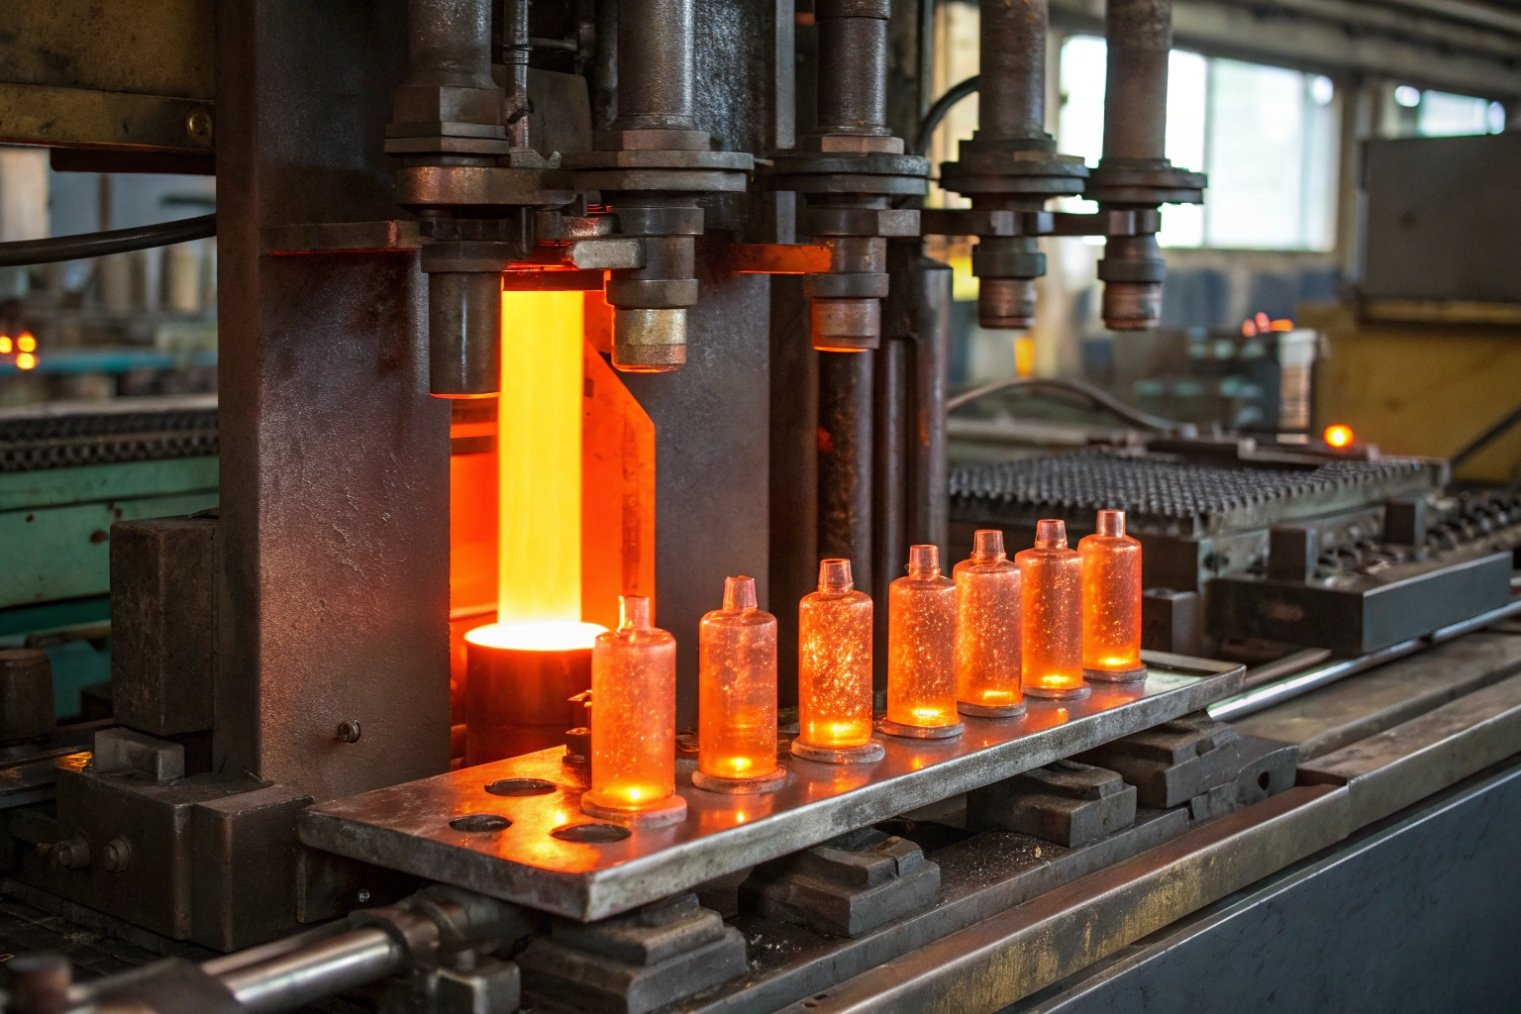
IS machine routes for borosilicate bottles
On an IS (Individual Section) machine, molten high-borosilicate flows out of the forehearth and is cut into gobs. These gobs move into a blank mold and then a blow mold. The difference between press-and-blow and blow-and-blow is how we form the parison—Eurotherm’s explanation of the press and blow container glass forming process 4 is a clear reference for the mechanics.
| Aspect | Press-and-blow | Blow-and-blow |
|---|---|---|
| First step | Plunger presses gob in blank mold | Air blows gob in blank mold |
| Wall thickness | More controlled distribution | More variable, needs fine tuning |
| Best for | Thick-wall, wide mouth, cosmetics, premium bottles | Narrow-neck, standard bottles |
| With borosilicate | Helps fight high-viscosity issues | Needs very careful gob and timing |
High-borosilicate has higher viscosity at forming temperature than soda-lime. So the gob behaves “stiffer”. In press-and-blow, the plunger forces the glass into shape. This helps fill heavy bases and shoulders and gives more even walls.
In blow-and-blow, air alone stretches the gob. With a “stiff” borosilicate gob, this can lead to thin shoulders or thick heels if timing is even slightly off. For thick-wall design, this risk grows, so we often prefer press-and-blow on IS machines.
When tubular forming makes more sense
For many small high-borosilicate containers, especially in pharma or labware, the bottle or vial does not start from a gob at all. It starts from tubing.
First, we draw and form a continuous glass tube. The tube already has very uniform wall thickness and smooth surface. Then another line cuts, heats, and forms this tube into vials, bottles, or other containers. SCHOTT’s description of the Danner tube-drawing process 5 is a good example of how technical borosilicate tubing is produced and stabilized.
This “tubular” route gives:
- Very uniform wall thickness
- Tight dimensional tolerances
- Smooth, low-defect surfaces
- Good control for small volumes
So when a customer needs a 10 ml vial with very strict size and weight limits, tubing is often the better choice than molded ware.
For thick-wall bottles, tubular forming works well in smaller sizes, such as perfume rollers, dropper bottles, or premium tincture packaging. For large food or beverage bottles with heavy walls, IS molding is still the main route, with press-and-blow giving the best control.
In our projects, we often suggest:
- Press-and-blow IS for 100–1000 ml thick-wall bottles
- Tubular forming for 5–100 ml pharmaceutical or cosmetic containers
This way, each forming method plays to its strengths and the customer gets both look and performance.
How do annealing and stress testing ensure thermal performance?
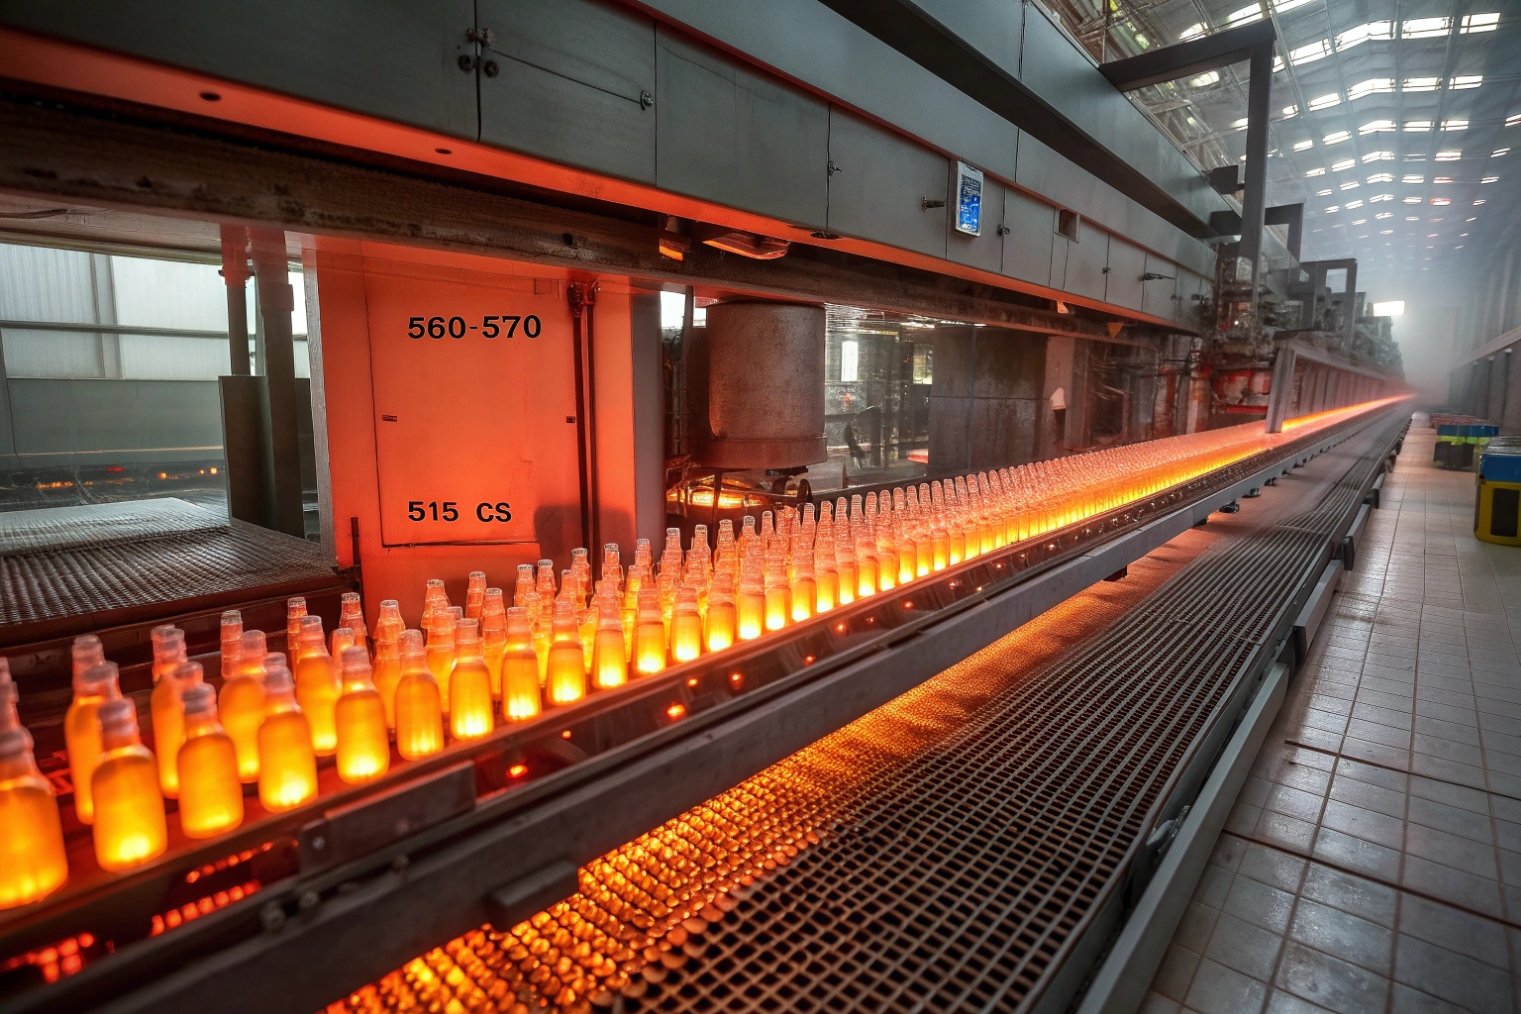
Even with a perfect batch and forming process, high-borosilicate bottles can still fail if annealing is not right. Internal stress is invisible but very real, and it shows up later as cracks during filling or thermal shock testing.
Borosilicate bottles are reheated near their annealing point, held, then cooled slowly through the strain point; polariscopes, thermal shock tests, and mechanical tests confirm that residual stresses are low and thermal performance meets the target.
Annealing window for high-borosilicate bottles
High-borosilicate has a specific set of “critical temperatures”, and the process logic (annealing point → strain point → controlled cooling) is laid out well in Lehigh’s Annealing and Tempering lecture 6.
An annealing lehr for borosilicate bottles usually does the following:
- Receive bottles from forming at a high surface temperature.
- Reheat or equalize them near the annealing point.
- Hold them long enough for the center and surface to reach near the same temperature.
- Cool them slowly through the critical zone down past the strain point.
- Then cool faster once the glass is “frozen”.
For thin-walled small bottles, the soak time can be short. For thick-wall premium bottles or cookware, we need longer time and a slower cooling rate. If we cool too fast, stress locks into the glass. This stress may not show on day one but can lead to sudden failure later when the bottle meets hot filling, pasteurization, or cold shock.
A simple way to think about it: thick glass is like a thick piece of meat in an oven. The core always needs more time than the surface.
Stress testing and thermal performance checks
After annealing, we never rely only on “feel”. We use tools and tests to prove that stress and thermal performance are under control.
Common checks include:
| Test type | What it checks | How we use it |
|---|---|---|
| Polariscope / strain viewer | Residual internal stress patterns | Routine batch or line checks |
| Thermal shock test | ΔT resistance (hot to cold or cold to hot) | Product qualification and periodic control |
| Mechanical impact | Resistance to knocks and conveyor handling | Line robustness |
| Pressure / vacuum | For bottles under internal pressure | Carbonated or hot-filled products |
A polariscope lets us see colored stress patterns inside the glass. For a good borosilicate bottle, the stress around the heel, shoulder, and neck finish should be low and smooth. Strong color bands or sharp transitions show poor annealing or forming defects.
Thermal shock tests depend on the application. For some food uses, we may test from 20 °C water to 90 °C or 100 °C. For more demanding uses, the test might go from room temperature to 150 °C or more. The number that matters to buyers is the safe ΔT the bottle can survive with low breakage.
In our factory, we link these tests back to real process data. When we see stress patterns move, we adjust lehr temperature, belt speed, or loading. Over time this builds a “playbook” for each bottle design, so every batch gives the same performance.
Which decoration processes adhere well to borosilicate surfaces?
Borosilicate bottles often go into premium markets. Brand owners want high-end decoration. But borosilicate has a hard, chemically resistant surface, and its low expansion means some coatings or inks may crack or peel if they do not match.
High-borosilicate bottles work well with high-temperature ceramic screen-printing inks, vitrified decals, acid or sand frosting, and well-prepared spray coatings; the key is surface cleaning and thermal-expansion-matched frits or binders.
Why borosilicate needs the right decoration system
Borosilicate’s strengths create decoration challenges:
- Very smooth, chemically durable surface
- Low thermal expansion
- Good resistance to acids and detergents
Coatings or inks must stick to this surface during curing and stay on during use. If the frit or binder has a very different CTE from the glass, stress builds up during cooling. This can lead to micro-cracks, flaking, or poor adhesion after dishwashing.
So we pay attention to three steps:
- Clean and activate the glass surface.
- Choose inks or coatings with proven borosilicate compatibility.
- Match firing or curing temperature with the annealing behavior of the bottle.
Common decoration options for high-borosilicate bottles
Here are typical methods we use or see used successfully on borosilicate:
| Method | Temp range / cure | Durability on boro | Notes |
|---|---|---|---|
| Ceramic screen printing | Fired ≈500–600 °C | Very high | Uses glass frit; bonds to surface |
| Decals (vitrified) | Fired ≈500–600 °C | Very high | Good for complex colors and gradients |
| Acid etching / frosting | Chemical process | Very high | Changes surface itself |
| Sandblasting | Mechanical process | Very high | Deep matte look, no extra layer |
| Organic spray coatings | Low-temperature cure | Medium–high | Needs good surface prep and topcoats |
| Hot stamping / foil | Medium (transfer temp) | Medium | Works well with undercoats or inks |
For premium bottles that must survive many wash cycles, ceramic inks and vitrified decals are often the safest choice. They rely on frit behavior and firing windows similar to what Ceramic Industry summarizes in its overview of enamel frits for glass and ceramic decorating 7. We still need to design the firing profile so we do not reintroduce stress.
For colorful exterior coatings, we use spray painting with UV or thermal curing systems. Good degreasing and sometimes flame or corona treatment help raise surface energy so the coating wets and adheres. A clear topcoat can improve scratch resistance.
Acid etching or sandblasting is another route when a matte or frosted look is wanted. These methods modify the glass surface itself. There is no extra layer that can peel. They also give a very “natural” touch that fits eco or minimalist brands.
In practice, the best approach is to define:
- Dishwasher cycles or cleaning conditions
- Contact with oils, alcohol, or strong detergents
- Target look (gloss, matte, metallic, translucent)
Then the glass supplier and decorator can choose a tested ink or coating system for borosilicate and validate it with adhesion and abrasion tests.
Conclusion
From batch design and high-temperature melting to forming, annealing, stress checks, and decoration, every step must match high-borosilicate’s low expansion so thick-wall bottles deliver the thermal performance your brand promises.
Footnotes
-
Defines “borosilicate glass 3.3” requirements buyers reference when asking for “3.3-like” performance. ↩ ↩
-
Supplier-style benchmark for borosilicate 3.3 composition and low-expansion property framing. ↩ ↩
-
Explains industrial melting and fining steps behind bubble removal, homogenization, and refining time. ↩ ↩
-
Clear overview of press-and-blow vs blow-and-blow stages on an IS machine. ↩ ↩
-
Practical description of the Danner tube-drawing route used for borosilicate tubing and tubular containers. ↩ ↩
-
Shows annealing/strain concepts and how residual stress relates to cooling profiles and inspection. ↩ ↩
-
Introduces enamel frit behavior and firing/softening ranges relevant to durable glass decoration systems. ↩ ↩


