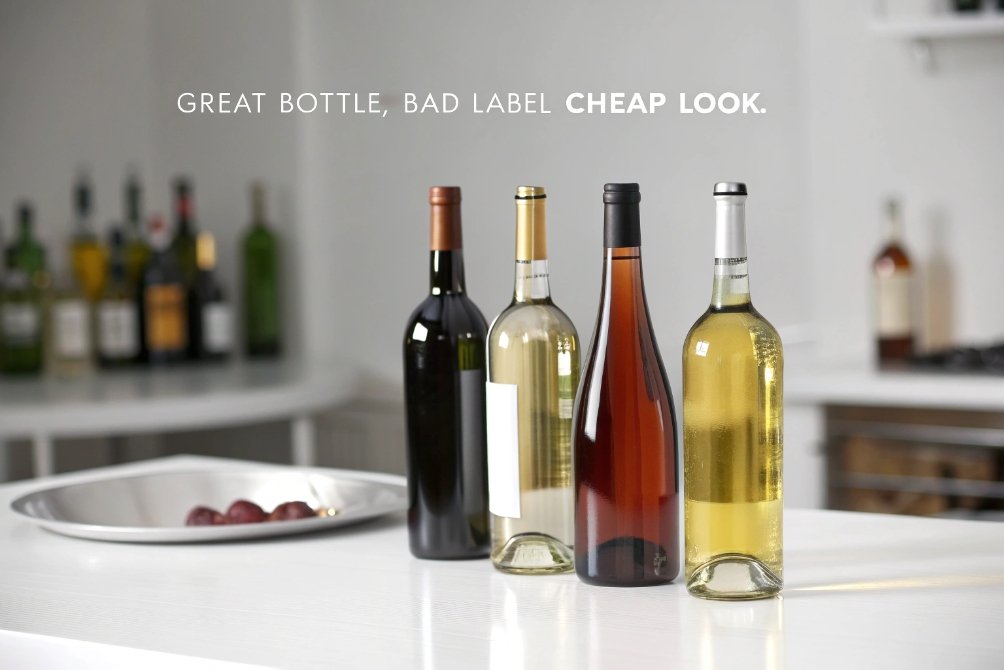
How do you apply labels to glass bottles?
A premium bottle can still look cheap when the label lifts, wrinkles, or turns soft in an ice bucket. That one detail can trigger returns and bad reviews.
Labels apply well on glass when the surface is clean and dry, the adhesive matches the conditions, and the line applies steady pressure at the right temperature.

Most label failures do not come from “bad labels.” They come from small misses: a greasy label panel, cold bottles from storage, the wrong adhesive for condensation, or a wrap belt that does not press evenly. The fix is simple when the process is treated like a system, not a sticker.
Should you choose pressure-sensitive, wet-glue, or shrink sleeves?
Many teams start with artwork and skip the label technology choice. Later they fight glue strings, lifted corners, and sleeves that shrink unevenly.
Pressure-sensitive labels fit most premium and flexible production, wet-glue wins on cost and speed for paper labels, and shrink sleeves are best for full-body decoration and complex shapes.
What each label type asks from your process
Pressure-sensitive labels (PSL) 1 look easy because there is no glue pot and no tunnel. Still, PSL needs clean glass and correct pressure. The adhesive must “wet out” on the surface, and that takes time. When bottles are cold or damp, the tack drops fast and bubbles show up. On small runs, a careful hand method works. On lines, a well-set wrap station makes the difference.
Wet-glue labels (cut-and-stack) 2 often use cut-and-stack paper. The line applies glue right before contact, so the process tolerates more dust than PSL, but it creates new risks. Glue viscosity, temperature, and pickup must stay stable. If the glue strings, the line gets messy and labels can skew. Wet-glue also prefers standard shapes. It performs best on traditional beverage bottles with consistent diameters.
Shrink sleeve labels 3 solve coverage problems. They handle strong tapers, embossing, and 360° branding. They also add tamper evidence in one step. The tradeoff is equipment, energy, and quality control. A sleeve can look perfect at one tunnel setting and then distort when the bottle heats unevenly. That risk grows with thick glass, cold-fill products, or bottles with heavy decoration.
Quick decision table for real projects
| Label option | Best fit products | Strong points | Common failure mode | Best first fix |
|---|---|---|---|---|
| Pressure-sensitive (paper/film) | Premium beverages, cosmetics, short runs | Fast SKU change, clean process, high-end look | Bubbles/flagging on cold or coated glass | Clean + room-temp apply + higher-tack adhesive |
| Wet-glue (cut & stack) | Beer, mass beverages, high speed | Low label cost, very high throughput | Glue strings, skew, wet label scuff | Stabilize glue pickup + better bottle handling |
| Shrink sleeve | Complex shapes, 360° branding, RTDs | Full coverage, bold graphics, tamper options | Distortion, haze, seam lift | Tune tunnel profile + correct film + steam/air balance |
For most export beverages and cosmetics, PSL is the safest start because it is flexible and consistent. When a plant already runs returnable bottles at high speed, wet-glue is often locked in. When the bottle shape is aggressive or the branding needs full coverage, sleeves become the practical answer.
How do frosting and coatings impact adhesion and cure time?
Frosted and coated glass sells “premium” in one glance. The same surface can make labels slide, lift, or take days to reach full bond.
Frosting and low-energy coatings reduce initial tack, so labels may need a stronger adhesive, a cleaned “label window,” and 24–72 hours of cure before wet or cold testing.
Why coatings change adhesion
Glass is usually a high-energy surface. That is why many adhesives bond well to it. Frosting, matte sprays, metallic coatings, and silicone release agents can change the surface energy 4 of the label panel. Some finishes lower surface energy, so the adhesive cannot wet out fast. Other finishes add micro-roughness, which can trap air. Both effects reduce initial bond strength, especially right after application.
A practical rule helps: if the surface feels “slippery” or “powdery,” it will label worse than clean, bare glass. When coating is part of the brand look, a clear label panel is the simplest engineering fix. That means leaving a small window uncoated where the label sits. It protects label performance without changing the visual story.
Cure time is not optional
Pressure-sensitive adhesives often feel “stuck” in minutes, but full strength builds over time. That is why ice-bucket tests right after labeling are misleading. For coated or frosted glass, cure time matters even more. A stable plan is to apply at room temperature, then hold for 24–72 hours before cold, wash, or ice tests. This prevents false failures and avoids chasing the wrong root cause.
Prep methods that work without drama
On small runs, the standard approach is enough: wash with warm soapy water, rinse, dry, then wipe the label area with 70–90% isopropyl alcohol and let it fully dry. On production, the goal is consistency. If bottles have cold-end coatings or silicone agents from manufacturing, the label panel may need a stronger solvent wipe or a light abrasion. Testing is key here because some coatings respond better to chemistry, and others respond better to mechanical “tooth.”
Coating risk map
| Glass finish | Label risk level | Typical symptom | Best design/process move |
|---|---|---|---|
| Clear, uncoated glass | Low | Minor bubbles from cold bottles | Apply at 18–24°C and increase wrap pressure |
| Light frosting / acid etch | Medium | Slow wet-out, edge lift | Higher-tack adhesive + longer cure time |
| Heavy matte spray coating | High | Sliding, poor initial tack | Clear label window + solvent wipe |
| Metallic / electroplated look | High | Edge lift and “tenting” | Test specialty adhesives + reduce label height |
| Silicone / cold-end coated | High | Random failures by batch | Panel cleaning + light abrasion + incoming QC |
When frosting and coatings are part of the brand, label success comes from planning the label panel early. That one choice saves weeks of rework later.
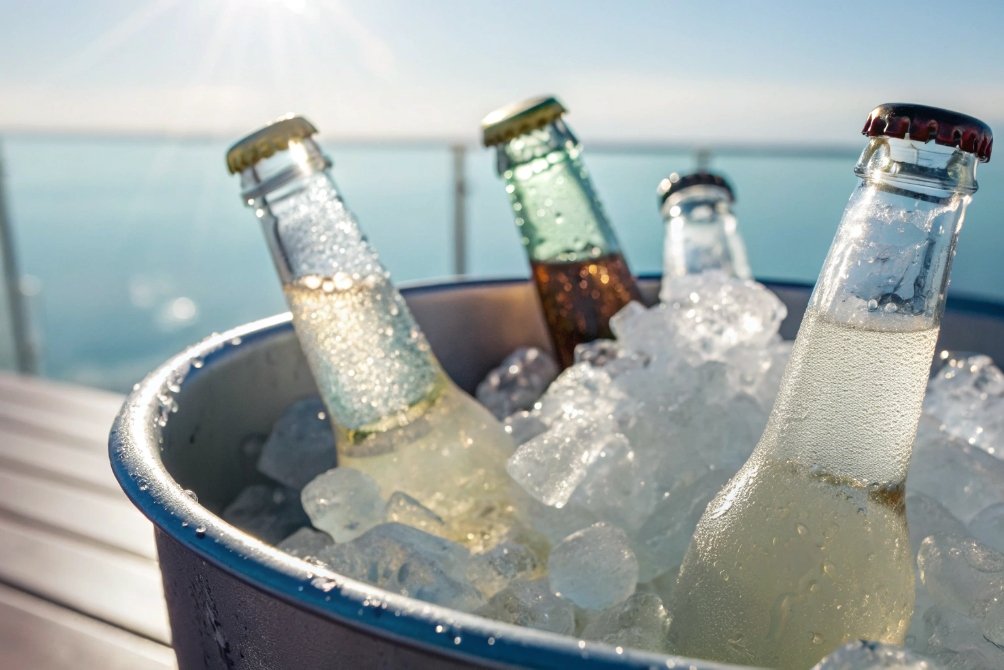
What label stocks survive ice buckets and condensation?
A label that looks perfect in the office can fail in a bar. Condensation and ice water expose weak face stocks and the wrong adhesive fast.
For ice buckets, film labels with moisture-resistant adhesives are the most reliable; if paper is required, choose wet-strength papers and water-resistant varnish made for cold and wet service.
Choose face stock and adhesive as a pair
Paper vs film is a real performance decision
Standard paper absorbs water. In an ice bucket, it swells, wrinkles, and turns grey. Even if the adhesive holds, the face stock can still fail visually. Wet-strength papers 5 improve that, but they still need a protective varnish or laminate to reduce water pickup. This is why classic beer labels use specific “wet-strength” papers and coatings that survive cold and moisture better than normal paper.
Film stocks like PP, PE, and PET do not absorb water. That is the simplest path to “stays pretty” performance. Film also handles condensation cycles without the same fiber swelling. For premium beverages and cosmetics, film often gives the most forgiving results when the product will be chilled, displayed in ice, or handled with wet hands.
Adhesive choice decides whether the label stays put
Condensation creates a thin water layer between adhesive and glass. That blocks contact and reduces tack. This is where a standard permanent adhesive can fail, even if the face stock is film. For cold/wet bottles, a wet bottle / ice bucket adhesive 6 is the right ask. It is built to grab through light moisture, resist water exposure, and keep shear strength when the bottle sweats.
Testing should match how people actually use the bottle
A clean lab test is not enough. The label should be tested after cure time, then exposed to the real sequence: chill, sweat, ice bucket, wipe, and handle. A common mistake is to label cold bottles right out of a cooler and judge the result immediately. That is the worst case for many adhesives. A better plan is to test two scenarios: labeling at room temperature (best practice) and labeling on cold bottles (field reality). The gap between those results tells how robust the system is.
If you need a measurable acceptance standard instead of “looks good,” reference a peel test method like ASTM D3330 7 for consistent, repeatable adhesion checks.
Ice-bucket survival checklist
| Scenario | Recommended face stock | Recommended adhesive | Extra protection | What usually fails first |
|---|---|---|---|---|
| Ice buckets (bars, promos) | Film (PP/PET) | Wet bottle / ice bucket PSA | Optional laminate | Edge lift from moisture barrier |
| Condensation only (fridge) | Film or wet-strength paper | Cold/wet PSA | Varnish for paper | “Greying” and wrinkles on paper |
| Room-temp shelf (dry) | Paper or film | Standard permanent PSA | None | Usually fine if glass is clean |
| Wet-glue returnables | Wet-strength paper | Correct cold glue system | Varnish | Scuffing and wash durability |
A simple rule helps: when the product is meant to be cold and wet, film plus a wet-bottle adhesive is the safe baseline. Paper can still work, but the face stock, ink, and varnish must be chosen as a system.
How can you prevent wrinkles, flagging, and bubbles on line?
Nothing hurts confidence like a label that looks handmade on a production line. Defects also trigger claims, because buyers assume the product inside is careless too.
Bubbles come from trapped air or cold/wet glass, wrinkles come from label geometry fighting the curve, and flagging comes from overlap, low tack, and poor pressure or cure.

Build a repeatable application method
Start with cleaning and temperature control
Glass must be clean and degreased. The baseline routine works well: warm soapy water, rinse, dry, then wipe the label area with 70–90% isopropyl alcohol and let it fully dry. On lines, the same logic applies, but the process needs control. Cold bottles from a warehouse or filler can cause bubbles and edge lift. The easiest fix is pre-warming bottles to room temperature before labeling. The target is usually 18–24°C with low humidity.
Use a placement method that prevents drift
For manual work, a simple “datum + hinge” technique keeps placement straight. The bottle seam or emboss acts as the datum. A light hinge of masking tape holds one edge of the label in position before final application. This reduces rework and keeps artwork consistent across cases. It also avoids the temptation to peel and re-stick many times, which weakens the result as the adhesive starts to grab.
Apply from center outward with real pressure
For pressure-sensitive labels, the best method is to tack the center first, then roll outward with a squeegee or finger pressure to push air to the edges. Touching the adhesive should be avoided because skin oils reduce tack. On machines, wrap belts or trunnion rollers must press evenly. Low pressure creates bubbles. Uneven pressure creates wrinkles. Dirty rollers can print defects into the label surface.
Design for the curve, not against it
Wrinkles often come from using a full rectangle on a tapered or strongly curved bottle. A slight taper in the die-cut can solve most of that. Smaller panels also behave better on complex shapes. For large decals, micro-relief cuts in the liner reduce tension and help the label lay flat on curves. For wrap-around labels, overlap is risky. A small non-adhesive gap of about 2–3 mm is safer than overlapping edges, because overlap becomes a flagging point when water wicks between layers.
Troubleshooting table teams can use on the floor
| Defect | Most likely cause | Fast check | Practical fix |
|---|---|---|---|
| Bubbles | Cold or damp glass, low wrap pressure | Bottle temperature and condensation | Pre-warm bottles, dry surface, increase wrap pressure |
| Wrinkles | Label too tall/stiff for the curve | Compare label height to radius | Use tapered die-cut, reduce height, add relief in liner |
| Flagging (edge lift) | Overlap, low tack, coated panel | Check overlap and coating | Add 2–3 mm gap, higher-tack adhesive, clean/abrade label panel |
| Skew / crooked | Poor alignment method, timing drift | Check seam-to-art alignment | Use datum + tape hinge, adjust dispensing timing |
| Sliding | Weak shear, wet bottle, wrong adhesive | Check for moisture under label | Switch to wet-bottle adhesive, increase pressure, extend cure time |
One more point matters: do not wet-apply paper labels. The “wet method” with water and a drop of dish soap can help vinyl or film decals reduce bubbles, but it hurts paper and can weaken bonding. For consistent runs, even a simple hand-crank or semi-automatic applicator improves alignment and pressure control.
Conclusion
Clean glass, room-temperature application, correct adhesive, and curve-friendly label geometry keep labels flat and strong from packing line to ice bucket.
Footnotes
-
Pressure-sensitive label basics and why pressure, dwell time, and cleanliness matter. ↩ ↩
-
Quick overview of wet-glue “cut-and-stack” labeling and what it demands from line setup. ↩ ↩
-
Practical explanation of shrink sleeves, tunnels, and why complex shapes often push you toward sleeves. ↩ ↩
-
Learn how surface energy affects adhesive wet-out and why coatings can reduce initial tack. ↩ ↩
-
Definition of wet-strength papers and why they’re used on beverage labels that get wet. ↩ ↩
-
Example of an adhesive technology designed for condensation and ice-bucket performance on bottles. ↩ ↩
-
Intro to ASTM D3330 peel adhesion testing for pressure-sensitive materials and repeatable acceptance criteria. ↩ ↩


