Coatings are the last thing we touch on a bottle, but they are the first thing the brand owner sees. When they look patchy, everyone blames “the paint”.
Uneven coatings usually do not start in the paint drum. They start with glass temperature, hot-end tin or TEO level, spray-gun setup, bottle motion, and cure profile all pulling in different directions.

When a bottle shows orange peel, runs, or bare glass, the pattern on the surface is a map. It tells a story about temperature, airflow, surface energy, and machine settings. Once that map is clear, the fixes become simple and repeatable instead of trial and error.
Are hot-end tin/TEO and cold-end PE coatings really out of spec?
Uneven hot-end and cold-end coatings often hide behind words like “slippery” or “sticky”. In many plants, no one measures hot-end and cold-end coatings 1 until a scuff or breakage complaint arrives.
Hot-end tin/TEO and cold-end PE are often technically in spec for chemistry, but out of spec for distribution. Container temperature, vapor flow, and spray coverage decide if the film is uniform on the glass.
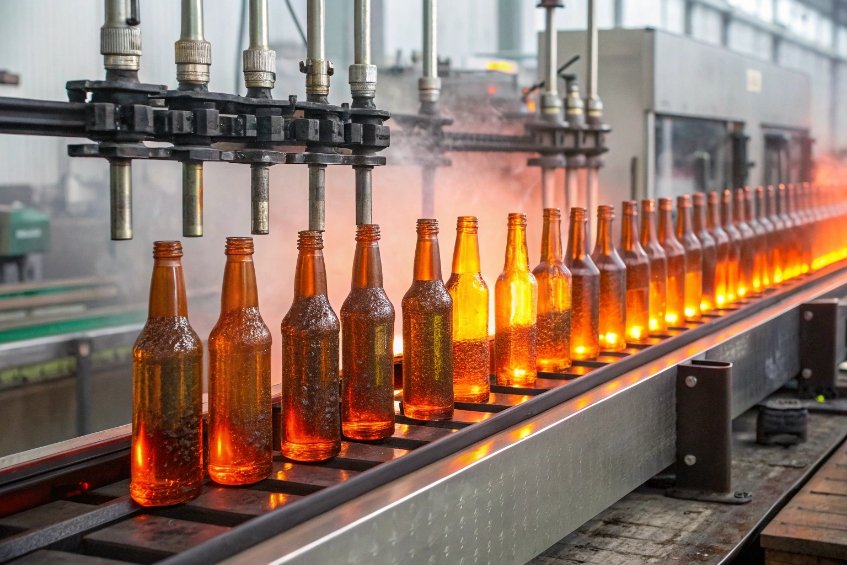
Hot-end tin layer: coverage starts with heat and flow
The hot-end coating sits on glass that just left the forming machine. So the first question is not “How is the coating?” but “How is the glass temperature profile?”
If the body is hotter than the shoulder and neck, the vapor reacts more there. Tin or TEO builds heavy bands on the body while the shoulder and neck stay weak. (If your plant uses titanium ethoxide (TEO) 2 as a precursor, this sensitivity to heat and airflow becomes even more obvious.) When this bottle meets a conveyor or a case packer, the “dry” zones scuff first and labels can grab.
Uneven container temperature comes from:
- Different mold cooling across cavities
- Delay imbalances between sections
- Poor shielding from cross-drafts between IS and lehr
On top of this, hot-end lances and manifolds can plug or drift:
- Plugged holes and corroded lances push vapor to one side of the hood
- Leaks in the hood let fresh air in and reduce reaction on the far side
- Wrong hood height changes residence time over the glass
The result is a patchy tin-oxide layer. Slip and scratch resistance jump up and down from bottle to bottle, even if chemical consumption is stable.
Cold-end PE or wax coatings add another layer of complexity. Cold-end polyethylene wax coatings 3 rely on:
- Correct bath concentration and pH
- Stable bath temperature
- Right spray or curtain pattern and bottle coverage
If bath concentration creeps high, the film gets thick and can look streaky or greasy. If it creeps low, bottles feel “dry” and scuff in the lehr exit or palletizer.
Here is how I map common causes against symptoms and checks:
| Cause | Typical symptom on bottle | Simple check |
|---|---|---|
| Non-uniform glass temperature at hood | Tin-rich body, weak neck/shoulder | Infrared scan, body vs neck temperature |
| Plugged tin/TEO lances or manifolds | Coating only on one side of bottle row | Lance inspection, hood flow balance test |
| Hood leaks / open doors | Random weak coating zones | Smoke test, hood pressure check |
| PE bath concentration / pH drift | Slippery spots, greasy streaks, dry patches | Regular titration and pH trend |
| Cold-end spray fan misaligned | Bare stripes, shiny bands | Visual spray pattern on test plate |
When hot-end and cold-end coatings are balanced and uniform, the wet coating later (color, varnish, ink) behaves much better. So I treat tin/TEO and PE weight and coverage as part of the base “surface recipe”, not as background noise.
Do spray-gun angle, line speed, and bottle rotation create orange peel and runs?
The same coating can lay down like car paint on one day and look like an orange peel the next day. Often nothing changed in the formula. The change came from spray guns and motion.
Spray-gun angle, distance, atomizing pressure, line speed, and bottle rotation define droplet size, overlap, and film build. Bad combinations give orange peel, dry spray, runs, and hard bands of overspray.
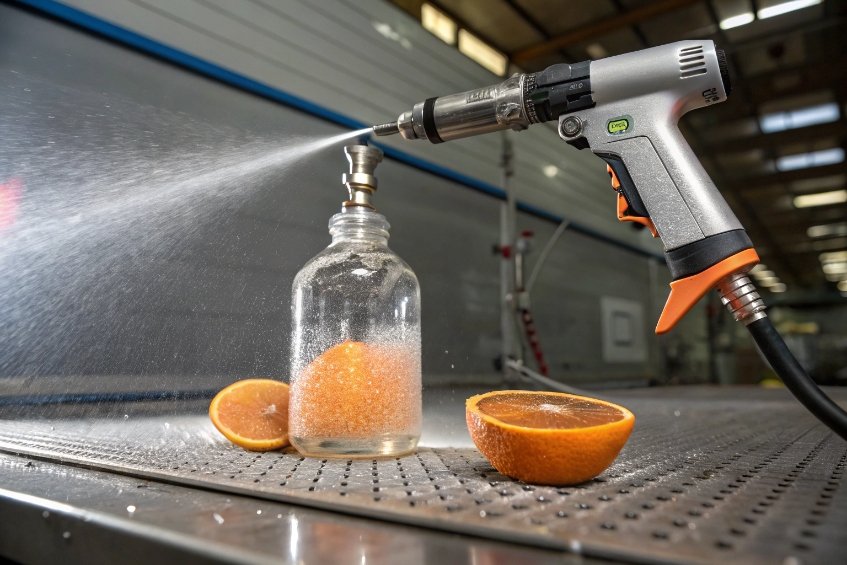
Spray setup: droplet size, film build, and “wet edge”
A good coating film starts with consistent droplets. When atomizing air is too high for a given fluid pressure, droplets become very fine. They dry in the air, hit the bottle “dry”, and make a rough orange-peel texture 4. When atomizing air is too low, droplets are big and heavy. They pile up and sag.
Nozzle wear and clogging shift this balance:
- Worn tips give a wider, weaker fan in the middle and heavy edges. This makes bands where fans overlap.
- Partial clogs create streaks of heavy and light film in the same fan.
- Wrong nozzle size pushes operators to run strange pressure combinations, which hurts consistency again.
Gun angle and distance decide how even the film is around the body. Guns aimed too far up or down create thick bands near the heel or shoulder. Guns too close give a narrow fan and strong center stripe. Guns too far miss the neck and heel and waste coating in overspray.
The “wet edge” is key. The coating needs enough overlap from pass to pass to stay wet and level. If line speed is too high or bottle rotation is slow, the overlap drops and we see dry bands, orange peel, or color shift.
Motion: line speed, rotation, and spacing
Bottle motion converts a fixed spray fan into a full 360° film. Three things matter most:
- Line speed
- Bottle rotation speed and direction
- Bottle spacing
When line speed goes up and rotation stays the same, each gun has less time to “see” each bottle. Coverage weakens on the far side. If spacing is not stable, some bottles receive double coverage, others get almost none. This shows as:
- “Zebra stripes” down the body in the direction of travel
- Random pairs of bottles with runs, next to dry-looking bottles
- Color and gloss variation along the same pallet layer
Challenging geometries make this more visible. Deep punts, raised shoulders, heavy embossing, and long necks cast shadows. Without extra guns or moved guns, these areas always run thin.
Here is a simple spray and motion map:
| Parameter | Too low / small effect | Too high / large effect | Visual symptom |
|---|---|---|---|
| Atomizing air pressure | Large drops, runs, poor leveling | Dry spray, orange peel | Texture change across body |
| Fluid pressure | Dry, low build, poor hiding | Heavy build, sagging, curtain marks | Runs and curtains |
| Gun-to-bottle distance | Narrow band, localized heavy film | Poor coverage, more overspray | Thick center stripe or dry shoulders |
| Line speed | Heavy build, possible runs | Thin film, color fade, dry bands | Directional stripes |
| Bottle rotation | Shadowing, uncoated back side | Overlap bands, swirling patterns | Spiral or banded appearance |
In my own trials, small spray changes were almost always less effective than basic housekeeping: clear nozzles, correct angles, and stable bottle spacing. Once those are stable, fine tuning the pressures and speeds becomes much easier. To keep discussions grounded, I like to point operators to the same definition of spray atomization methods 5 so “droplet size” means the same thing to everyone.
How do surface energy and contamination change adhesion and uniformity?
When the same coating runs perfectly on one job and crawls or “fish-eyes” on another, the glass surface is usually the difference, not the paint.
Surface energy and cleanliness decide if the coating wets the glass or pulls away. Moisture, caustic residues, oils, and dust create local low-energy spots that resist wetting and give craters, bare areas, and color changes.
Clean, high-energy glass vs “polite rejection”
Fresh hot glass has high surface energy and accepts coatings well. Over time, many small things lower this energy:
- Caustic washer residue that is not fully rinsed
- Fingerprints and handling oils from manual touch points
- Conveyor and transfer lubricant mist
- Dust and paper fibers from cartons or dividers
- Condensed moisture when cold bottles meet warm, humid air
On a low-energy spot, the liquid film pulls away. It tries to round up into droplets. This shows as craters, fish-eyes, islands, and weak color. Under the microscope, there is usually a center of contamination in each defect.
Surface texture from forming also matters. Very rough mold finishes or sandblasted zones catch dirt and hold contamination. They also increase the real surface area, which can demand more coating to look even.
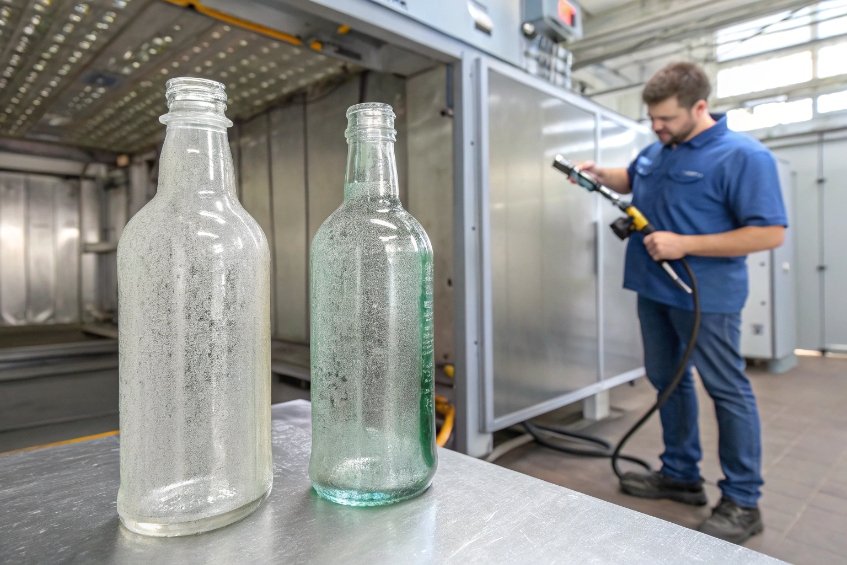
How I check and control surface energy
Simple shop-floor tests can give fast feedback:
- Water-break test 6: a clean, high-energy surface holds a continuous water film. A dirty, low-energy surface lets water pull away and bead up.
- Dyne pens or test inks 7: they give a rough “wetting level” in dynes/cm. If the coating needs, for example, 42 dynes and the glass is at 36, we expect trouble.
Once we know surface energy is low, the root cause search goes back through the line:
- Washer settings and caustic carry-over
- Rinse water quality and final rinse temperature
- Handling steps before coating (who touches the bottles?)
- Air quality around the coating booth (oil or silicone mists)
A simple control table helps keep the team aligned:
| Factor | Effect on surface energy / cleanliness | Coating symptom | Basic control |
|---|---|---|---|
| Caustic residue | Local chemistry change, low energy spots | Craters, poor adhesion | Washer program, conductivity check |
| Fingerprints / oils | Strong local hydrophobic zones | Fish-eyes, small bare spots | Gloves policy, avoid manual touch |
| Dust and fibers | Physical barrier under film | Small bumps, pinholes, weak color | Air filtration, clean packaging |
| Moisture condensation | Water layer blocking good wetting | Blushing, hazy or streaky areas | Bottle temperature vs room humidity |
| Low base tin/TEO or PE pattern | Mixed surface chemistry along the body | Color shift, variable slip | Regular coating weight checks |
In one case, a single new lubricant on an upstream conveyor cut surface energy enough to wreck adhesion on one side of every bottle. The coating formula was blamed for days. Only when we tested the surface with dyne pens did the real cause become clear.
Which cure temperatures and dwell times give consistent gloss and hardness?
Many lines treat the cure oven as a black box. As long as bottles come out “dry”, people think it is fine. But gloss, hardness, and slip all depend on the cure window.
Cure temperature and dwell time must match the coating chemistry. Too low gives soft, low-gloss films and blocking. Too high or too long can yellow, embrittle, or dull the coating and change slip.
Under-cure vs over-bake: two different failures
Under-cured coatings often look glossy at first, but they feel soft. Common signs are:
- Easy scratch with a fingernail or coin
- Labels that pick coating when removed
- Bottles that block or stick in cartons or on pallets
- Poor chemical resistance to alcohol, perfume, or cleaning agents
This comes from oven temperature being lower than the setpoint, short dwell time due to high line speed, or cold spots in the oven.
Over-baked coatings tell a different story:
- Loss of deep gloss, more “matte” than planned
- Color shift, especially for bright or delicate colors
- Increased brittleness and chipping in impact areas
- Reduced slip or inconsistent friction vs design
This can happen when we turn up oven heat to “be safe”, or when bottles stay too long in hot zones due to buffers and line stops.
Building a stable cure window
To keep gloss and hardness uniform, cure control needs real data, not only panel lights. Some practical tools:
- Regular oven temperature profile with a traveling data logger
- Clear target for metal temperature (not only air) at exit
- Dwell-time calculation linked to actual conveyor speed
- Standard cure checks: solvent rub (like MEK), cross-hatch adhesion, pendulum hardness, and gloss meter readings
I like to map the key cure parameters in a simple table for the team:
| Parameter | Too low / short effect | Too high / long effect | Control method |
|---|---|---|---|
| Oven set temperature | Soft film, poor adhesion, blocking | Yellowing, embrittle, dull gloss | Calibrated sensors, regular profiling |
| Actual metal temp | Incomplete crosslinking | Over-cure, property loss | Data logger on sample bottles |
| Dwell time | Incomplete cure, large batch-to-batch variance | Waste of energy, over-bake in slow zones | Link to line speed and belt length |
| Airflow / circulation | Hot and cold spots across belt | Mixed under- and over-cure in same batch | Balance dampers, visual smoke tests |
Booth and oven climate also play a role. High humidity can slow solvent evaporation and early cure. Very dry, hot air can flash off solvent so fast that leveling stops and orange peel appears, even if final cure is correct.
When cure conditions are stable and well matched to the coating, gloss, hardness, and slip sit inside tight windows. This makes downstream SPC data much calmer and reduces customer complaints about “different” looking or feeling bottles between runs.
Conclusion
Uneven coatings on glass bottles almost never come from the coating alone. They come from a chain: glass temperature, hot-end and cold-end films, surface energy, spray setup, and cure. When that chain is stable, the coating looks simple again.
Footnotes
-
Overview of hot-end and cold-end coatings and why uniform coverage affects handling and label performance. ↩ ↩
-
Chemical reference for titanium ethoxide (TEO), a common precursor used to form titanium oxide films. ↩ ↩
-
Explains cold-end polyethylene/wax coatings that reduce scuffing and improve line handling. ↩ ↩
-
Defines orange-peel texture in coatings and common process causes behind the defect. ↩ ↩
-
Basics of atomization methods and how droplet formation affects film build and uniformity. ↩ ↩
-
Quick guide to the water-break test for verifying a clean, wettable surface before coating. ↩ ↩
-
How dyne testing estimates surface wetting tension to predict coating wetting and adhesion risk. ↩ ↩


