
Dimensional defects look small on a drawing, but they kill filling speed, closure torque windows, and brand image. To control them, I trace every millimeter back through the hot end.
Out-of-spec dimensions come from one simple root: the glass does not see a stable “system” from gob to pallet. Gob weight, temperature, mold health, IS timing, lehr profile, handling, and metrology all stack their tolerances on the same bottle.

When a bottle fails a ring gauge or height check, the problem rarely sits at one point. It is almost always a chain. So I like to walk that chain in order: gob, forming, annealing, cold-end, then measurement. Once that path is clear, the failure pattern on the bottle starts to make sense, not feel random.
How do gob weight, temperature, and push-up control finish dimensions?
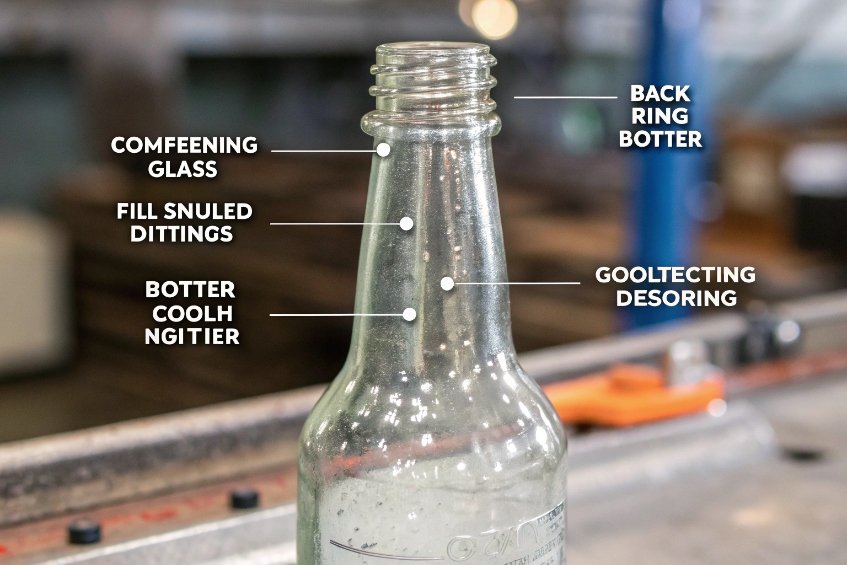
A bottle finish may be only a few millimeters deep, but every gram of gob weight 1 and every degree of glass temperature shows up right there.
When gob weight or viscosity drifts, the glass does not fill the neck and thread in the same way, even if the mold steel never moves.
Gob, push-up, and the “available glass budget”
I treat the gob as a fixed “glass budget” that the mold must spend between push-up, shoulder, body, and finish.
-
If gob weight drops:
The machine still tries to make the same outer shape. So the glass stretches more. Wall thickness goes down. Height can creep up. Finish and thread dimensions tend to run small on diameters and sometimes tall on height, because the glass pulls out of the ring area. -
If gob weight rises:
There is more glass than the cavity needs. Extra glass lifts the push-up and heel, and it can thicken the finish. Ring diameters walk high. Shoulders get heavy. Sometimes the thread start and end become less sharp because the groove overfills.
Gob temperature and the viscosity–temperature relationship 2 link to this effect. A hotter, softer gob flows easier into the neck-ring detail. It can give larger inside diameters and smoother threads, but also more risk of sag and lean. A colder, stiffer gob resists detail. It tends to shrink more, so finish diameters come in small and thread root depth drops.
Push-up setting closes this loop. A high push-up steals glass from the finish and threads. A low push-up feeds extra glass into the ring and shoulder. When gob weight and push-up move in the same “wrong” direction, the finish can move out of spec very fast.
Here is how I map it on the shop floor:
| Factor | Drift Direction | Typical dimensional symptom | First check |
|---|---|---|---|
| Gob weight low | Underweight | Small T/ET, tall height, thin wall | Auto-weight trend, IS mold number |
| Gob weight high | Overweight | Large T/ET, short height, heavy heel | Check shears, gob cut stability |
| Gob too hot | Softer | Larger IDs, risk of sag, leaning finishes | Feeder temp, gob thermal camera |
| Gob too cold | Stiffer | Smaller IDs, weak thread detail | Forehearth temp trend |
| Push-up too high | Upwards | Small ring OD, thin shoulder | Push-up gauge / mold change log |
| Push-up too low | Downwards | Large ring OD, thick shoulder and heel | Visual heel profile, push-up wear |
Gob and batch composition also matter. A change in coefficient of thermal expansion 3 or viscosity curve shifts how much the glass shrinks as it cools. Even if the gob weight is correct, a “tighter” glass can pull dimensions down, especially on finish and neck ID.
In daily practice, I like to connect dimensional drift to:
- Weight trend by cavity
- Gob thermal profile
- Push-up wear and setting records
- Recent batch or color changes
This stops me from chasing the neck ring first, when the real villain is the gob or push-up.
How do mold alignment and IS timing push ID/OD out of spec?
Many people blame “bad molds” when a ring goes off size. In my experience, mold wear is real, but misalignment and timing on the Individual Section (IS) machine 4 usually move faster than steel.
When blank-blow and settle-blow timing shift, the parison does not sit in the same place in the neck ring. That alone can skew ID and OD while the drawing stays the same.
Wear, mismatch, and misalignment in the forming area
Mold cavity, neck-ring, and blowhead wear change the effective cavity size day by day. The wear is not always even.
- A worn neck ring can enlarge the finish OD but also make the bore oval.
- A mismatched neck-ring pair can tilt the finish. This shows as off-verticality, “lean,” or one side of the ring running large.
- Blowhead and guide wear can change how the parison enters the blow mold, so body OD runs big on one side and small on the other.
Mechanical misalignment builds on that wear. If neck rings are not centered to the mold, the parison hangs off-axis. The bottle may look straight by eye, yet the CMM shows the bore offset and the ring OD out of round.
Swab and lubricant buildup add a softer layer of “fake mold steel.” A heavy swab can reduce local cavity volume, so wall and OD run small in that area. Soot and debris can do the opposite. They hold the parison away, so the body fattens and glass thins there.
IS timing, pressures, and parison distribution
The timing and pressure of settle-blow, counterblow, plunger motion (for press-blow), and final blow decide where the glass ends up.
If settle-blow is too strong or too early, it drives glass down into the heel and away from the shoulder and ring. Finish dimensions run small and the body may be tall. If it is weak or late, glass piles near the finish, raising ring OD and sometimes distorting the neck ID.
Blank-blow and counterblow pressure skew the parison wall. A heavy counterblow can thin the shoulder and ring area. A light one leaves a fat parison at the top. Final blow then stretches this uneven “tube,” so one part of the bottle hits the mold wall sooner and freezes thicker. OD and ID both shift, and ovality grows.
I like to structure the main forming levers this way:
| Forming factor | Effect on glass distribution | Dimensional effect | Typical symptom |
|---|---|---|---|
| Neck-ring wear/mismatch | Changes effective finish cavity size | Over/under ring OD, bore offset | Lean, thread mismatch, poor torque |
| Blank-to-blow misalignment | Off-axis parison transfer | Oval body, offset ID vs OD | Uneven shoulder and heel |
| Settle-blow pressure too high | Glass forced downwards | Small finish, high shoulder and heel | Heavy bottom, small threads |
| Settle-blow pressure too low | Glass stays near top | Large finish, thin heel | Wide ring, light base |
| Counterblow/final-blow mismatch | Uneven wall before final blow | Localized OD / ID drift | “One-sided” ovality |
| Plunger timing (press-blow) | Pre-forms wall profile | Shoulder / neck thickness variation | Out-of-spec inside diameter |
Non-uniform mold and parison temperatures sit behind many of these. A cold blank or blow mold chills the glass early. Shrinkage then becomes uneven and drives ovality. A hot mold pocket lets the glass relax longer, so it creeps under gravity and gives sag or lean. On a CMM report this shows as ID/OD variance along height.
So before I call for new molds, I check:
- Neck-ring alignment and clamp
- Blank-to-blow transfer setup
- Timing charts vs “golden” settings
- Mold temperature maps and swab habits
Most “mystery” ring deviations reveal themselves right there.
How do lehr settings and cold-end handling distort height and ovality?
Even when hot-end dimensions are good, bottles can walk out of spec in the lehr or on the conveyor.
If lehr belts or guides pull, twist, or cool the ware unevenly, height and ovality can creep beyond drawing limits without any forming change.

Annealing profile, belt tension, and warpage
The annealing lehr 5 is supposed to relieve stress, not create new shape. But if the soak and cooling profiles are wrong, glass keeps moving after it leaves the mold.
Key lehr issues that I watch:
-
Insufficient soak.
The glass does not fully relax. Residual stress pulls the container slightly after it exits. Height and ovality can drift as the bottle cools to room temperature, which means in-line gauges and lab measurements may disagree. -
Uneven thermal profile across the belt.
One side of the belt runs hotter. That side of each bottle relaxes more, or shrinks differently. Bottles lean in one direction and show ovality aligned to conveyor flow. -
Cooling rate too fast.
Surfaces lock while the core is still hot. As the core cools later, it tries to shrink. This can lift the base or pull the body inward, which influences height and body diameter.
Lehr belt tension and tracking also matter. A tight belt can “print” its pattern into the still-soft heel. It can bow bottles if there is a step or misaligned roller. If guide rails or pushers press on hot necks or shoulders, they squeeze the bottle into an oval and narrow the finish.
Early cold-end contact is a frequent villain:
- Transfer to inspection with bottles still too hot
- Aggressive guide-rail pressure for line stability
- Accumulation tables that let bottles rub together in one direction
All of this can deform the ring and neck when the glass is above its safe handling temperature.
Here is a simple map of lehr and cold-end impacts:
| Zone / factor | Main risk to dimensions | Main effect | Where it shows up first |
|---|---|---|---|
| Hot zone soak too low | Residual stress and post-lehr drift | Height and ovality drift | Lab checks vs in-line checks |
| Lateral temp gradient | One side softer than the other | Lean, directional ovality | Visual row pattern, CMM reports |
| Cooling too fast | Locked surface, moving core | Base warp, body pull-in | Rocking bottles, label panel warp |
| Belt tension high | Mechanical print and bow | Heel flatness, height shift | Base scan, H-height trend |
| Guide-rail pressure | Neck and shoulder squeeze | Oval finish, neck diameter | Ring gauge, cap application |
| Early accumulation | Bottle-to-bottle contact | Local oval spots | Random-looking ovality outliers |
Composition and glass expansion again play a role here. A glass with a higher expansion coefficient is more sensitive to thermal gradients. If batch changes but lehr settings stay the same, dimensional stability at the cold end can change even if hot dimensions look fine.
So, on any new job or batch change, I always link:
- Annealing curve vs stress checks
- Belt tension and tracking audit
- Cold-end rail and pusher pressure audits
This keeps the lehr from quietly undoing good work from the IS machine.
What metrology closes the loop and keeps SPC in control?
Good forming will not help if measurement is wrong. A bad gauge can create “fake” dimensional defects, and it can also hide real ones.
So I build the measurement system with the same care as the molds.

Gauges, CMM, and a stable measurement system
For routine control, simple gauges are still the backbone:
- Go/no-go ring gauges for finish OD and thread
- Plug gauges for bore
- Height and diameter stands for H, body OD, and push-up
These are quick and cheap, but only if they are correct. I see three frequent problems:
-
Gauges not zeroed or not at the right temperature.
Glass and metal both expand. If a gauge is set at a different temperature than it is used, readings shift. This can mark good bottles as bad or let bad ones pass. -
Worn gauges.
A ring gauge used for years can wear larger. Then every finish “passes” while real OD creeps upward. -
Poor sampling.
If operators take samples from the same cavity or same belt lane, SPC charts look calm, but the real process keeps drifting.
To map complex shape issues like lean, bore offset, and true ovality, coordinate measuring machine (CMM) 6 and multi-point scanners help a lot. With them I can see:
- True position of the bore vs bottle axis
- Variation of OD and ID along the height
- Thread pitch and start position variation
These data make the link between forming settings and dimensional results much clearer.
SPC and connecting data to forming causes
Metrology only pays off if it feeds back into forming. I usually structure the SPC system like this:
| Measurement tool | Target dimensions | SPC use | Hot-end link |
|---|---|---|---|
| Go/no-go ring gauge | T, ET, ring OD | Simple pass/fail counts | Gob weight, push-up, neck-ring wear |
| Plug gauge | Bore ID, ovality trend | Attribute or short variable checks | Plunger timing, mold temp, counterblow |
| Height gauge | H, push-up related height | X-bar / R or IMR charts | Gob weight, lehr, belt tension |
| OD gauge or scanner | Body OD, ovality | Continuous trend charts | Mold alignment, blank-blow timing |
| CMM / 3D scan | Full 3D geometry | Periodic capability studies (Cp/Cpk) | Mold design and long-term wear |
On top of the hardware, the measurement system itself needs rules:
- Clear gauge calibration cycles with records
- Standard work for sampling location, bottle temperature, and timing
- Training that explains not only “how” to measure but “why” each dimension matters for filling, capping, and packing
When measurement system analysis (MSA) 7 shows high repeatability and reproducibility, SPC charts start to reflect the real process. Then changes in gob, timing, or lehr show up fast, and the plant can react before pallets go to customers.
Without this, people adjust IS machines based on noise. That usually makes dimensions worse, not better.
Conclusion
Out-of-spec bottle dimensions do not come from luck. They come from traceable causes in gob, forming, annealing, handling, and metrology. When each link is stable, the drawings finally match the bottles.
Footnotes
-
Research on how gob temperature, viscosity, and weight correlate with forming stability. ↩ ↩
-
Defines viscosity reference points and why viscosity changes with temperature during forming. ↩ ↩
-
Explains coefficient of thermal expansion and why batch changes affect shrinkage and thermal distortion. ↩ ↩
-
Background on IS machines and how gobs are cut and formed into containers. ↩ ↩
-
Quick definition of a lehr and how controlled cooling reduces stress and warpage. ↩ ↩
-
What a CMM measures and why point-based probing helps diagnose ovality, lean, and bore offset. ↩ ↩
-
MSA overview of bias, linearity, stability, and GR&R to keep gauges from creating false defects. ↩ ↩


