Tiny bubbles in glass look harmless, but they can weaken the bottle, spoil the look, and trigger customer complaints if no one catches them in time.
To inspect a glass bottle for bubbles you use controlled backlighting, polariscopes, clear bubble-size rules linked to AQL, plus inline vision systems and documented sampling plans with defect maps for PPAP and pre-production samples.

When inspection is set up well, bubbles stop being “surprises” at the filler. Seeds, blisters, and cords turn into clear data points that link back to melting, forming, or annealing. That is how a plant moves from arguing about bubbles to managing them.
What light-table and polariscope methods reveal seeds, blisters, and cords?
Looking at bottles under random shop lighting hides many bubbles. A simple light table and polariscope turn those same defects into something obvious and repeatable.
Seeds, blisters, and cords show up best when you use uniform daylight-level backlighting at 90° to the surface, fixed viewing distances, 360° rotation, and shared definitions like the glass industry glossary definitions for “seeds” and “blisters” 1.
Step 1: Understand what you are looking for
In glass packaging, “seeds” are very small gas bubbles, usually under about 1 mm. Larger gas pockets are called blisters or bubbles.
You will also see:
- Single blisters: isolated, larger bubbles, sometimes thin-walled on the inside surface.
- Strings or clusters: lines or clouds of tiny seeds that can look like an “oil mark”.
- Cords: streaks or lines of slightly different glass that bend light and often carry small bubbles inside.
These features are easier to see when you control light, distance, and angle.
Step 2: Set up a simple light-table routine
Most plants can adopt a standard, very similar to the flat-glass inspection approach:
- Use a matte, uniform, daylight-level backlight (no direct sun, no strong reflections).
- Put the bottle vertical on a turntable in front of the light box.
- View the bottle straight on at 90° to the surface, not at a shallow angle.
- Set clear viewing distances, for example:
- Transmission: about 1–2 m (3–6 ft) for normal bottles.
- Reflection: step back another meter and look at glare on the surface.
- Rotate the bottle 360° while watching:
- Finish and threads
- Shoulder and neck
- Sidewall
- Heel and base
Many small seeds appear only when the bottle passes a certain angle against the light, so the rotation must be slow and continuous.
A bright LED flashlight behind and slightly below the bottle is a good extra trick for small runs or lab checks. The beam increases contrast for seeds and thin-walled internal blisters when you rotate the bottle in front of it.
Step 3: Add the polariscope to see stress around defects
A basic strain viewer or bottle polariscope shows stress patterns as colored fringes when you view a bottle between crossed polarizing filters, as described in the polariscope inspection guide for detecting internal stress in glass 2.
This tool does three helpful things for bubbles and cords:
- Shows stress halos around larger blisters or clusters.
- Reveals where cords carry different stress compared with the rest of the wall.
- Confirms whether a suspicious “shadow” is just cosmetic or a stress concentrator.
You can build a simple routine:
-
First pass on the light table to classify seeds, blisters, cords by size, location, and count.
-
Second pass in the polariscope for any bottle with:
- Large blisters
- Bubbles in the heel, shoulder, or finish
- Visible cords across load-bearing zones
-
Record whether the stress pattern stays within your internal annealing limits.
Here is a compact view of the two methods:
| Method | What You See Best | Typical Use Case |
|---|---|---|
| Light table | Seeds, blisters, cords, open blisters | Routine visual inspection and classification |
| Flashlight aid | Very small seeds, thin-walled internal blisters | Quick lab checks, field complaints |
| Polariscope | Stress around bubbles and cords | Annealing checks, risk ranking of defects |
When operators learn to move between light-table view and strain patterns, bubble inspection stops being subjective and starts to look like a standard measurement.
Which bubble sizes and counts are acceptable under AQL and customer specs?
Most arguments about bubbles happen because size and count are vague. “Too many bubbles” means nothing unless it links to a clear defect class and AQL level.
Acceptable bubble size and count come from how you classify seeds and blisters, the risk of their location, and the defect classes tied to your AQL levels for critical, major, and minor defects. Typical AQL schemes use 0 for criticals, around 1–2.5 for majors, and 2.5–4 for minors.
Step 1: Define size bands and locations
First, you need a shared language for bubbles and where they sit:
- Seeds: bubbles smaller than about 1 mm in diameter.
- Blisters: bubbles larger than about 1 mm. Some plants use 0.8–1.0 mm as the threshold.
- Open blisters: bubbles that break the surface, inside or outside.
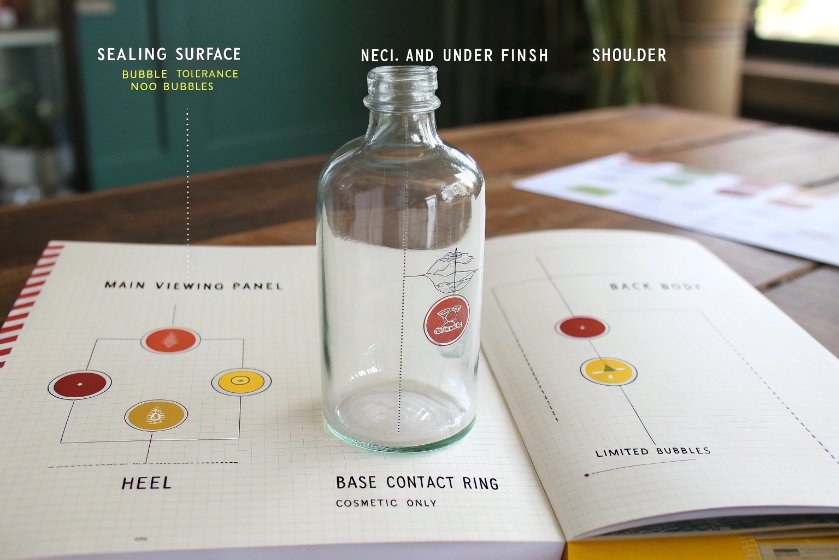
- Critical zones:
- Sealing surface and under-finish
- Thread and neck ring area
- Heel and base contact ring
- Any planned pressure or hot-spot region
With that, you can write simple rules such as “no bubbles in finish or heel” without confusion.
Step 2: Link bubbles to defect classes
Then link each “bubble situation” to a defect class:
- Critical defects (AQL often 0)
- Any open blister (inner or outer surface).
- Any bubble intersecting the sealing surface or bore.
- Any bubble in the heel or base contact area for pressure bottles.
- Major defects
- Blisters above a set size in the body or shoulder.
- Dense clusters or strings that affect appearance strongly.
- Bubbles near the neck that may disturb capping or labeling.
- Minor defects
- Isolated seeds below a size limit in non-critical areas.
- Low-density seeds that do not affect strength or branding.
A simple internal table might look like this (purely as an example, to be tuned per customer and standard):
| Bubble type and location | Defect class | Typical AQL target* |
|---|---|---|
| Any open blister anywhere | Critical | 0.0 |
| Any bubble in sealing surface or finish bore | Critical | 0.0 |
| Blister ≥ 2 mm in heel, shoulder, or body | Major | 0.4–1.0 for high-risk; 2.5 for standard |
| Cluster of seeds making a visible streak in body | Major | 1.0–2.5 |
| 1–3 seeds < 1 mm in non-critical body area | Minor | 2.5–4.0 |
| Many seeds but still “hazy” look | Minor / Major by brand rules | Brand-specific |
*These numbers are examples that follow common AQL practice; real values must follow your customer and market requirements.
Step 3: Use AQL and ANSI/ASQ Z1.4 sampling
Most glass plants already use attribute sampling based on Z1.4 for other defects. The same approach works for bubbles using ANSI/ASQ Z1.4 sampling procedures and tables for inspection by attributes 3.
- Choose lot size and inspection level.
- Read sample size code letter and sample size from the Z1.4 table.
- Set separate acceptance numbers for critical, major, and minor defects based on the AQL values.
Then build a clear work instruction, for example:
- Inspect X bottles per lot on the light table.
- Count critical, major, minor bubble defects as defined.
- Compare counts with acceptance numbers from the AQL chart.
- Reject the lot or trigger investigation when limits are exceeded.
If you use ISO-based customer language instead, map your plan to the ISO 2859-1 acceptance sampling system indexed by AQL 4 and keep the defect classification logic the same.
Once this is written into the quality manual and customer specs, bubble discussions move from feelings to numbers.
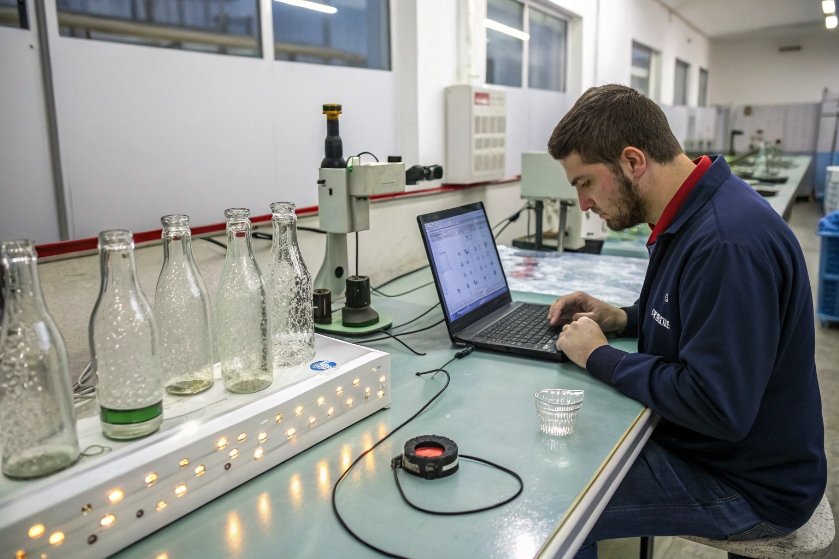
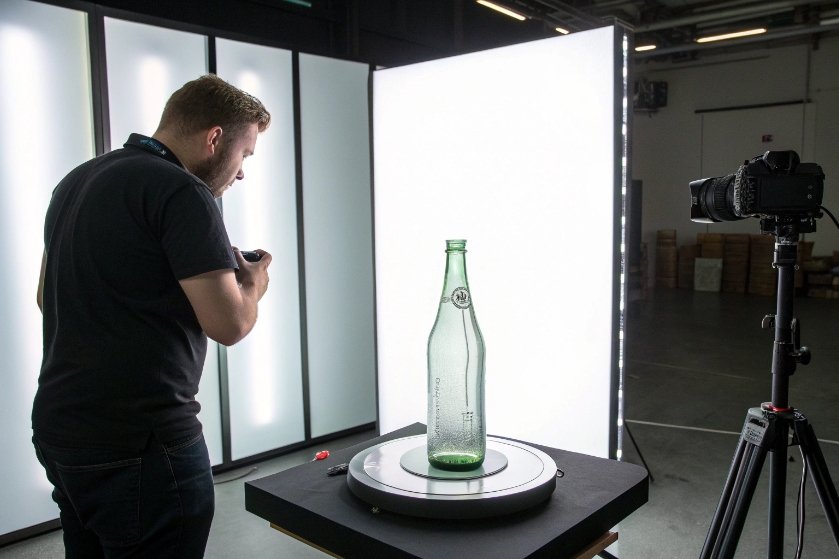
Can inline vision systems reliably flag subsurface bubbles at line speed?
Manual inspection alone cannot keep up with modern high-speed lines. People get tired. They miss small bubbles, especially in the heel and finish.
Modern empty bottle inspection systems with high-resolution cameras, smart lighting, and image processing can detect bubbles, including many subsurface bubbles, at full line speed. They still work best when combined with good lighting design and regular validation against known defect samples.
How inline vision “sees” bubbles
Most empty-bottle inspection (EBI) systems mount camera stations around the line:
- Base and heel camera with special backlighting.
- Sidewall cameras for 360° coverage.
- Finish and under-finish cameras focused on the critical sealing area.
If you need an easy reference for how these systems achieve multi-view coverage and controlled illumination, review an example of empty bottle inspection with 360° sidewall coverage and homogeneous lighting 5.
Lighting is crucial. For bubble detection, systems often use strong transmitted backlight so that air inclusions look bright while solid inclusions or dirt look dark.
Algorithms then classify defects using shape, brightness, and position:
- Round or oval bright spots → likely bubbles.
- Elongated bright tubes → possible cords or strings of bubbles.
- Dark or irregular shapes → stones, dirt, insects, labels, etc.
Strengths and limits for subsurface bubbles
Inline vision is very strong at:
- Detecting medium to large blisters in the body, heel, and finish.
- Finding clusters of seeds, especially in the sidewall.
- Rejecting bottles with bubbles in defined critical zones.
Real limits still exist:
- Very tiny seeds near the surface can sit below the detection threshold.
- Bubbles buried under heavy embossing or decoration can be masked.
- Poorly tuned lighting can make subsurface bubbles blend with background or mold marks.
So the right mindset is not “vision replaces people,” but “vision watches every bottle, people set the rules and verify the machine.”
Validating vision performance for bubbles
To trust the system, you should:
- Build a master defect set with known bubbles.
- Run repeatability checks:
- Repeat detection tests at different speeds and shift conditions.
- Track false rejects and false accepts:
- Use Pareto charts by defect type, including bubbles, to spot drift.
- Make sure recipe settings reflect each bottle type:
- Different glass colors, wall thicknesses, and embossing need tuned thresholds.
For training and consistent defect naming during validation, it helps to keep a shared reference such as the Emhart Glass container defect causes and remedies guide 6.
If this validation is part of your quality system, you can confidently say to customers that subsurface blisters larger than a set limit will be caught at line speed.
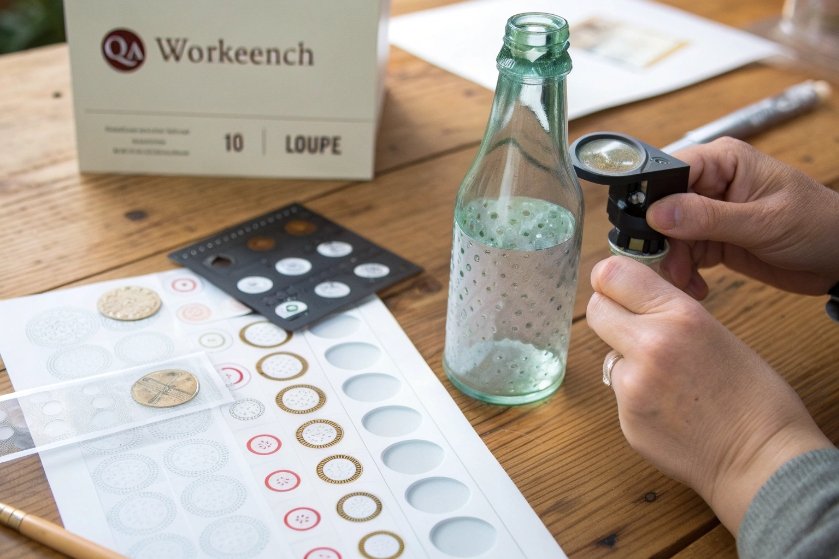
How should sampling plans and defect maps be documented for PPAP/PPS?
Automotive, pharma, and many food customers do not only want “good bottles.” They want proof that the bubble inspection method, limits, and sampling are stable before mass production.
For PPAP and pre-production samples, you document bubble inspection in the control plan, list bubble criteria in the Appearance Approval Report, attach defect maps showing critical zones, and define sampling plans based on Z1.4 or ISO 2859-1 and the agreed AQL levels.
Building defect maps for a bottle
A defect map is a simple diagram of the bottle divided into zones, often with cross-sections:
- Finish sealing surface
- Thread and neck ring
- Shoulder
- Sidewall regions
- Heel and base
For each zone, you mark:
- Which bubble defects are not allowed (critical).
- Which are limited by size and count (major/minor).
- Which are cosmetic only (if any).
If your customer team uses closure language rather than glass language, referencing the sealing surface (“land”) on a bottle finish 7 helps align “critical zone” discussions across packaging, QA, and the filler.
A simple example of how a table behind that map could look:
| Bottle zone | Bubble type | Allow / Limit | Notes |
|---|---|---|---|
| Sealing surface | Any bubble or open blister | Not allowed (critical) | AQL 0.0 |
| Under-finish / bore | Any bubble | Not allowed (critical) | Pressure and seal risk |
| Heel / base contact | Blister ≥ 1 mm; any open blister | Not allowed (critical) | Impact and thermal shock risk |
| Shoulder / body | Blister ≥ 2 mm | Limited (major) | AQL 0.65–2.5 as agreed |
| Shoulder / body | Seeds < 1 mm, low density | Limited (minor) | AQL 2.5–4.0 or brand-specific |
Linking PPAP / PPS documents to your bubble controls
For a new bottle or a key customer, you can tie everything together:
-
Control Plan
- List light-table inspection, inline vision checks, polariscope audits, and AQL sampling for bubbles as specific steps, with frequency and reaction plans.
-
PFMEA (Process FMEA)
- Identify failure modes like “unseen blister in heel” or “open blister in finish.”
- Rate their severity higher for pressure or hot-fill bottles.
-
Appearance Approval Report (AAR)
- Attach bubble defect map and photo examples of acceptable and rejectable bubbles.
- Record customer sign-off on the appearance and bubble criteria.
-
Sampling plan summary
- Describe the code letter, sample sizes, and AQL values used for critical, major, and minor bubble defects.
-
PPS / pre-production samples
- Keep a small “master set” of approved bottles that show the allowed level of seeds and cosmetic bubbles.
- Use these as training and calibration standards for operators and the customer.
When all this is written down, PPAP is no longer just paperwork. It becomes a shared contract about what “good” looks like for bubbles and how both you and the customer will monitor it over time.
Conclusion
With clear viewing methods, defined bubble limits, validated vision systems, and documented sampling in PPAP, bubble control becomes routine, not a constant fight at the filler.
Footnotes
-
Defines seeds, blisters, and cords consistently for specs, training, and inspection alignment. ↩ ↩
-
Explains how a polariscope reveals internal stress patterns tied to bubble risk and annealing quality. ↩ ↩
-
Provides standard attribute-sampling plans and switching rules to convert bubble limits into pass/fail decisions. ↩ ↩
-
ISO reference for acceptance sampling indexed by AQL, useful for customer-facing quality plans. ↩ ↩
-
Shows how EBI systems use controlled illumination and multi-view cameras to detect defects at line speed. ↩ ↩
-
Photo-based defect catalog to standardize naming, root-cause discussions, and vision validation training. ↩ ↩
-
Clarifies bottle finish terms like sealing surface (“land”) to define critical bubble zones clearly. ↩ ↩


