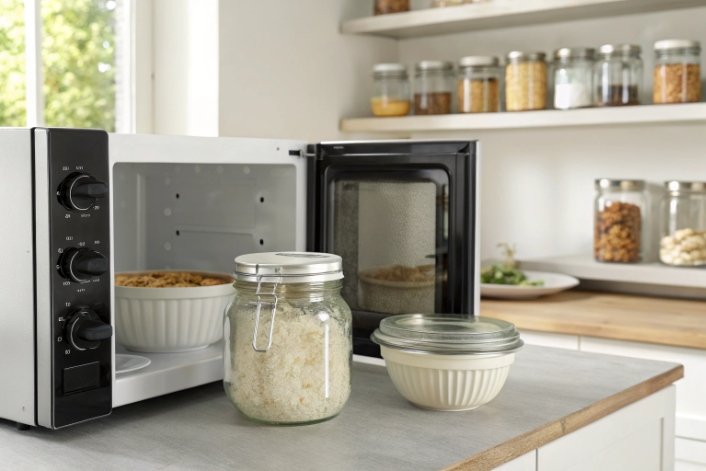
Meal prep in cute Mason jars looks great online, but no one wants hot soup, broken glass, or a ruined microwave in real life.
Glass Mason jars can go in the microwave only when they are labeled microwave-safe, used without metal parts, and heated gently to avoid thermal shock and pressure buildup.

In work with food brands and wholesalers, this question comes up again and again. The short truth is that “Mason jar” is a style, not one single material or standard. Some jars are fine for quick microwave reheats; others should never go in a microwave at all. The rest of this guide breaks that down in a way that works both for home users and for operations buying jars by the pallet.
Are all Mason jars microwave-safe, or does glass type (soda-lime vs. borosilicate) matter?
It is easy to think “glass is glass”, until a jar cracks with hot soup inside and you spend an hour cleaning tiny shards.
Most Mason jars are soda-lime glass that can handle boiling water but not harsh thermal shock; only jars clearly labeled microwave-safe, often tempered or borosilicate, should be trusted for routine microwave use.
What “Mason jar” really means
“Mason jar” is a generic name for a style of home-canning jar with a screw thread and separate lid and band. Many brands make them, including Ball and Kerr 1. When we say “Mason jar”, we usually mean clear canning jars used for water-bath or pressure canning.
Almost all classic canning jars are soda-lime glass. They are designed for:
- Gradual heating in boiling-water or pressure canners 2
- Temperatures around 100 °C during processing
- Slow cooling in hot water after processing
They are not designed like lab beakers or high-end cookware that jump from freezer to oven.
By contrast, borosilicate glass 3 has extra boron in its recipe. This gives it a much lower thermal expansion and much better resistance to sudden temperature change. That is why borosilicate shows up in labware and some premium kitchen brands.
Soda-lime vs. borosilicate in the microwave
Manufacturers are quite clear on this:
- Ball’s official guidance says their canning jars are not microwave safe. The glass is not tempered for microwave use and may break.
- Several packaging and jar suppliers explain that most Mason jars are soda-lime glass and are “generally heat-resistant” but not always microwave-safe, especially if there is no symbol or text to say so.
Some newer “Mason style” jars and canisters are marked as microwave-safe. These are often:
- Tempered soda-lime glass designed for better thermal shock
- Or borosilicate glass, which tolerates larger temperature swings
These jars usually carry a microwave-safe symbol or clear wording on the base or packaging.
Reused grocery jars, like pasta sauce or jam jars, are another story. They are thinner, not made for canning, and break more easily in boiling water or microwave heat. Any chip, scratch, or hairline crack increases that risk.
How glass type affects real-world use
Here is a simple way to think about it:
| Feature | Soda-lime Mason jar | Borosilicate / tempered glass jar |
|---|---|---|
| Typical use | Home canning in boiling water or pressure canner | Cookware, labware, some premium storage jars |
| Thermal shock resistance | Moderate; often 40–80 °C temp difference | High; can handle much larger temp swings |
| Common in classic Mason jars? | Yes, almost all | Rare, unless clearly advertised |
| Microwave rating | Often not rated; Ball says “not microwave safe” | Often labeled microwave-safe |
| Good rule | Safe for canning water baths with gradual heating | Safer choice for repeated microwave use |
For day-to-day life, this means:
- Do not assume every jar with “Mason” on the side is microwave-safe.
- Take manufacturer advice seriously. If a brand says “do not microwave”, treat that as final.
- If you need heavy microwave use, choose jars that are sold as microwave-safe and ask your supplier which glass type they use.
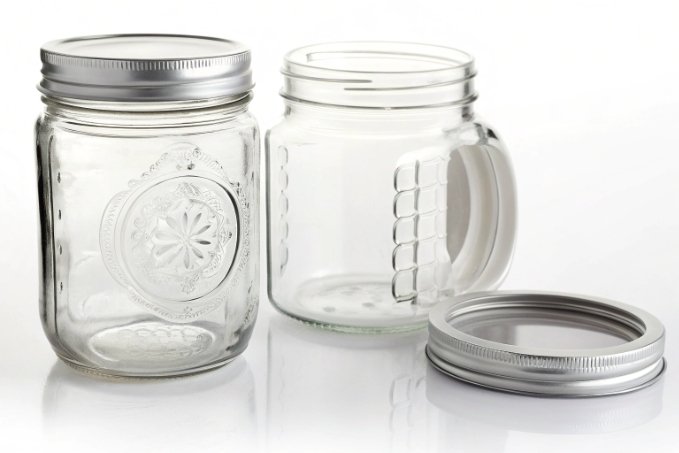
Should I remove lids, bands, and seals before microwaving a Mason jar?
Many people put a jar straight from the fridge into the microwave, metal band and all, then wonder why they saw sparks or heard a loud pop.
Always remove metal lids, bands, and any foil or metal-lined seals before microwaving a Mason jar; use only vented, microwave-safe plastic or silicone covers if you cover the jar at all.
Why metal and tight seals are a problem
Microwaves and metal do not mix. Metal lids and bands can arc, spark, and damage the oven. Packaging and appliance guides such as microwave oven safety resources 4 all warn against metal in the microwave and say to remove Mason jar lids and bands before heating.
Sealed jars are a second risk. When you heat a closed container, steam builds up and has nowhere to go. This can lead to:
- The lid blowing off
- The jar cracking or shattering
- Hot food erupting when you open it
Microwave safety rules repeat the same point: never heat sealed containers, especially bottles or jars with narrow necks.
In canning, jars are meant to vent while they are in boiling water; bands are only “fingertip tight” so air can escape. Overtightened lids increase stress on the glass. The same idea applies in the microwave. A fully sealed jar is under pressure it was not designed for.
What to do with different lid types
Here is a simple rule set you can use at home or in an operation:
1. Classic 2-piece metal canning lids
- Remove both the flat lid and the screw band before microwaving.
- You may set a clean microwave-safe plate or paper towel loosely on top to control splatter.
- Do not rest the metal parts inside the oven at all.
2. Plastic one-piece lids
Some Mason jar accessories use plastic lids for storage.
- Only use them in the microwave if they are clearly marked microwave-safe.
- Loosen the lid so steam can vent. Do not screw it down tight.
- Avoid lids with glued-in foam liners or unknown inserts for long heating times.
3. Silicone lids and gaskets
High-quality silicone is usually fine in microwaves and has good heat resistance.
- Silicone stretch lids or gasket-style covers can work well as vented splatter guards.
- Leave one corner slightly lifted or use lids designed with vent holes.
4. Induction or foil seals
If your product line uses induction foil linings:
- Never microwave a jar while the foil seal is intact. Remove it fully first.
| Closure or component | Microwave action | Why |
|---|---|---|
| Metal lid + band | Remove completely | Metal sparks and can damage oven |
| Plastic storage lid | Only if labeled microwave-safe; keep vented | Some plastics warp or leach if not made for microwaves |
| Silicone lid / gasket | Usually safe; keep vented | Handles heat, but steam still needs an escape path |
| Foil or induction seal | Remove before heating | Metal layer can spark; sealed jar traps pressure |
| No lid, paper towel cover | Safe for short reheats | Lets steam escape; helps control splatter |
In short, glass only in the microwave, and even then, never under a locked lid.
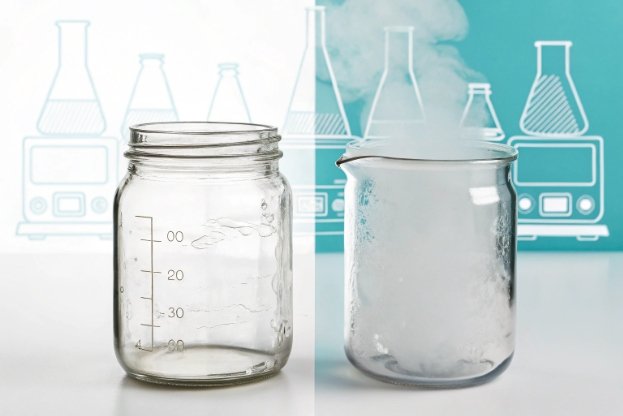
How do I prevent thermal shock and cracking when reheating liquids in glass jars?
Many jars do not fail from “too much heat” but from “too fast heat” in one part of the glass compared with another.
To avoid thermal shock, start from room-temperature jars, avoid big jumps from fridge or freezer to microwave, heat in short low-power bursts, stir or swirl, and set hot jars on a dry, padded surface.
What thermal shock looks like in a microwave
Soda-lime glass expands when it heats. If one part of the jar gets much hotter than the rest, stress builds until the glass cracks. Regular canning jars survive boiling water because:
- The jars are pre-warmed
- Water heats them evenly from the outside
- The temperature rise is gradual
Microwaves are different. They heat the food first. The jar heats from the inside out, and liquids can gain hot spots. Even clear water can superheat in a microwave 5 and then erupt when disturbed.
Any chip, scratch, or hairline crack in the glass becomes the weak point where that stress shows up. Thin grocery jars and older jars with wear marks are more likely to fail.
Step-by-step method for safer reheating
You can reduce most risks by changing the process, not just the container.
1. Start with the right jar
- Prefer jars that are explicitly labeled microwave-safe.
- Avoid vintage, decorative, or very thin jars.
- Skip any jar with chips, star cracks, or obvious scratches, especially on the base and rim.
2. Manage temperature steps
Borrow a few habits from safe canning:
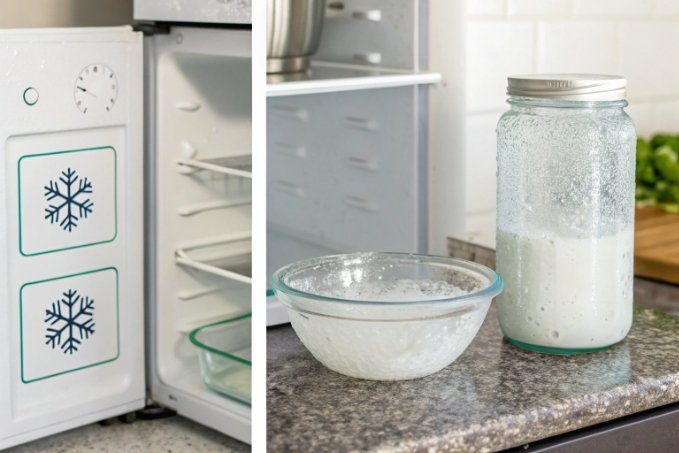
- Do not take a jar directly from the fridge or freezer to high power.
- If the jar is cold, let it sit at room temperature for 10–15 minutes, or rinse it briefly under lukewarm water.
- After microwaving, do not set the hot jar onto a cold stone or into cold water. Place it on a dry towel, wooden board, or silicone mat first.
3. Control fill level and headspace
- Fill the jar no more than about two-thirds full. This leaves space for boiling and steam.
- Avoid very thick purees or foamy liquids in tall, narrow jars; they trap steam and are more likely to surge.
4. Use low power and short bursts
Microwave guides and jar makers suggest medium power and short cycles with stirring in between:
- Use around 50% power in 30–60 second bursts for reheating.
- Pause to stir or gently swirl liquids between cycles to even out hot and cold spots.
- Let the jar stand for a minute after heating so heat can spread.
5. Think about what you are trying to do
Microwaves are not safe for canning or sterilizing jars of food. USDA food safety guidance 6 is clear: use boiling-water or pressure canners, not microwaves, to make shelf-stable canned foods.
So use the microwave for:
- Quick reheats of already safe food
- Thawing frozen contents after you have gently brought the jar closer to fridge temperature
Do not use it to:
- Process jars for long-term storage
- Heat sealed jars of low-acid food
- Sterilize empty jars for canning (stick with boiling-water methods instead)
| Step | Good practice in microwave use | Risky practice to avoid |
|---|---|---|
| Starting temperature | Room temp or gently warmed jar | Frozen or fridge-cold jar at full power |
| Heating pattern | 50% power, short bursts, stirring | Long full-power run with no pauses |
| Fill level | Max 2/3 full, extra headspace for liquids | Jar filled to brim, especially with thick soups |
| Surface after heating | Dry towel, wood, or silicone mat | Cold stone bench or wet metal sink |
| Use case | Reheating or defrosting ready-to-eat foods | Home canning, sterilizing, or processing sealed jars |
What labeling or certifications confirm a jar is microwave-safe for wholesale/commercial use?
Operations cannot rely on guesswork or “it seems fine in my kitchen” testing when they buy thousands of jars at once.
For wholesale use, look for a clear microwave-safe symbol or wording plus written food-contact compliance, and ask suppliers for thermal shock and microwave test data for the exact jar you plan to buy.
How microwave-safe is usually marked
On both glass and plastic, microwave-safe containers often show:
- A small microwave icon
- Or a square with wavy lines
- Or the words “Microwave safe” on the base or on packaging
This symbol means the maker has tested the container so that, under normal microwave use:
- The container keeps its shape and does not crack
- There is no unsafe leaching of materials into food
Some jar makers now offer Mason-style jars that carry such a symbol and highlight that they are designed for short microwave reheats. At the same time, Ball clearly says their standard canning jars are not microwave safe, which shows that labeling matters more than shape.
What to ask for as a buyer
If you buy jars for a brand or wholesale operation, a small symbol is not enough. The safe way is to build microwave use into your specification.
1. Food-contact and migration compliance
Ask your glass supplier for:
- A declaration of compliance with relevant food-contact regulations (for example, FDA food-contact rules 7 in the US or EU frameworks in Europe).
- Migration test reports showing the glass and any lid components meet limits under the temperatures and times you plan to use.
2. Thermal shock test data
Request data on:
- The thermal shock resistance of the jar (for example, tested safe at a 60 °C or 80 °C temperature difference). Soda-lime and borosilicate will show different numbers.
- Whether the glass is tempered or not, and what cycle it was designed for (boiling-water canning, hot-fill, microwave reheats, etc.).
3. Microwave performance tests
Responsible suppliers will either:
- Provide internal test reports showing the jar used in a microwave cycle with water loads and no breakage, or
- Confirm that the line is not approved for microwave use and should be marketed for storage only.
You can also run a basic in-house check: fill the jar halfway with water, microwave for one minute, then check that the water is hot but the glass is not far hotter than the water. If the jar itself absorbs most of the heat, it is not a good candidate.
Reading labels honestly
Here is how to read common markings when you see them on sample jars:
| Marking or document | What it tells you | What it does not tell you |
|---|---|---|
| Microwave-safe symbol or wording | Jar has passed maker’s own microwave tests | Exact limits on time, power, or temperature swings |
| “Dishwasher safe” only | Glass handles wash temperatures | Safe for microwave; the maker may not have tested that |
| FDA / EU food-contact compliance letter | Materials are safe for food contact | Toughness under rapid heating and cooling |
| No symbol, no wording | Maker gives no promise on microwave use | Whether a jar will survive a one-off kitchen test |
| Ball/Kerr guidance “not microwave safe” | Brand does not endorse microwave use of these canning jars | That other Mason-style jars from other makers share the same limit |
For consumer safety and for your own brand protection, it is better to over-label than under-label. If a jar is not tested for microwaves, marking it “Not for microwave use” on packaging and spec sheets can save many complaints later.
Conclusion
Mason jars can sometimes go in the microwave, but only when the glass, lids, and heating process are all chosen and controlled with care, not guesswork.
Footnotes
-
Background on Ball and Kerr brands and how Mason jars developed from 19th-century patents to modern home canning. ↩︎ ↩
-
Research-based overview of safe boiling-water and pressure canning processes for home food preservation. ↩︎ ↩
-
Technical description of borosilicate glass properties, including thermal expansion and suitability for high-temperature glassware. ↩︎ ↩
-
Official consumer guidance on microwave oven safety, including why metal objects should not be used inside. ↩︎ ↩
-
Explanation of superheating and why water can explosively boil when disturbed after microwaving. ↩︎ ↩
-
USDA and partner publications on safe home canning methods and why microwaves are unsuitable for processing jars. ↩︎ ↩
-
Regulatory overview of packaging and food-contact substances used in materials like glass and closures. ↩︎ ↩


